Your roof is the shield of your home, protecting you and your loved ones from the elements. When it comes time for repairs or a complete replacement, finding the best residential roofing services in Frisco, TX becomes a crucial decision. This blog post will guide you through the process, highlighting key aspects to consider and providing a starting point for your search.
Why Local Matters in Residential Roofing:
While Frisco boasts a vibrant market for roofing services, prioritizing local companies offers several advantages:
- Understanding Local Weather: Local roofers possess firsthand experience dealing with the specific weather patterns of Frisco, TX. They understand the challenges posed by hail, strong winds, and fluctuating temperatures, allowing them to recommend the most suitable roofing materials and installation techniques.
- Building Relationships: Working with a local company allows you to establish a rapport with the team and build a sense of trust. Local businesses are often more invested in building long-term customer relationships and providing exceptional service.
- Familiarity with Building Codes: Local roofing contractors are well-versed in the specific building codes and permitting procedures of Frisco, TX. This ensures a smooth and compliant installation process, saving you time and potential headaches.
- Availability and Response Time: Local companies can often respond more quickly to emergencies and offer more flexible scheduling options for repairs or consultations.
Qualities of the Best Residential Roofing Services:
- Experience and Licensing: Look for a company with extensive experience in residential roofing and a proven track record of successful projects. Ensure they hold the necessary licenses and certifications required to operate in Frisco, TX.
- Insurance and Warranties: Verify that the company carries adequate liability insurance and offers warranties on both materials and workmanship. This provides peace of mind and protects your investment.
- Reputation and Reviews: Read online reviews and ask for referrals from friends and neighbors. A company with a strong reputation for quality work, excellent communication, and fair pricing stands out from the crowd.
- Communication and Transparency: Choose a company that prioritizes clear communication. They should be able to explain their recommendations and answer your questions in a way that is easy to understand.
- Materials and Options: Look for a company that offers a variety of high-quality roofing materials to suit your budget and aesthetic preferences. They should also be able to advise you on the most appropriate material for your specific needs.
- Safety and Cleanliness: Safety is paramount. Ensure the company employs qualified and insured roofers who prioritize safety procedures throughout the project. Additionally, a clean and responsible company will minimize disruption during the roofing process and ensure proper cleanup upon completion.
Getting Started: Finding the Perfect Roofing Partner
Ready to find the best residential roofing services in Frisco, TX for your home? Here are some tips to get you started:
- Ask for recommendations: Talk to neighbors, friends, or family who have recently had roofing work done and seek their feedback.
- Research online: Search for roofing services in Frisco, TX and explore their company websites and online reviews.
- Contact multiple companies: Get quotes from several different roofing companies to compare prices, services offered, and overall impression.
- Schedule consultations: Don’t be afraid to ask questions and discuss your project in detail with each potential contractor. This allows you to gauge their expertise, communication style, and overall professionalism.
Major League Roofing: Trusted Roofing Services in Frisco, TX
At Major League Roofing, we understand the importance of keeping your home safe. As a Frisco-based, family-owned company, we have been providing exceptional residential roofing services in Frisco, TX for over 20 years. We pride ourselves on experience, expertise, and a commitment to exceptional customer service. We offer:
- A team of highly qualified and experienced roofers
- A wide range of roofing materials and services
- Competitive pricing and financing options
- A commitment to safety and clear communication
Contact us today for a free consultation and let us help you choose the right roof for your Frisco home. We are confident that we can provide the quality, expertise, and peace of mind you deserve.
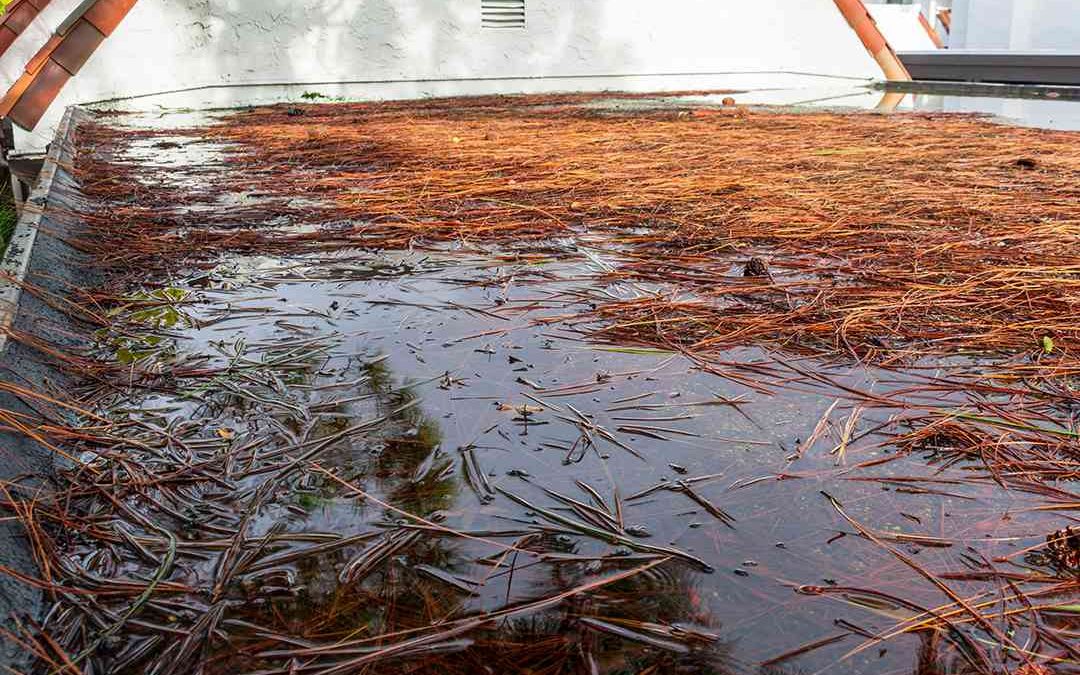
Table of Contents:
- What is Ponding?
- Why Shouldn’t Flat Roofs have Puddles?
- Why Does Ponding Happen?
- How to Fix Ponding on a Flat Roof
- The Importance of Getting Professional Help with Ponding
While they are a staple of the commercial world, flat roofs are becoming more popular on residential structures. You may have purchased a home with a flat roof or added one to your garage or home addition. While flat roofs can be beautiful and modern, many homeowners are unprepared for how different these systems are from sloped roof systems.
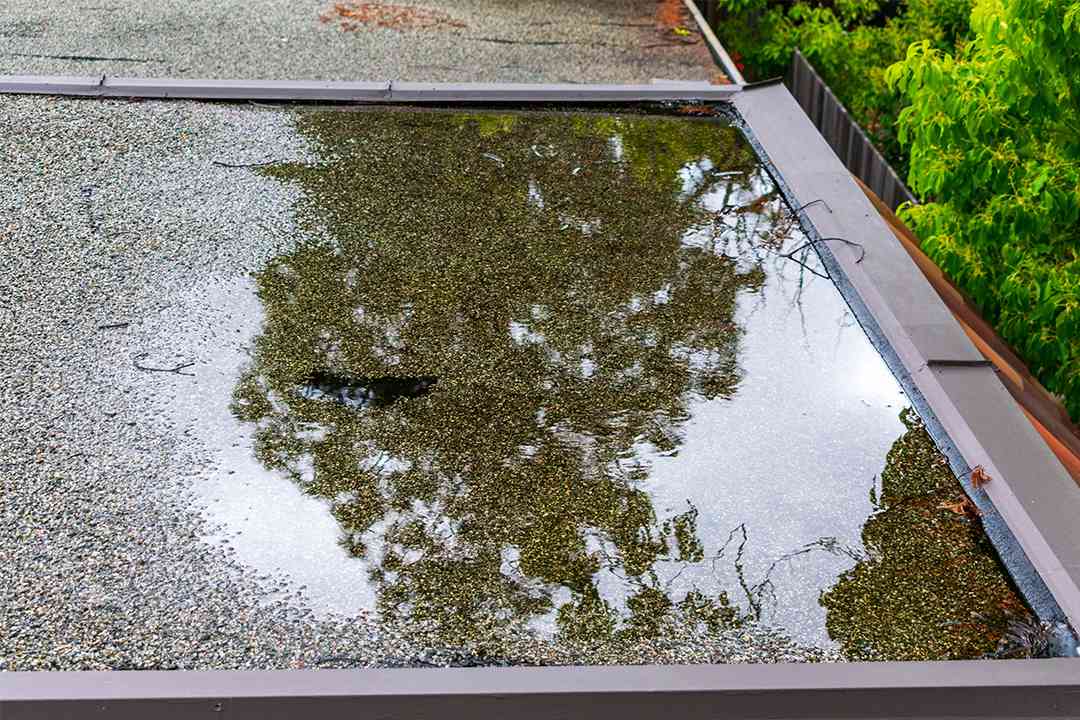
For example, flat roofs may develop a problem called ponding that doesn’t occur on sloped roofs. Ponding is when water collects in puddles on the roof instead of draining off in a timely manner. Homeowners may think this small amount of water is harmless, but ponding tends to get worse over time and can have a negative impact on the roof and your whole home.
If you own a flat roof, it is essential to understand what counts as ponding, why it happens, and how to resolve it before it damages your roof and home. We’ll explain the basics of ponding and why it’s a wise idea to get a professional involved as soon as possible when your flat roof has ponding.
What is Ponding?
Roof ponding is where water gathers on a flat roof. So how much ponding is acceptable on a flat roof? Specifically, water must remain on the roof for 24-48 hours for the National Roofing Contractor’s Association (NRCA) to consider it ponding. If you have this leftover water, you may notice it collects in dips in the roof or around drains.
Why Shouldn’t Flat Roofs have Puddles?
Even minor ponding can have a serious impact on your roof and your home. The excess weight from the water may cause damage to the building’s structure, especially if it exceeds the safe weight that the home can carry. Even if it does not, increased weight can stress the roof trusses and other parts of the building.
Constant exposure to water is also a problem for roofing materials. Water can erode your roofing materials, which may result in early roof failure.
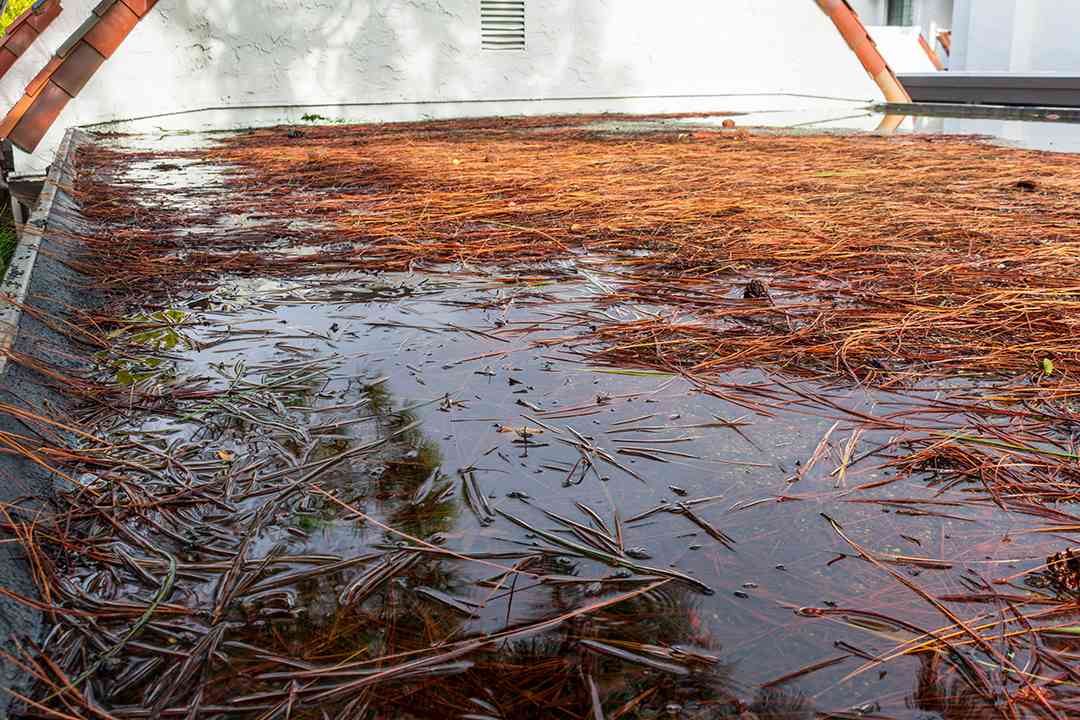
Water may also enable the growth of algae, moss and lichen. This vegetation can stain or damage your roofing materials. Standing water may also attract animals or insects who are looking for a drink, and they may damage the roof or the rest of your home. Or, they may simply become a nuisance that impacts the quality of your home and your quality of life in it. For example, mosquitoes may breed in standing pools of water on the roof. This may become a nuisance when you try to enjoy your outdoor space.
Damage from ponding may result in a roof leak. One way it can cause a leak is when the depth of the ponding exceeds the height of the flashing on a roof feature, thereby allowing water to penetrate the structure. In cold climates there is also the possibility that the water will freeze in winter. Freeze/thaw cycling can erode the mineral surface on some roofing materials, such as modified bitumen, which can reduce the life of the roof.
For all of these reasons, ponding may also significantly shorten the lifespan of the roof, so do everything that you can, as a homeowner, to avoid it.
Why Does Ponding Happen?
Why does ponding happen, and why does it tend to get worse over time? There are several possible causes of this problem, including:
- Improper installation: A flat roof isn’t perfectly flat. It must be installed on a slight pitch to allow for positive drainage of the roof. The slope should gently guide water towards the drains. If it slopes away from the drains instead or has an inconsistent slope, you may get ponding at the lowest points on the roof.
- Drainage issues: Clogged or slow-moving flat roof drains can create ponding issues. Some flat roofs are so large that they need siphonic drains to move water in a timely manner. On residential roofs, a more common issue is the connection point between flat and sloped roofs. Improper installation of this connection can result in poor drainage and ponding issues.
- Compressed insulation: Some flat roofs are not built for foot traffic or for the storage of heavy items. When these roofs are used for that purpose, the insulation can compress. This compression will create a low spot which may naturally collect water. The weight of the water can exaggerate this problem over time. You should not store objects or place heavy decoration on your flat roof unless the roof is specifically designed and protected to accommodate these loads.
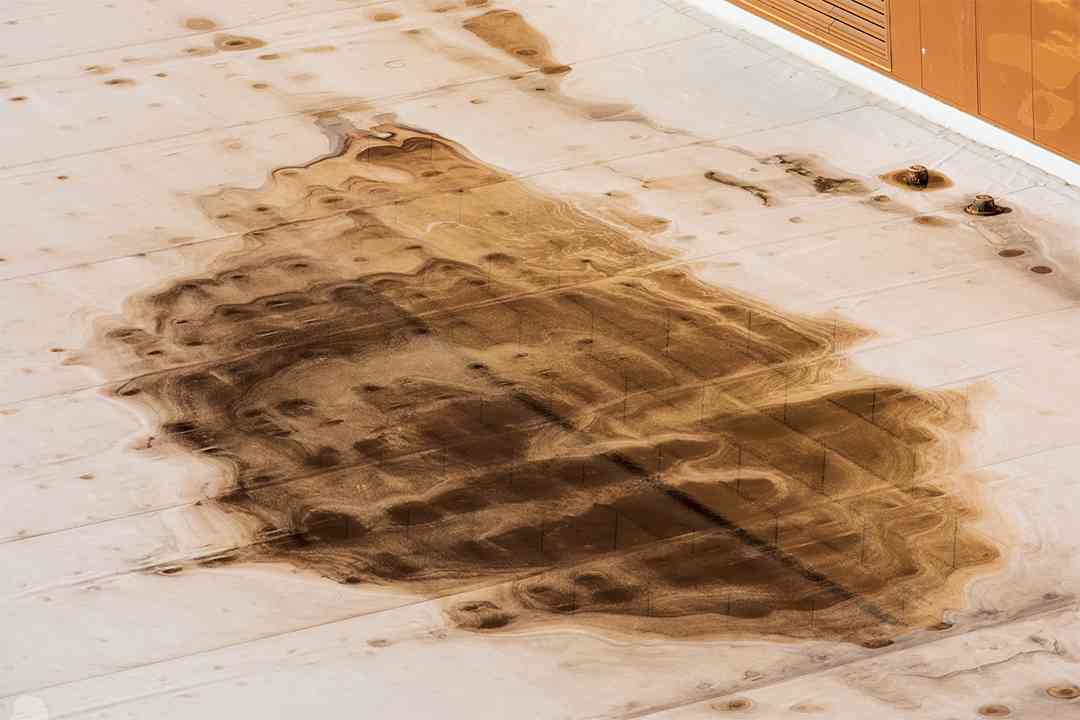
- Dips near roof features: Certain roof features, such as skylights or plumbing vents, may have been installed with small dips that allow for ponding and become worse over time. It is essential to get an experienced roofing professional to install these features and their flashing to prevent this problem.
- Structural issues: Buildings settle over time, and sometimes this settling can create problems with the slope of the roof and cause ponding.
- HVAC leaks: Sometimes HVAC equipment that is installed on the top of the roof causes ponding because it is too heavy and creates a dip in the roof. The ponding water may also be normal condensation or an abnormal leak from the air conditioner itself. The water may be slowly draining, but resupplied by the machinery. In this case you will need an HVAC professional to fix the equipment’s leak or reroute the normal condensation.
How to Fix Ponding on a Flat Roof
You will need a professional to help you fix ponding on your flat roof. There are several flat roof ponding solutions that your roofer may discuss with you. Which one is right for your roof will depend on what’s causing the ponding and the specifics of your residential roof system. However, to give you an idea of what might be involved, we’ll discuss some common strategies that might be useful to fix ponding on your flat roof.
- Conduct the Roof Inspection: When you call roofers about your flat roof’s ponding, the first thing they should do is inspect the roof to discover what is causing the ponding. Your roofers may also need the help of an architect or structural engineer if there has been structural damage to the home. Your roofers should explain what the problem is and give you a quote before they begin work.
- Fix Structural Issues: When ponding has caused structural damage to the building, that damage should be addressed first. Your roofers may need to work with structural engineers or architects to make a plan to address structural issues.
- Fix Slope Issues: If your roofers found that your previous roofers installed the flat roof without the proper slope, they may need to replace the entire roof. Unfortunately, this is one of the more expensive and time-consuming solutions to ponding, but if the roof is improperly sloped, you may have no other choice to solve the ponding for the long-term.
- Fix Drainage Issues: When the drains are the problem, your roofers have a wide variety of solutions available to them. It may be that you need to add in a new drain or change the drainage system so that it can accommodate more water. If the drain is frequently getting clogged, your roofers may recommend a better drain screen, or for you to get the roof cleaned more regularly. In cold climates, meltwater from snow may freeze in the drain. In this case, your roofers may recommend an electric cable to re-melt any ice in the drain. Or, they may suggest a new schedule for snow removal that may reduce ice development.
- Fix Low Points on the Roof: If your roof has a correct slope overall but has developed low points from improper installation, misuse or damage, your roofers can correct those specific low spots on the roof. They may install a roof cricket to redirect water away from a low point. They may use a flat roof puddle filler to bring low points back up to the appropriate level. Or, if the low spot is near a roof feature or a drain, they may need to reinstall the flashing on that feature.
- Fix Other Roof Damage: Once they have fixed the underlying cause of the ponding, your roofers should also be careful to replace any materials that were damaged by the ponding. They may need to replace sections of your cap sheet that were constantly exposed to water or replace insulation that was compressed under the weight of the water, or any other part of the roof.
The Importance of Getting Professional Help with Ponding
Ponding tends to get worse over time, and, if not appropriately addressed, can result in roof leaks, premature failure of the roof, and damage to the rest of your home. A professional roofer should be able to get to the root of your ponding problem, resolve it, and help you understand how you can avoid this problem in the future. If you need help with ponding on your residential flat roof, you can find a local roofer to help through IKO’s Contractor Locator.
Table of Contents:
Disclaimer: The following information is provided for general information purposes only. It is incumbent upon the homeowner to follow all building codes and safety codes as well as public advisories from safety and emergency response authorities. The information provided in this article is supplemental to advice from your roofer, local building code authorities and your local laws. IKO disclaims all liability in respect to the information provided.
Unfortunately, there’s no such thing as a hurricane-proof roof. However, there are still plenty of things you can do to protect your roof, and therefore the rest of your home, from hurricanes and the damage they can do. Research published by the Environmental Protection Agency (EPA) suggests that hurricane winds are getting stronger, and hurricanes will begin to affect more people. While any given year might have more hurricanes than average or fewer, the overall trend is for hurricanes to cause more damage.
That means it is more important than ever to do what you can to protect your home and ensure a hurricane-proof roof, especially during hurricane season. Below, we provide information on how roofs handle hurricanes and practical steps you can take to reinforce your roof or otherwise reduce your risk from a serious storm.
How Hurricanes Impact Roofing
While some roofs survive major hurricanes intact, other roofs suffer severe damage. Some roof trusses even blow off the home entirely. Much of the difference in roof performance during a hurricane has to do with the construction of the building. The major factors that determine whether or not your roof will blow off your home in a hurricane include:
- Where the home is situated.
- The strength of the structural connections in the building.
- The shape of the roof.
- Other architectural choices.
Hip roofs survive hurricanes better than gable roofs. The flat face of the gable catches wind, while the angle of a hip roof can better withstand the same pressure. In addition, low-slope roofs inherently experience higher wind loads and therefore perform worse in hurricanes than steep-slope roofs, according to research conducted by civil engineers at the New Jersey Institute of Technology. Specifically, this research found that roofs at a 7:12 pitch perform the best in high wind conditions.
How to Secure Your Roof for Hurricane Season Against Wind-Driven Rain
Roofs that are structurally sound and well-attached to the rest of the building may still suffer in hurricanes. The extreme wind forces often blow water at a structure horizontally. Instead of moving down from the sky, the water is directed across, hitting the roof from the side. This phenomenon is called wind-driven rain, and when it occurs during hurricanes, it can involve large amounts of water directed at your home for hours. It is a tough challenge to design materials and roofing systems that can resist this force.
Any small gap in flashing, missing shingles or holes in the roof may let water into the home. Any piece of roofing material that catches the wind may be ripped off, creating a chain reaction that can strip the roof of shingles or underlayment. Then, the exposed decking can soak, which can create major leaks.

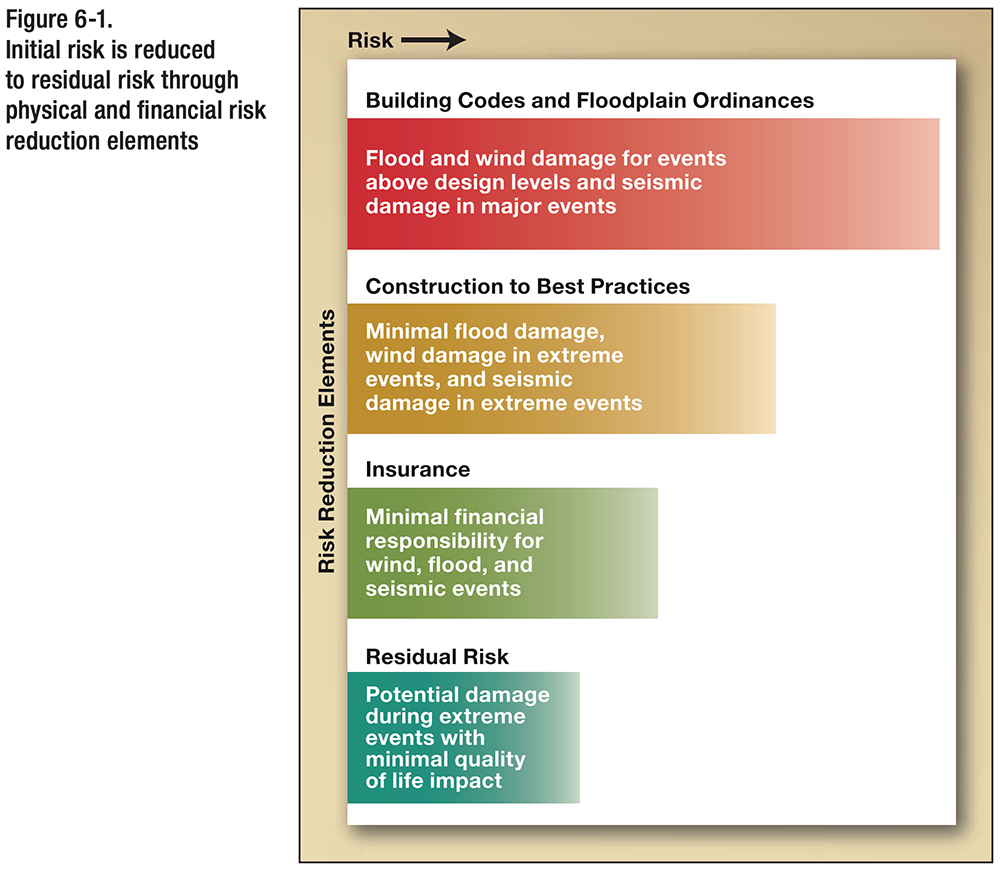
According to the Federal Emergency Management Agency (FEMA), there are multiple layers of risk reduction you can take to protect your home. Following building codes is the first step. Following construction best practices is the second. Obtaining homeowners insurance policies and purchasing additional insurance to cover hurricanes and flooding when your homeowner’s insurance does not cover these perils, is third. With these three elements of risk reduction, you should have excellent protection during a hurricane. However, FEMA recognizes that there will always be residual risk during extreme events.
What Can You Do To Protect Your Roof in a Hurricane?
Protecting your roof in a hurricane is all about preparation. Unless you intend to do a major rebuild of your home, you can’t control the design of your home or your roof. Instead, factors for roof performance that are within your control are about ensuring the roof you have will do the best job it can under the circumstances.
1. Ask for a Preseason Roof Inspection
Professional roofers are your roof’s first line of defense from hurricanes. Before hurricane season begins (this varies by year, but it is roughly May 15 for the Pacific and June 1 for the Atlantic), you should have a roofer inspect your roof. They may spot potential problems, from bent flashing to missing shingles, which could make your roof more vulnerable to extreme winds. One of the most common issues is damage to the edge of the roof, including the fascia and soffit boards. Roofers should pay special attention to this area of the roof and ensure all is secure before hurricane season.
Routine maintenance, such as cleaning gutters, downspouts and valleys, as well as trimming nearby tree limbs, can also help protect your roof from damage during storms.
While you have your trusted roofer inspecting your roof, ensure that you have their updated contact information available in case of an emergency roof issue after the storm.
2. Choose Performance Products
Not all roofing materials and features are made equal. Choose roofing products that offer limited wind warranties up to 130 mph (210 km/h). No shingle is impervious, but IKO has specifically designed performance shingles to better handle various environmental challenges, including high winds.
Some shingle manufacturers, including IKO, suggest different installation practices for high-wind conditions. We strongly suggest you consider a high-wind application if you live in a high-wind area. The chart below shows FEMA’s assessment of the high-wind areas in the United States.

Underlayment choice can also impact roof performance. Ensure that your roof has at least the bare minimum amount of ice and water protector. Choose synthetic underlayments that offer better moisture protection than felt. Even if some shingles are blown off, the right underlayment can help reduce the amount of water that gets into your home.
3. Follow Building Codes
Typically, you will only have to get your roof up to code with any changes to the building codes when you get a roof replacement or a repair of an area affected by the building code change. However, sometimes adopting the improvements laid out in the building codes before hurricane season can help offer you additional protection.
For example, as of January 1, 2021, the Florida Building Code has changed several roof requirements, including adding a secondary water barrier and additional fastening. Changes to rules for soffits were also implemented to reduce the impact of high winds on this key area of the roof. These new regulations do not negate other building code requirements for your roof.
Ask your roofer if it is in your best interest to update your roof to meet any new building code requirements before a hurricane.
4. Add or Inspect Hurricane Ties
Hurricane ties strengthen the connection between the roof truss and the home’s structural elements, preventing roof blow-off in high winds. Consider adding hurricane ties. If your home already has hurricane ties, your roofer should inspect them for corrosion and other damage during the preseason inspection.
5. Consider the FORTIFIED™ Program
The FORTIFIED ™ program is a voluntary program run by the Insurance Institute for Business & Home Safety (IBHS) with the goal of improving roof and home performance in hurricanes. By bringing your home up to the program’s standards, you can improve your roof’s performance in weather events.
The program has requirements for roofing and other parts of the home beyond what most building codes require. These enhancements can help a roof and home withstand even Category 3 hurricanes. The program’s requirements are based on research from the IBHS. Standards include sealing the roof deck, using a thicker drip edge, and ensuring that starter shingles are fully adhered to the roof deck. As research has demonstrated, the most critical factor in shingle performance is the strength of the seal between the shingles. These measures are intended to bolster this connection. You can ask a professional roofer to ensure your roof meets FORTIFIED™ standards.
6. Address Roof Repairs, Including Leaking Roof Vents
Before a storm, it is smart to get your roofer to complete any roof repairs that you have been putting off. Even small issues with the roof can lead to more serious damage during a hurricane.
Roof vents are especially important to inspect and repair. They are crucial components of a roofing system, but they can become points of concern during hurricanes, particularly if they leak. Choose hurricane-rated roof vents and have a reputable roofer install them to prevent leaks and hurricane-related vulnerabilities.
7. Protect Skylights
Skylights are particularly vulnerable during hurricanes and any high-wind conditions. Manufacturers equip modern skylights with tempered glass or plastic, which means they do not leave dangerous shards behind if broken during a hurricane. Skylights are typically designed to resist wind, but they can still suffer damage in high winds and hurricanes.
Have your roofers replace your current skylights with hurricane-resistant skylights. They are not hurricane proof, but they do have much higher wind-resistance properties than some other options on the market.
If this is not an option, you may be able to cover your skylight with a metal cage, plywood or a specifically designed skylight shutter. If the installation is temporary, your roofers will need to repair any shingles surrounding the skylight that they had to puncture with nails to secure the skylight cover.
8. Secure Roof Documentation
Take some “before” pictures of your roof for insurance and limited warranty claims. Take overall pictures from multiple angles and some close-ups as well. Your roofer can help by taking photos of points of interest, like chimneys and skylights, from on top of the roof. Save the photos to your cloud storage to ensure that you don’t lose them if something happens to your phone.
It may also be useful to scan and save digital copies of any limited warranties your roof may be under, including those from your manufacturer and the roofers who installed the roof.
9. Store Potential Projectiles
Many of the loose objects you have on your property may become projectiles in hurricane conditions. These can damage your roof, other parts of your home or your neighbor’s property. Before a hurricane, bring in lawn furniture, trampolines, children’s toys and anything else that you typically store unsecured outside.
10. Verify Your Home Insurance
In the United States, most homeowner’s insurance policies will not cover flooding and may not cover other hurricane damage. Before you choose a policy, or at least before a hurricane, confirm with your insurance provider that you also have hurricane and flood protection policies in addition to your homeowner’s insurance policy. You can purchase flood insurance through the National Flood Insurance Program (NFIP) in the United States. In Canada, you may find it offered by any insurance broker as an umbrella policy on top of homeowner’s insurance or separate to homeowner’s insurance.
Also, ensure that your coverage is large enough to provide for the whole cost of your roof replacement in the event a hurricane destroys it. It may be worthwhile to buy an umbrella insurance policy to increase the dollar amount of coverage so that your policies will cover more of your roof replacement cost.
11. Buy a Tarp
When roofers deal with roof damage after a hurricane, they typically install a tarp over the damaged sections of the roof to prevent further water damage. They can only address the repairs properly after storm conditions and precipitation have passed. If you have a tarp on hand, your roofers may use it instead of bringing their own. While having a tarp is useful for minor storms too, it is an especially good idea if a hurricane is approaching, as roofers may run out of tarps if enough roofs in your area have been damaged.
Though owning your own tarp is a wise precaution, attempting to install it yourself, especially during a storm, is dangerous. Homeowners should allow professionals to tarp their roof. Do not walk on your roof, during a storm or otherwise, or you may fall and suffer serious injury.
Protecting Your Home’s Roof From Hurricanes
When considering what steps you should take to protect your home from hurricanes, it is always wise to speak with your trusted roofer, who may have specific advice for your roof. In the unfortunate event a hurricane damages your roof, it can help you to know you have financing options for roof replacement and repair that can ensure you get the damage fixed quickly. Plan ahead and be prepared this hurricane season.

How to Plan a Roof Replacement That Fits Your Schedule
Need to replace your roof but not sure what the best time is or how to make it fit your schedule? You’re not alone. From weather conditions to contractor availability to everything else that life throws at you, planning a roof replacement can feel a little bit like putting a puzzle together (unless, of course, the reason you need to replace your roof is due to emergency circumstances).
If your roof incurred damage from a storm or you have a significant leak in your home, then the best time to do it is as soon as possible. But, if you are planning a full home remodeling project, or you intend to replace your roof to increase the value of your home prior to sale, you will have a bit more flexibility.
Having your roof replaced can feel quite disruptive as a homeowner due to the noise and time commitment, but there are a few ways to prepare yourself to make it feel less like a burden and more like an exciting project to take on.
Here’s how to plan a roof replacement that fits your timeline.
1. Planning a full home renovation? Consider the timeline of the entire project before booking your roofers.
If you are building an addition to your home, or are in the midst of a full home remodel, the best time to replace your roof will depend on the overall scope of the project (as long as none of the various projects are urgent).
For example, if you plan to replace most of the exterior of your home (i.e., doors, windows, siding and your roof), then it is ideal to start with your roof. This will help ensure that your new windows or siding are not damaged while your roof is being replaced.
Whenever you are planning a series of home improvement projects, it is best to speak to a contractor or roofer before confirming start dates.
2. Plan to replace your roof during a time when you have the resources to get your pets and small children out of the house.
When you are trying to choose the best time to replace your roof, ensuring that you have the resources to get your pets and small children away from the home will be beneficial. If your pets exhibit fear during a thunderstorm, they are more than likely going to be quite scared during a roof replacement.
There is no way for a roofing crew to avoid the inevitable hammering and walking on the roof of your home, so you may want to make arrangements before your roof replacement for them to stay with a friend or sitter.
3. Choose a time to replace your roof that will not disrupt your work schedule.
Choosing a convenient time to replace your roof depends on several factors: weather conditions, roofer availability, and your own schedule.
But, just like small pets and children will be disturbed by the noise when you replace your roof, you likely will be, too, particularly if you work from home! If this is the case, weekends might be an ideal time for a roof replacement (if your roofer works on weekends), as you will be able to leave the home or set work aside for the time that the project is completed.
Additional scheduling factors to take into consideration include whether you want to be close by to oversee the project and potentially leave space for unexpected delays.
4. Consider the best time to replace your roof based on weather conditions.
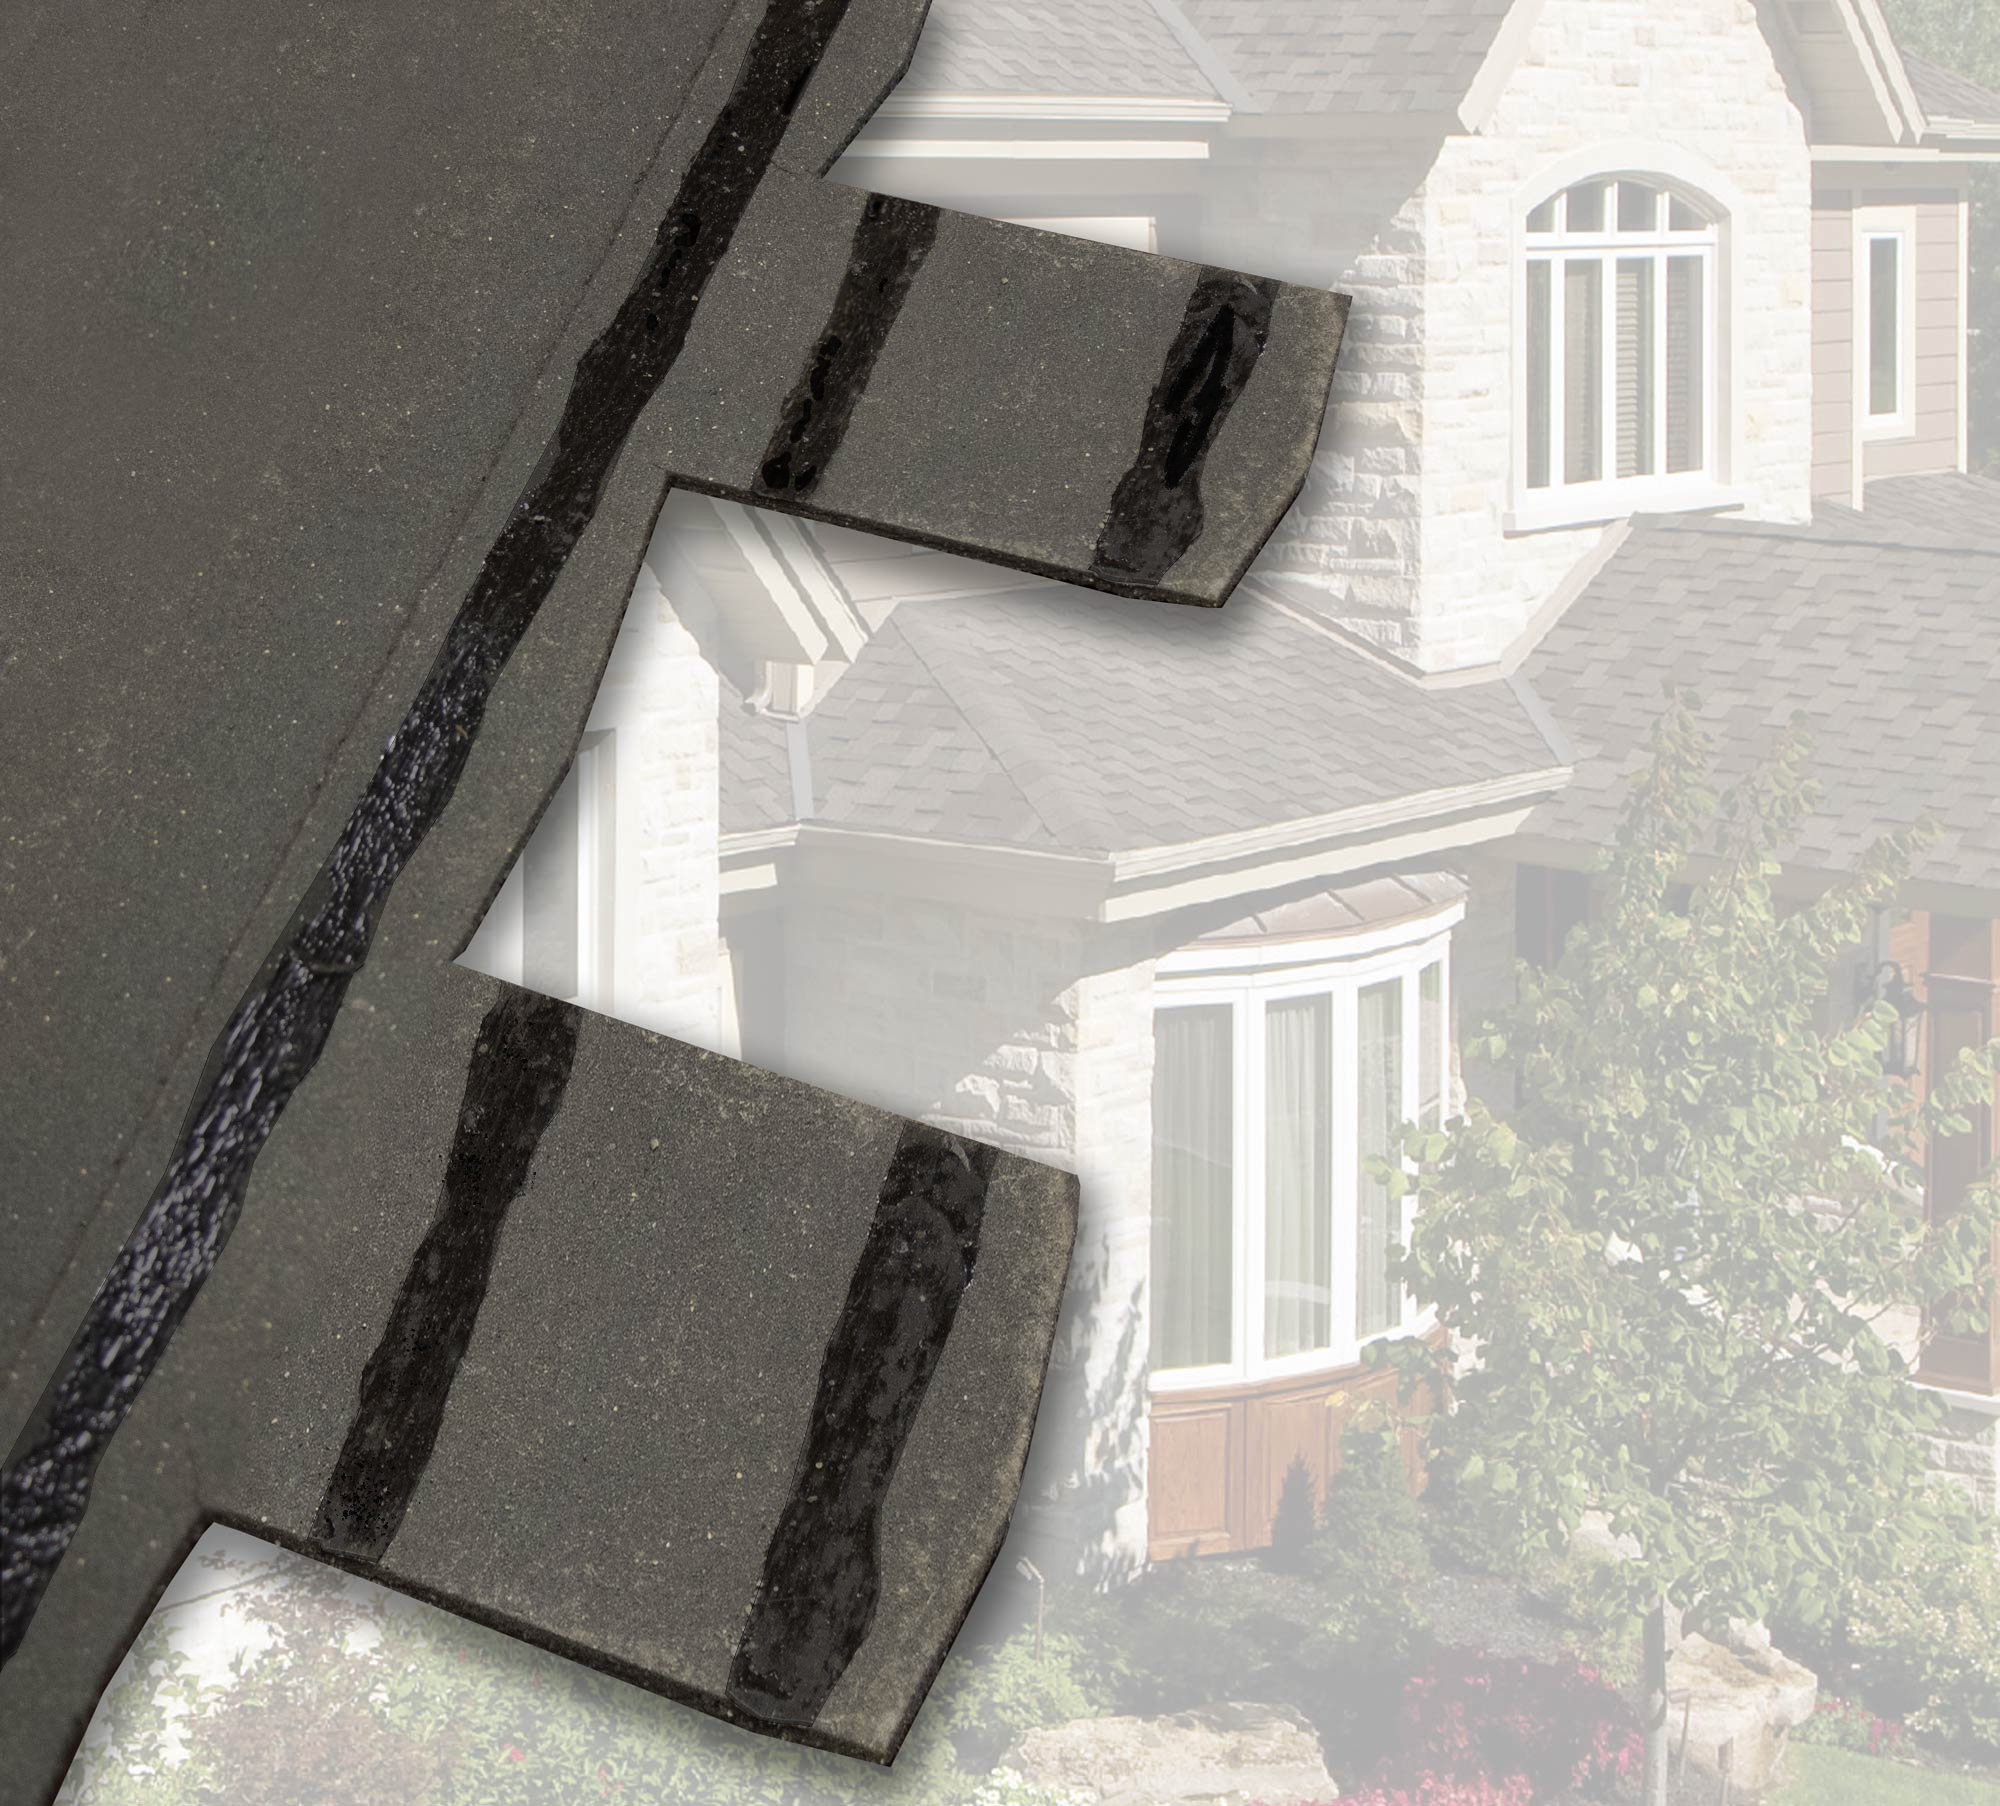
Summer and fall are some of the best times to replace your roof for a reason: Lower humidity and moderate temperatures are ideal for shingle installation. Summer is a particularly ideal time to replace your roof because products like IKO shingles with FastLock sealant are activated by the sun’s heat.
Replacing your roof in cold-weather conditions is not ideal for the materials or your roofers, but it can be easier to find a reputable contractor since it is a slow season. With that said, your roofer will need to take additional health and safety precautions, and the project will likely take longer than it would in fair weather conditions. Cold weather roof replacement also requires additional installation steps, which is likely to result in higher labor costs.
5. Make a plan for your vehicles.
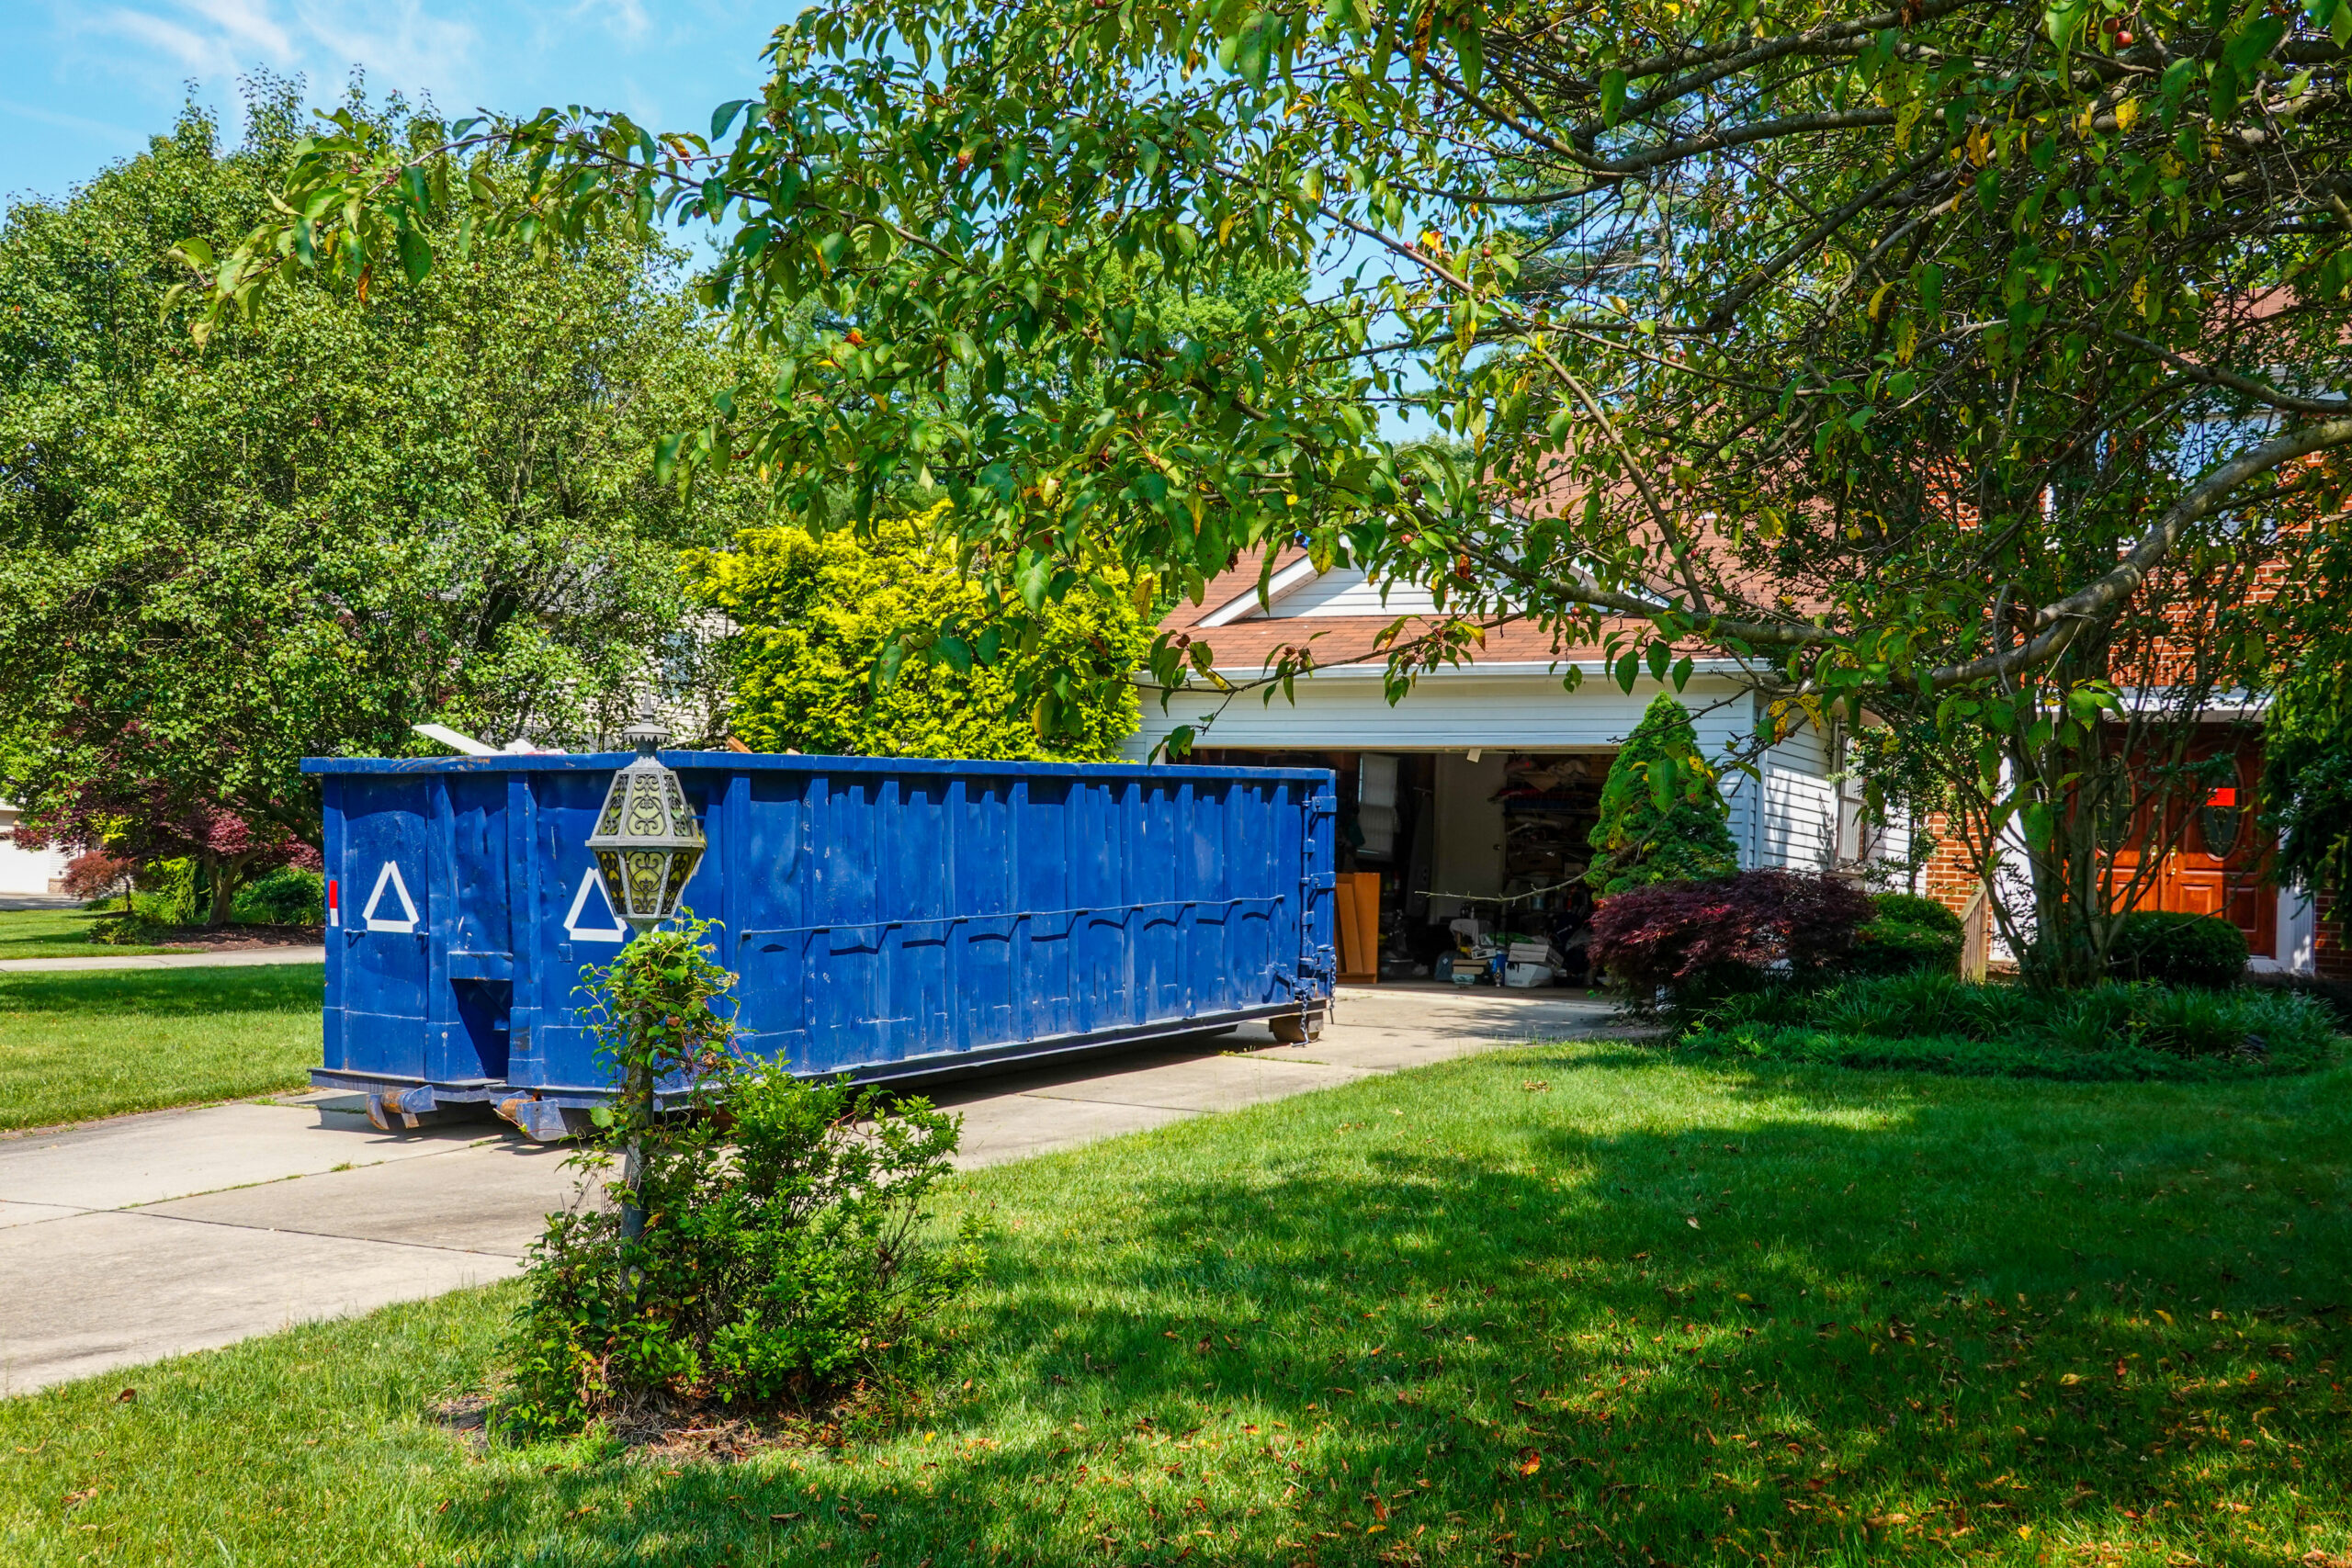
Your driveway is more or less occupied while contractors replace your roof. Your roofer will likely have a large dumpster delivered to your home a day or two before the beginning of the project, which they will use to dispose of the current roofing materials they remove.
It is not advisable to use your driveway while your roof is being replaced. Reputable contractors will use a magnet to pick up any stray roofing nails from your driveway and gardens at the end of each day of roofing but to be safe, it’s best to find somewhere else to park your cars for the extent of the project.
6. Set time aside to take down and store any valuables before your roof replacement.
You might be surprised by the level of vibrations that can come with the process of having your roof replaced!
Ensure any fragile interior objects like mementos or photos on the wall are put away in a safe place before the roofers’ arrival. While they are not guaranteed to knock things off the walls or shelves, it is an extra safety precaution that is worth setting aside some extra time for!
Read our article about preparing for a roof replacement for more tips.
7. Plan for any necessary permits or approvals ahead of your roof replacement to avoid delays.
Depending on where you live and the scope of your roof replacement project, there is a possibility that you may require permits before the contractors can get started. Most contractors will navigate the permit process on your behalf, but it is still important to take into consideration when choosing a time for your roof replacement, particularly if you are planning multiple home renovation or home improvement projects.
Replacing a roof with the same type of roofing materials, repairing missing or damaged shingles and eavestrough replacement often does not require any permits, but we recommend checking your local zoning regulations and bylaws, as well as any Homeowner Association (HOA) rules apply to you and your home. But, if you are adding a second story to your home, changing the slope or pitch of your roof, or, say, installing a skylight, these are circumstances that may require a permit. Be sure to speak to your contractor ahead of time and plan your roof replacement accordingly.
8. Stay in touch with the roofing company for updates and have a backup plan for delays
Communication is key in any project. By staying in communication with your roofing company before the project starts and staying informed throughout a roof replacement, you will be less likely to come up against any surprises. If your contractor expects any project delays due to setbacks, like changing weather conditions or material delays, maintaining a steady stream of communication will ensure that you are prepared to adjust your plans accordingly (i.e., leave the dog at the sitter for an extra few days, let your employer know that you need an extra day off, etc.).
9. Consider the type of roofing material you want to use and its availability.
Material shortages and delays have become quite common in any trade industry following the COVID-19 pandemic. While most reputable roofing companies plan their projects and timelines accordingly, if you hope to replace your roof with a trending, custom, or particularly unique roofing material, be sure to let your roofer know well ahead of time.
10. Finally, be sure to ask the roofing company for advice and guidance on how to best plan for a successful and timely replacement.
As a homeowner, you can try to plan your life around your roof replacement as carefully as possible with the information you have, but one of the best places to start is by speaking to your contractor before even booking the project.
They are the experts and will be able to guide you on best practices, material availability, their schedules, and the ideal weather conditions in your particular location.

What Homeowners Need to Know About Roofing Insurance Claims
Most homeowners in North America have homeowners’ insurance. Unfortunately, not many homeowners truly understand their policy, what it covers and how it can help them if they need to make a roof insurance claim.
We sat down with IKO ROOFPRO Jen Silver, the founder and CEO of Roofing Utah, one of the fastest-growing roofing companies North America, to gain some insight into the roof insurance claim process and what homeowners need to know before they contact their insurance agent and file a roof insurance claim. In addition to sitting at the helm of Roofing Utah, Jen is a public speaker, consultant and expert in roof insurance claim work who speaks publicly across the nation on the topic.
So, she shared with us seven things that every homeowner should know about their insurance policy prior to filing a roof insurance claim and what resources are available to them to learn this essential information.
Whether you wonder what kind of roof damage is covered by your insurance company, if your homeowners insurance will cover your roof leak or how often insurance will pay for a new roof, there are a few questions you should answer about your homeowners insurance prior to filing a roof insurance claim.
Thinking About Filing a Roof Insurance Claim? Here’s What You Need To Know First.
1. Do You Have Replacement Cost Value (RCV) or Actual Cash Value (ACV) Coverage?
If you are in the process of purchasing a homeowners insurance policy or considering making a roof insurance claim, be sure to know whether you are getting RCV or ACV coverage.
RCV will cover you for the entire cost of a roof replacement, minus your deductible. So, if you were in the middle of a hailstorm and got a quote for $15,000 to replace your roof, and you have a $1,000 deductible, your insurance company will cover the remaining $14,000 to replace your roof upon approval of your quote.
ACV, on the other hand, will only pay out the value of your current roof if you make a roof insurance claim. So, if your roof was already 10 years old and has depreciated by $10,000, your insurance policy will only cover $5,000, minus your deductible, which means you as a homeowner would be responsible for covering the remaining $11,000.
The reason why this is so important to know prior to filing a roof insurance claim, Jen explains, is that if for whatever reason you are unable to cover the gap in insurance coverage, but your roof is approved, and you don’t replace it, your insurance company could drop you as a client.
2. What Is Your Deductible?
When you make any sort of roofing-related claim on your homeowners’ insurance, the deductible is the amount that you must pay out before your insurance company will cover the remaining cost. Depending on your homeowners’ insurance policy, this deductible may be a set amount or a percentage of the claim.
So, say you have an RCV policy, and you make a roof insurance claim because you need to replace your roof due to storm damage beyond repair and you have a $1,000 deductible. if the total cost to replace your roof was $10,000, you would pay $1,000, and your insurance company would cover the remaining $9,000.
Deductibles apply in almost all cases of property loss or damage, including most roof insurance claims. If the cost of the claim is below your deductible (e.g., you try to claim a relatively simple $500 repair), you are responsible for covering that cost in most cases. In which case, you would likely be better off covering those repairs out of pocket to avoid negatively impacting your premium moving forward.
Your deductible can be waived under certain circumstances, most often When a claim is over a certain dollar amount; but this depends on your insurance policy.
Always choose a deductible that you know you will comfortably be able to afford. If you opt to have a higher deductible (e.g., $5,000), you will need to be able to pay that amount out of pocket in the event of a claim
3. What Is Your Insurance Policy Limit?
Insurance policies rarely offer unlimited coverage. Rather, they set maximum amounts that they are willing to pay out for different types of insurance claims.
When you purchase homeowners’ insurance, you have the option to raise or lower these limits based on the coverage you need.
Choosing insurance limits is really a balancing act between ensuring you have enough coverage for any sort of significant loss (otherwise, what’s the point of having insurance?), yet avoiding such high limits that cause you to pay way more for your premiums than necessary.
4. What Applicable Exclusions Do You Have?
The general understanding of insurance of any kind is that there needs to be enough people with a shared need for protection for insurance to work properly and keep premiums at reasonable rates.
This means that it is not possible for insurance companies to cover every single type of loss that could ever occur, and this is where the term “exclusions” applies.
Most insurance policies across North America will contain a similar set of exclusions, but it is important to read the fine print of your policy to understand what is and is not covered by your home insurance.
Some of the more common exclusions include losses that are the result of wear and tear or a homeowner’s failure to maintain their property. Old roofs are one of them. So, even if your roof was damaged in a storm, you could come up against challenges in making a claim if your roof is significantly aged.
Additional exclusions may include intentional, fraudulent or criminal losses; failure to reasonably protect your home; high-risk activities; and catastrophic losses that would exceed an insurance company’s resources (for example, war, terrorism, unexpected natural disasters like floods, tornados, earthquakes, or other “acts of God”).
5. How Does Your Policy’s Loss of Settlement Provision Work?
This brings us back to that ACV vs. RCV policy-type question. ACV insurance policies are often calculated at approximately 20 to 25% less than a replacement cost policy, as well as figuring depreciation into the claim.
So, again, if your roof is 20-years-old and has depreciated significantly in value, your insurance company will cover significantly less of the cost to replace it, even if the claim is related to a natural event, like hail or a windstorm, at the time of the claim.
Keep in mind that when considering roof insurance claims, depreciation rates tend to be higher than, say, your kitchen appliances due to exposure to the elements.
6. What Is the Statute of Limitations on Your Claim?
A statute of limitations is a specific period during which you, the insurance policyholder, can file a claim for damages. This varies from state to state in the United States and from province to province in Canada.
Your insurance policy may provide the time period within which a claim may be made, which typically is as short as one year.
If the policy does not provide such a limitation, the claim will be subject to the statute of limitations, which can be anywhere from two to four years, and in rare cases, up to six.
In some jurisdictions, the statute of limitations period may override the period stated in the policy. It is important to review your policy and consult with legal counsel in your jurisdiction to make sure you make a timely claim.
If you are certain that you intend to file a roof insurance claim, be sure to do so within the statute of limitations in your geographical area.
7. Do You Have Ordinance and Law Coverage?
Ordinance and law coverage would cover the cost to rebuild your home or undergo significant renovations and updates to bring it up to current code in the event of a major covered loss.
When considering roof insurance claims, what might seem like a simple repair when making a claim could, in some cases, require a full roof replacement if your roof is not up to the current building code.
Ordinance and law coverage would ensure that your policy covers the cost to replace your roof in compliance with the most up-to-date code and laws.
Many homeowners are unaware that this type of coverage can be included in homeowners’ insurance, and it is not included in every policy type. To determine whether you need this type of coverage, it is best to speak to an insurance specialist.

Understanding Your Homeowners Insurance Policy Prior To Filing a Roof Insurance Claim: Whom Can You Talk To?
Homeowners insurance policies can be extremely overwhelming to understand, but there are experts out there who can help you interpret your policy prior to filing your roof insurance claim.
With that said, not just anyone is able to discuss, explain or interpret your policy for you. Rather, you will want to reach out to an insurance agent, attorney or public adjustor.
“Once a homeowner has all of this information, then they will be in a better position to make an educated decision on whether they want to file a claim or not,” Jen concluded. And, if you ever notice roof damage of any kind, the best first move is always to reach out to a ROOFPRO roofing contractor, as they are a wealth of information and may be able to guide you through the claims process.
Follow IKO’s tips about the seven things you need to know prior to filing a roof insurance claim, and you will be well-prepared if you discover any sort of roof damage.
Install a Roof Tarp: Step-by-Step Guide
Table of Contents
- How to Tarp a Roof
- How to Tarp a Roof Around a Chimney
- How to Tarp a Roof Without Nails
- How Long Can You Leave a Tarp on Your Roof?
- Get Help with Your Damaged Roof
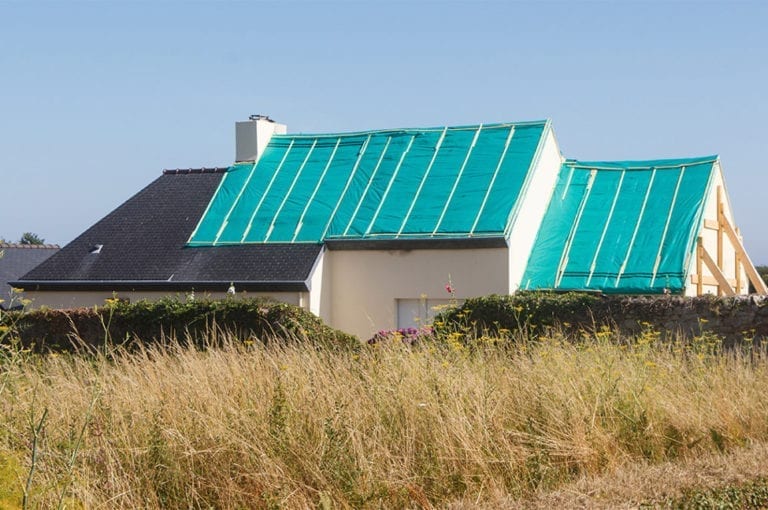
There’s a problem with your roof, but your roofer is too busy to come by and fix the problem right away. What should you do? This is a common situation that homeowners may find themselves in after a major storm or hurricane has blown through town. After extreme weather events, roofers are so busy fixing multiple roofs throughout town that they don’t have time to address even emergency repairs right away. In this case, you may opt to add a temporary roof tarp to prevent further damage.
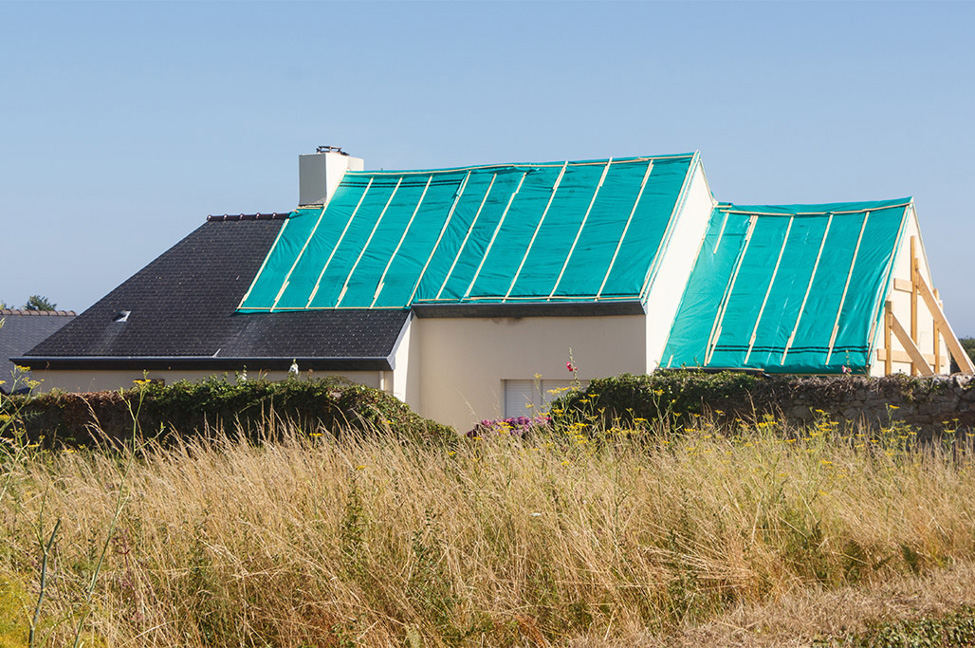
A roof tarp, when secured properly, can protect your roof from new rain, snow or wind. It can prevent holes or missing shingles from turning into leaks and can keep existing leaks from getting worse. Not only is protecting your roof with a tarp a wise precaution to shield your home, but it may also be necessary under your homeowners insurance policy. If you don’t limit the damage that the storm has caused on your roof and the rest of your home, your insurance company could refuse to cover the additional damage, even if it will cover the costs of the initial damage.
You should hire a professional roofer to put up a roof tarp. Attaching a tarp doesn’t take much time, and roofers are also motivated to do this work as it increases the odds that you’ll wait until they can fit you into their schedule instead of choosing another roofer.
You should not attempt to place a tarp by yourself. Standing on the roof without proper safety training and equipment is dangerous at the best of times, never mind after a major storm or when you suspect your roof has damage. It’s easier to fall off wet roofs or those with tripping hazards, such as loose shingles. Roofs that are extremely damaged may even collapse under your weight. If you’re the type of person who likes to take action, look into safe things you can do to prepare for your roof replacement in nonemergency situations.
While a professional should do the actual work of attaching the tarp, you may want to make sure that your roof is tarped properly, to ensure your peace of mind and to reassure your insurance company. So, we’ll explain how to install a roof tarp and answer some common questions homeowners have about the process.
How to Tarp a Roof
Here are step-by-step instructions on how to secure a tarp to a roof:
Tools required:
- Ladder and safety equipment.
- Camera or smartphone.
- Measuring tape.
- Suitably sized tarp.
- Thin wooden boards, 2×4 or thinner.
- Tool to remove debris, such as a roofing shovel.
- Nails or screws.
- Examine the Roof and Measure
To start, your roofers must first examine the roof to determine which parts of the roof need a tarp. They may survey the roof from a ladder, wear a safety harness to inspect the damage physically or use a drone. Using a tape measure, they’ll determine what size tarp they will need to cover the damaged area.
- Take Pictures
You should ask your roofers to take pictures of the damaged parts of the roof to show to your insurance company. You should take pictures before the tarp is applied and before any debris is removed from the roof unless removing the debris is necessary to see the full extent of the damage.
- Select Tarp
Your roofers will select a tarp to place on your roof. As the tarp should extend a few feet past any damage to provide proper protection, it should be larger than the area the roofers have measured. Ideally, the tarp will also be long enough to hang over the ridge of the roof. When the tarp hangs over both sides of the roof, water will roll onto the tarp smoothly, without getting beneath it. If the water rolls down the roof and then reaches the lip where the tarp begins, it is more likely to work its way under the tarp.
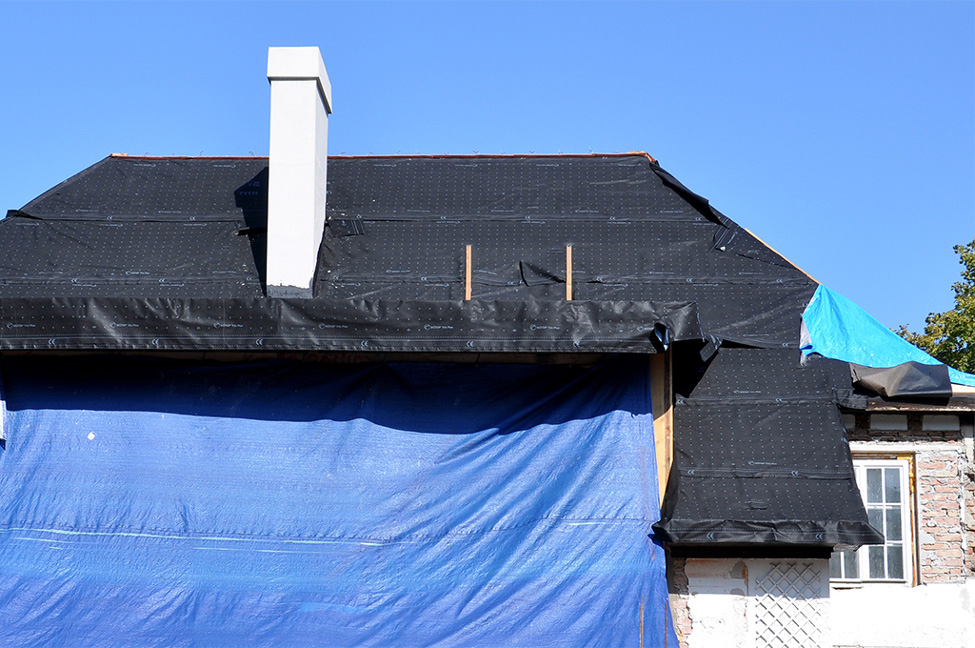
The quality of tarp needed may also depend on how soon your roofing team expects to be able to get to your roof, or whether or not the severe weather is expected to return.
- Remove Debris
Next, your roofers will remove any loose debris from the roof, including shingles and nails. If debris is left behind, it can clog gutters, interfere with the proper flow of water and create the opportunity for more roof issues.
- Unfurl Tarp
Two or more roofers will be needed to unfurl the tarp and place it over the damage. If your roofers are using an adhesive roof tarp, they may then remove the backing on the adhesive to secure the tarp. Adhesive tarps can be a challenge to install, but they are similar to the ice and water protectors that roofers use all the time. Although, the shingles beneath an adhesive tarp will need to be replaced, because the adhesive pulls up some granules.
If your roofers are not using an adhesive tarp, they will need to complete a few more steps in order to weigh down the tarp.
- Secure Tarp
In order to secure a tarp with nails or screws, your roofers will need to wrap the end of the tarp around a piece of lumber as an anchor. The board helps give weight to the tarp to keep it on the roof and prevent it from flapping around. Also, if your roofers were to add a few nails to the tarp, this would create points where the tarp could easily rip. When the whole end of a tarp is wrapped around the board, it spreads out the pressure through the whole tarp, making it much less likely to rip off.
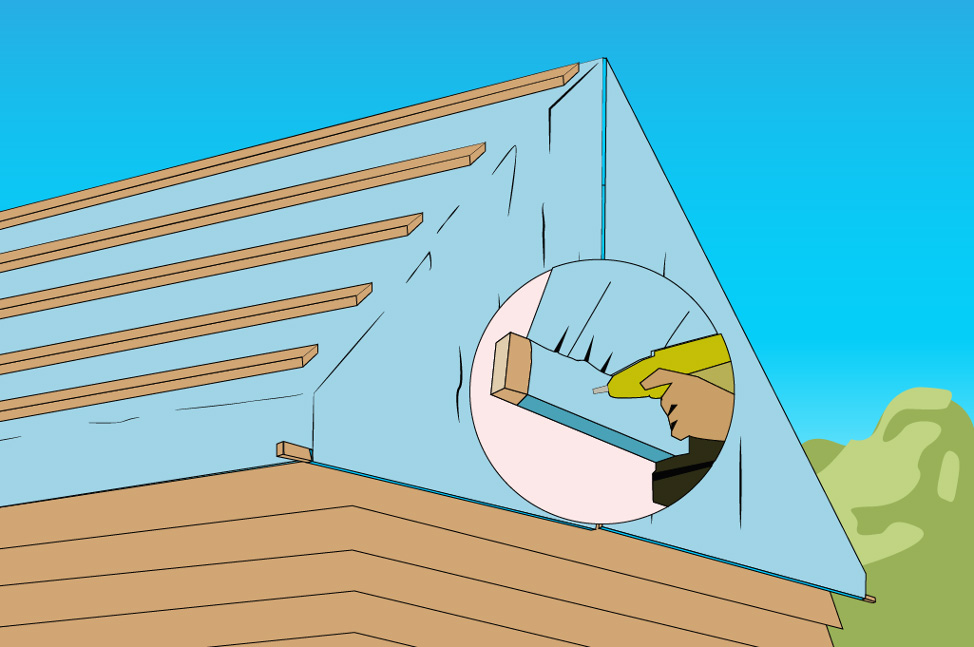
Depending on the extent of the damage, your roofing team may need to add several boards to ensure the tarp will stay in place. They’ll also need to position the boards carefully to prevent water dams. For example, the boards should not be perfectly horizontal. One end should be lower on the roof, allowing water to drain off that side.
- Nail or Screw Boards Down
After they roll the edge of the tarp around a thin wooden board, the roofers will secure the board to the roof with nails or screws. The nails or screws should be driven right into the shingles. All these shingles will need to be replaced when the roofers repair the roof; but this is a small price to pay to prevent more water intrusion.
How to Tarp a Roof Around a Chimney
It is more challenging to tarp a roof if the damage is near roof features, such as chimneys, plumbing vents and skylights. While you can leave a skylight covered by a tarp, it would be a serious safety hazard to leave a plumbing vent or chimney covered. In general, your roofer should cut a hole for these features and then tape the edges of the tarp to it. It is very important to use quality tape to keep these areas watertight. Some tapes may not adhere well to chimney masonry; so, your roofer may need to tape the tarp to the chimney flashing.
How to Tarp a Roof Without Nails
Most roofers will use screws when attaching the tarp’s anchor boards to the roof. However, if you want to avoid making additional punctures in the roof, you can use an adhesive roof tarp. These have a glue-like material built in to stick to the shingles. However, these tarps may be less secure than tarps secured with wooden boards and nails; so, you should check on them regularly to make sure they are still in place. Using an adhesive roof tarp may require additional effort to remove the adhesive residue or replacing the shingles that the tarp was adhered to.
How Long Can You Leave a Tarp on Your Roof?
Ideally, you would leave the tarp on your roof for as little time as possible. That said, as long as the tarp is in good condition, without tears or rips, and as long as the water isn’t getting beneath it, it can be left in place. When your tarp will wear out depends on the quality of the tarp and the conditions it is exposed to.
If you’re concerned that your tarp isn’t effectively protecting your roof anymore, you should reach out to the roofers who put it in place. They should be able to tell you if anything has changed since their initial installation.
Get Help with Your Damaged Roof
It is important to get a tarp on your roof as soon as the bad weather has cleared so that it is in place if another storm rolls in. It is also important to get repairs done as soon as possible and not leave the tarp on for an extended period. If you’re looking for a roofer to help with emergency roof repairs or to just place a tarp, look for a local contractor through IKO’s Contractor Locator
Storm is Over: Ensure Your Loved Ones’ Safety
Is there anything more important than the safety of those you love? Once the storm has passed, it’s time to turn your attention to the shelter that protected them. If your roof has been damaged, it’s important to have it repaired or replaced as soon as possible to avoid further damage to your home and property. It can be hard to know where to start, which is why we’ve compiled these top tips to help.
Table of Contents:
Check Your Roof for Damage
Contact Your Insurance Agent
Call in the PROs
Check Your Roof for Damage.
It’s important to know how badly your roof has been damaged, to prevent further harm to your belongings and to provide your insurance agent with some basic information. In checking your roof for damage, unless you are experienced in working at heights and have the necessary safety equipment, you should limit your investigations to visual inspections from street level and have a professional roofer conduct a full inspection for you.
Download Checklist

Here’s what to look out for in different weather conditions:
Snow: A roof stacked with a fresh coat of white snow may look pretty, but if a heavy pile of it is left long enough, the accumulated weight can damage the roof’s structure and gutters. Using IKO StormShield to create a watertight seal can help protect the most vulnerable areas of the roof that are susceptible to water leakage caused by ice and snow accumulation.
Wind: After a heavy windstorm, you may find yourself with wind-damaged roof shingles. Homeowners must know what to look for when assessing wind damage to asphalt roof shingles. This will help to determine if you should call a roofing contractor for repairs. During the storm, you may have noticed your roof shingles flapping in the wind. If this is the case, you should have a look around your property for any missing shingles that may have blown off your roof. You should also look for cracked and lifted shingles. If you must replace your roof due to wind damage, pay attention to the roof shingles’ wind rating when deciding on a replacement shingle. IKO Nordic and Dynasty shingles are reinforced with ArmourZone for exceptional high-wind performance, making them some of the best wind-resistant shingles on the market.
Heavy Rain: When a roof is in good condition and properly installed, rain damage is rare. However, if your gutters are clogged, the water may not be able to drain off your roof properly. This can result in the water slowly damaging the roofing materials. In very heavy downpours, water can quickly gush out of downspouts, potentially damaging landscaping. A downspout diverter or extension can help redirect excess storm rainwater, resulting in less ground damage.
Hail: Hail damage to roof shingles may not always be the most obvious, but it is critical to look for deterioration before it leads to water damage inside your home. So, what does hail damage look like on roof shingles? Some things to look out for include patches of the shingles’ black asphalt left exposed due to missing surface granules, small divots or dents and cracks or dents in roof accessories. When dealing with hail damage, roofing contractors can help to determine the damage and suggest the best course of action for repair. IKO Nordic, Crowne Slate and Armourshake shingles have been tested for impact resistance and have achieved the highest rating possible, Class 4.* These are IKO’s best asphalt shingles for regions subject to hail and may be good replacement shingles to minimize future hail damage.
* The Impact Resistance ratings are solely for the purpose of enabling residential property owners to obtain a reduction in their residential insurance premium, if available. This is not a guarantee of impact resistance against hail. Damage from hail is not covered under the limited warranty.
Whether you call a professional roofing contractor or your insurance agent first, they will need information from each other in order to evaluate the damage and provide an estimate for your insurance claim. Ideally, invite your adjuster and your contractor to meet at your home, to work together most efficiently.
Before you make that call, check out this handy guide on how to deal with insurance:
Learn More
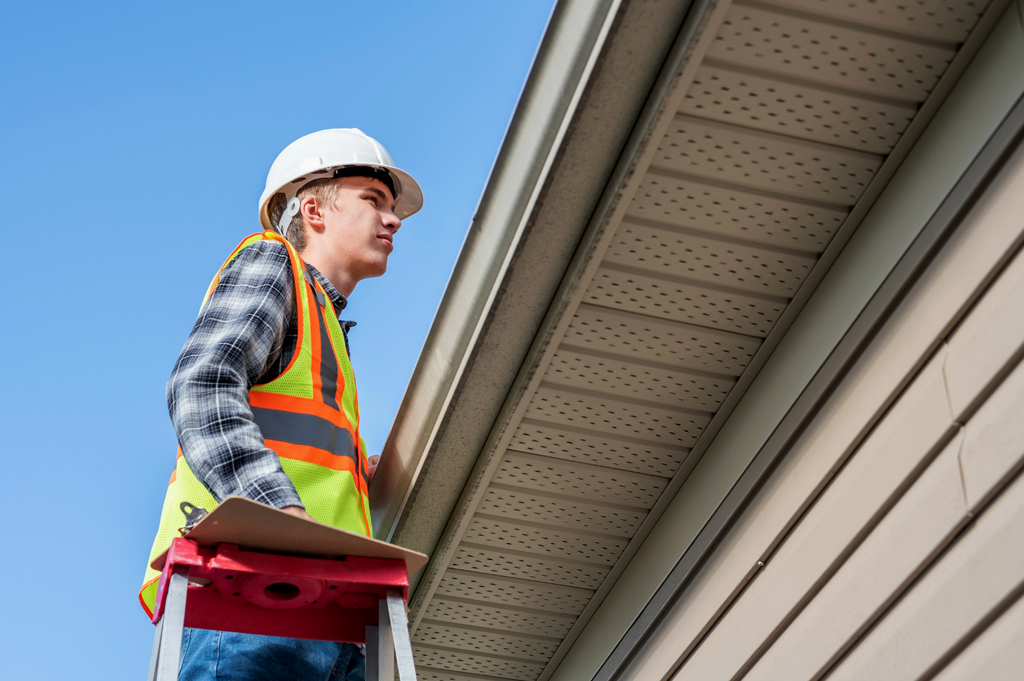
Call in the PROs.
Once you’ve contacted your insurance agent, it’s important to do what you can to avoid further damage by keeping water out until your chosen contractor can start the project.
Click here to find an IKO-approved contractor in your area:
Find a Contractor

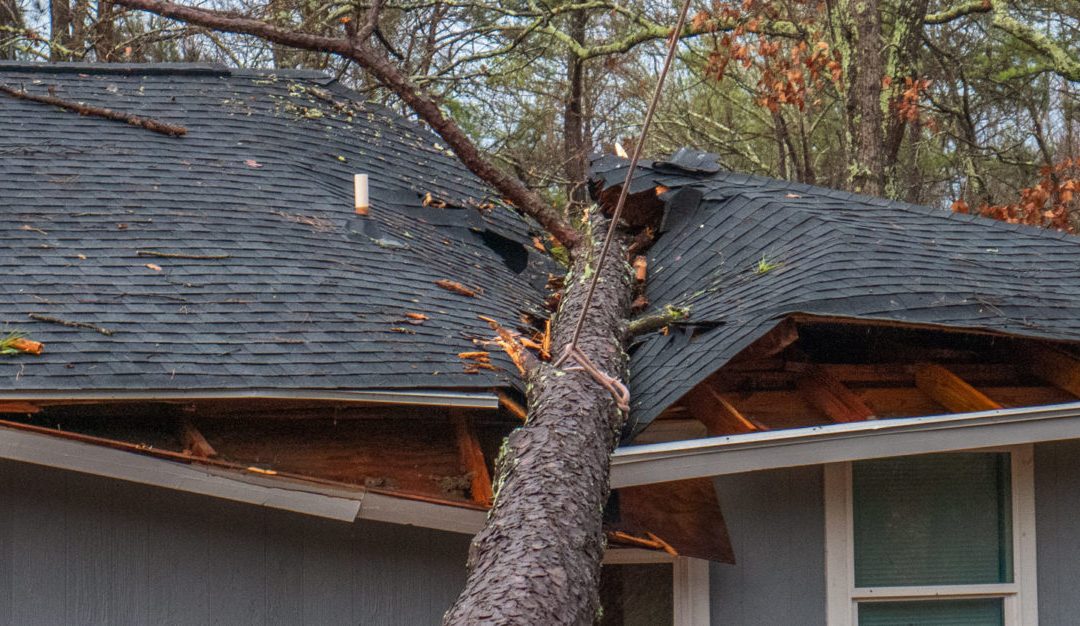
Before you call your insurance agent, here’s a checklist you can use to prepare for your claim.
DEALING WITH INSURANCE AND OTHER ISSUES
- Always seek advice from a qualified insurance professional. Never try to settle an insurance claim on your own.
- Beware of “storm-chasers”. People who may represent themselves as either roofing or insurance experts often appear at the door of homeowners who have experienced storm damage. They may claim they’ll be able to get you a new roof or have you sign what’s called a “contingency agreement” so they can climb up to assess the damage. Such a document may legally bind your claim to their company.
- Never sign anything before you read it fully, have your questions adequately answered and know exactly who they are or whom they represent.
- Before you hire a roofing contractor, ask to see all licenses and certificates of insurance that your municipal, state or provincial laws require and ensure that all are up to date.
- Once your insurance adjuster and selected roofing contractor have worked out the essential details, the insurance settlement may be sufficient to pay for a new roof that’s similar or better than the one you had before.
- Consider not only the style and color of a possible new roof, but the available warranties, accessory products and application methods that might protect your home and family best should similar extreme weather events occur in future. Ask your contractor for options and to see samples of actual shingles before you commit to buying.
Find a qualified IKO roofing contractor in your area.
Here’s what to ask a contractor.

What’s on Your Essential Home Buyer’s Checklist?
So, you’re planning to buy a house. Let us be the first to say congratulations! Buying a home is an exhilarating and rewarding experience. But it can also feel a bit overwhelming. This is one of the biggest investments you’ll make and shouldn’t be done lightly. Before you sign your name on the dotted line, there is a lot to consider, especially for first-time buyers.
Whether buying a new build or an existing home, we want your homeownership journey to be as exciting and fulfilling as possible. Using our decades of experience working with contractors, home inspectors, specifiers and more, we’ve compiled a little home buyer’s checklist and inspection guide so you can buy with confidence.
Please remember that this article is meant to provide advice for new home buyers only and is not a substitute for legal or financial advice. It should also not be considered a complete guide to home inspections. No home is perfect, and issues will undoubtedly arise. The goal is to provide you with enough information to help you make an informed decision. We’ve broken down our home buyer’s checklist into the following steps, which will be discussed in detail below:
- Viewing the Home:
- Roof.
- Gutters and Drainage Systems.
- Foundation.
- Bedrooms.
- Living Room.
- Kitchen.
- Bathrooms.
- Basement.
- Getting a Home Inspection.
- What a Home Inspection Isn’t.
- Can a Home Fail an Inspection?
- Hiring a Home Inspector.
Viewing the Home
Viewing a home is one of the best parts of buying a home. While it can’t tell you everything you need to know when buying a house, it’s a great place to start. The trick is to know what to look for. To help make the best decision possible, here are some inspection tips for new homeowners to consider when viewing a home.
Roof
The roof is the first thing you should look at when approaching a potential home. From the ground, inspect the state of the shingles. See if they are curling severely, if any are missing, or if any areas look completely worn out. Curling shingles aren’t necessarily a sign that the roof is leaking, but they could indicate that the roof may have to be replaced sooner than you’re prepared for.
Also, check to see if any areas appear to be buckling. This could mean water has infiltrated the roofing deck, affecting its dimensional stability and possibly its structural integrity. Keep this in mind when inspecting the attic and see if you spot any signs of water damage.
Check for algae or moss growing on the roof, or mold in the attic. This can appear as dark, white, green, or black patches and can indicate poor ventilation and/or water leakage. Also, look around and see if there are any overhanging trees touching or sitting extremely close to the roof, as this may cause issues in the future.
If you’re looking at a semidetached home, inspect the neighbor’s roof as well. When talking to the seller, ask them how old the roof is, if it’s been replaced and why.
Gutters and Drainage Systems
While you’re there, look at the roof’s drainage system. Gutters and downspouts should capture and direct runoff away from the house, protecting it from water damage. Take a walk around to see if you can spot any gaps or breaks that would cause water to run down rather than away from the house. If the fascia (the board beneath the gutters) is damaged or degraded, that could mean the gutters are frequently clogged. Damaged fascia can also cause leaks and allow animals to get in.
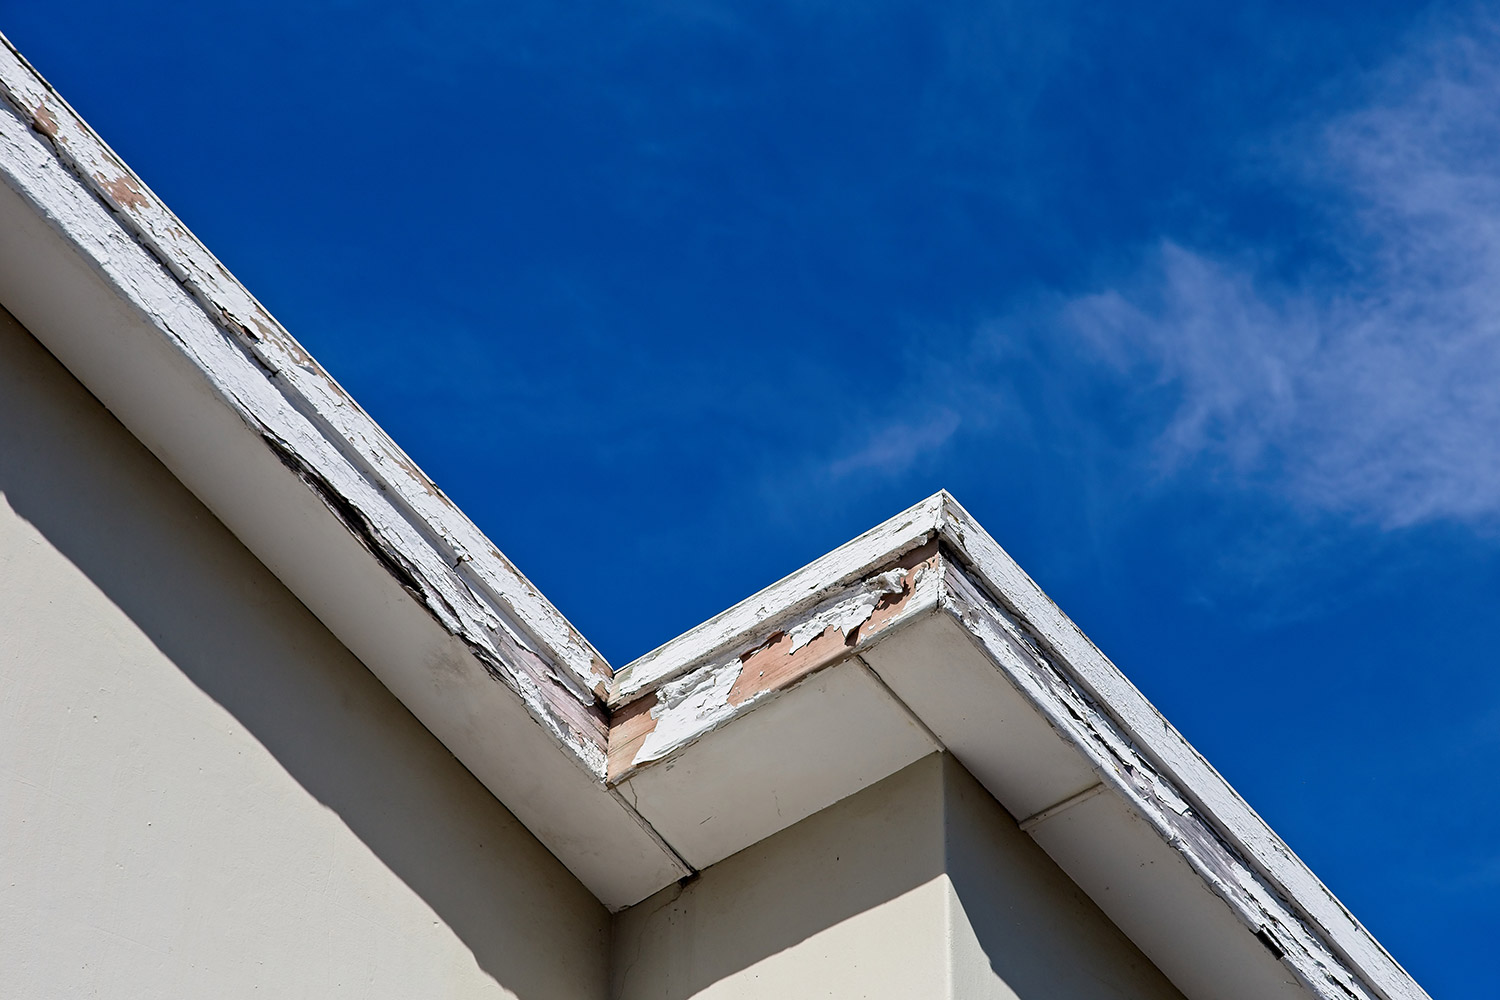
Check to see if the downspouts have an extension. A downspout without an extension may cause water to pool, causing soil saturation, which can damage the foundation. All downspouts should have an attachment to carry water safely away from the house.
Foundation
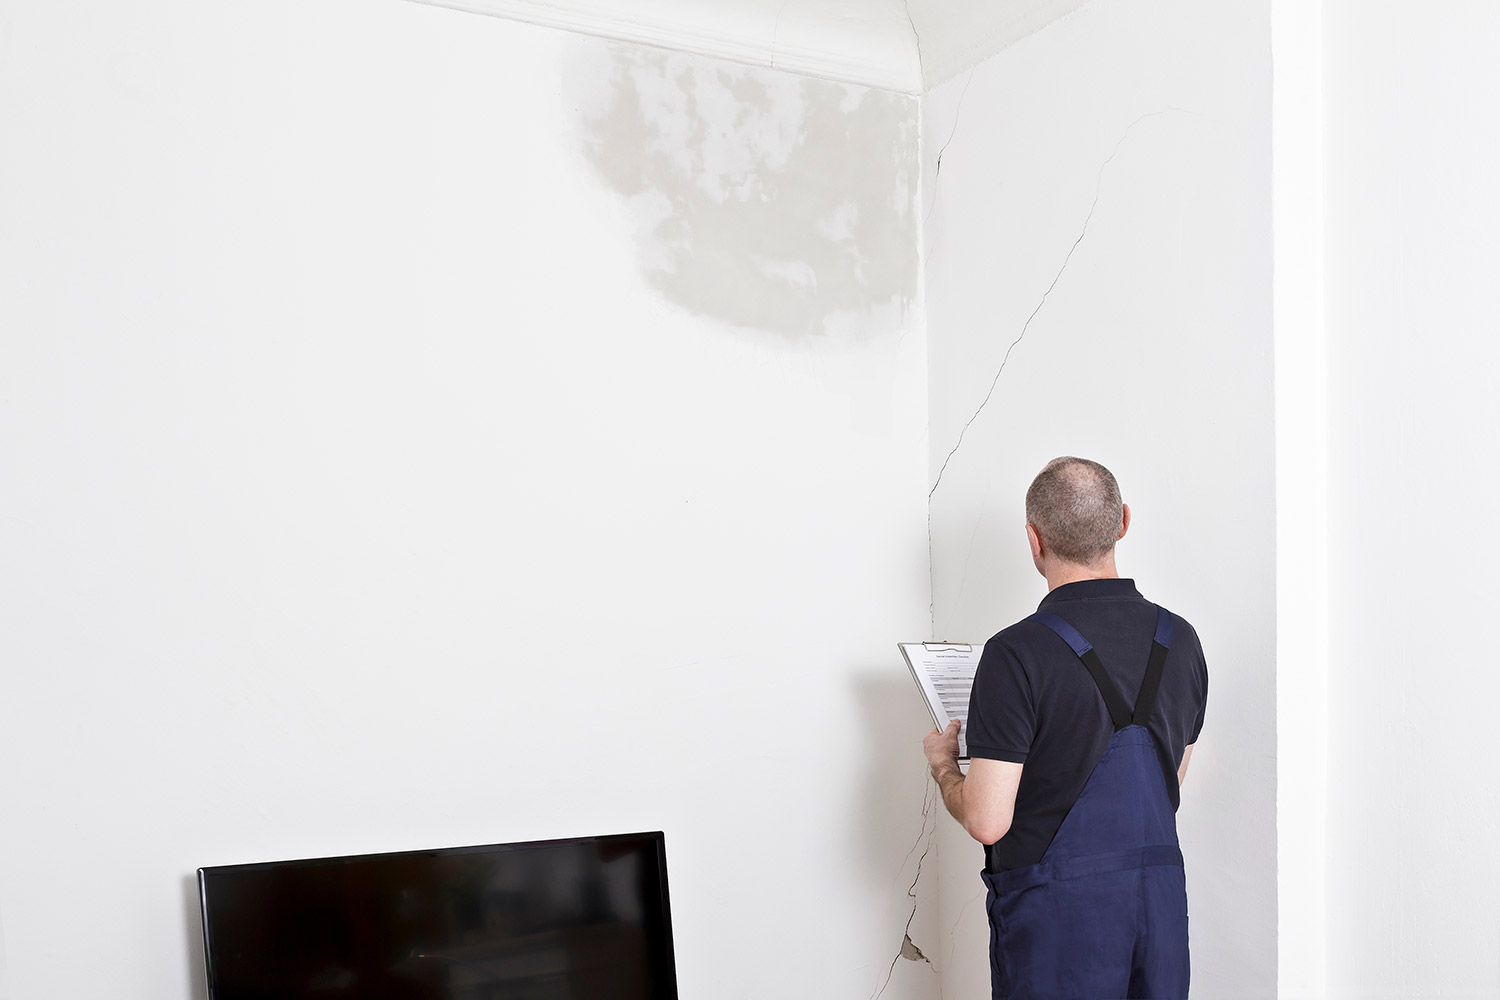
Inspecting the foundation can be tricky as it’s usually covered up externally by soil, decks, porches, etc., and internally by drywall. However, there are a few ways to inspect its structural integrity. Look for any cracks in the walls, particularly around doorways or windows, and see if any doors or windows stick or jam. These may all be signs that the foundation has shifted. Remember, downspouts without an extension may also affect the foundation’s integrity. An unfinished basement will likely give you the best view of the foundation and reveal any cracks or water damage.
Bedrooms
When inspecting the bedrooms, the first thing to consider is the size. Take note of window placement. Will there be a lot of natural light? Is there enough privacy? Walk from each bedroom to the bathroom to get a feel of how far it is and check all light switches. Check the ceiling and walls for any water damage. Finally, scan the room for outlets. We use a lot of devices nowadays, so having multiple outlets within reaching distance will make all the difference in the world. Do you really want to get out of bed every time you have to plug your phone in?
Living Room
As you did in the bedrooms, consider the size, windows and outlet placement when walking through the living room. Try not to get too wrapped up in the current décor. Instead, consider the style and layout. Will your existing furniture work? Take pictures of your current living room layout and use them as references. Also, like in every room, test all electrical outlets and switches to ensure they work correctly. An easy way of doing this is by using your phone charger. Also, be sure to check for any water damage.
Kitchen
The kitchen is where you’ll move around the most, sometimes holding hot pots and pans, so you want to make sure you can do so easily and safely. Play out your typical routine a few times to get a feel for the space. Counter space is king in any kitchen, so you’ll want to ensure you have enough for appliances, cooking and prep work. To check the plumbing, let the water run and look under the sink to see if there are any leaks. Once again, test all electrical outlets and switches to make sure everything works.

Bathrooms
You’ll want to make sure everything in the bathroom is watertight and in working order. Test the faucets, toilet, and shower. To check the water pressure, turn on the faucet and flush the toilet. If the water flows uninterrupted, that usually means the water pressure is good. Check under the sink and around the toilet for leaks, water damage, or mold. Make sure there is a working exhaust fan. Bathroom fans help reduce odors, improve air quality, and remove moisture and humidity that can cause mildew, mold, and structural damage.
Basement
Basements are like a box of chocolates: You never know what you’re going to get. Nowadays, most basements are finished. However, it’s not guaranteed. If the basement is finished, inspect it like you would the main floor, being especially vigilant for any signs of water damage as this is where it’s most likely to occur. If it’s unfinished, you’ll get a clear view of the foundation, plumbing, floor/ceiling joists and wiring. The basements of older homes were often used for cold storage and may not be set up for HVAC, making them cold in the winter and humid in the summer. So, keep this in mind when viewing.
In the end, it comes down to personal preference. A finished basement provides more room and is great for kids. However, if you’re only using it for laundry/storage, you may not care if it’s unfinished. Plus, an unfinished basement is a great blank canvas for you to create your own space.
Getting a Home Inspection
A home inspection is an in-depth visual examination of a home, from the roof down to the foundation. Home inspectors are trained to see what others can’t, identify potential issues, and save you tens of thousands of dollars in repairs and renovations down the line. A home inspection should consist of, but is not limited to, the following:
Roof:
A home inspector can get up on a roof to look closely at the state of the shingles, flashing and ventilation systems. Many new homeowners believe that seeing excessive granules in the gutters is a sign that the shingles need to be replaced, but that isn’t always the case. All shingles, including IKO’s performance shingles, are engineered with extra granules to ensure complete coverage of the shingle’s asphalt weathering layer. So, having a few of those extra granules in the gutters isn’t necessarily a cause for concern.
However, a qualified home inspector can get on the roof and see if the shingles have been worn down so much that the base layer is showing. This is a sign that the shingles may need to be replaced. While up there, they can also inspect the gutters to see if they are clogged or need to be replaced.
Attic:
Here, a home inspector can further examine the underside of the roof deck, the attic’s ventilation system and insulation. Adequate ventilation, in conjunction with vapour barriers and attic insulation, helps maintain the home’s temperature and moisture levels. They can also help prevent the formation of ice dams in the winter. A home inspector should check all roof intake and exhaust vents and the type of insulation used and should recommend whether or not the attic insulation levels should be increased. A properly ventilated and insulated attic can save you hundreds on your energy bills.
HVAC:
Most of us are unfamiliar with HVAC systems. A home inspector will be able to tell you how old the home’s furnace and duct system are, whether they’re working properly and if there are any leaks. Depending on the home, they should also check the air conditioning unit.
Electrical and Plumbing:
While you can check all the outlets and switches in the home, a home inspector can check the wiring. They can determine its age, if it’s been done properly and if there are any fire hazards. They will also inspect the circuit breakers to ensure everything is up to code and installed correctly. They’ll check all visible plumbing, including the water heater, for leaks or signs of degradation.
Floors, Ceilings and Foundation:
A home inspector will look closely at the structural integrity of the home’s floors, ceiling, and foundation. They can pinpoint subtle signs of water damage, shifting, buckling and the quality of the craftsmanship, and can identify load-bearing walls. This can come in handy if you ever decide to renovate.
Doors and Windows:
Improperly sealed windows and doors allow for hot and cold air to escape, can make a room drafty and increase the chances of water infiltration. A home inspector can ensure all windows and doors keep the outside out and the inside in.
What a Home Inspection Isn’t
While a home inspection can provide great advice for new home buyers and give you a better understanding of the home, it’s important to remember that it is a visual inspection only. There are certain things a standard home inspection cannot always account for. Such as:
- Asbestos.
- Radon.
- Methane.
- Radiation.
- Wood-destroying organisms like termites.
- Extensive mold, mildew, or fungi.
- Pests and rodents.
- Lead.
- Sewer, septic and waste systems.
A home inspector will not enter inaccessible areas like locked or cluttered rooms. They also will not venture into any space that is deemed unsafe, such as steep roofs. Specialized inspectors are available for the above, but usually come at an added cost.
Can a Home Fail an Inspection?
No, a home cannot fail a home inspection. A home inspection only describes the home’s physical condition and anything that requires significant repair or replacement.
Also, a home inspection is not an appraisal and cannot affect the home’s market value. However, it can open price negotiations between you and the seller. You can also request repairs after a home inspection, though the seller may refuse.
Hiring a Home Inspector
Always hire an independent, fully licensed home inspector who is certified according to your region, state and/or province. If you’re buying a home in Canada, you’ll want an inspector licensed by The Canadian Association of Home & Property Inspectors (CAHPI). If you’re buying in America, you’ll want someone authorized by the American Society of Home Inspectors (ASHI).
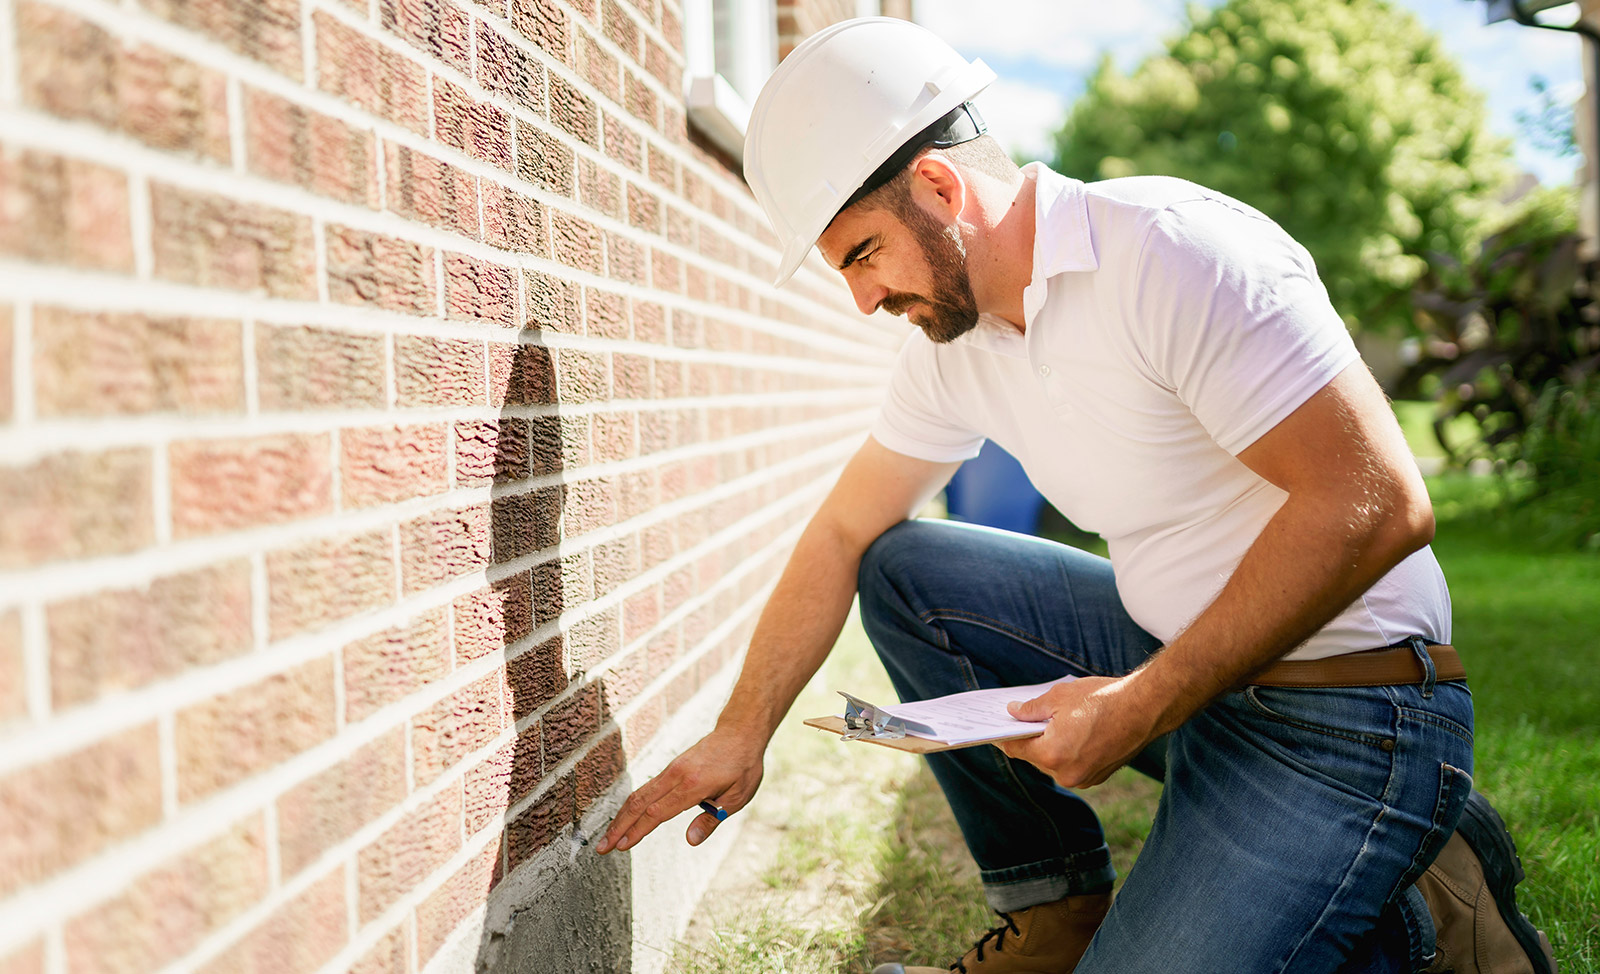
The best action plan is to schedule a home inspection immediately after the Agreement of Purchase and Sale (APS) documents have been signed. You can also negotiate with the seller to include a home inspection as a condition in the APS. This will make the purchase of the home contingent on the outcome of the inspection.
We hope our beginner’s guide to buying a new home eases some of those first-time buyer jitters and helps you find the house you want to make a home.
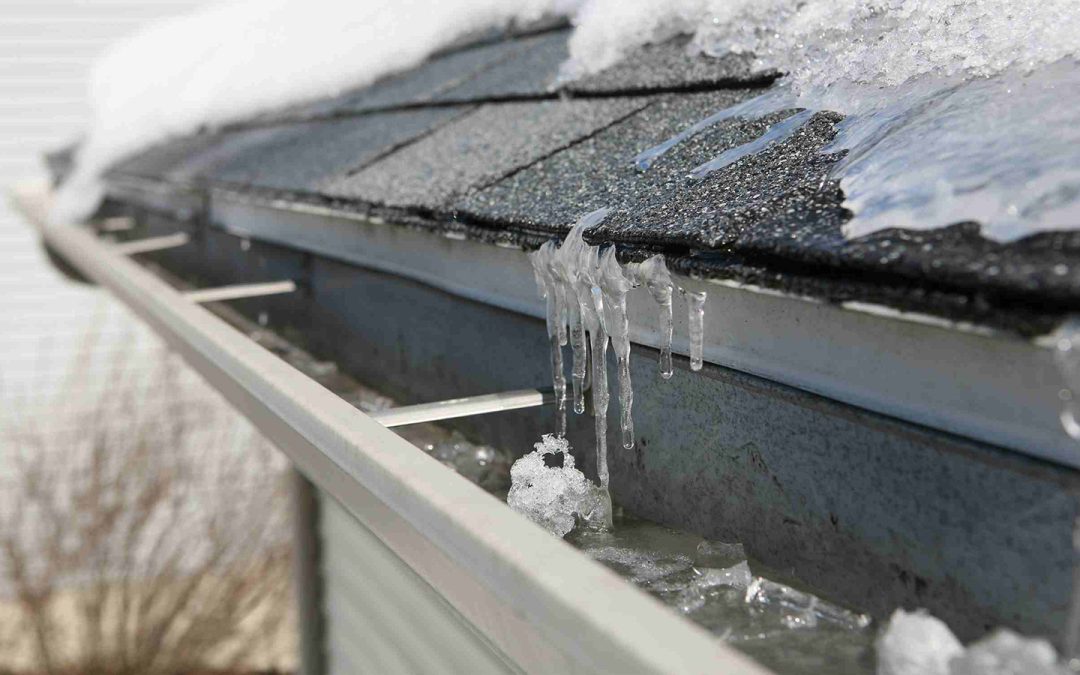
Table of Contents
- Roof Ice Dam Removal
- The Best Ways To Get Rid of Ice Dams
- How To Remove Ice Dams on Your Roof
- How Not To Remove Ice Dams
- Prevent Ice Dams for Good
- Need Help With Your Ice Dams?
Roof Ice Dam Removal
In the winter, ice tends to collect on some roofs near the edges because of snow from a snowstorm that melts and refreezes during a drop in temperature. While you can, and should, address the underlying cause of the ice dam, you should also seek to remove the current dam from the roof. Otherwise, it may wear on the roof and increase your likelihood of developing a leak.
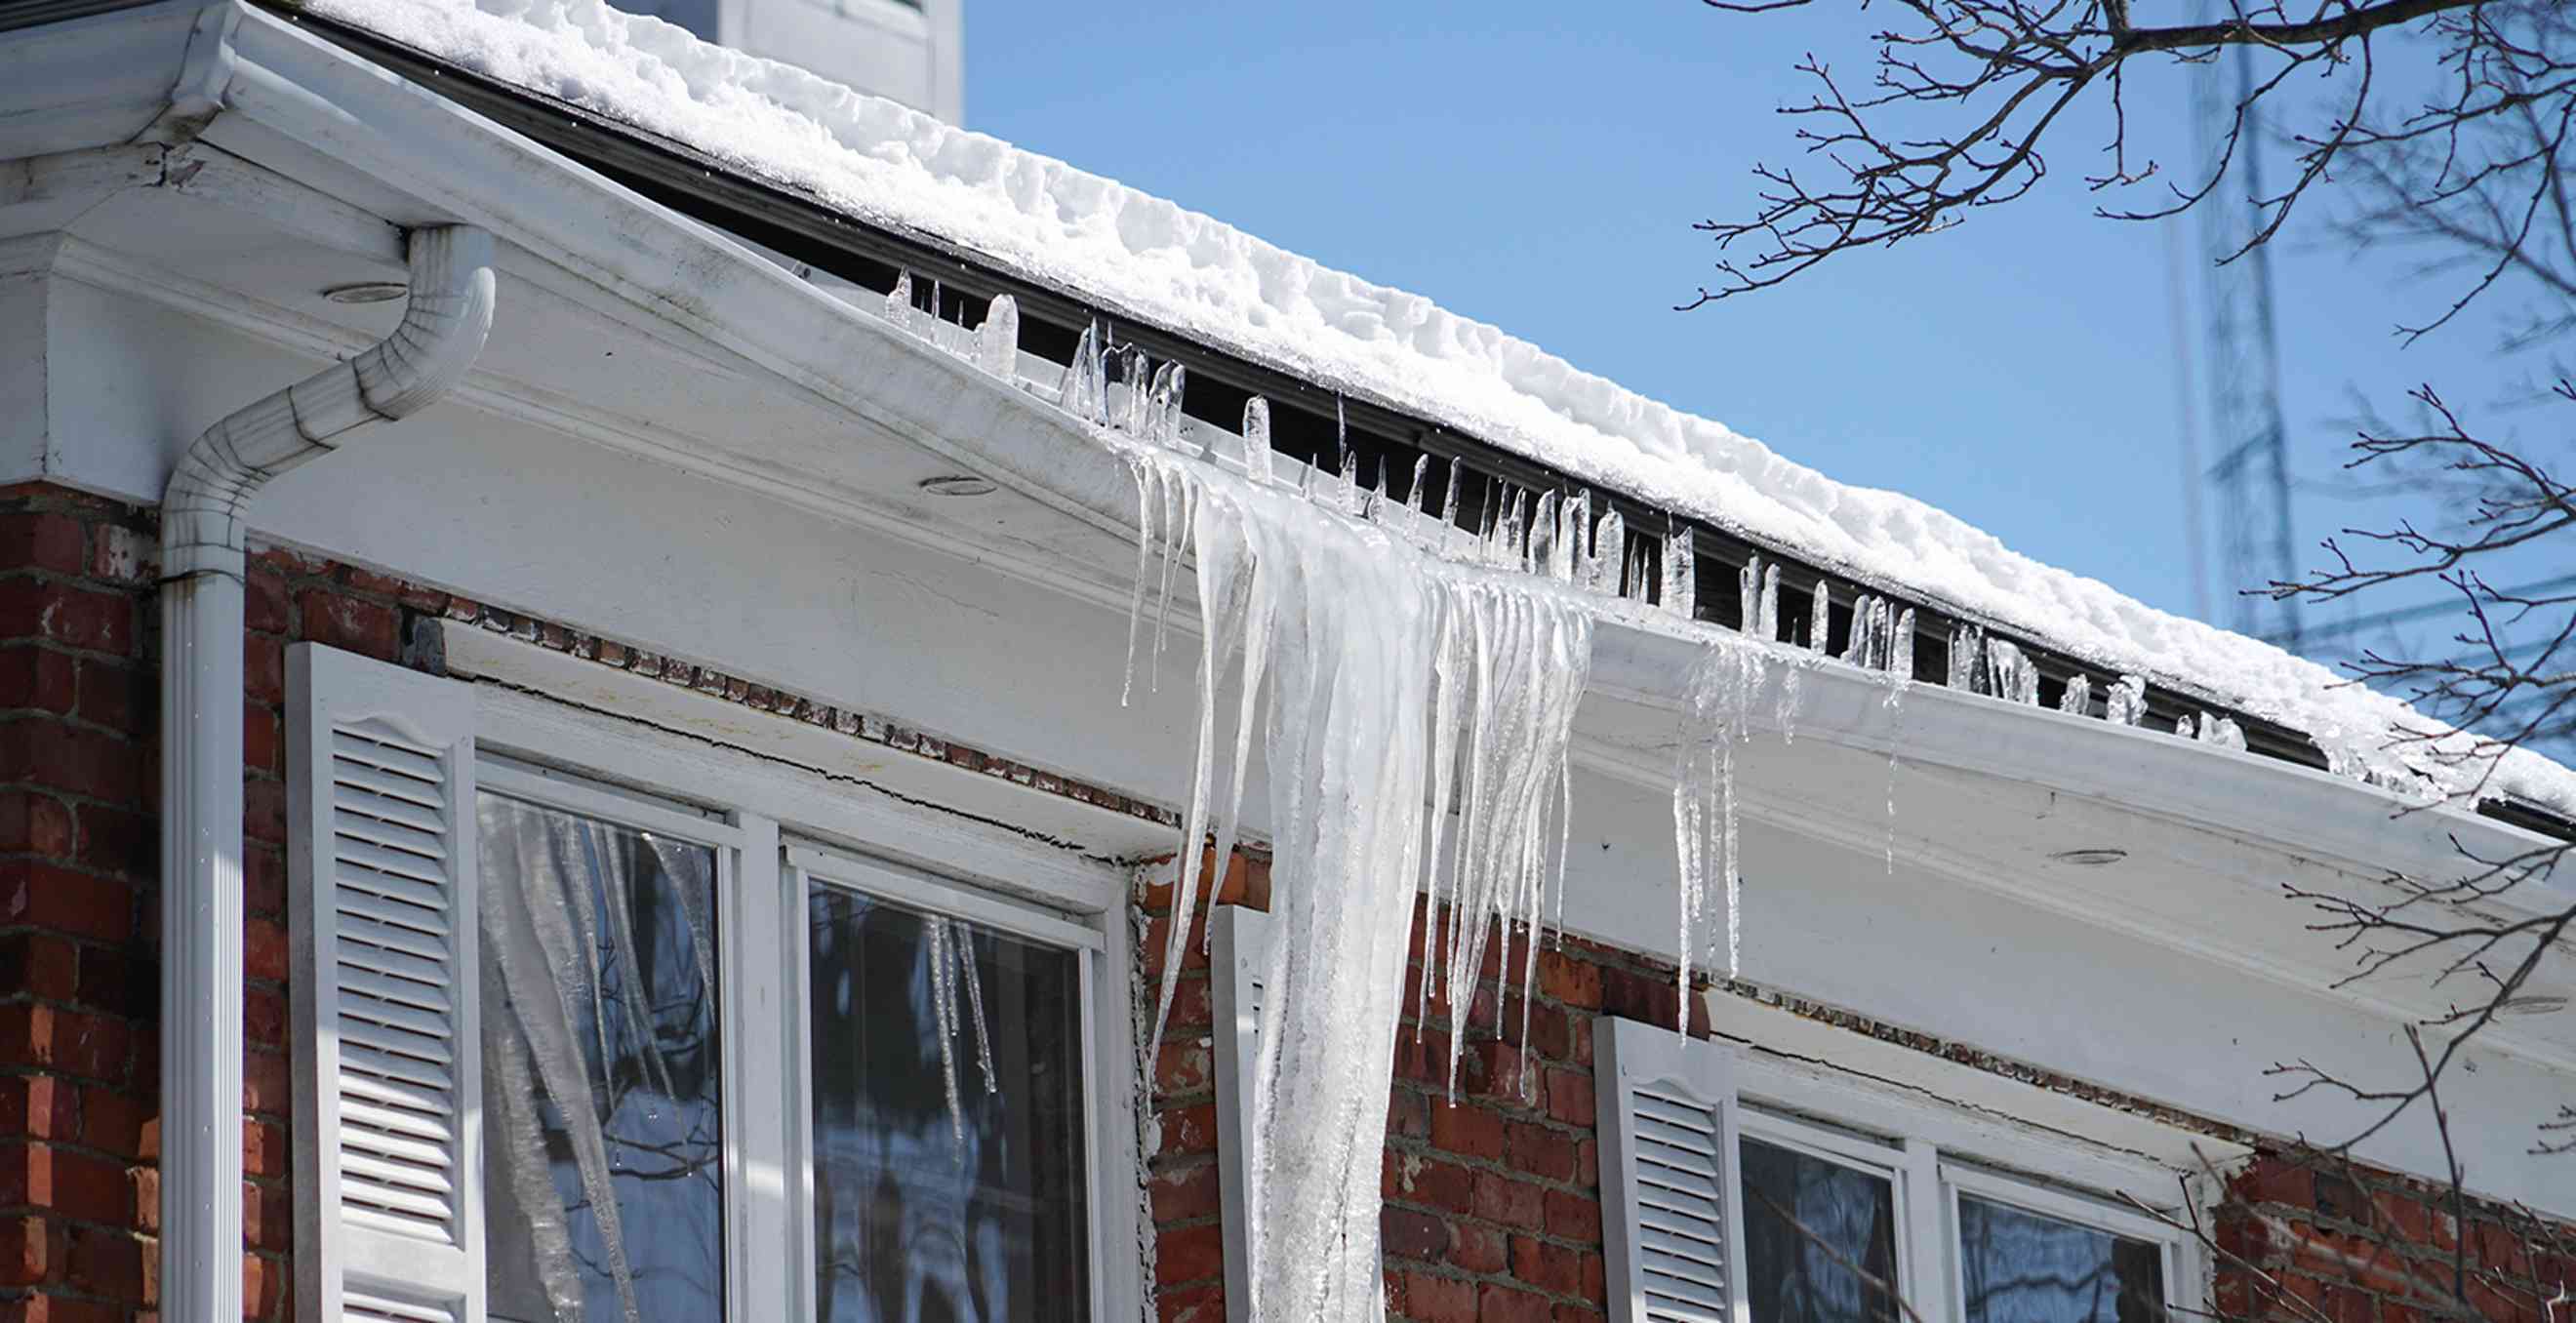
The longer the ice dam remains, the higher the risk you take. However, you also must be careful about how you remove the ice dam, as certain methods may damage the roof. We’ll guide you through the ice dam removal process, revealing which methods are safe for your roofer to try, and which methods should not be attempted at all.
The Best Ways To Get Rid of Ice Dams
You can temporarily get rid of ice dams by melting them away. There are four safe ways your roofing professional can remove an ice dam from your roof:
- Use hot water: Running hot water over the ice dam, gently, will melt it and allow the water to drain out through the gutters.
- Install heat cable: You can have heat cables installed on the roof in the summertime which will then be there come cold weather to melt the ice dam for you. Your roofer may recommend that you use them temporarily or install them permanently to solve your ice dam problems moving forward. For example, they may be installed on roof planes that face north and have a higher roof plane draining onto them. As these roof planes get very little sun in the winter, the excess water becomes an ice dam more easily. Roofers may also use heat cables to prevent ice dams from forming and drainpipes from freezing on commercial roofs.
- Remove snow: If warmer weather is on its way, and the ice dam is likely to melt, your roofer might choose to have the rest of the snow on your roof removed. Otherwise, the snow may melt under the sun and become another ice dam when it refreezes at the colder roof’s eave. The National Roofing Contractors Association (NRCA) recommends that some snow be left on the roof in order to prevent damage to the shingles. That way, the contractor’s shovel doesn’t come into direct contact with the roof, so it won’t scrape it. Remember that only a professional can safely remove snow from the roof with a shovel, and they must be very careful.
While it’s always best to consult with a professional roofer about how best to remove your ice dam, there are some less-experienced roofers or general contractors who may attempt to remove ice in an unsafe way. It is important for you to be educated about how a professional should remove ice safely, so that you can protect your investment in your roof. Here’s a guide explaining how a professional can safely remove ice dams with hot water.
How To Remove Ice Dams on Your Roof
Tools you’ll need include:
- Ladder.
- Garden hose.
- Roofing team.
Steps you’ll need to take are as follows:
- Step One: Your roofers should place their ladder safely next to the portion of your roof with the ice dam. They should follow ladder safety protocol to keep themselves safe. They should not place their ladder on ice or snow.
- Step Two: One roofer will climb the ladder and have another member of the team hand him or her the hose. One roofer will then turn on the hose.
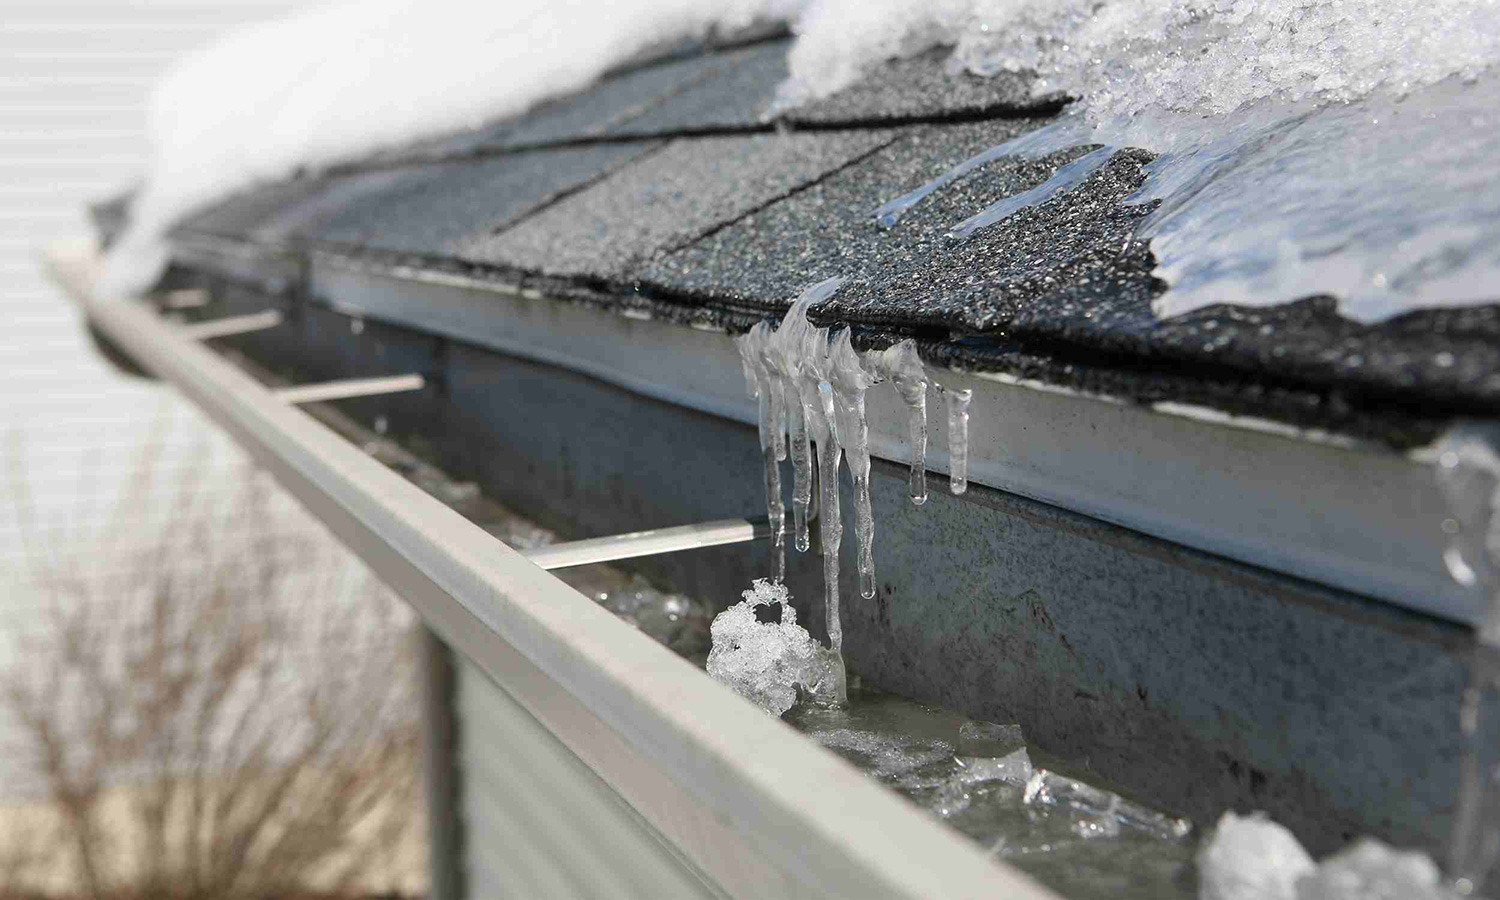
- Step Three: Next, your roofers will direct the hot water onto the roof. It may take some time depending on the size of the ice dam, but it will eventually melt. As they work, your roofers will be careful not to aim the pressurized water directly against the shingles. Otherwise the shingles may lift, and the water could damage them. This is one reason why you should not use a pressure washer on a roof. Once the ice has melted, your roofer should ensure that all chunks of ice have cleared the gutters, or they may create a gutter clog.
How Not To Remove Ice Dams
There are many incorrect ways to remove ice from your roof that will damage your asphalt shingles and compromise your roof’s water-shedding ability. Protect your roof and home, and keep your limited warranty valid by asking your roofer to avoid these risky ice-removal methods:
- Manual removal: It is NOT a good idea to take a pick, shovel or another tool to the ice and chip it off. This might remove the ice, but might end up damaging the shingles too. Plus, the next ice dam in this spot is likely to take advantage of the cracks or gaps your roofers have created in the roof. As the snow melts, the water could settle into these cracks and freeze and expand. This kind of damage may result in a leak. The only time roofers should manually remove ice is when they will also replace the roof beneath it.
- Chemicals: Roofers should avoid using any chemicals on your roof. Many ice-melt products combine salt and other chemicals that make the salt a more effective de-icing treatment. More targeted ice dam ice-melt tablets are available, but are not recommended for asphalt roofs. Unfortunately, some of these chemicals can have a negative effect on asphalt shingles, especially if the chemicals are left on the roof for long periods, and their use may void the manufacturer’s limited warranty.
Prevent Ice Dams for Good
These ice dam removal methods are all temporary. They can help your roof avoid damage in the short term, but they won’t stop another ice dam from forming. In order to resolve your ice dam problem for the long run, your roofers need to address the underlying issue that is causing the ice dam to form. While many homeowners believe that the real problem is poorly maintained gutters, this is rarely the case. Most commonly, the underlying issue is inadequate attic insulation.
Work with your roofing professional to discover what kind of insulation you have and whether it needs to be replaced with a more effective type of attic insulation. Better insulation will prevent the home’s heat from reaching your shingles. Therefore, the snow on the shingles will likely not melt or be able to refreeze as an ice dam.
Other roof issues may be contributing to the formation of ice dams on your roof. While fixing these problems will not typically resolve the ice dam by themselves, they may help reduce the severity. They will also help keep your roof in better condition in general. These contributing factors may include:
- Ventilation: Plumbing vents commonly end on the top of the roof. However, ventilation for other home systems should not end on the roof. If they do, they run the risk of melting the snow around them, leading to ice dam formation when the water refreezes. Consider running vents out through the wall of the home instead.
- Connection points: Roof design may contribute to ice dam formation. For example, if an upper roof plane drains onto a lower, unheated, roof plane, this water may create ice dams. A roofing professional can tell you if your roof design is the problem and what can be done to correct it.
- Gutter maintenance: Although they are very rarely the primary cause of an ice dam, clogged and slowly draining gutters may develop ice dams. It’s essential to clean your gutters in the fall to avoid this problem.
There is also a way to protect your roof and home from damage from any potential ice dams that might develop. Installing ice and water protector is often required by building codes because it offers your roof extra protection.
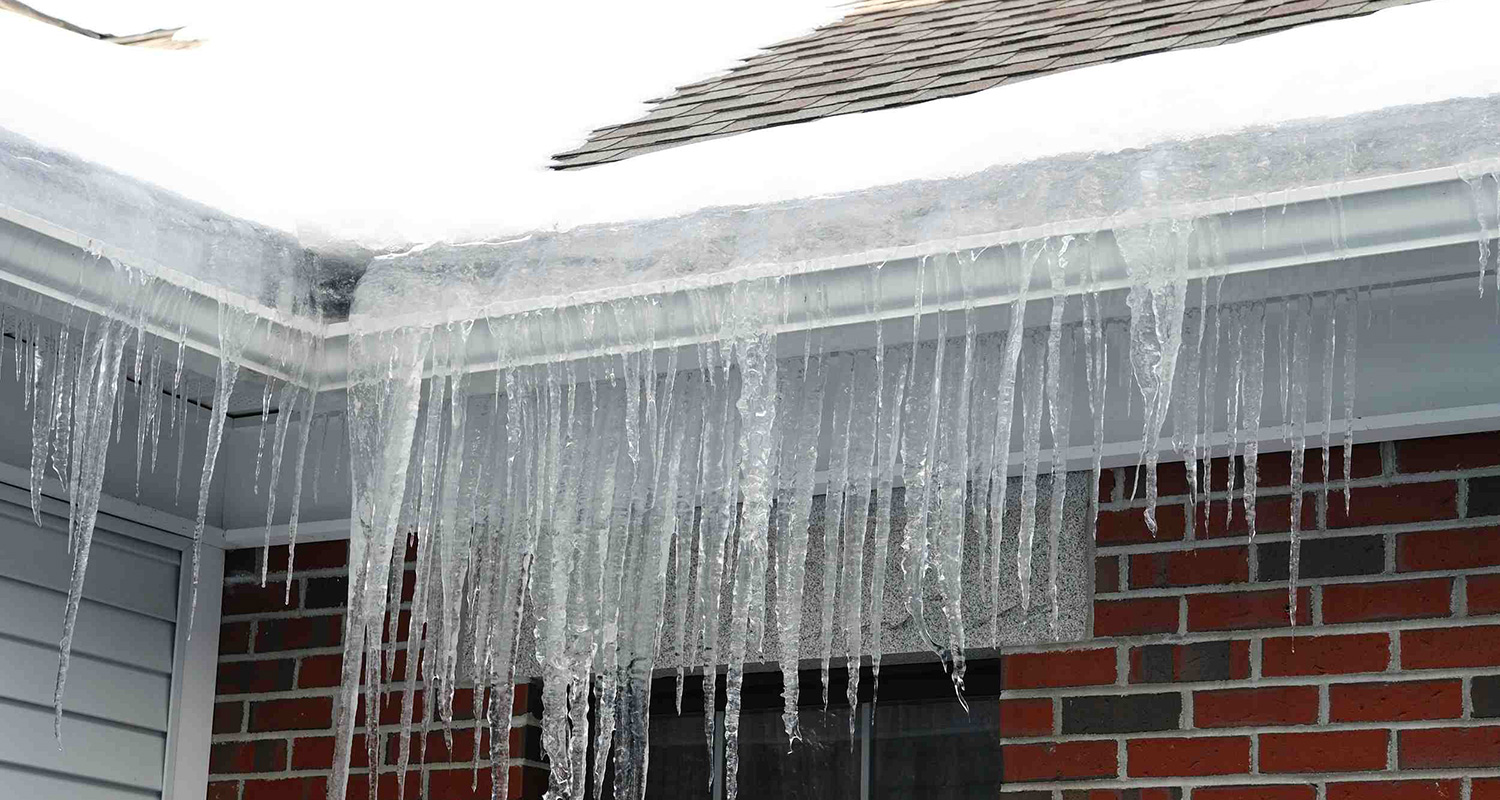
Need Help With Your Ice Dams?
Ice dams should always be removed by professionals who understand winter roof safety and how to protect the shingles from further damage. Plus, once they have removed your current ice dam, they will need to address the underlying cause before another ice dam occurs. If you need to reach out to a professional, consider IKO’s Contractor Locator, which may suggest roofers right in your area.

Need to replace your roof but not sure what the best time is or how to make it fit your schedule?
You’re not alone. From weather conditions to contractor availability to everything else that life throws at you, determining the best time to replace your roof can feel a little bit like putting a puzzle together (unless, of course, the reason you need to replace your roof is due to emergency circumstances).
If your roof incurred damage from a storm or you have a significant leak in your home, then the best time to do it is as soon as possible. But, if you are planning a full home remodeling project, or you intend to replace your roof to increase the value of your home prior to sale, you will have a bit more flexibility.
Having your roof replaced can feel quite disruptive as a homeowner due to the noise and time commitment, but there are a few ways to prepare yourself to make it feel less like a burden and more like an exciting project to take on.
Here’s how to plan a roof replacement that fits your timeline.
1. Planning a full home renovation?
Consider the timeline of the entire project before booking your roofers. If you are building an addition to your home, or are in the midst of a full home remodel, the best time to replace your roof will depend on the overall scope of the project (as long as none of the various projects are urgent).
For example, if you plan to replace most of the exterior of your home (i.e., doors, windows, siding and your roof), then it is ideal to start with your roof. This will help ensure that your new windows or siding are not damaged while your roof is being replaced.
Whenever you are planning a series of home improvement projects, it is best to speak to a contractor or roofer before confirming start dates.
2. Schedule roof replacement when you can relocate pets and kids temporarily.
When you are trying to choose the best time to replace your roof, ensuring that you have the resources to get your pets and small children away from the home will be beneficial. If your pets exhibit fear during a thunderstorm, they are more than likely going to be quite scared during a roof replacement.
There is no way for a roofing crew to avoid the inevitable hammering and walking on the roof of your home, so you may want to make arrangements before your roof replacement for them to stay with a friend or sitter.
3. Choose a time to replace your roof that will not disrupt your work schedule.
Choosing a convenient time to replace your roof depends on several factors: weather conditions, roofer availability, and your own schedule.
But, just like small pets and children will be disturbed by the noise when you replace your roof, you likely will be, too, particularly if you work from home! If this is the case, weekends might be an ideal time for a roof replacement (if your roofer works on weekends), as you will be able to leave the home or set work aside for the time that the project is completed.
Additional scheduling factors to take into consideration include whether you want to be close by to oversee the project and potentially leave space for unexpected delays.
4. Consider the best time to replace your roof based on weather conditions.
Summer and fall are some of the best times to replace your roof for a reason: Lower humidity and moderate temperatures are ideal for shingle installation. Summer is a particularly ideal time to replace your roof because products like IKO shingles with FastLock sealant are activated by the sun’s heat.
Replacing your roof in cold-weather conditions is not ideal for the materials or your roofers, but it can be easier to find a reputable contractor since it is a slow season. With that said, your roofer will need to take additional health and safety precautions, and the project will likely take longer than it would in fair weather conditions. Cold weather roof replacement also requires additional installation steps, which is likely to result in higher labor costs.
5. Make a plan for your vehicles.
Your driveway is more or less occupied while contractors replace your roof. Your roofer will likely have a large dumpster delivered to your home a day or two before the beginning of the project, which they will use to dispose of the current roofing materials they remove.
It is not advisable to use your driveway while your roof is being replaced. Reputable contractors will use a magnet to pick up any stray roofing nails from your driveway and gardens at the end of each day of roofing but to be safe, it’s best to find somewhere else to park your cars for the extent of the project.
6. Set time aside to take down and store any valuables before your roof replacement.
You might be surprised by the level of vibrations that can come with the process of having your roof replaced!
Ensure any fragile interior objects like mementos or photos on the wall are put away in a safe place before the roofers’ arrival. While they are not guaranteed to knock things off the walls or shelves, it is an extra safety precaution that is worth setting aside some extra time for!
Read our article about preparing for a roof replacement for more tips.
7. Plan for any necessary permits or approvals ahead of your roof replacement to avoid delays.
Depending on where you live and the scope of your roof replacement project, there is a possibility that you may require permits before the contractors can get started. Most contractors will navigate the permit process on your behalf, but it is still important to take into consideration when choosing a time for your roof replacement, particularly if you are planning multiple home renovation or home improvement projects.
Replacing a roof with the same type of roofing materials, repairing missing or damaged shingles and eavestrough replacement often does not require any permits, but we recommend checking your local zoning regulations and bylaws, as well as any Homeowner Association (HOA) rules apply to you and your home. But, if you are adding a second story to your home, changing the slope or pitch of your roof, or, say, installing a skylight, these are circumstances that may require a permit. Be sure to speak to your contractor ahead of time and plan your roof replacement accordingly.
8.Regular communication with the roofing company
Communication is key in any project. By staying in communication with your roofing company before the project starts and staying informed throughout a roof replacement, you will be less likely to come up against any surprises. If your contractor expects any project delays due to setbacks, like changing weather conditions or material delays, maintaining a steady stream of communication will ensure that you are prepared to adjust your plans accordingly (i.e., leave the dog at the sitter for an extra few days, let your employer know that you need an extra day off, etc.).
9. Consider the type of roofing material you want to use and its availability.
Material shortages and delays have become quite common in any trade industry following the COVID-19 pandemic. While most reputable roofing companies plan their projects and timelines accordingly, if you hope to replace your roof with a trending, custom, or particularly unique roofing material, be sure to let your roofer know well ahead of time.
10.Regular communication with the roofing company
As a homeowner, you can try to plan your life around your roof replacement as carefully as possible with the information you have, but one of the best places to start is by speaking to your contractor before even booking the project.
They are the experts and will be able to guide you on best practices, material availability, their schedules, and the ideal weather conditions in your particular location.

