View Our Service Areas on Google Maps to see how we measure up in your neighborhood
View Our Leaderboard
Are you curious about how your town stacks up? Check out our leaderboard to see which towns are leading the charge and which ones have some catching up to do!
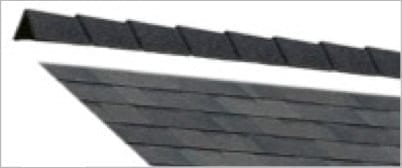
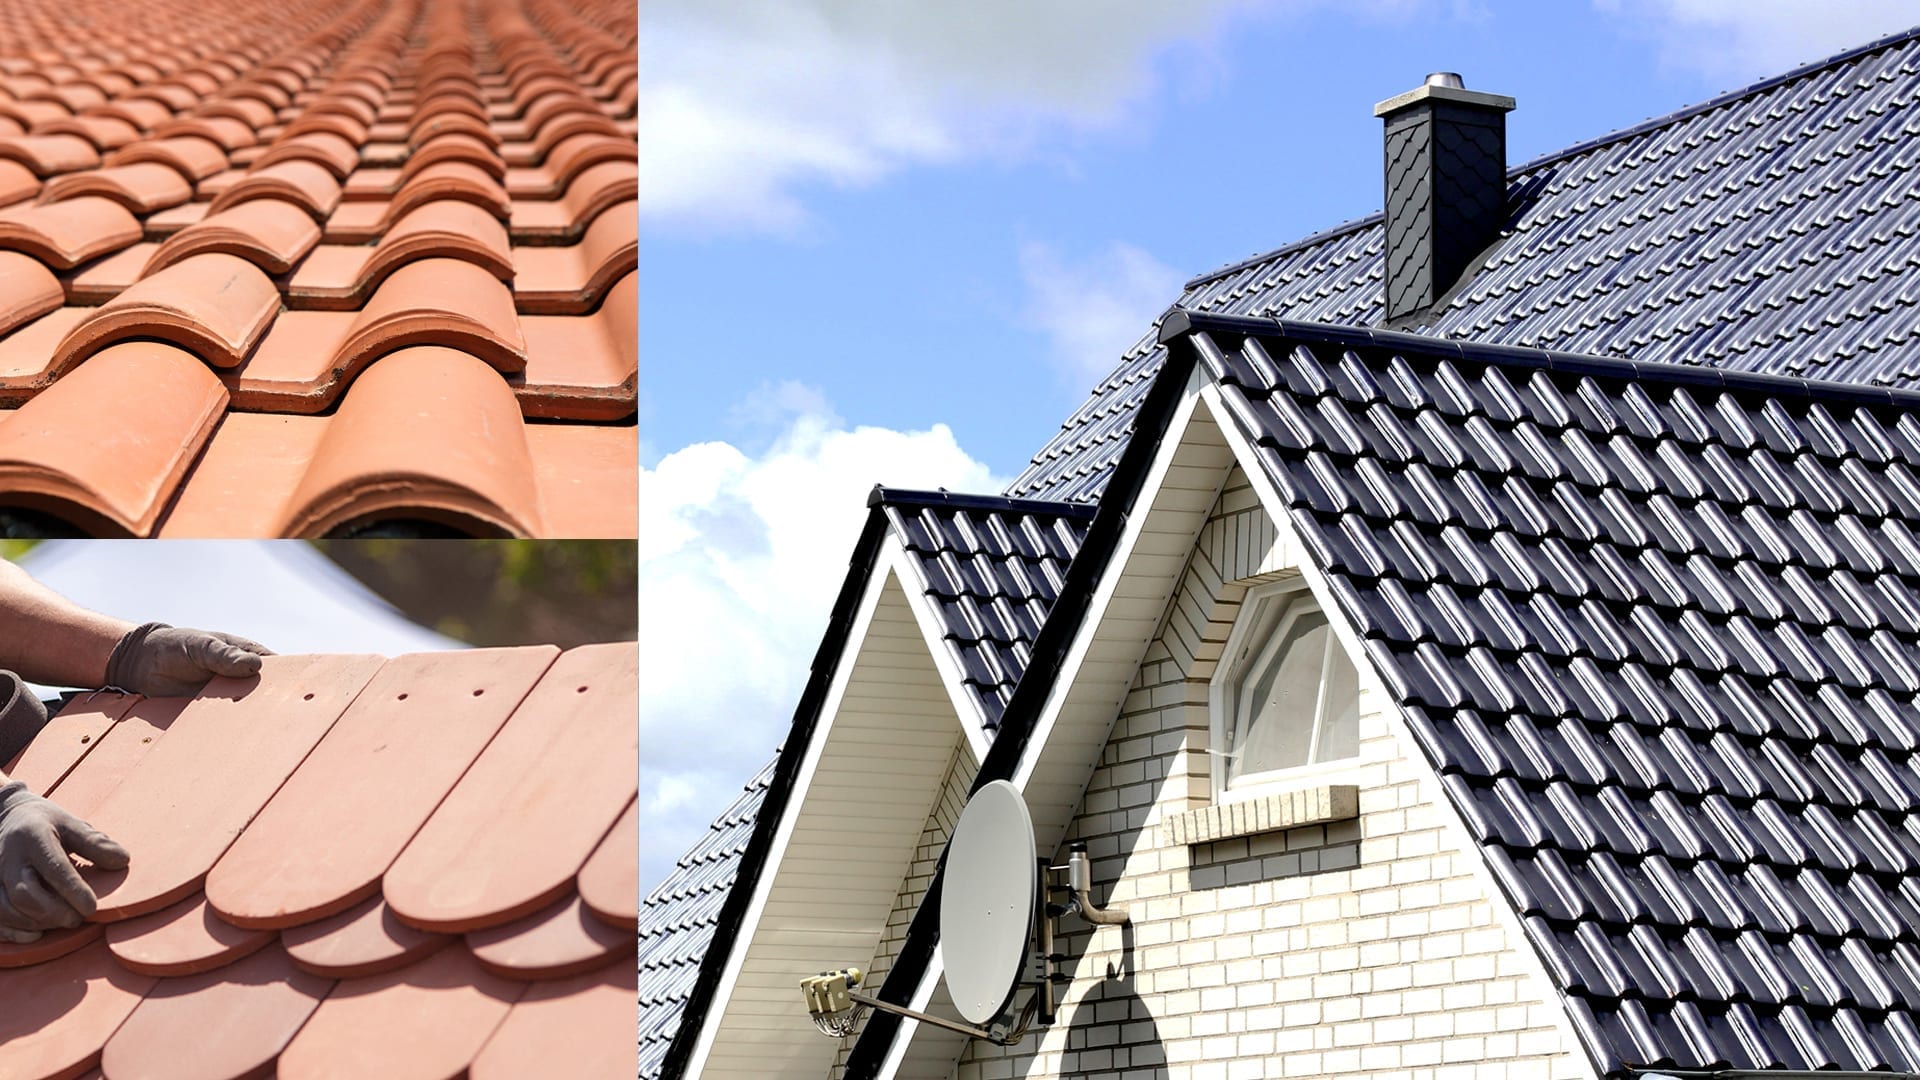
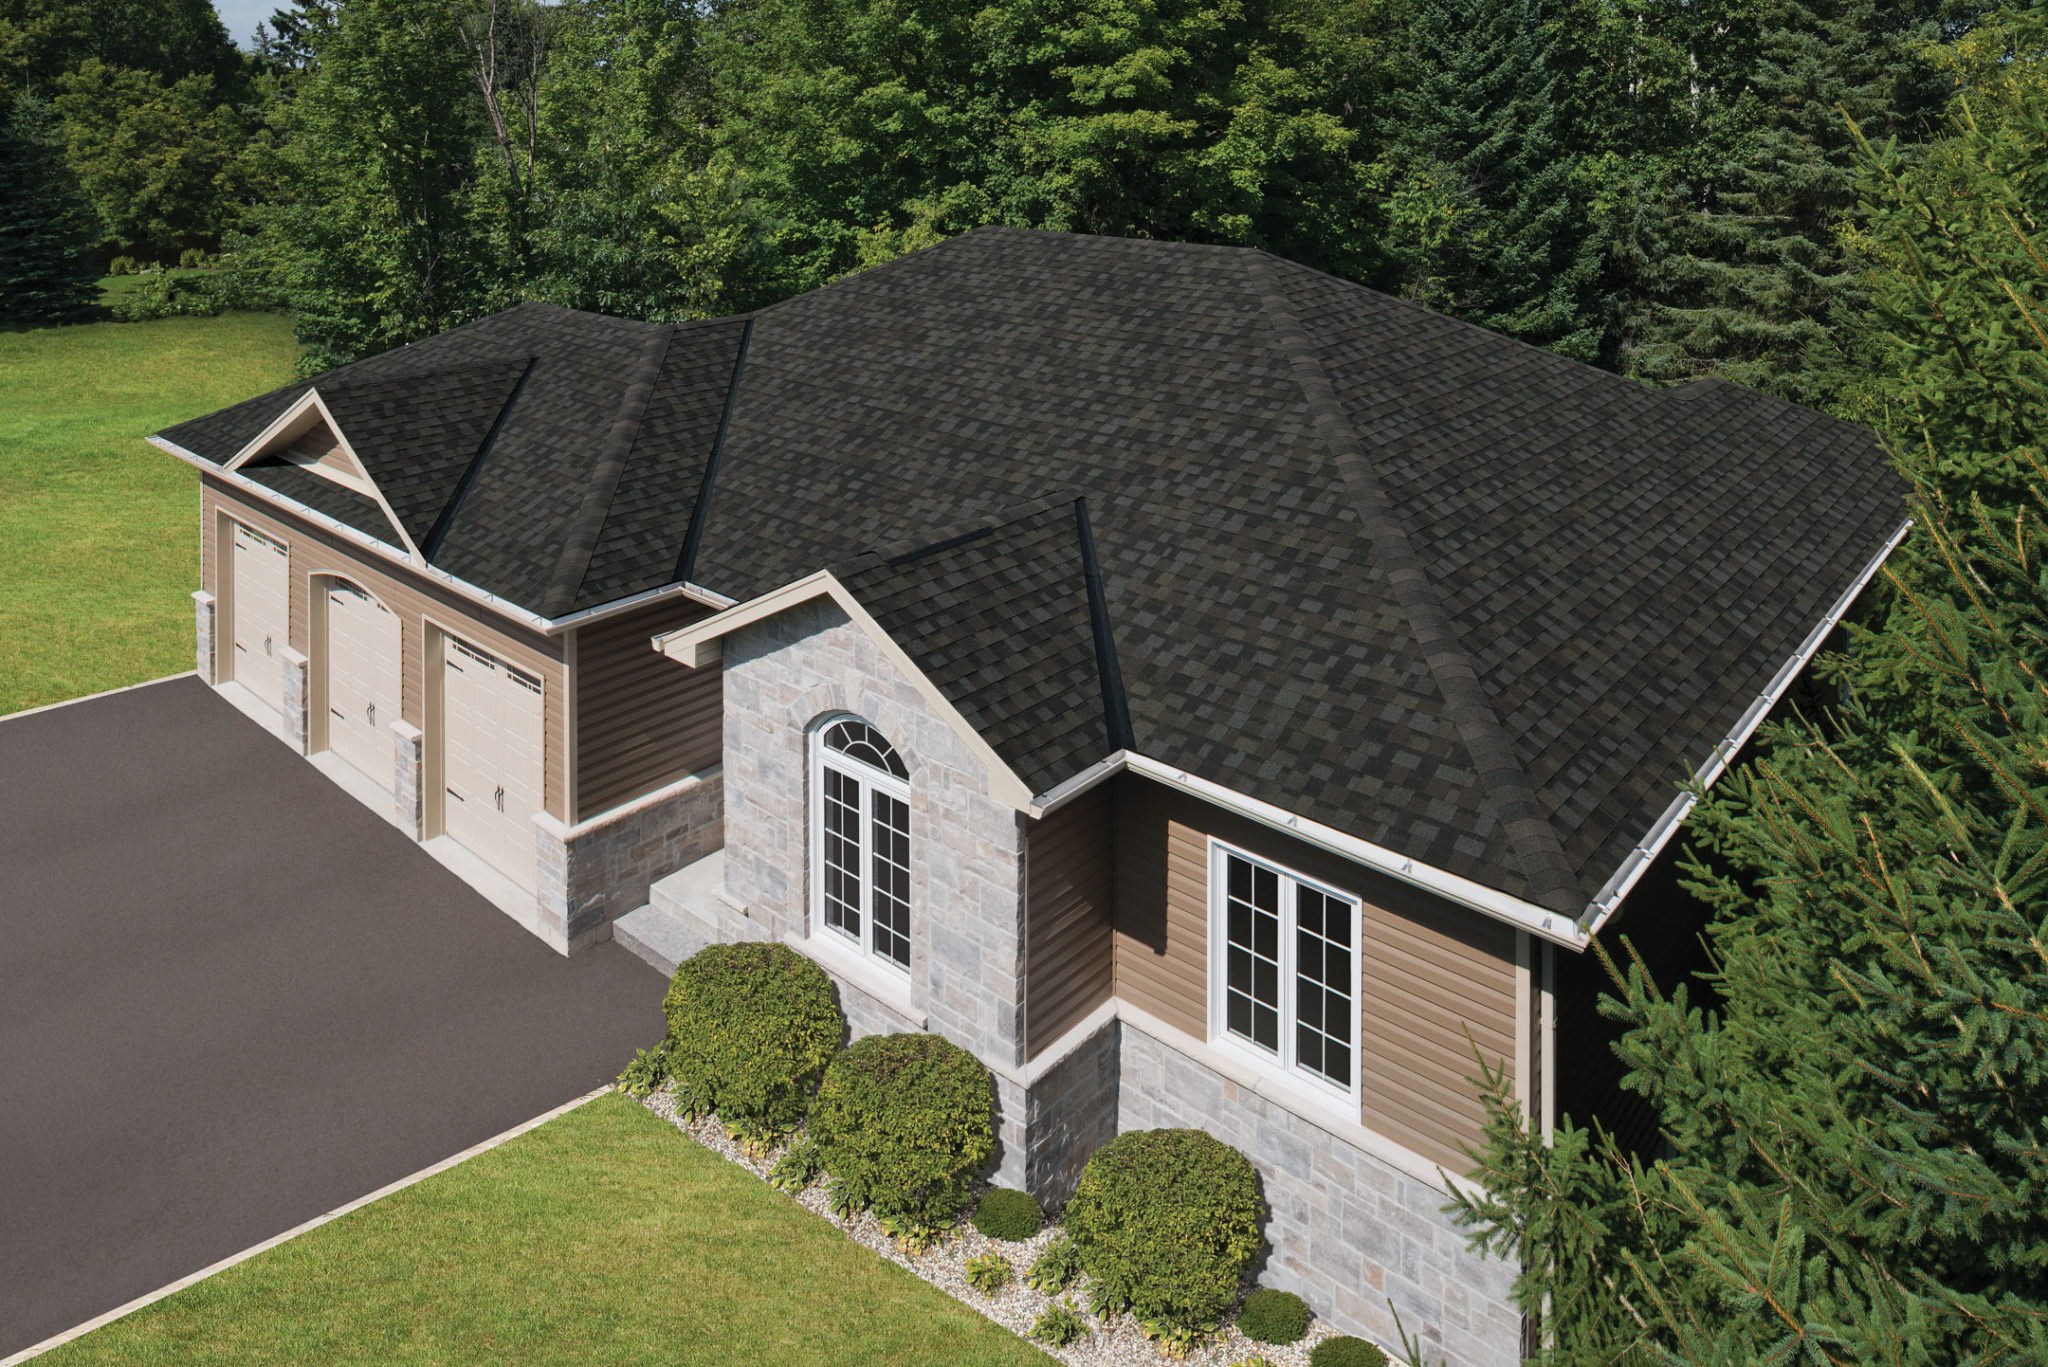
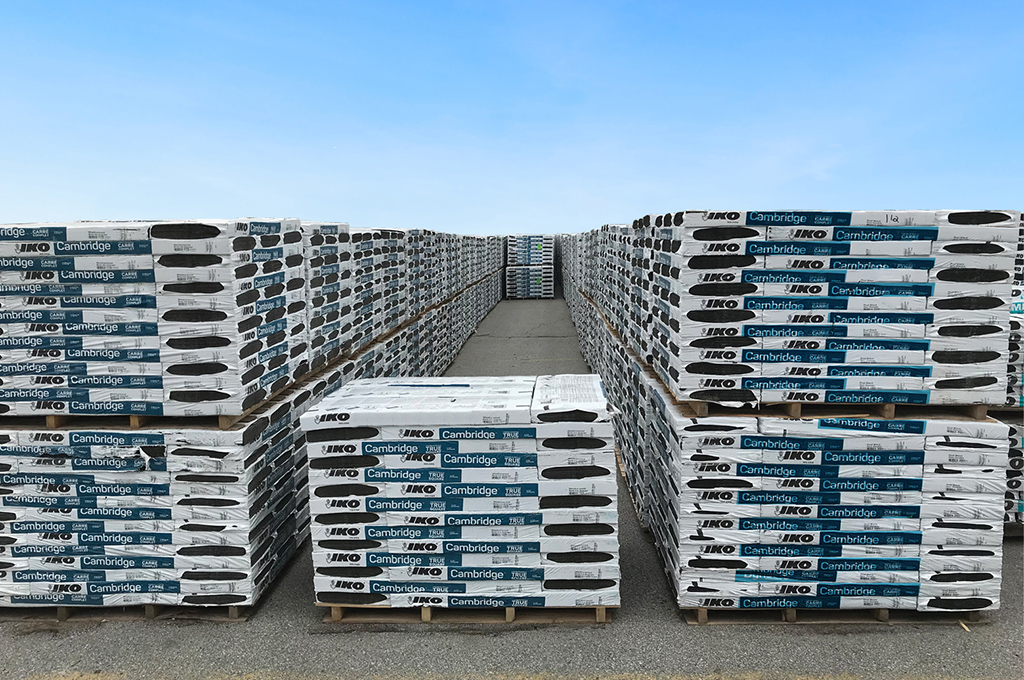
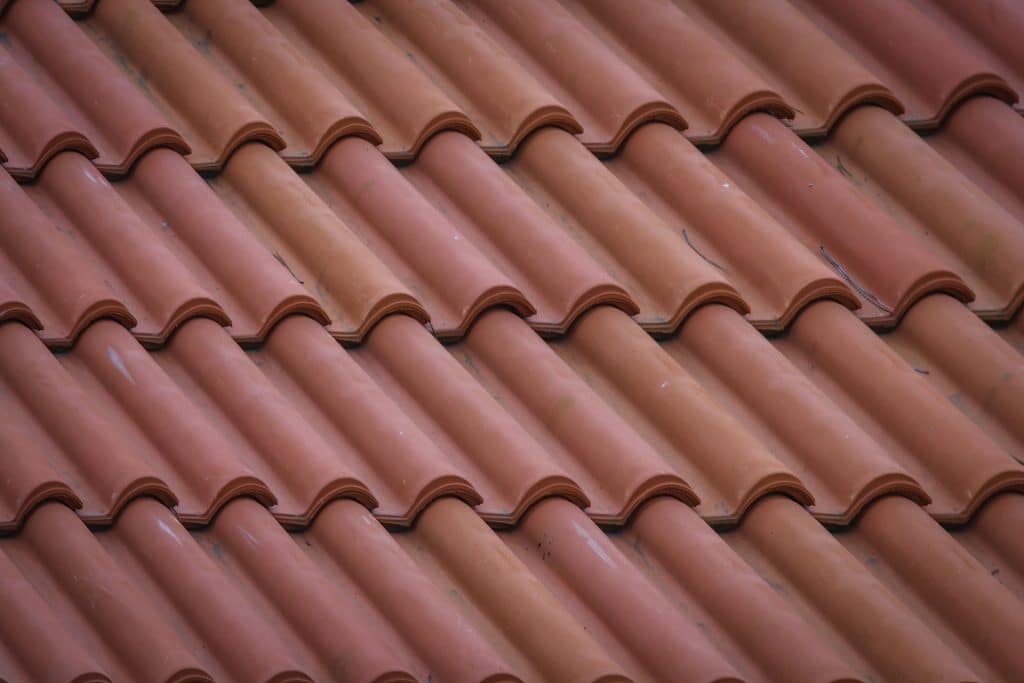
Iko Residential Roofing Shingles
View IKO's Color Selection
Discover the rich and vibrant colors of IKO's residential roofing shingles by clicking here.
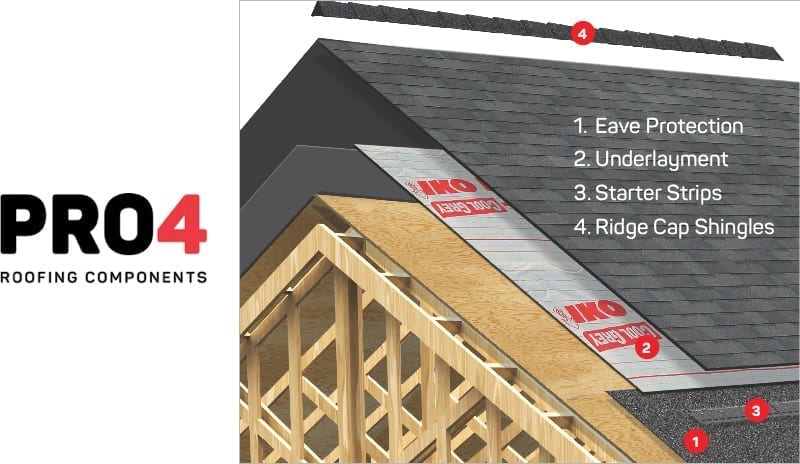
Learn the basics of installing an asphalt shingle roof, courtesy of IKO.
When it’s time to replace your roof, the amount of information available can be overwhelming. Lots of websites and videos go into great detail on how to shingle a roof. This article from the experts at IKO Roofing will help you make sense of it all by highlighting the basic steps and outlining the fundamental purpose for each roofing system component. This article is not a substitute for proper live training and IKO recommends that only properly trained professional roofing contractors engage in the shingling of roofs.
The next time you read the package instructions or watch a how-to video on YouTube, you’ll have a much better understanding of why roof shingles are installed the way they are.
Here are the basic steps to shingle a roof.
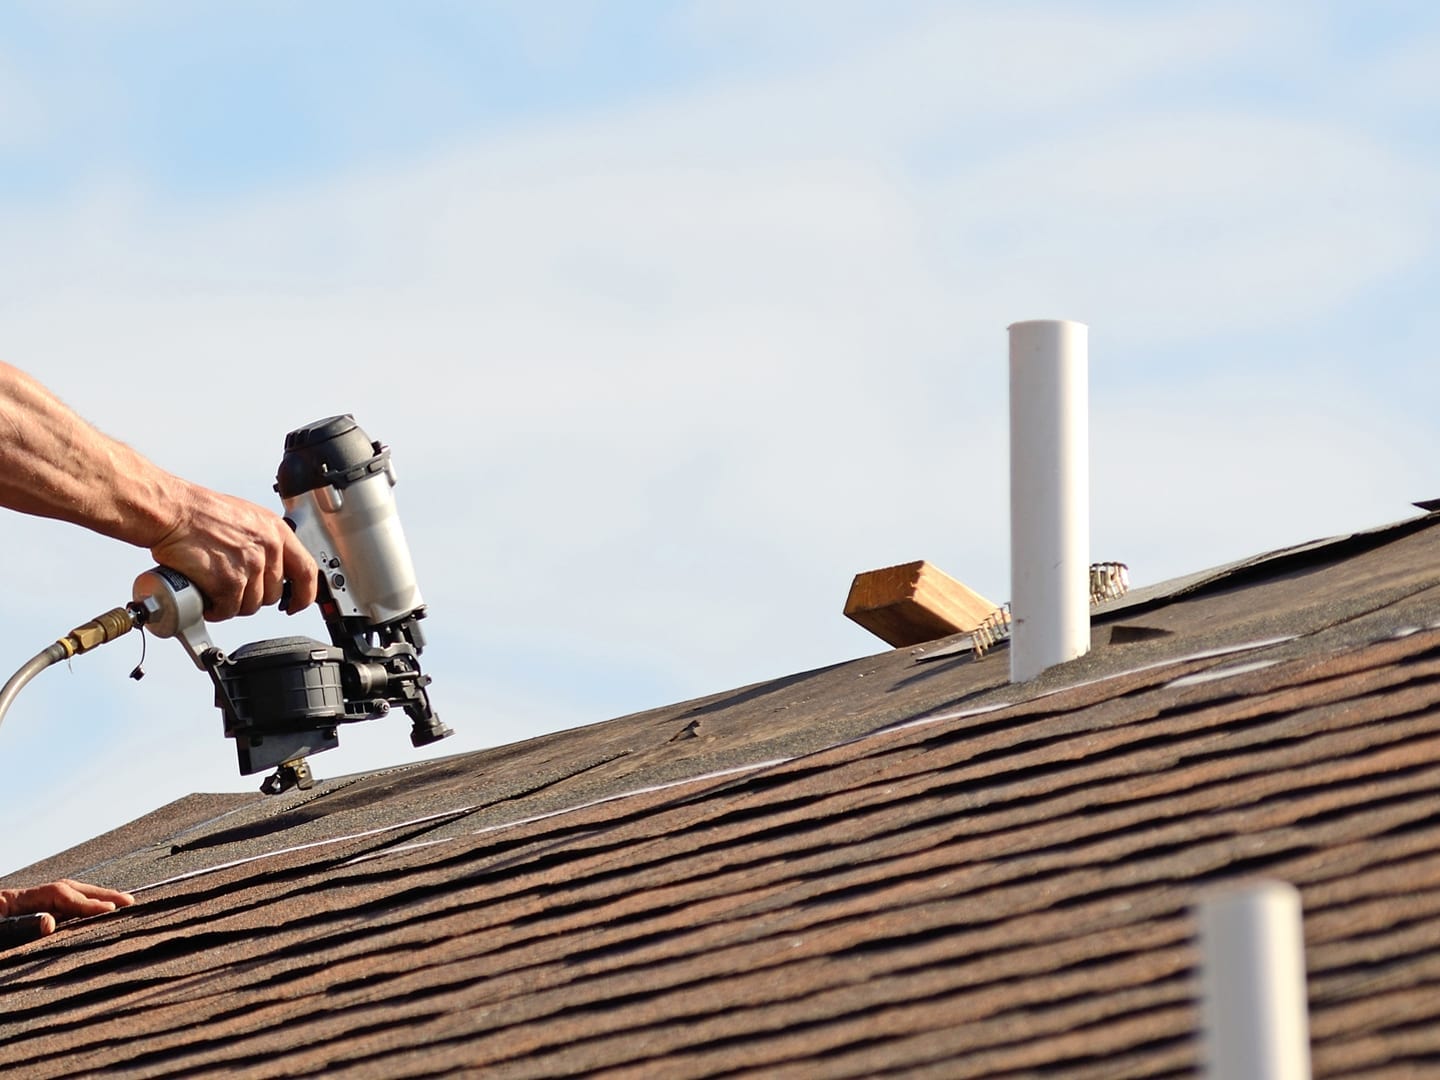
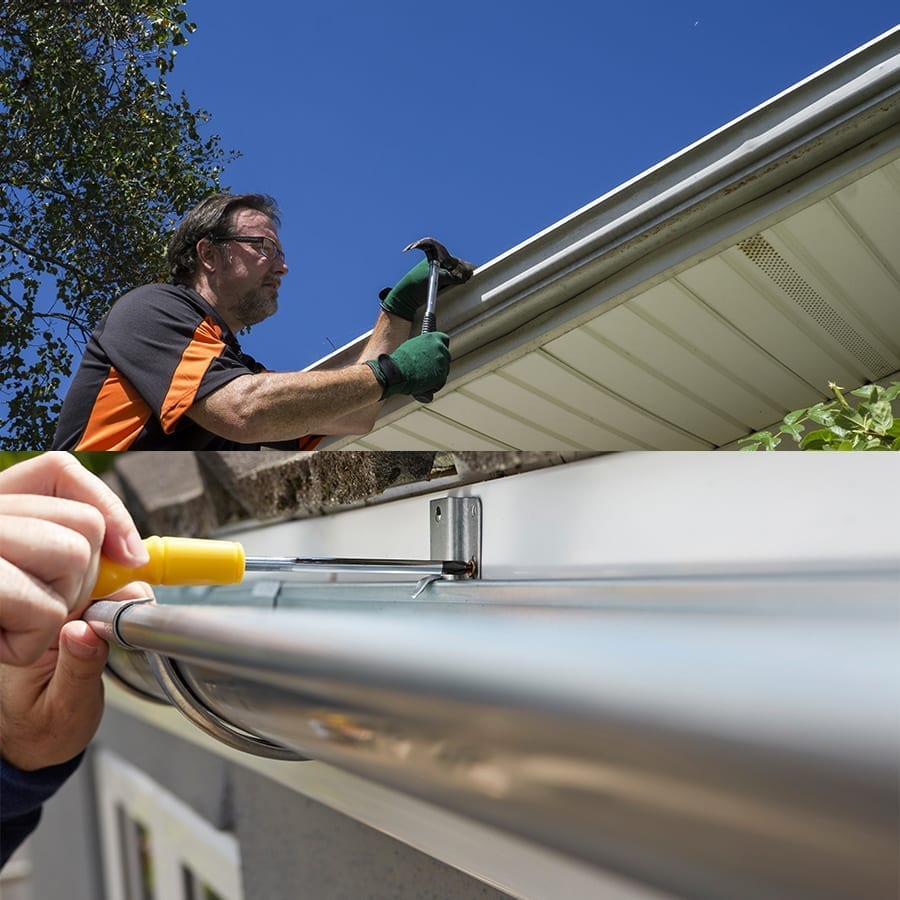
1. Step one in any roofing project is always safety first.
Working at heights on a roof presents fall hazard risks and other safety concerns. IKO recommends that roofing work be done by qualified professionals who know the best way to shingle a roof and have been fully trained in all aspects of roof construction safety. Further, it’s important to review local applicable building codes and ensure the roof conforms to all requirements.
2. Understand the physics of how a sloped shingle roof works.
Asphalt roofing shingles simply rely on the force of gravity to shed water from rain or snow melt. If the roof shingles and all accessory roof components are arranged and overlapped with this in mind, the roof should successfully shed water. In the dictionary, “to shingle” is defined as “to lay out or arrange so as to overlap.” So now let’s look at the sequence of overlapping roof construction components to see how this applies.
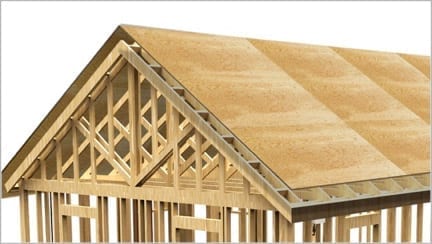
3. Deck preparation.
Before installing any roofing materials, make sure that the roof deck is smooth, properly fastened to the roof trusses, dry and free of any gaps or holes. Having a clean, flat deck surface will help ensure that the newly shingled roof will likewise appear smooth and flat when finished.
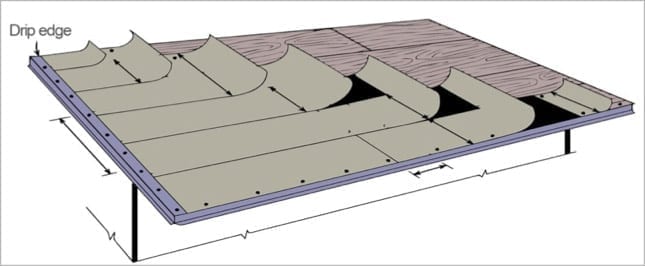
4. Work from the bottom up.
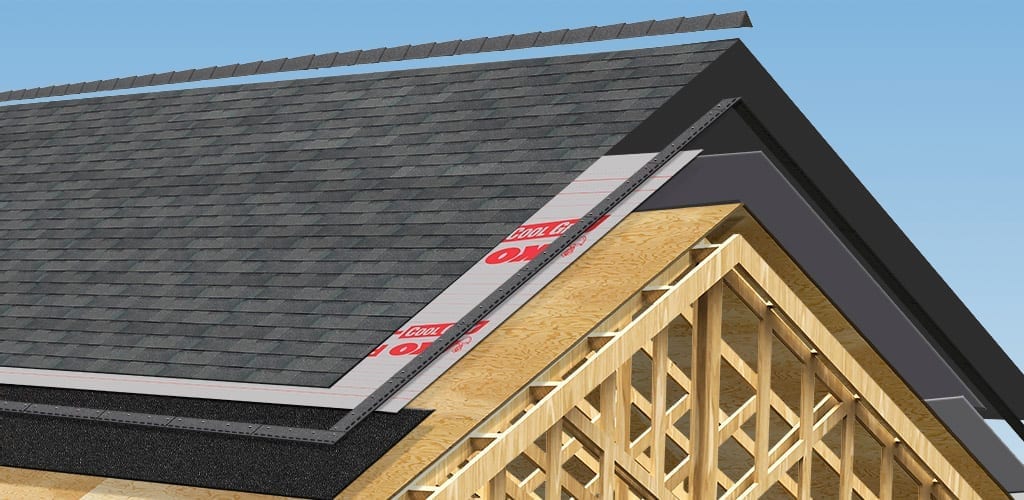
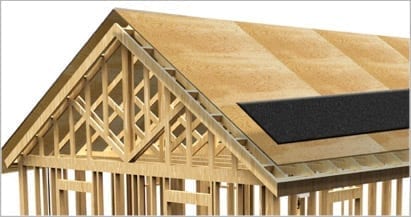
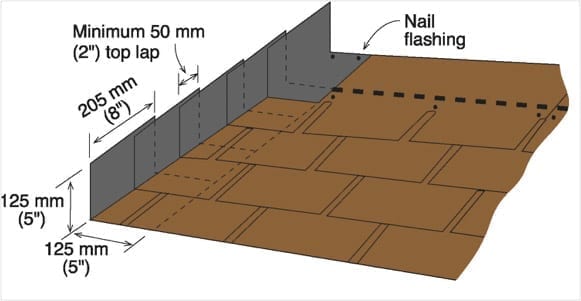
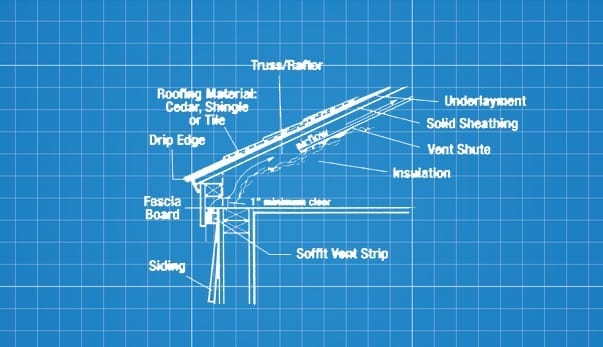
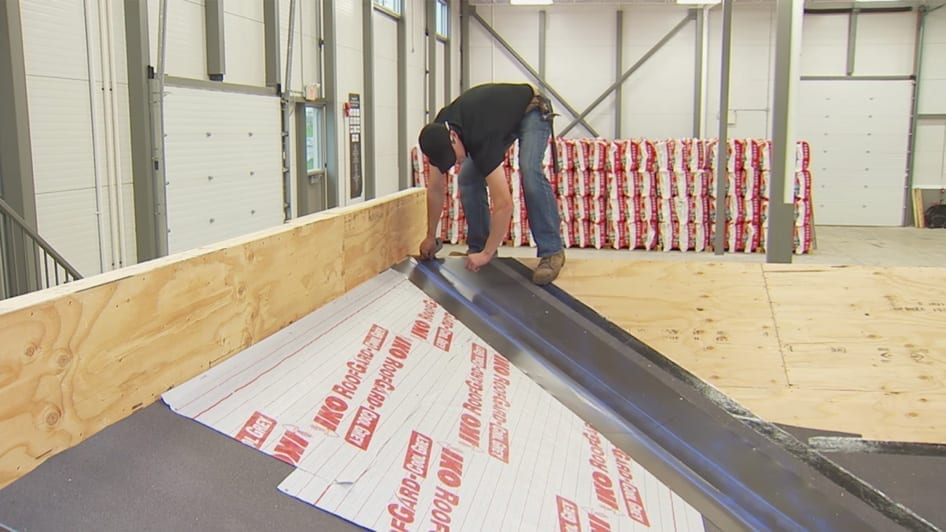
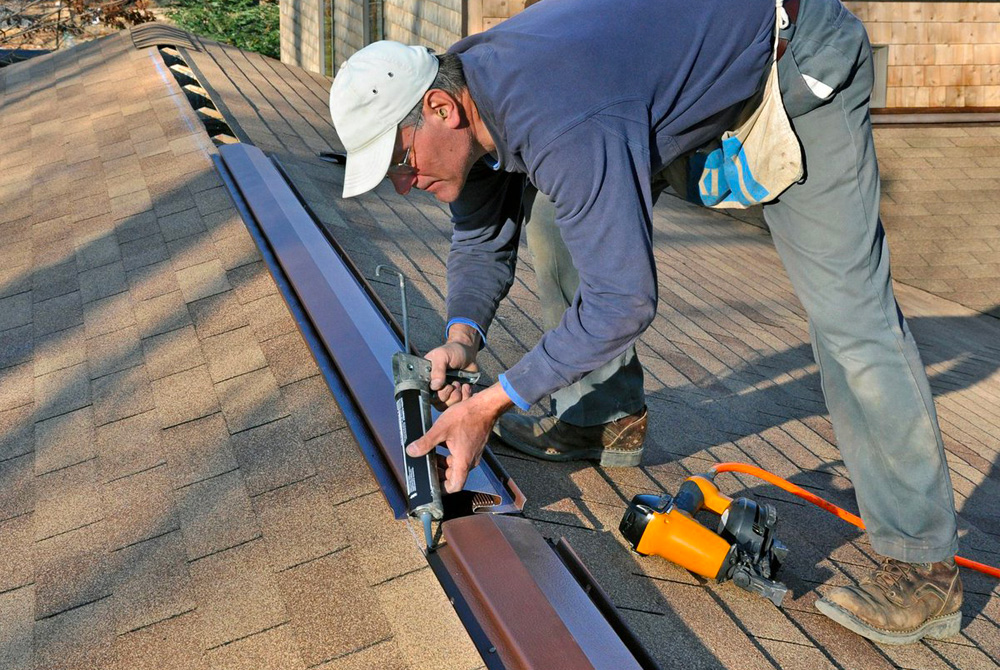
Not only are we working from the bottom of the roof, we’re also starting with the bottom-most layer, in terms of roofing components. The asphalt roof shingles are the visible part and the first line of defense against inclement weather, but what’s underneath them really counts.The first material installed at the eave is the drip edge. It literally provides a clean, sharp edge for the start of the roof and protects the lower edge of the roof deck from water damage by preventing water from “defying gravity” and wicking back “up” before it leaves the roof.
Drip edge is installed under the ice and water at the eaves and on top of the ice and water and underlayment on the rakes.
5. Ice dam protection at the eaves.
If you live in an area where the climate includes significant cold winter weather, you’d wear boots to protect your feet from ice, slush and puddles, right? Well, your roof and the home under it need the same kind of protection that an ice and water protector is engineered to provide. This thin, self-adhering membrane is the next component and it gets installed over the drip edge. Ice dam formation is best prevented by having a proper attic vapor barrier, adequate attic insulation and thorough ventilation;
However, an ice protection membrane is a wise roofing system component and is likely required by your local building code in cold climates. This ice and water membrane is typically applied to overhang the eaves by 1/4″-3/4″. To be fully effective, it should extend up the roof to a point at least 24″ inside the vertical extension of the interior side of the wall.
At this time, any valleys on the roof should also be flashed with an ice and water membrane. Why an ice and water protector? Because these membranes work on the principle that their rubberized asphalt coating seals around the shanks of the overlying shingle fasteners, adding an extra degree of water-shedding protection.
Ice dams form when melted snow runs down the roof to the eaves and freezes again, which forces water back up underneath the shingles.
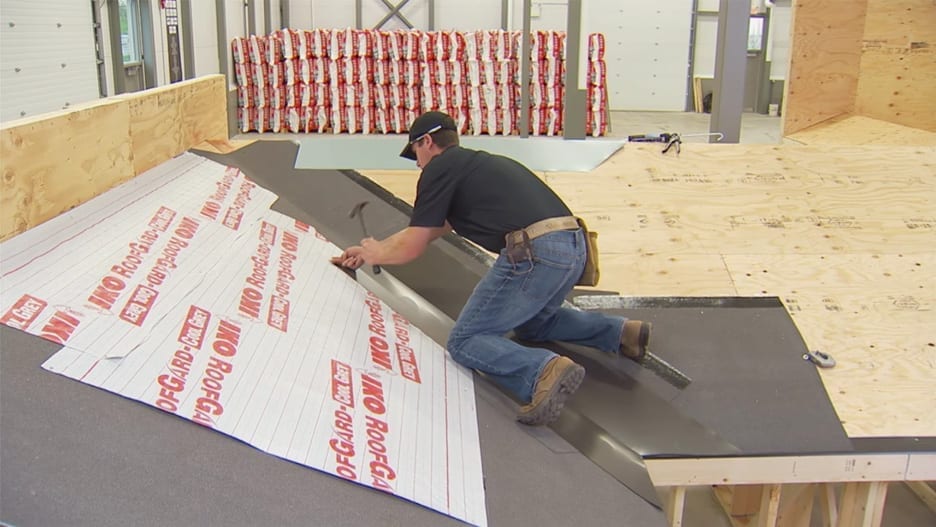
StormShield Ice and water protector.
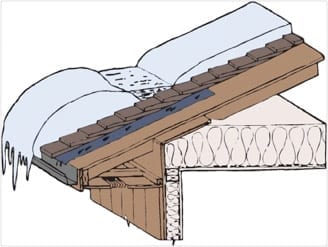
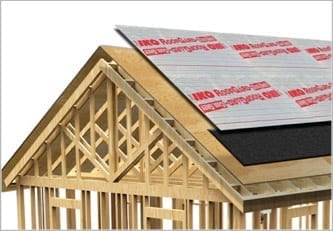
6. Underlayment for overall secondary roof protection.
Next it’s time for the roof underlayment, which can either be an asphalt-saturated felt or a synthetic roof underlayment. Both offer you peace-of-mind protection beneath the shingles. While the asphalt shingles will be the primary water-shedding roof layer, there are many benefits to installing a roof underlayment. The felt is laid in horizontal courses, overlapping the eave ice and water protector by 4″ and the valley membrane flashing by 6″.
Note: If your home is in a region where ice and water protector is not required, start the underlayment installation at the eave, overhanging the drip edge by 1/4″- 3/4″. Remember that drip edge we installed at the bottom of the roof? When going up the sloped edges of the roof (called the “rakes”) it goes on top of the underlayment.
Although this seems to contradict the overlapping principle, installing the drip edge over the underlayment at the rakes creates a clean roof edge and provides the underlayment attachment with increased resistance against wind uplift. Also, any wind-driven rain blowing on the rake edge would cross the top flange of the drip edge and go on top of the underlayment instead of beneath the underlayment where it could potentially cause a problem.
IKO’s RoofGard-Cool Grey Synthetic Roof Underlayment gives your roof secondary layer of protection.
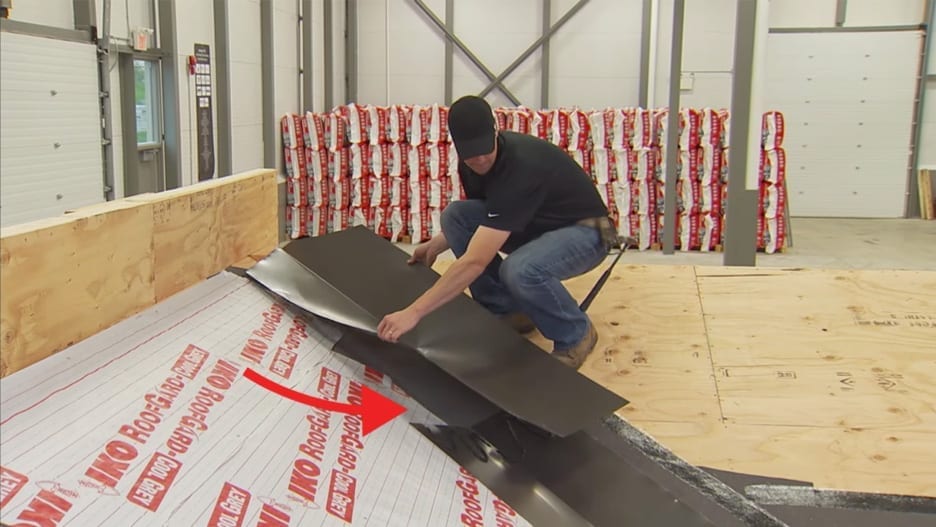
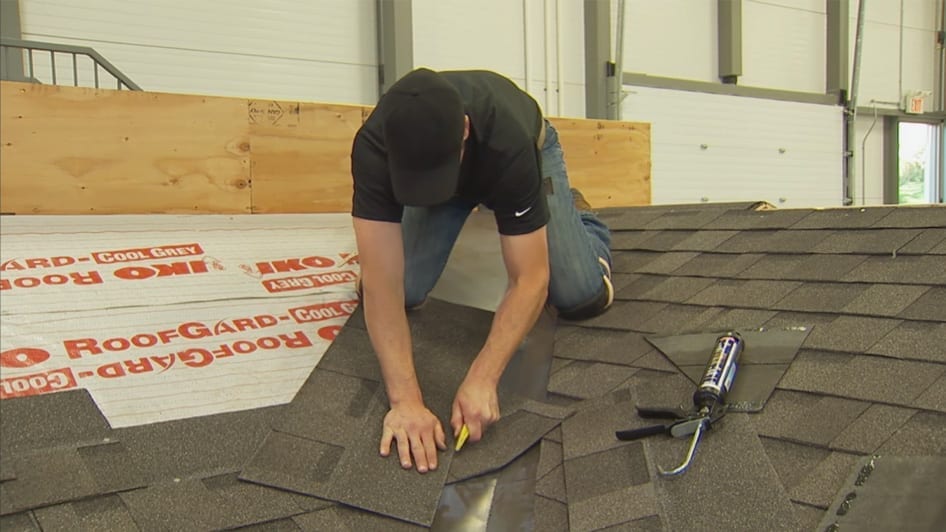
7. Covering the joints and valleys.
If a roof is going to leak, it will most likely occur wherever the shingle layer is penetrated, interrupted or meets a wall. These are the special areas that require flashing – an added layer of water-shedding material to help keep the water running downslope. Valleys can either be open or closed – open valleys are not covered with shingles, closed valleys are. If your roof will have open valleys, which IKO recommends, now is when the valleys should be lined with a pre-formed width of corrosion-resistant metal.
Closed valleys are completed during shingle installation. For longer roof performance, IKO strongly recommends open metal valleys. Complete the application of underlayment and valley flashing before the roofing shingles are applied. The recommended flashing material is a 28-gauge galvanized metal or an equivalent corrosion resistant, non-staining material (check with local codes). Center a 914 mm (36″) width strip of an ice and water protector membrane in the valley. The product is tacked in place temporarily along one edge.
Carefully peel away the backing, and put it in place, smoothing out any wrinkles. Start working from the eave, allowing additional pieces to overlap by at least 150 mm (6″). Remove the temporary nails. Center a minimum 610 mm (24″) wide, minimum 28 gauge pre-finished/galvanized metal valley liner in the valley, and fasten with only enough nails to hold it in place, nailing at the edges only.
Proper Overlap and Flashing for Roofing Valleys
Overlap each metal piece by at least 150 mm (6″) and use asphalt plastic cement under each section of overlap. Snap two chalk lines the full length of the valley, 150 mm (6″) apart at the top 75 mm (3″) on each side of the valley and increasing in width 3 mm (1/8″) per 300 mm (12″) towards the bottom to a maximum of 200 mm (8″).
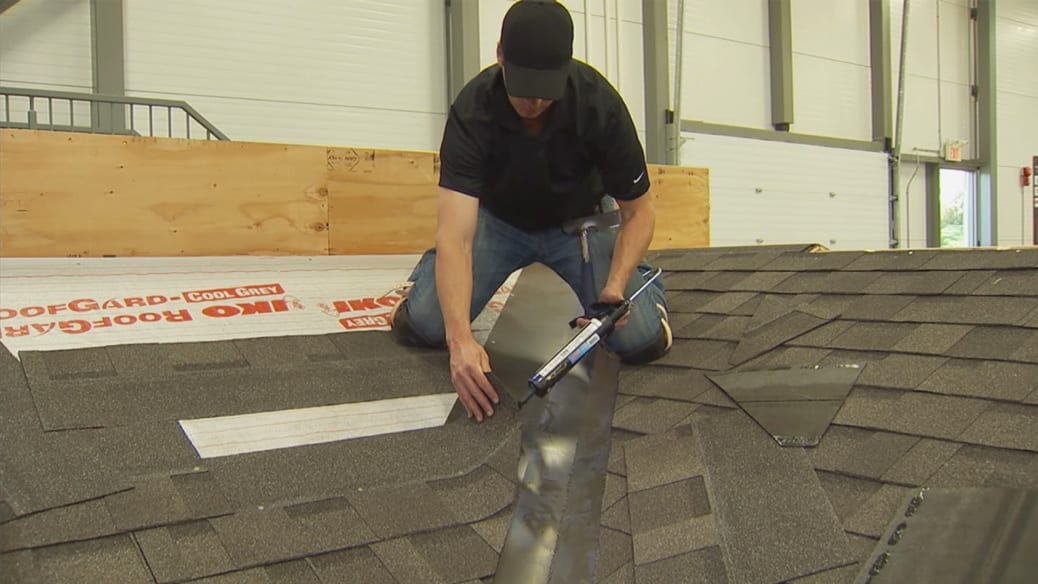
When the shingles are being applied, lay them over the valley flashing, trim the ends to the chalk line and nail the shingles at least 50 mm (2″) back from the chalk line. Cut a 50 mm (2″) triangle off the top corner to direct water into the valley and embed the valley end of each shingle into a 75 mm (3″) band of asphalt plastic cement. It’s critical to flash around plumbing stacks and attic vents because they are the most common roof penetrations. Install metal flashings where shingles meet walls or chimneys, too.
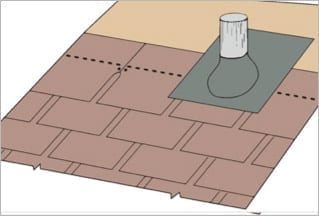
Flashing is placed around plumbing stacks and vents to help prevent leaks.
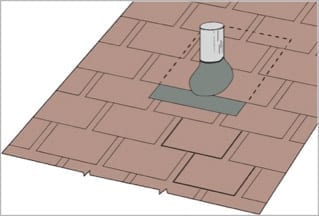
Complete shingle installation above the plumbing stack flashing.
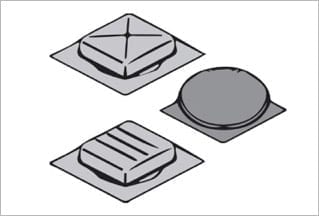
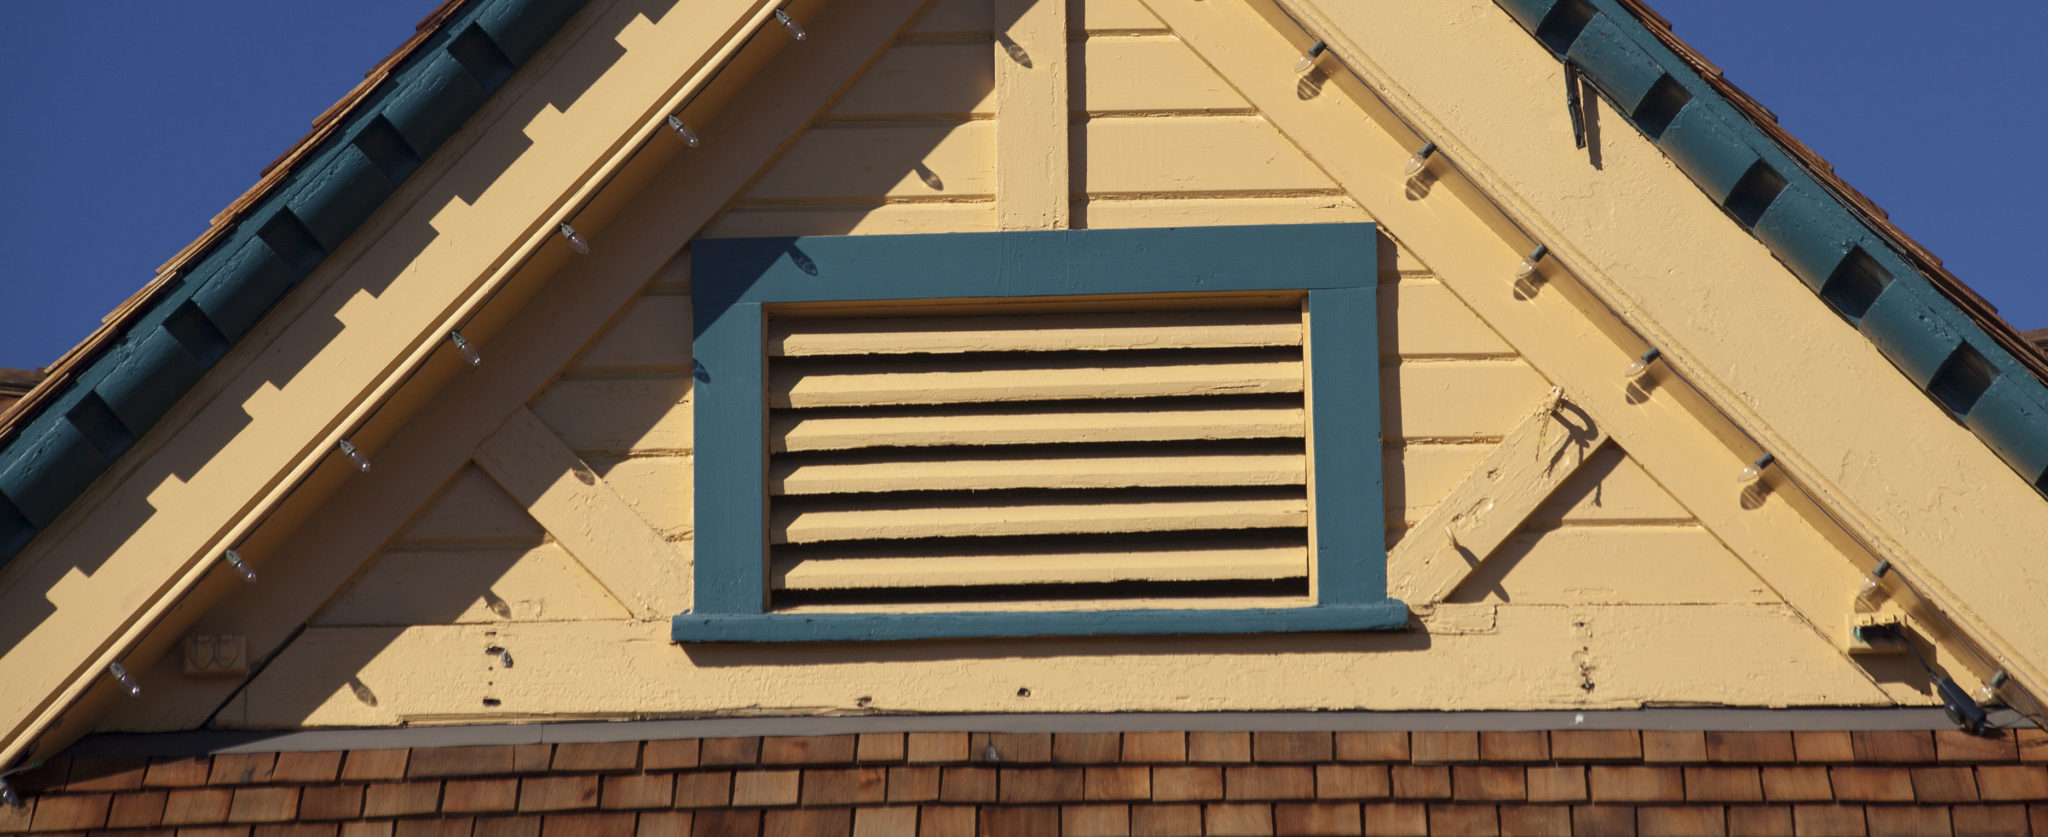
Various Roof Vents
Roof planes that butt against vertical walls at the end of the shingle course are protected by metal step flashing at least 125 mm high and 125 mm wide (5″ high and 5″ wide). When applying the new shingles, each shingle course will be covered by a step flashing.
Metal Step Flashing Pieces
There are two simple rules to follow:
Each flashing should overlap the one below by at least 75 mm (3″), but not be visible below the shingle top lap.
Imbed each step flashing in a 75 mm (3″) wide application of asphaltic plastic cement, and nail in place. Then the end of each shingle overlapping a step flashing must also be well embedded in plastic cement.
The metal step flashing pieces are rectangular in shape and style, approximately 250 mm (10″) long and at least 50 mm (2″) wider than the face of the shingle being used. For instance, when using metal flashing with shingles with a typical 143 mm (5 5/8″) exposure (such as traditional 3-tab shingles), the size of the flashing will be 250 mm x 200 mm (10″ x 8″). The 250 mm (10″) length is bent in half so that 125 mm (5″) will reach up the wall surface and the other 125 mm (5″) will extend onto the roof deck.
Note: Other step flashing sizes are also acceptable. For IKO’s Cambridge shingle, with its larger 5 7/8″ exposure, a 10″ x 8″ flashing piece is still suitable, since the 8″ dimension is still at least 2″ larger than the shingle’s exposure dimension. However, when flashing Crowne Slate, with its much larger 10″ exposure, the flashing piece would need to be 10″ x 12″.
How to Install Asphalt Shingles with Flashing
To install the flashing piece on the first course, place it over the end of the starter strip. Place it so the tab of the end shingle covers it completely. Secure the horizontal flange to the roof deck using two nails. Do not fasten the flashing piece to the vertical wall. This will allow the flashing piece to move independently of any differential expansion and contraction that may occur between the roof deck and the wall.
Place the second step flashing piece over the end shingle in the first course by positioning it 143 mm (5 5/8″) above the bottom edge of the exposed asphalt shingle.
Make sure that the tab of the shingle in the second course will cover it completely. Secure the horizontal flange to the roof. The second and succeeding courses will follow with the end shingles flashed as in preceding courses.
8. The shingles in the “field” of the roof.
Once everything that goes beneath the shingles has been properly prepared and installed, it’s finally time to learn how to shingle a roof. Regardless of the asphalt shingle type or style you’ve chosen, the process is basically the same as mentioned earlier – you start at the bottom and overlap as you work your way across and up the roof.
First – before you lay the field shingles (“field” referring to the large expanse of roof within the boundaries of eaves, ridge and rakes) – it’s important to install a preparatory course of starter shingles which are specifically manufactured for that purpose. But, even if you fashion your own on-site by cutting standard shingles to size, both serve critical functions at the roof’s eave. They provide a sealant adhesion point for the first course of shingles and provide water-shedding protection at shingle joints as well as at any cut-outs.
Using Starter Strips and Proper Nail Placement
Professional contractors often recommend and use starter strips along rake edges in order to yield a straight edge from which all the field courses can begin. Furthermore, these starter strips enhance the roof system’s wind-resistance at the rake. It’s critical to follow the manufacturer’s instructions for the specific roof shingle because not all shingles have the same exposure (the part of the shingle that’s visible once installed), offset (the lateral distance between joints in successive courses sometimes called ‘stagger’ or ‘edge-to-edge spacing’) and/or nail placement. Problems may occur if the shingles are given too much exposure or too little or if they’re not offset by the proper dimension in successive courses (rows of shingles).
You must place nails in the proper location and drive them flush with, but not cutting into, the shingle. Nailing the shingles correctly is critical to the roof system’s wind-resistance. Proper nail placement is also a requirement for the shingles’ limited warranty coverage. If you’ve chosen closed valleys, they are completed as shingle courses approach and run through the valley.
The most common closed valley is a “closed cut” valley, where shingles are installed on the entire roof area on one side of the valley first, with each shingle course extending at least 12″ through the valley centerline. As shingles are installed on the adjoining roof area, the end of each course of shingles is trimmed (cut) 2″ back of the valley centerline.
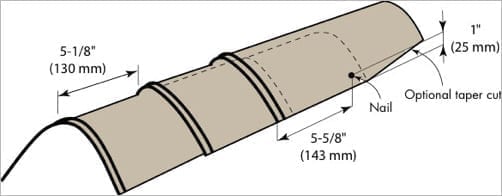
9. The hip and ridge caps.
You’ve nailed in the last field shingle and you can see the finish line from here. Well done! In this case, the finish line is the hip and ridge capping. When you install the field shingles up to the peak of the roof, you can’t just “bend them” over the peak. Instead, individual ridge cap shingles are used to straddle the ridge and shed water down either slope. There are various ridge cap shingles available on the market but, once again, the procedure for installing them is based on the same fundamental principle of overlapping.
For hips, start at the bottom and work upslope. Since ridges are on a horizontal plane, the upslope principle doesn’t apply, so ridge cap shingles are typically installed like this: begin at the end of the ridge opposite the prevailing wind direction, for optimum ridge cap wind-resistance. On hip roofs, it’s also acceptable to install the ridge caps starting at each end of the ridge, with the last piece installed in the middle of the ridge.
The last ridge cap piece should be nailed in place and, since this will be the only place on the roof where the nails are directly exposed, the nail heads should be sealed and covered with a suitable asphalt roof cement. Always remember to use longer nails for ridge cap shingles. Because the nails must penetrate the ridge caps and the last course of roof shingles below, you’ll need longer nails to fully penetrate through them to the roof deck.
An example of a hip and ridge installation.
Take a look at IKO’s PROFORMAX Integrated Roofing Accessories to see how the various roof system elements described above work together.
Now that you have a greater insight into the major steps involved in how to shingle a roof, you can more fully understand the nuances of the entire process. You may even appreciate why it’s recommended to hire a professional!
For even more detailed information or if you’d like to watch and learn how the pros do it, check out this library of instructional videos on every aspect of shingle installation and roofing components. You can also read our article describing how to replace shingles.
Which Residential Roofing Products Are Right for You?
You have many more options in roofing products than you think. Here are some tips on choosing the best roof, and how to get the best value, from the pros at IKO Roofing.
You need a roof for your home, whether it’s a brand-new build or an existing roof that needs replacement. The big question is, of all the roofing products available, which one should you pick?
In some cases, the decision may have been made for you based on local municipal requirements but, most of the time, the decision is up to you, the homeowner. There are five general categories, or families, of roofing products which we outline below. Keep in mind that availability of these roofing products may vary by region, so be sure to do research ahead of time to determine what options are available in your area.
The price of roofing products can also vary significantly, sometimes even within a certain category, so read through our tips to ensure you get the best value for your dollar. We offer an average price range here for your reference. Just remember that pricing is highly variable, depending on what you’re looking for and where you live.
Roofing Product Types
Asphalt Shingles
Asphalt shingles continue to dominate the North American roofing market for a variety of reasons: they are affordable (while still offering great value over their lifetime), easy to install, maintain and repair, and come in a variety of styles and colors.
Plus, asphalt shingles are available in all North American markets, so you won’t have any trouble finding a selection to choose from. IKO recommends having a qualified roofing professional install them.
According to Maciek Rupar, an NRCA Director of Technical Services, “There is a wide and ever-increasing range of residential roofing products on the market today.” He adds, “Although NRCA member-contractors are trained and qualified to install a variety of roofing products, for steep-slope applications, asphalt shingles continue to be the product most commonly installed by our professional members.”
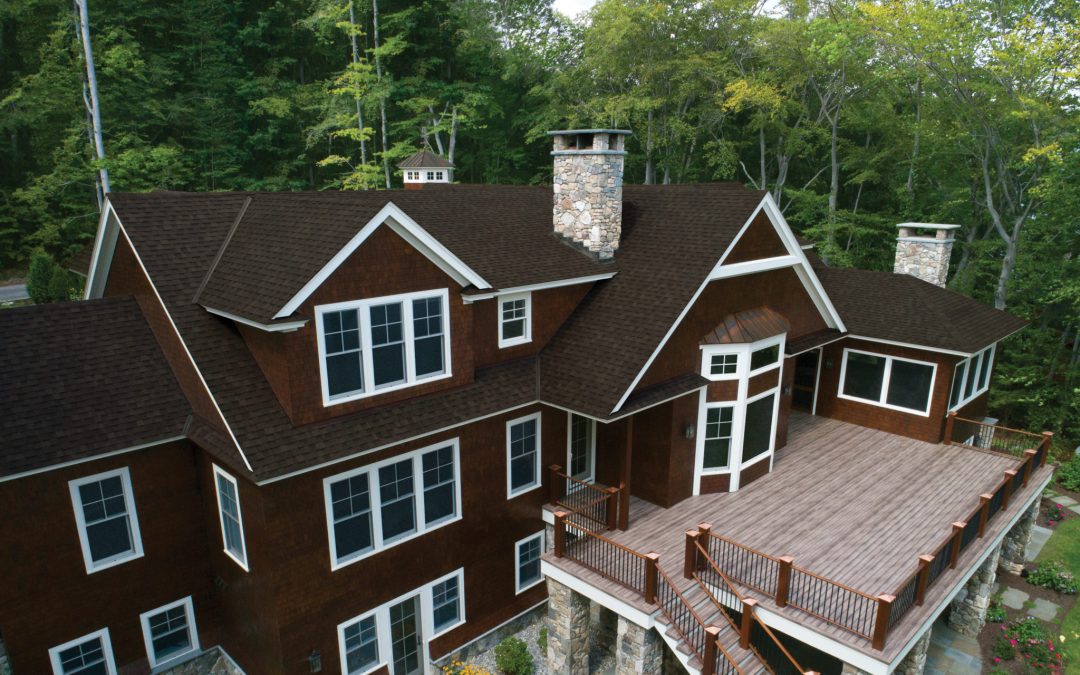
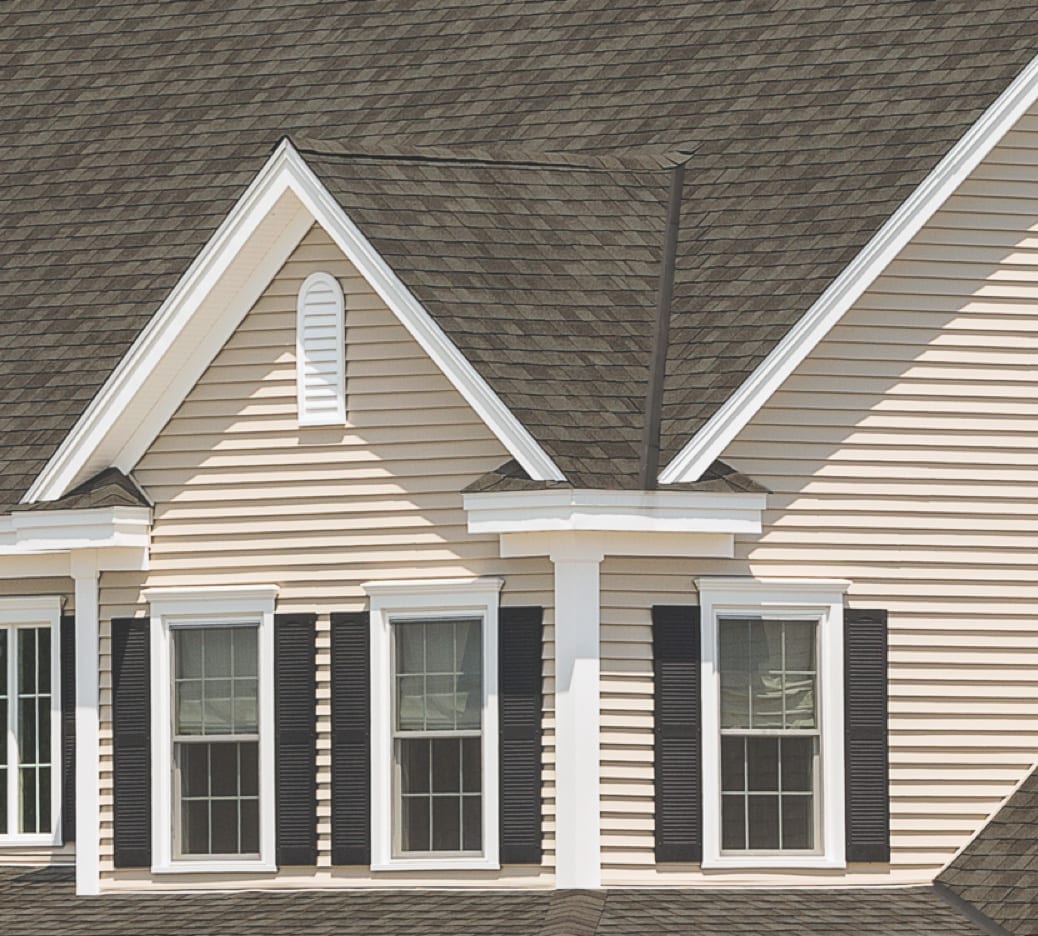
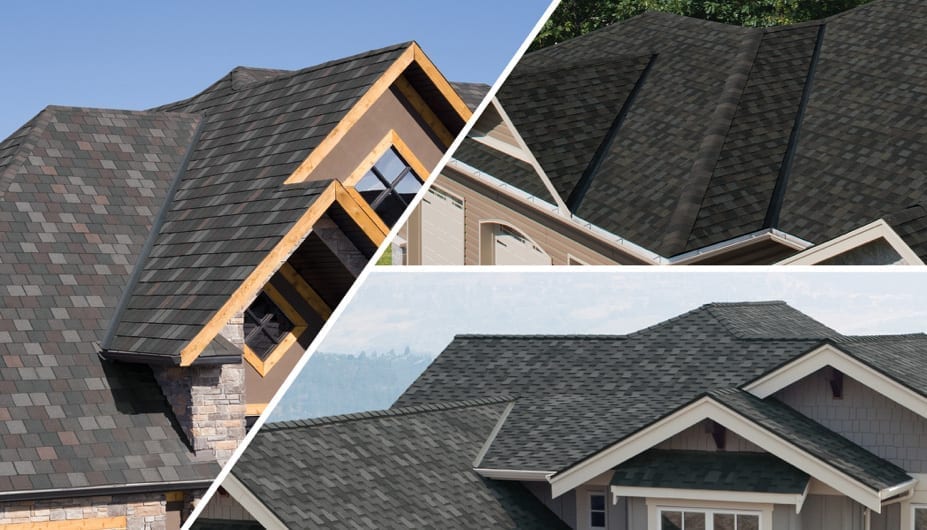
Royal Estate Asphalt shingles, like IKO Royal Estate shown, continue to dominate the residential roofing market. Increasingly, homeowners are opting for the upscale, high-definition profiles that look like genuine slate tiles or cedar shakes.
Metal Roofing
Metal roofing is available in shingle-style panels (most often made from rolled steel or aluminum) or in larger sheets. Larger metal sheet roofing is the more established type of metal roofing, while smaller stamped panels have been developed in recent decades to simulate the look of shingles and shakes. Unlike asphalt shingles, steel panels must be treated for rust resistance before they’re installed. This is done at the factory.
Copper has long been used for roofing, primarily due to its water resistance and malleability. You can see the characteristic green-colored, aged patina of copper roofing on many historic buildings.
A Typical Metal Shingle Roof Photo courtesy of The Metal Roofing Alliance.
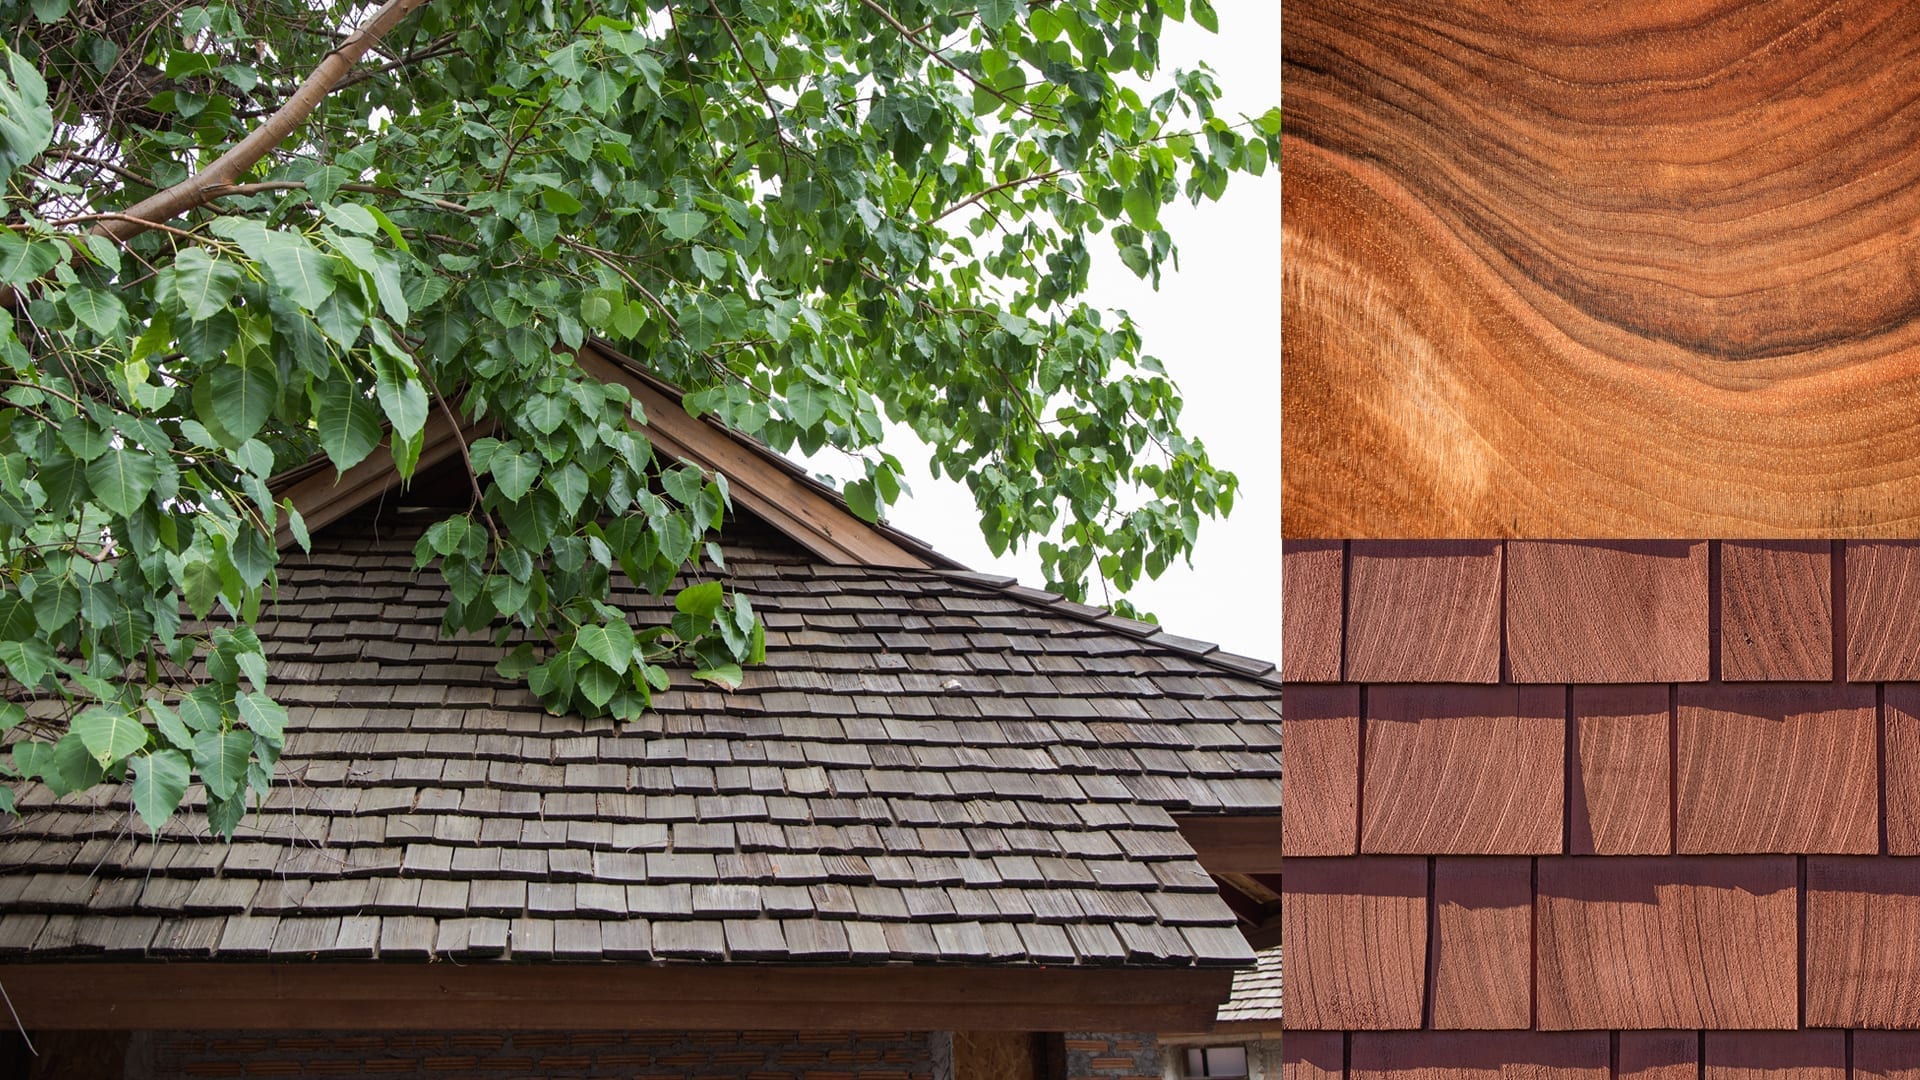
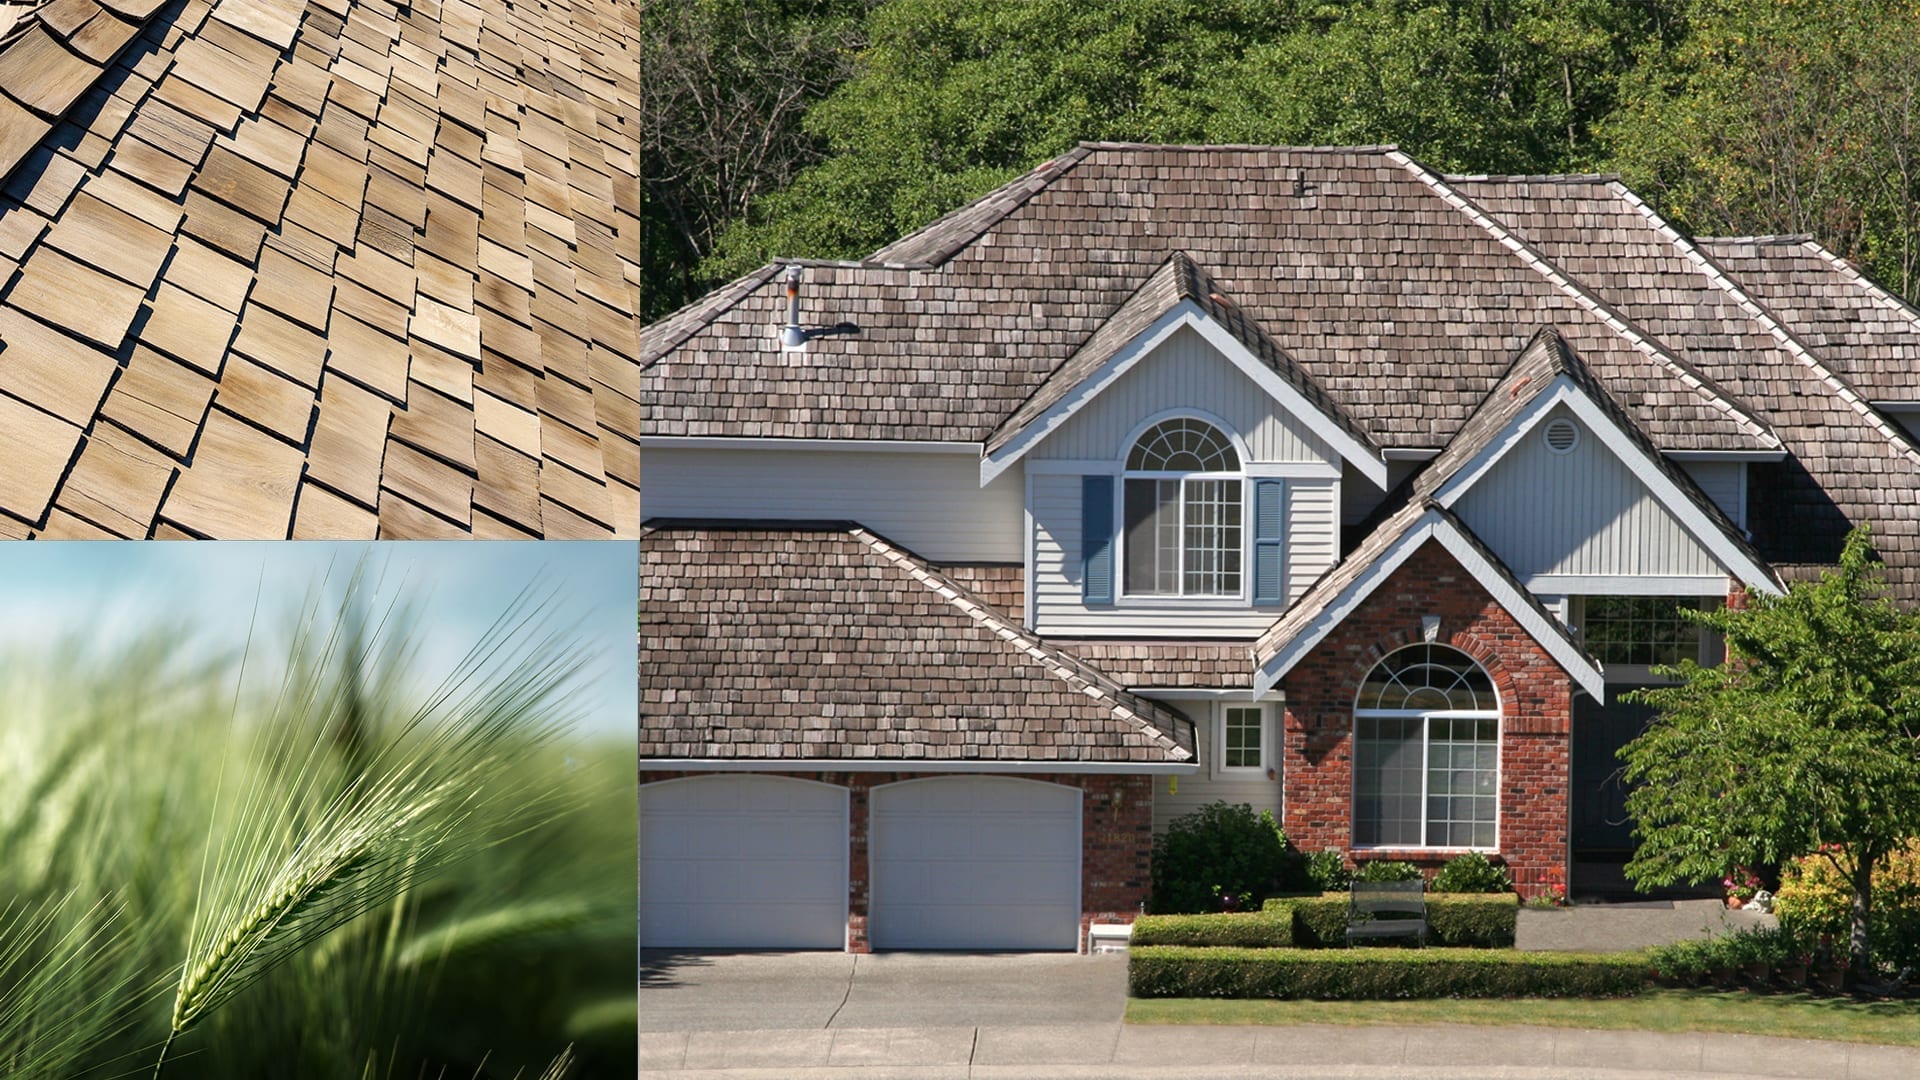
Wood Shakes And Shingles
One of the earliest types of roof covering used throughout North America, wood shakes can give your home a rustic, country appearance. Cedar is the most commonly used wood species because its inherent oil content provides good weather-resistance.
The term “cedar shakes” typically implies the wood has been split, whereas the term “cedar shingles” usually indicates the wood has been cut to shingle thickness. Untreated pine shakes were introduced in the 1980s in parts of North America, but they have not performed well in service.
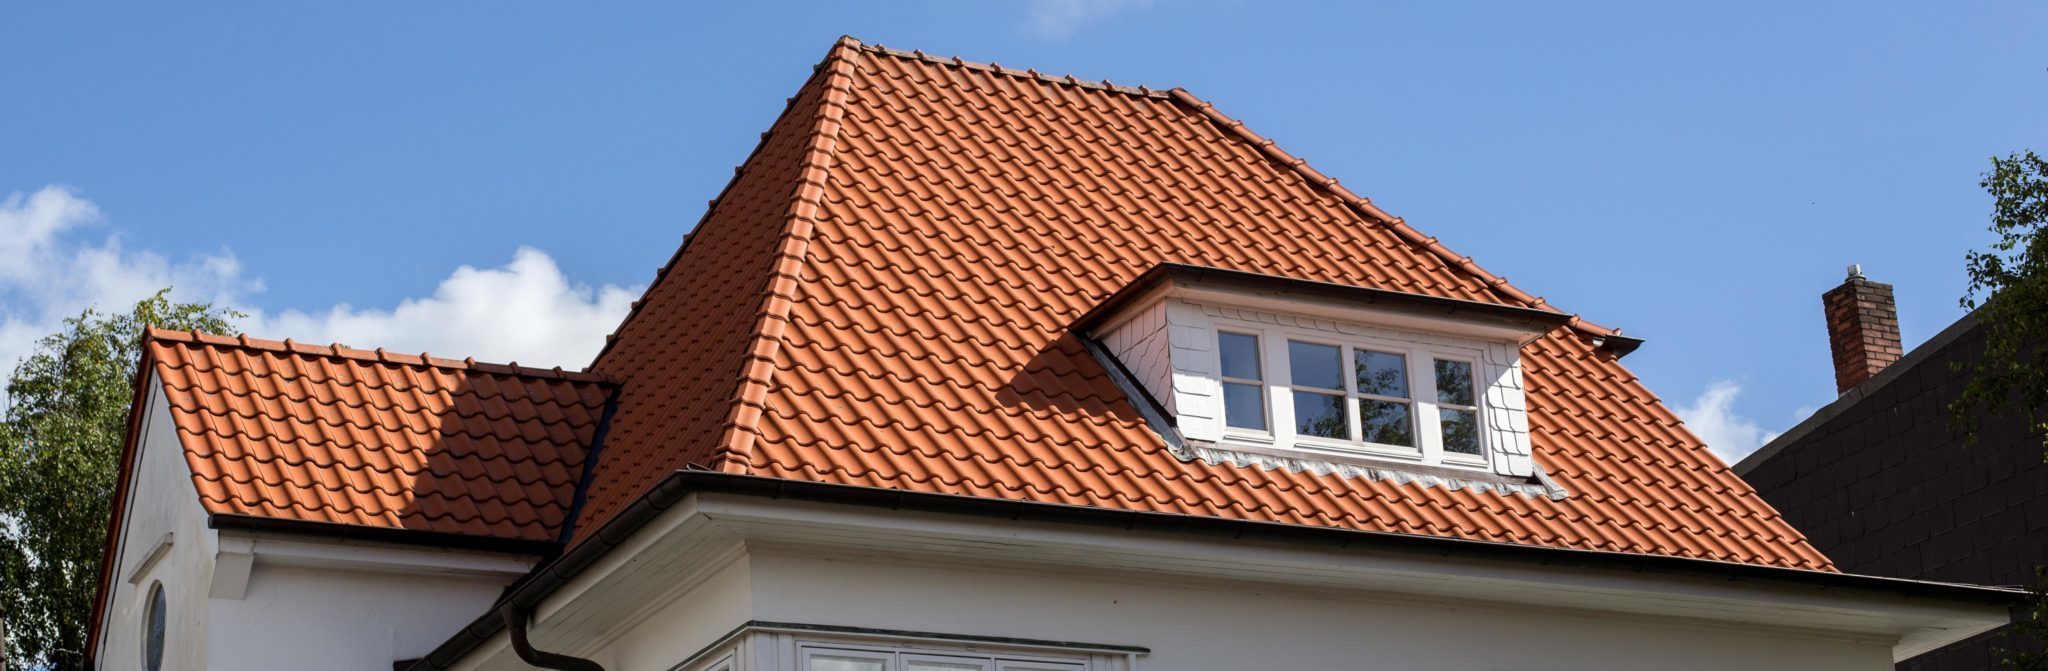
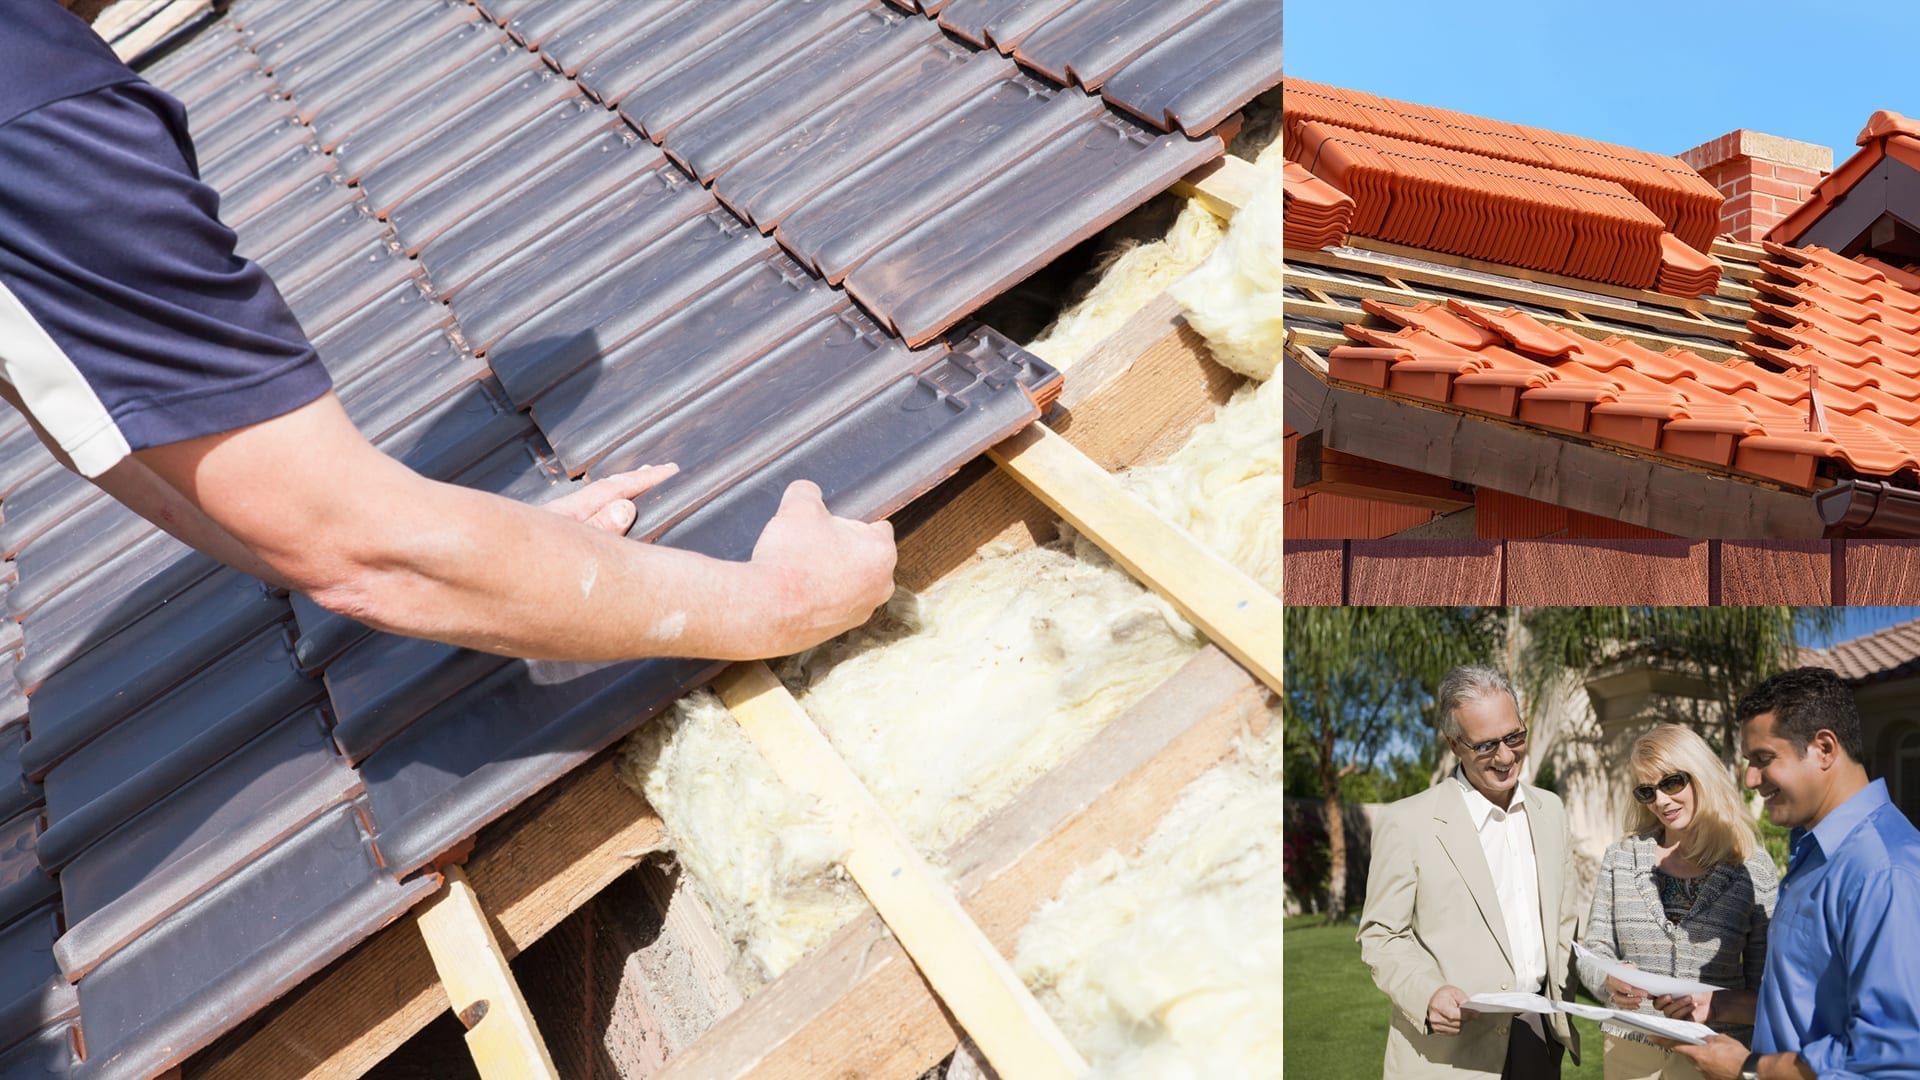
More common in the snow-free southern states due to traditional architectural home styles and product availability, rigid concrete and clay roof tiles come in a wide variety of colors and profiles. “Profile” is a common industry term that refers to a tile or shingle’s shape or contour. Because these tiles require special installation techniques, accessory materials and tools, tile roofs are typically installed by trained professional contractors, not by do-it-yourselfers.
Some tile profiles, like the larger half-tube-shaped ones, may require vermin screening in areas where there is a gap between the underside of the tile and the roof deck to help prevent critters from entering the roof space.
You can find a comprehensive review of these tiles’ features and benefits, along with the most recent installation manual, at the Tile Roofing Institute.
Synthetic Tiles
Synthetic tiles are the newest roofing products on the market. Most brands have been around for less than twenty years. Many manufacturers are making a wide range of synthetic roofing shingles designed to emulate concrete tiles, asphalt shingles, slate tiles and wood shakes. Availability varies by region.
These roofing products generally have a high recycled material content of post-consumer plastics, which can be a priority for some enviro-conscious homeowners. They are manufactured according to different formulas which may include plastics, rubbers and other resins and extenders.
Factors to Consider When Selecting Your Roofing Product
Value
You cannot base the value of the roofing product you select solely on its initial material cost. Rather, when considering the right roofing product for your home, consider the total cost, including any special structural or decking considerations, labor and special accessory materials, factored over the anticipated service life of the material. Although somewhat difficult to calculate, you also need to consider any increase in overall value that the new roof may add to your home.
Appearance
Any new roof is likely to look better than the one it’s replacing. It’s your home and, unless there are neighborhood rules dictating otherwise, you should choose the style you like! If you really want your roof and home to stand out, you may want to select a radically different roofing material not found in your area.
More often, homeowners want a great looking roof that blends in with the home and roof styles around them. Consider what look best suits your home’s style and your family’s personality.
Climate and Performance
Severe weather events such as hurricanes, tornadoes, hailstorms and heavy rain are on the rise. Choose shingles that are specifically engineered to provide maximum protection against the elements, based on the prevailing climate and weather conditions where you live. IKO offers two performance class shingles, IKO Nordic and Dynasty. They’re fortified with ArmourZone for maximum resistance to uplift and blow-off even in high wind. Nordic also offers a Class 4 Impact Resistance rating*. And their high-definition color blends make them look every bit as great as they perform.
*This impact rating is solely for the purpose of enabling residential property owners to obtain a reduction in their residential insurance premium, if available. It is not to be construed as any type of express or implied warranty or guarantee of the impact performance against hail, of this shingle by the manufacturer, supplier or installer. Damage from hail is not covered under the limited warranty. For further details concerning the FM 4473 standards, visit the FM Approvals website.
Structural and Roof Design Issues
Some roofing materials (particularly tiles made of heavy materials such as clay or concrete) may require additional structural support for the installed roof system. Consult the roofing contractor, product installation specifications and/or a qualified structural engineer if you’re thinking of using a heavy material.
Color options: Make sure that the roofing material you choose is available in a color that complements your home’s exterior. Certain roofing options may have a limited color range.
Compliance: Consult your local building code and homeowner association rules for your neighborhood to ensure the product you want to install is approved for your area.
Installation and Availability
You may have seen a nice roofing product on a trip, or maybe your cousins had some beautiful tiles installed at their home down south, and you want the same roof on your home. Contact local roofing supply outlets and local roofing contractors to ensure the material you want is available, and there are trained professionals available who have experience installing that product.
As you consider each roofing option, many other factors may enter your decision-making process. For instance: the limited warranty coverage offered for each product, the history of the proposed roofing material in your region, the roofing product’s environmental impact in terms of recyclability or sustainability, its compatibility with solar panel installations and, if you live in an area prone to hail storms, its impact-resistance rating.
Choosing the Best Residential Roofing Materials
Carefully evaluating all these factors will help you choose an appropriate roof for your home – not just one that’s been hyped up through marketing.
Choosing a new roof is a big decision, one you’ll have to live with for many years, so review all the options to make an informed and successful choice.
As a starting point, visit IKO Roofing to check out the latest shingle designs and color blends from one of North America’s largest shingle manufacturers.
Please note:The below information and instructions are for the general information and are not intended to be relied upon as specific advice for a particular roof.
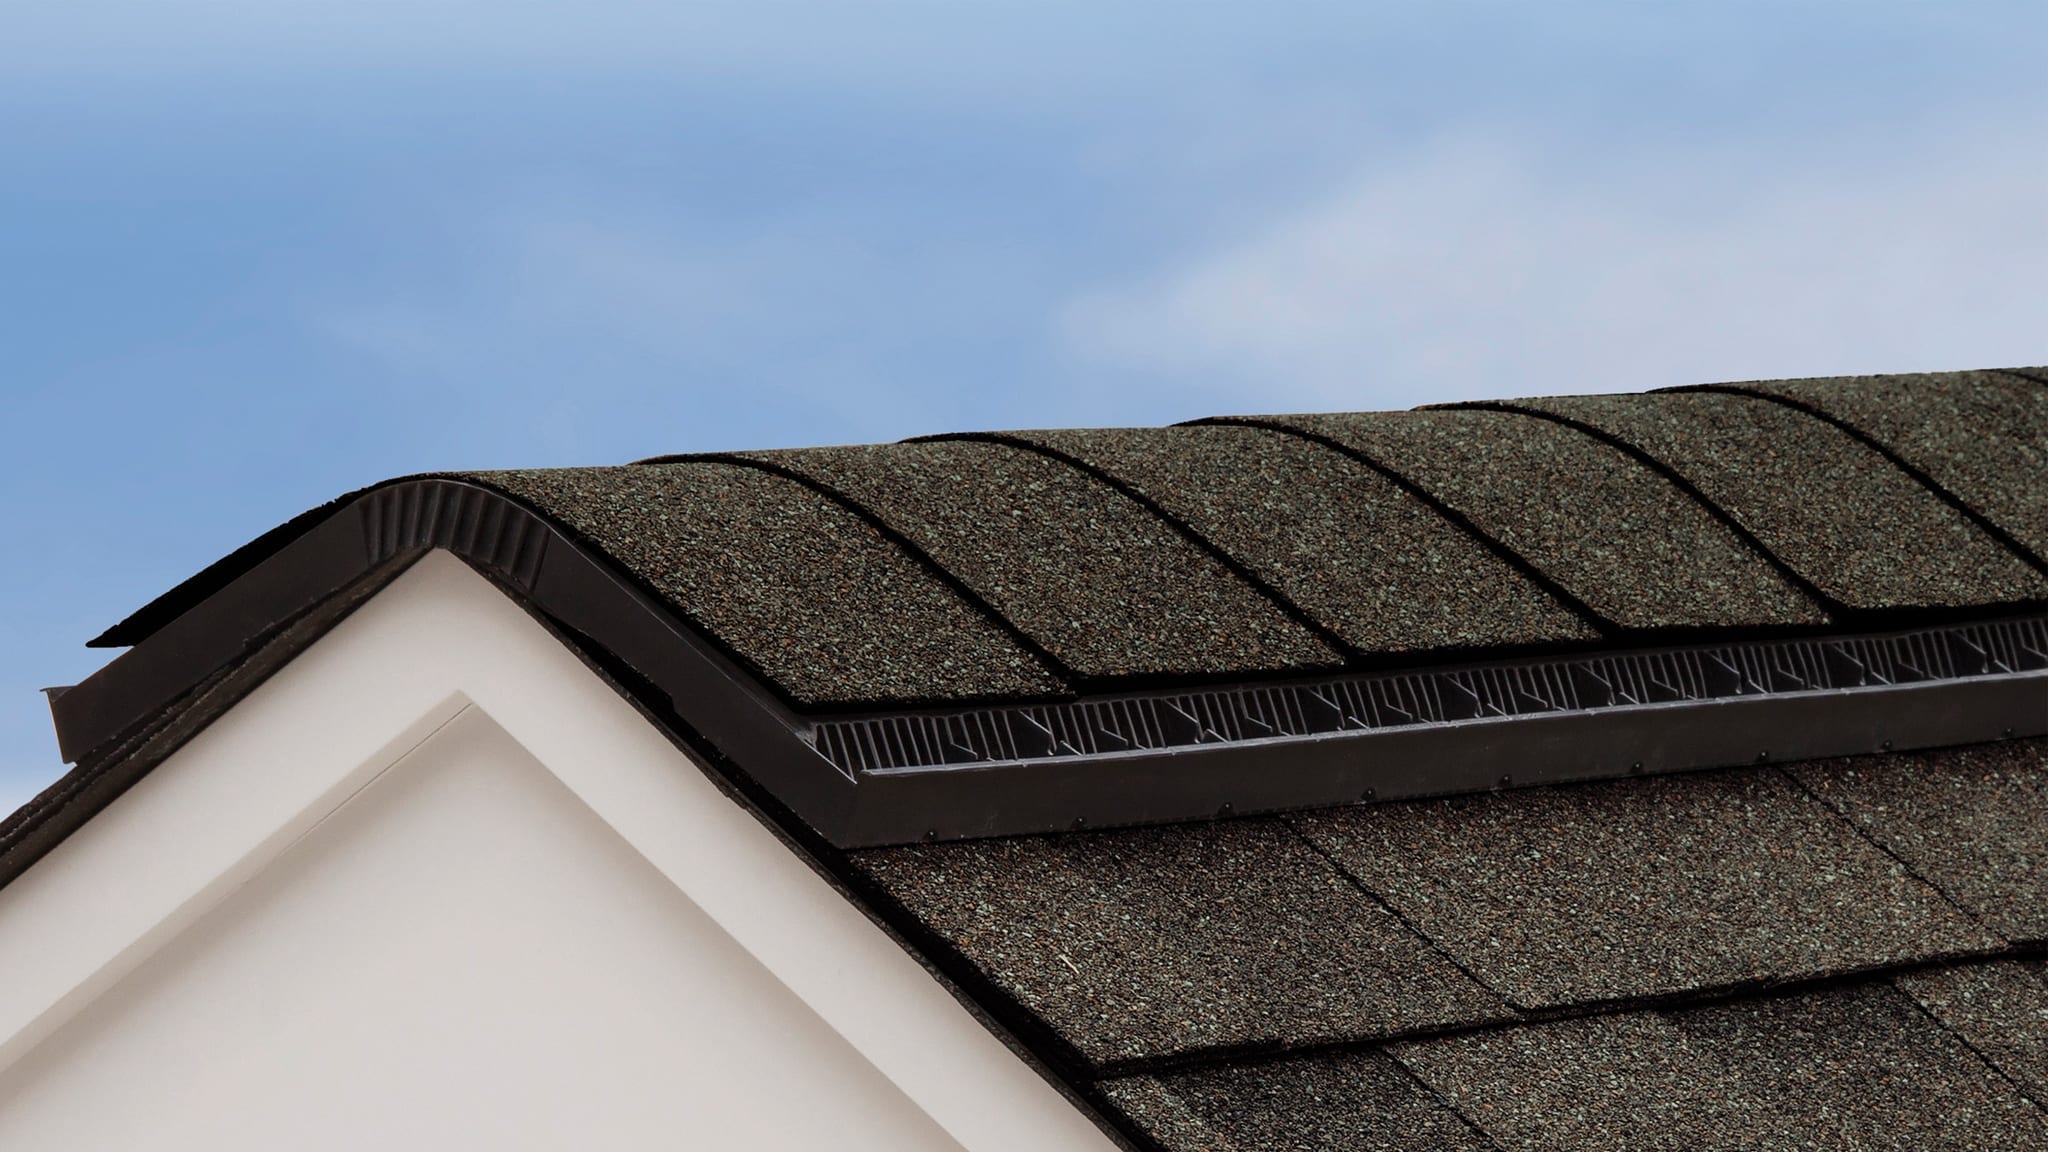
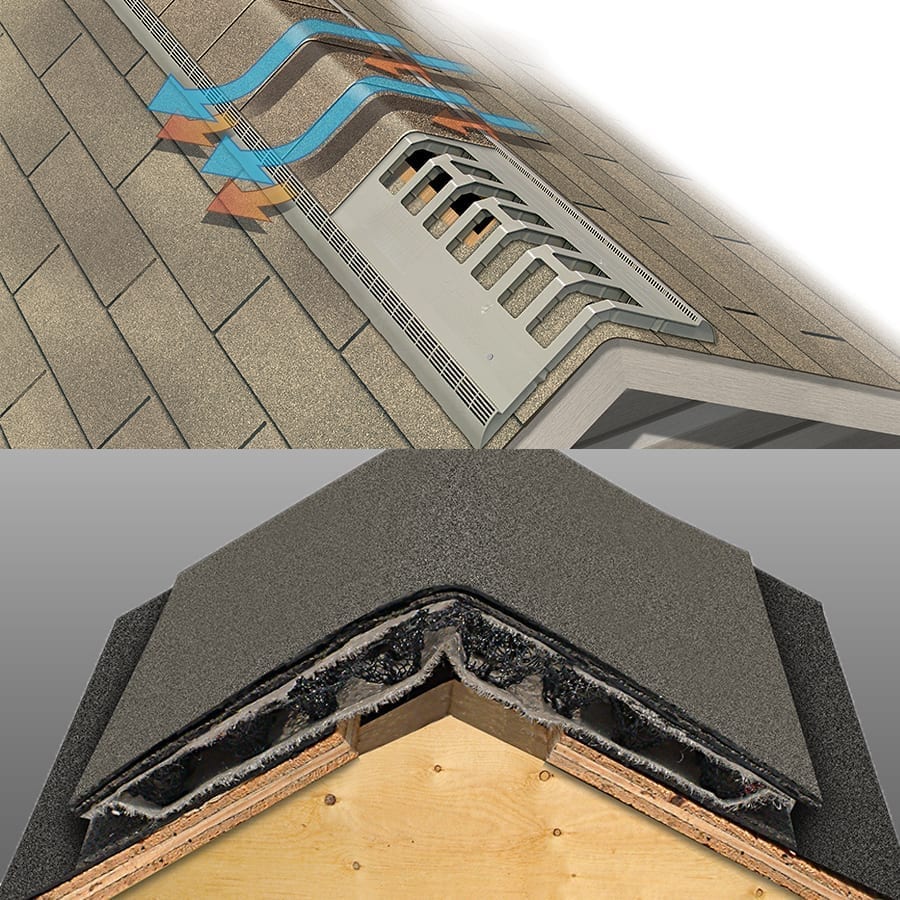
An important part of a healthy home, and a complete roofing system, is roof vents.
The installation of roof vents is a crucial part of roof design because it allows for proper attic ventilation, which may help prevent condensation and early aging of your roofing materials.
Advantages Of Proper Roofing Ventilation
Although there are many different types of roof vents to choose from, ensuring you have the right number of both intake and exhaust vents is a central part of roof design. Proper attic ventilation offers numerous advantages to the homeowner:
As the ventilation helps moderate the temperatures in the attic, this may also help moderate the temperature in the rest of the home
It helps prevent moisture buildup in your attic, which, during colder months, can help prevent condensation issues that can affect the materials in the attic space, especially insulation.
By preventing excess heat buildup, proper ventilation promotes energy efficiency in the home, so your heating costs may be lower
It helps protect the life of the roofing materials (condensation is a leading cause of damage to roofing materials, such as asphalt roofing shingles)
It helps you remain compliant with most local building codes, which often require proper attic ventilation in homes
How To Calculate The Amount Of Ventilation You Need
Please note: the following provides advice for homes with ventilated attics. There are some styles of vaulted ceiling homes or flat roof homes that have ventilation spaces within the roof itself, and no attic. These ventilation needs are calculated differently.
The key to proper ventilation of your roof and attic is balance: the amount of space you devote to intake must be equal to the amount you allow for exhaust, and these must be calculated according to the size of your attic and slope of your roof.
You can calculate attic ventilation requirements by determining the square footage of your attic floor (its width times its length), and compare that to the total required “net free area” (NFA). Vents are rated by their net free area, or the amount of space for air to flow in or out. This helps make it easy to calculate how many vents you need for your attic, once you’ve determined your requirements.
If your attic floor has a vapor barrier, you will need one square foot of NFA per every 300 square feet of attic floor area (half of that will be intake, half for exhaust). If there is no vapor barrier, double it to one square foot of NFA for every 150 square feet of attic floor space (half for intake, half for exhaust). These are broad guidelines, so be sure to check with your local building code.
(Source: NRCA, Stanley Complete Roofs and Siding, AirVent.com.)
Also, the NFA will be calculated differently if your roof slope is greater than average. If the slope of your roof is greater than 6:12 you will need more ventilation to reflect the extra volume of attic space: Calculate 20 per cent more for 7:12 to 10:12 pitches, and 30 per cent more for a pitch that is 11:12 or greater.
(Source: Asphalt Roofing and NRCA.)
Then, you can begin choosing the style and type of roof vents you want for your home.
It’s important to remember that it’s better to have too much intake ventilation than too little – and many homes often undercalculate the amount of intake needed — so worry less about having too much intake and err on the side of having more.
(Source: House Logic and ARCA.)
The most popular way to ventilate an attic is to take advantage of buoyancy, or warm, moist air’s natural tendency to rise, especially when pushed by cold air beneath it. Homes are naturally filled with warm moist air on a daily basis thanks to human physiology and activities such as cooking and showering.
To take full advantage of this effect, a roofer will generally install intake roof vents for houses lower on the roof (closer to the eaves) while placing exhaust vents higher (near the peak), to let the cold air push the hot air out more easily.
(Source: NRCA.)
How to Install Roof Vents
Before a roofer gets to work installing your roof vents, they will need to determine what type of vents your home needs (or which you prefer) and how many you require according to the calculations above.
Below we describe the different types of roof vents, which will vary according to the needs and architecture of your home, the geography and weather patterns of your region, and your roof structure.
These are general guidelines, as most manufacturers will offer instructions on how to best install roof vents and what measures are required to meet the limited warranty specifications.
Intake Vents
Continuous or Individual Soffits
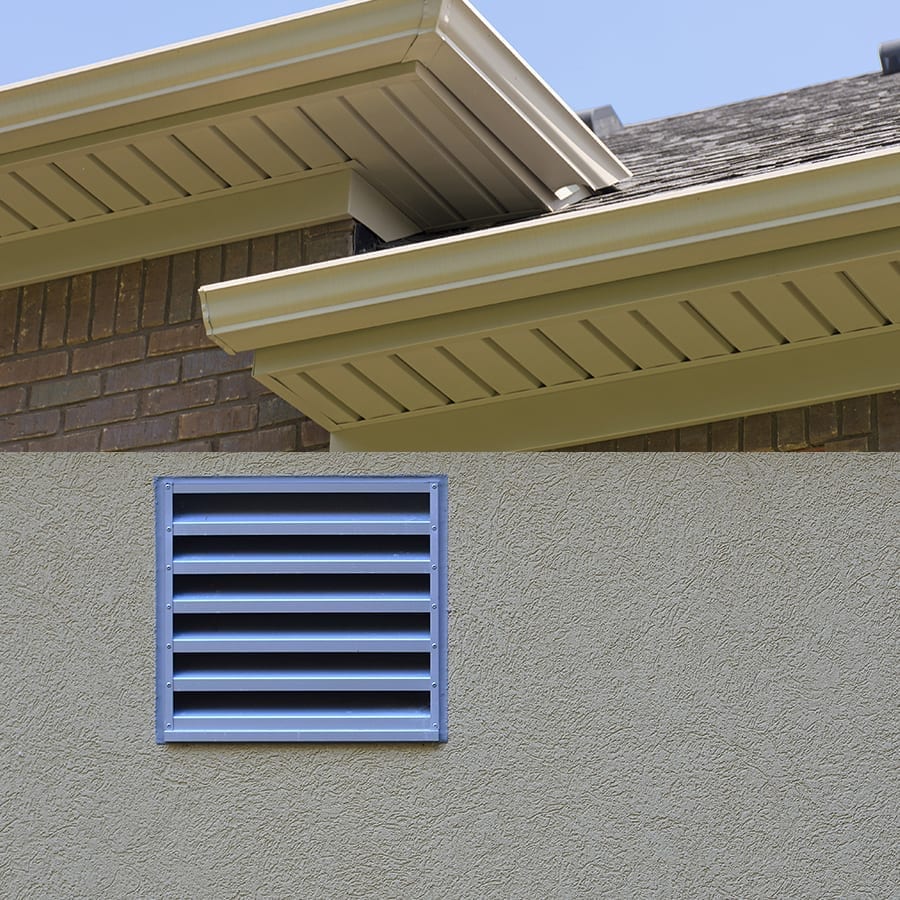
Soffit vents are one of the most popular intake vent styles: they are easy to install under the roof’s overhang (which is known as the soffit), are generally hidden from sight and provide excellent protection from weather, outdoor debris and pests, while still allowing air to flow into the attic.
Soffit vents are commonly made of aluminum or vinyl and are installed into your soffit, the surface under the eave of the roof. Soffit vents are recognizable for the narrow slits that provide open space into which air can flow. There are a number of different types and styles of soffit vents. Always be sure to check with your manufacturer that the vent you choose has sufficient NFA for your project.
No matter which style you choose, it’s essential soffit vents remain clear of buildup or debris so air can continuously flow freely though the openings.
Homeowners also need to ensure their attic insulation isn’t blocking the flow of air. Check that the insulation is pulled back, away from the vents, or ask your roofer to install attic ventilation baffles to prevent the insulation from creeping over the edge of the soffit.
(Source: Professional Roofing)
How to Install Soffit Vents
Note: Always ask a licensed professional to install your roofing materials.
Working from under the soffit, your roofing professional will mark the size of the vent and then cut a hole slightly smaller than the unit (about two inches shorter and narrower), between the rafters. They will then install using screws, according to manufacturer specifications.
(Source: NRHA.)
Drip Edge Vent
If you don’t have soffits, or your roof style doesn’t allow for soffit vents, some homeowners will consider a drip edge vent. Drip edge vents are a two-in-one installation that promote water shedding at the eaves and rakes of a roof, while also allowing for ventilation into the attic. A drip edge vent is made of a corrosive-resistant material that sticks out about three inches back from the roof edge and then bends downward over them. Slits in the product allow for air to flow into the attic.
Organizations such as the NRCA recommend against this roof vent style in cold climates because it can promote ice dams. So, only use this if soffit vents aren’t an option. This style should also not be used with gutters.
How to Install A Drip Edge Vent
Just like a drip edge, the drip edge vent is applied along the eaves, the underlayment or waterproofing membrane is installed on top, and then the gable end drip edge can be applied on top. This sequence will help promote waterproofing.
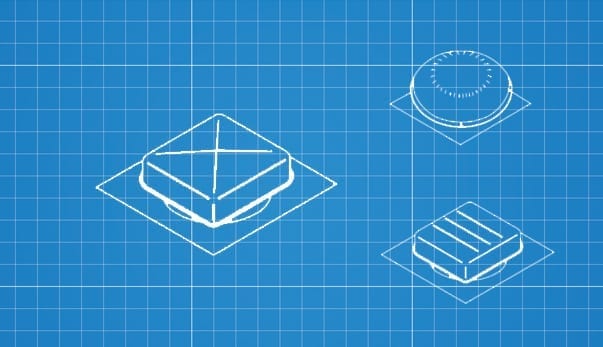
Exhaust Vents
Ridge Vents
These vents are laid along the ridge of the roof and can come as a series of separate pieces or one long piece.
Because the vent material will look different than the shingles, some homeowners may choose to have their roofer shingle over the ridge vent once it’s installed.
These exhaust vents provide a reliable open area for warm air to escape the attic, providing essential outward ventilation across the entire length of the attic (versus a few isolated areas from other smaller vents). However, some pros recommend against this style because along with increased openings for air also comes the possibility for blowing snow or rain to enter. Newer styles of ridge vents have curved channels to reduce this risk or are comprised of a mesh like material.
(Source: Winnipeg Free Press, Fine Homebuilding)
How to Install A Ridge Vent
First, the roofer should remove any cap shingles along the ridge.
Next, they will outline the area using chalk and use a circular saw to cut away sheathing about one or 1.5 inches down on either side of the ridge, stopping three inches from the end of the roof on either side (or according to how far from the end the manufacturer recommends).
The roofer will be careful not to cut into the trusses or ridge board. They will then remove sheathing and install the ridge vent by securing one piece of vent at a time and attaching the next piece into it, nailing each piece as he goes. The ends should be capped or sealed. If it’s a newer style of shingle-over vent, it may be one continuous piece of aluminum or vinyl, or made of a single fibrous material that’s rolled out over the ridge hole.
The final piece may need to be cut to the right length with a hacksaw at the end of the roof.
Finally, the roofer will secure and weatherproof according to manufacturer instructions (which will generally recommend different materials for different styles). If it’s a shingle-over roof vent, ridge cap shingles will be applied over the vent and secured with two-inch nails.
(Source: Home Guides, NRHA, Fine Homebuilding, Stanley Complete Roofs and Siding)
Static Vent
Static vents come in a variety of different styles and sizes, but are all non-motorized vents installed near the roof ridge to allow for unobstructed flow of air from the attic. If there are more than one, they are centered between the rafters and installed at regular intervals in a horizontal line along the roof.
How to Install A Static Vent
First, from inside the attic, your roofer will drive a nail through the roof structure to mark spots for the vents. (The nail will either drive directly through the roof or pop a shingle that’s easy to spot) on the topside of the roof. The roofer will mark these spots between the rafters evenly along the roof. From the roof they will then draw a guide hole the size the diameter of each vent. These holes will likely be installed closer to the ridge but manufacturer instructions should always be followed.
From the roof, the roofer will remove shingles around the guide hole and about one inch back on the upper side of the hole. They will use a saber saw to cut through the underlayment and decking of each marked hole.
To install the vent, the roofer slips the flange (the metal lip of the vent) under shingles at the upper part of the hole and rests the flange on top of the shingles at the down-slope part of the hole.
To secure, your roofer will (following manufacturer instructions) likely use roofing nails, ensuring these are long enough to penetrate through the unit, the shingles and the decking.
The final step is waterproofing the vent, which will be done by applying manufacturer-recommended material (such as caulking) around the flange.
(Source: Air Vent.)
Gable Vents
A gable vent is a slotted piece of wood or siding that’s installed into the side of a home near the gable ( where two roof pitches meet in a triangle). Gable vents can function as both intake and exhaust, but rely on strong winds to be effective, so they are recommended to be used in conjunction with additional intake soffit vents near the bottom of the roof. Also, roofing professionals usually recommend against installing a gable vent if that side of the home is subject to driving rain on a regular basis.
(Source: Stanley Complete Roofs and Siding.)
How to Install A Gable-End Vent
Rather than being installed on the roof, gable vents are installed on the exterior side wall of the home, near the roof ridge. Installation first requires a wood frame, made of 2X4s, installed from the attic between two studs. Your roofer will build this frame just a little larger than size of the vent (leaving 1/8 inch of extra room on each side). Your roofer will secure the frame from inside the attic then drill holes in each corner of the frame right to the exterior of the house.Working from the outside he will use these four holes as a marker to create a rough hole of where the vent is to be installed. He will cut through the siding and sheathing to create the hole for the vent. He will add felt paper around to hole to add a layer of water proofing, lapping it over the existing felt paper. Then he will install the flashing to the frame, or directly to the vent, and insert the vent into the wood frame, securing with screws and/or applying caulking or sealant recommended by the manufacturer.
(Sources: Home Addition Plus, Do It Yourself, Home Advisor, Homes Guide.)
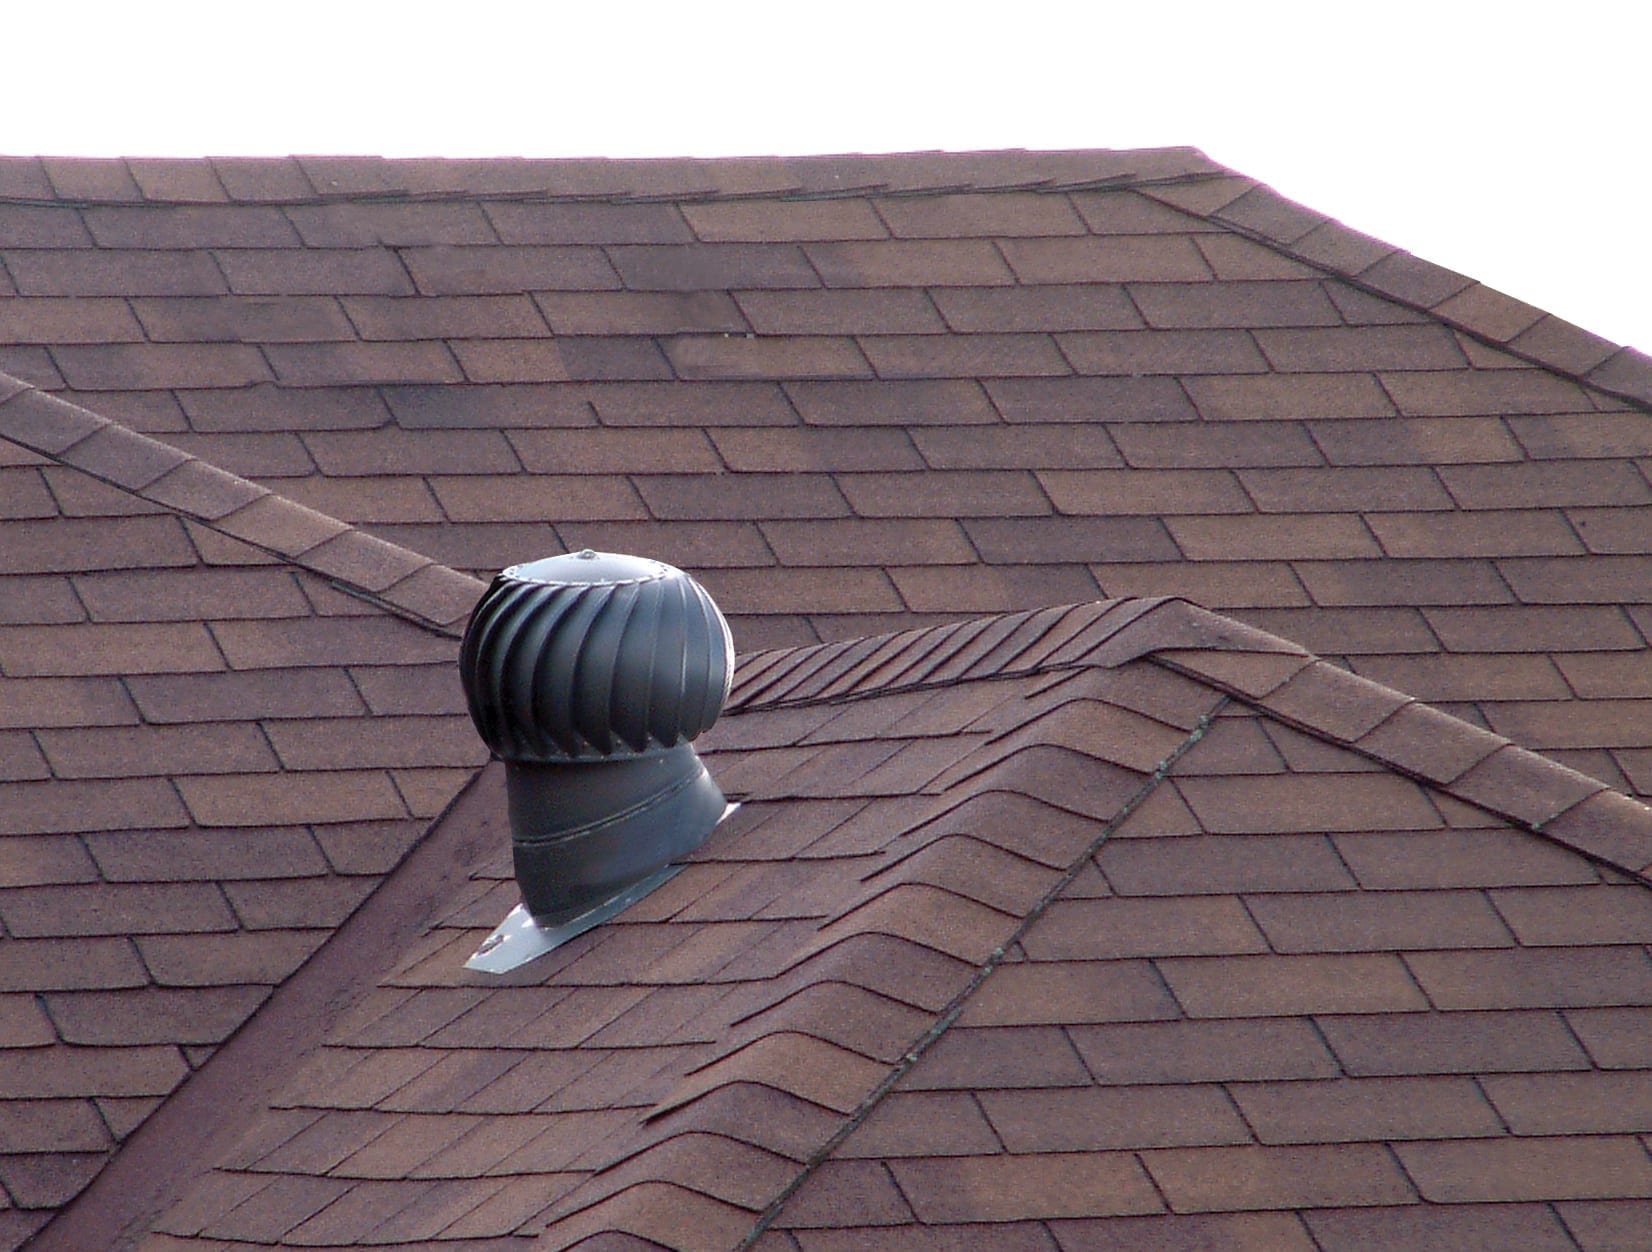
Turbine Vent
A turbine vent draws air from inside the attic as wind turns the turbines. This is most effective in areas where winds average at least five miles per hour, or otherwise will not offer the most effective, reliable source of venting.
How to Install Turbine Vents
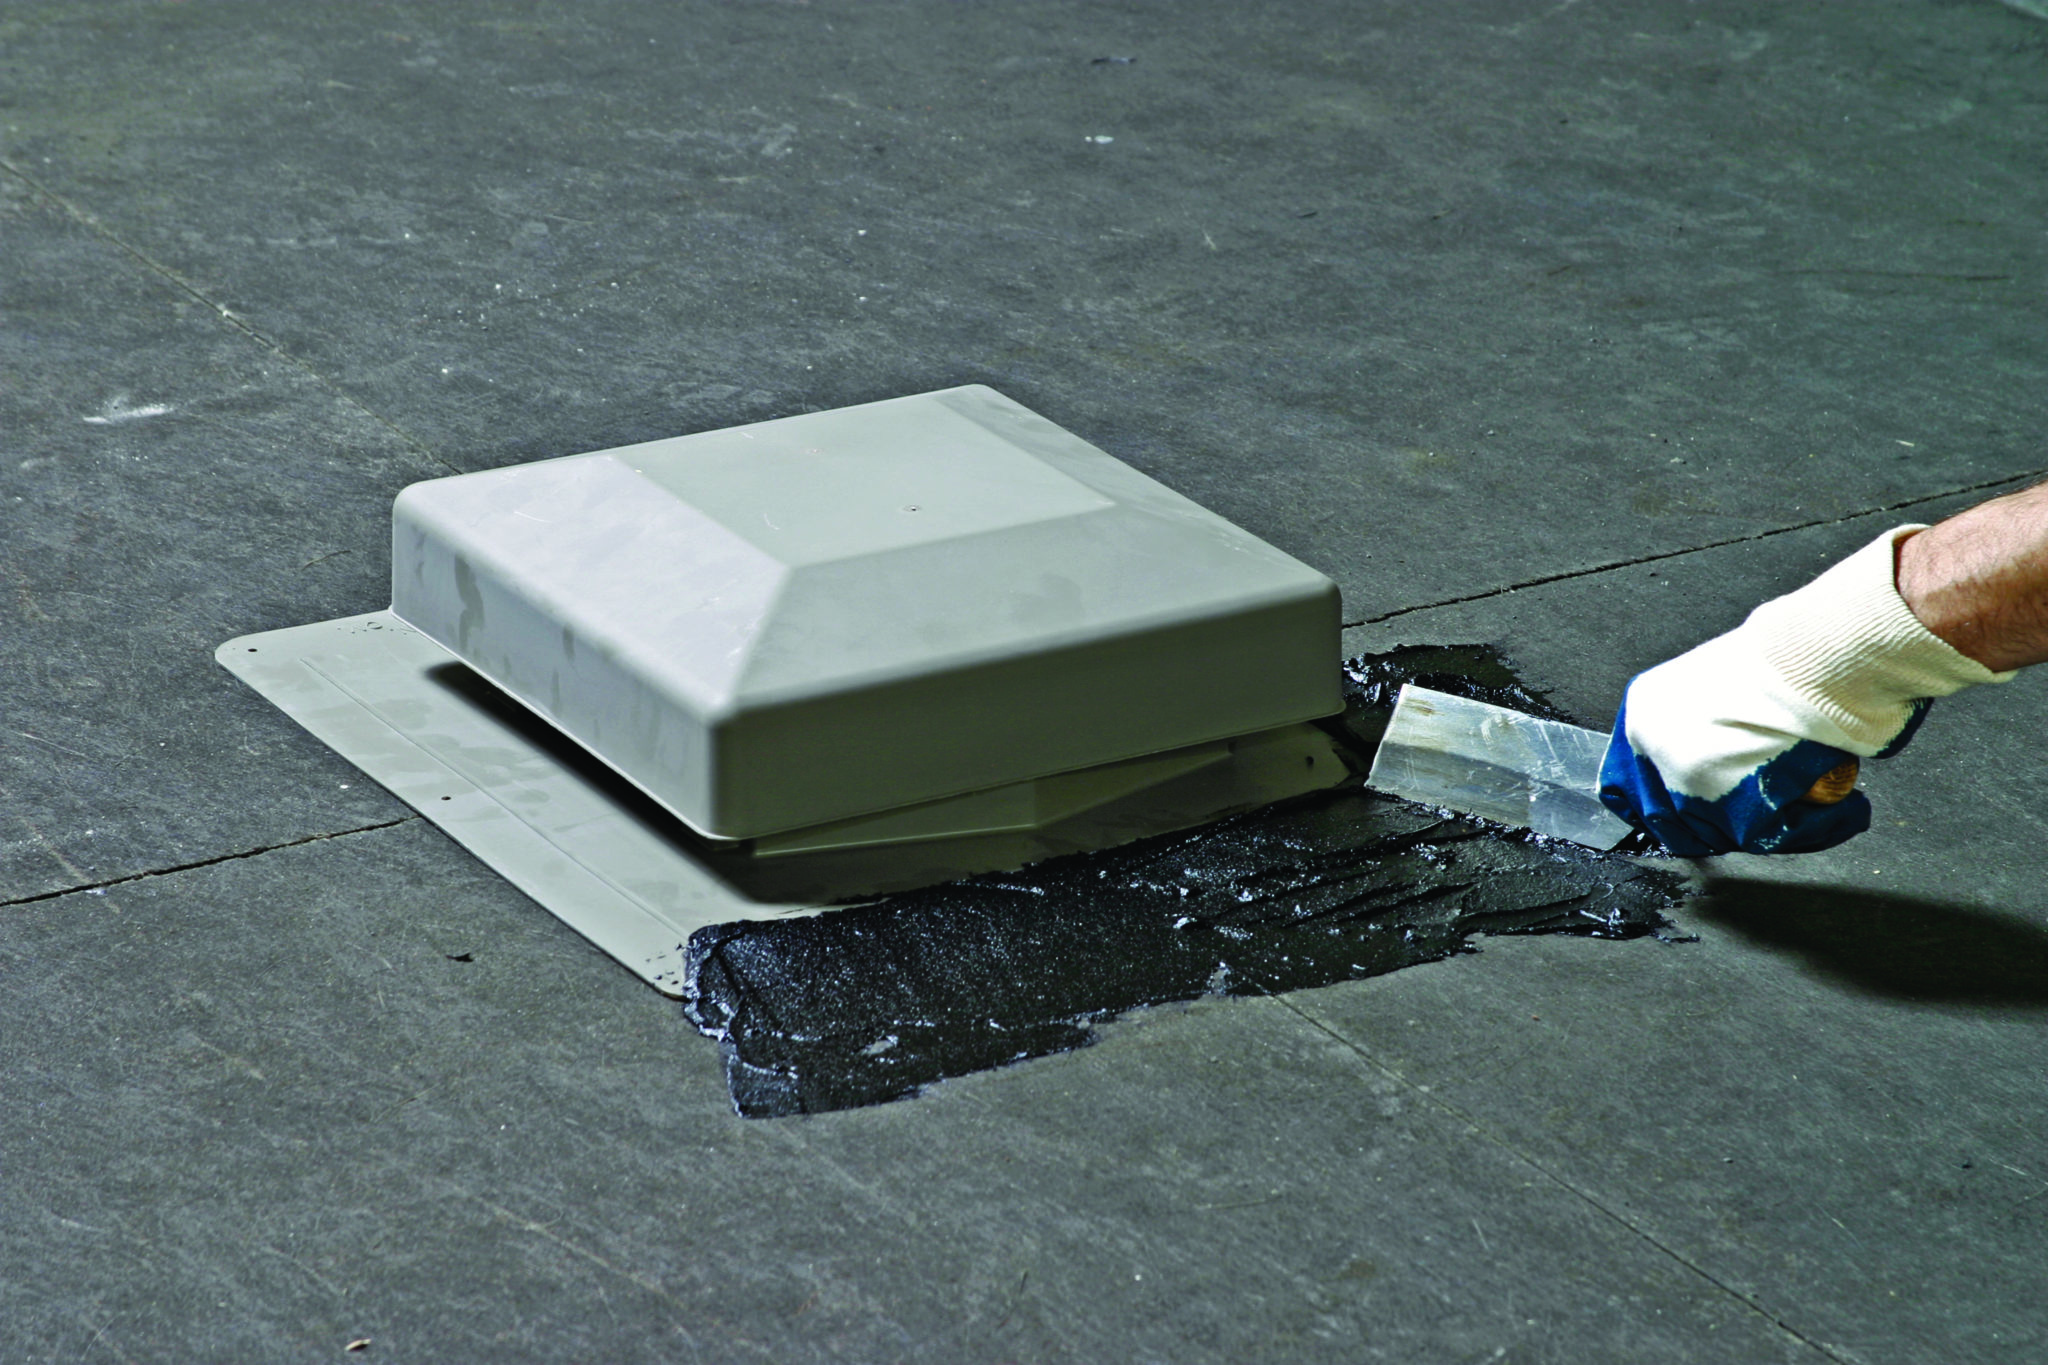
The installation of a turbine vent is nearly identical to a static vent. A roofer will, from the attic, mark a spot near the ridge of the roof (he may first use nails from the attic to mark preferred spots between two rafters). From the roof, the roofer will cut away shingles and underlayment, and use a saber saw to cut a hole the same size as the diameter of the vent.
Following manufacturer’s instructions for securing the vent, the roofer will likely spread plastic roof cement on the underside of the vent, place it over the hole, slip the flange under the top-side shingles, and lay the flange over the down-slope shingles.
The roofer will then nail the base in place with galvanized roofing nails and cover nail heads with roofing cement.
(Source: NRHA and House Logic)
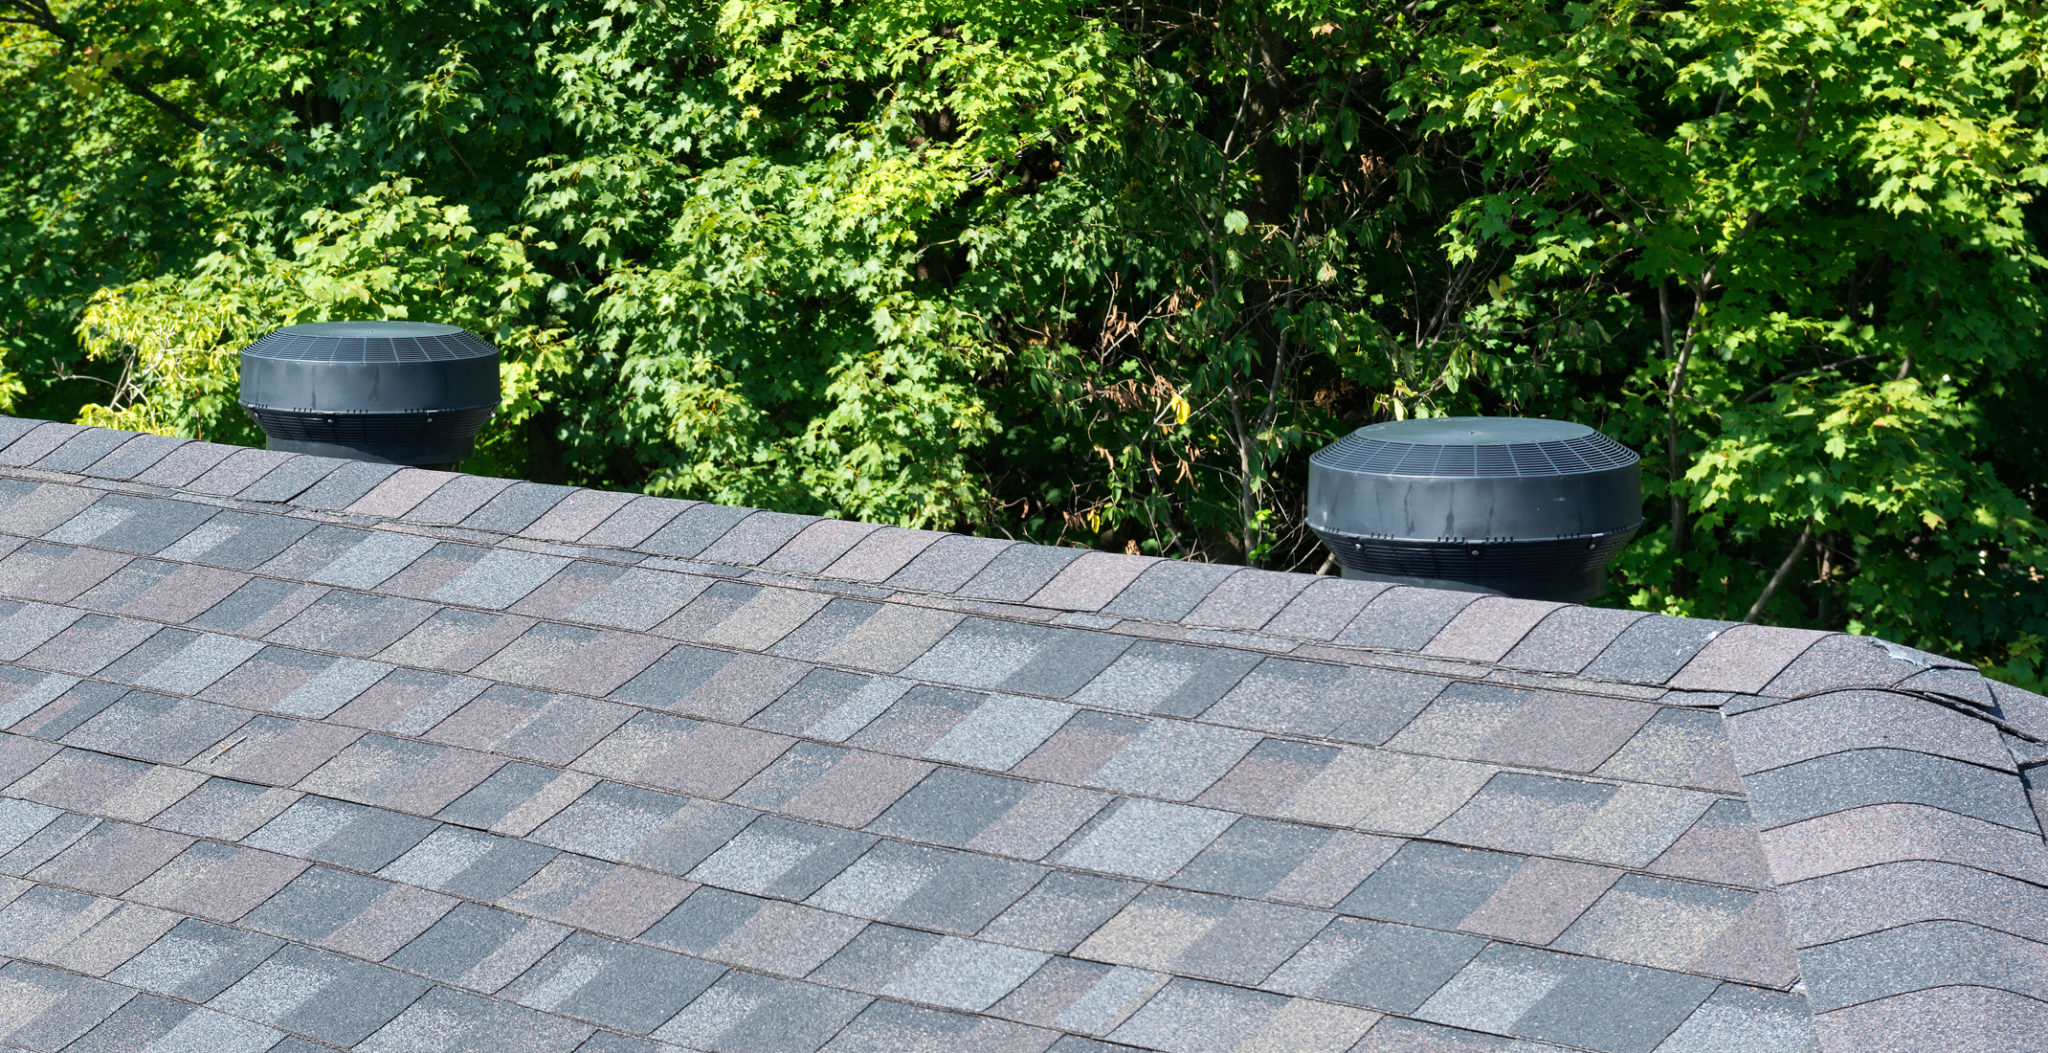
Powered Vent
A powered exhaust vent is much like a roof-mounted exhaust fan. It can be controlled by a thermostat or moisture monitor. Blades spin within the unit to expel air from the attic until the right temperature or moisture level is reached, at which point it will automatically shut off.
How to Install Powered Vents
From inside the attic, your roofing professional will drive a nail about one third of the way down from the ridge between two rafters to mark the desired spot for installation. From the roof, he will cut a hole the same size as the diameter of the vent. As with static and turbine vents, he will then secure the flange under the top-side layer of shingles, lay the flange on top of the bottom shingles and use roofing cement (or manufacturer-recommended waterproofing materials) to seal the unit.
(Source: Home Guides and Roofing Canada.)
A Note About Bathroom And Kitchen Exhaust Vents
Bathroom and kitchen exhaust vents are not a type of roofing vent. It should be noted that these vents, which expel warm moist air from the bathroom and food prep areas of the home, need their own ducts and vent hoods, which direct air to the home’s exterior. These vents and ducts should never share space with the roof vent, and air should never be vented directly into the attic.
(Source: Family Handyman.)
The Lasting Benefits Of Ventilation
With the right balance of intake and exhaust ventilation, a homeowner can help optimize the life of his roof system and his home’s energy efficiency. He can also feel confident neither the roofing system nor the contents of the attic will be victim to the destructive effects of condensation so common to poorly ventilated roofs.
A Guide to Roofing Valleys with Architectural Shingles
A roof valley is formed where two roof slopes meet. Water collects in a valley to flow off the roof. Your choice of valley installation method is critical because, when improperly installed, valleys are risks for serious leaks.
Essentially, there are three main ways to shingle a roof valley: woven, closed-cut and open. There are various techniques you’ll need to know for each type of installation, which we’ll go over in detail. When deciding how to shingle a roof valley, you will need to consider your materials, the climate and the desired look of the roof. IKO recommends that you install architectural shingles with the open valley method for the best roof performance. This recommendation includes IKO’s premium shingles.
The Three Methods to Shingle a Roof Valley
1. Woven Valley Shingle Installation
To achieve a woven valley installation, a roofing professional lays shingles in the valley and weaves them together. Some homeowners prefer the consistent look that a woven valley provides. But, if the shingles are not laid in the valley properly, a woven valley may not lay flat, creating bumps and detracting from the overall look of the roof.
The woven valley shingle installation method does not call for roofing cement, relying instead on the weave pattern to protect from water infiltration. So, if you are installing a woven valley, you must push the shingles snugly into the valley, while not nailing within six inches of the valley center. If this is not done properly, hollow space may develop under the shingles.
This “bridging” is a serious problem for the durability of a roof. The empty space makes the shingles vulnerable to penetration, either by footsteps, hail or other debris. For this reason, installing some manufacturers’ shingles in a woven valley may void their limited warranty.
A woven valley shingle installation has other drawbacks, including that they are slow to install, especially in cold weather, and more difficult to repair than the other types. In order to shingle this kind of roof valley, a roofing professional has to install both roof faces at the same time, which is quite slow. If repairs are needed, the contractor has to remove and then reweave multiple shingles to replace a single one. While a woven valley may save on initial installation costs, because they require less materials, they may cost more in the long term.
Woven valleys are suitable for three-tab shingles as their single-layer construction allows them to be woven together and overlapped more easily. When considering how to shingle a valley with architectural shingles, you must take into account their thickness and reduced flexibility. Laminated shingles are more liable to create bumps in woven valleys. Often, they are too thick to be woven at all. Thus, IKO does not recommend installing a woven valley with laminated shingles.
2. Closed-Cut Shingle Valley Installation
Closed-cut valleys, also called closed valleys, are installed quickly and have a cleaner, sharper look than woven valleys. From the ground, it looks as though the shingles meet in a clean line in the center of the valley. One layer of shingles actually crosses the valley beneath the other.
In summary, during the installation of a closed-cut valley, you install the first roof plane’s shingles into the valley. It is essential to only use whole (not cut) shingles during this step. As you install roof shingles on the second roof plane, you allow them to lap over the valley on top of the first shingles. The shingles on the second layer are then cut, ideally creating a clean line down the center of the valley. A chalk line can be used to guide you as you cut the shingles.
Unlike a woven valley, a closed valley will not have hollows. However, closed valleys still rely on shingles to protect the valley, which has its drawbacks. The shingles in the valley may lose their granules, and thus their coloration and protective capability, faster than the rest of the roof. Ultimately, laying any shingle in a valley can restrict proper water and debris flow, unlike the metal flashing used in an open valley.
A Variation of Closed-Cut Valley: the California Valley
One variant of the closed-cut valley is the California valley, also called Long Island valley and New Jersey valley. For this method, the last shingles on the “cut” side of a cut valley are actually installed sideways, so they run up and down the valley. This saves the time of cutting shingles and is the fastest way to shingle a roof valley, but it does not provide adequate protection in most climates. Indeed, California valleys are prohibited in some areas. Always be sure to refer to your local codes to see if they demand a particular kind of valley installation.
3. Open Valley Shingle Installation
An open valley relies on metal flashing for protection. That flashing is left exposed, so the roof has visible lines of metal running down the valley. Some homeowners do not like the look of open valleys, while others feel the metal accentuates the roof’s shape, particularly if copper or painted flashing is used.
IKO recommends installing an open valley with architectural or laminated shingles. Jeff Tessaro, a knowledgeable IKO sales representative, explains that open valleys have key advantages, including longevity. Tessaro says, “Provided the rest of the roofing shingles were properly installed and are performing properly, my experience has been that an open valley system holds up better over time.”
Metal sheds ice and water faster than shingles, reducing the risk of ice dams and blockages of debris. Also, as all valley flashing metal is galvanized, it isn’t susceptible to losing its integrity under running water. Neither can it be pushed open by an ice dam or wind-driven rain. Additionally, the National Roofing Contractors Association explains that low-slope roofs are good candidates for open valleys because they are more likely to accumulate debris.
Tessaro also says that the open method allows for faster replacement and repair than the other techniques of shingling a roof valley. As another benefit to the roofing professional, open valleys are sometimes used to easily bridge the gap between roof faces of vastly different pitches.
If homeowners are looking to have their roof last for many years, an open valley is IKO’s recommended choice and a good up-sell opportunity for the roofing professional.
Valley Flashing Options for an Open Valley Installation
If you are installing an open valley, you will need to select a flashing material. Generally, flashing is a metal. Possibilities include:
Copper (may be cold-rolled or high yield).
Aluminum.
Steel (must be stainless or galvanized).
Zinc alloy.
Painted terne (steel with a lead and tin coating).
Different codes may require different materials, but IKO recommends, as a minimum, a 28-gauge galvanized metal. If not metal, the material must still be corrosion-resistant and non-staining. Also, at a minimum, valley flashing must be 24 inches (610 mm) wide.
Take care to understand your code’s thickness requirements for flashing, as there is often confusion about this point according to Professional Roofing. Also, it is ideal to install valley flashing that will match or outlast the life span of the shingles, so they can be replaced together.
You also want to consider the valley flashing profile. While some flashing is straight, others have a “W”-shaped bend in the center. This creates a crimp in the center of the flashing, which prevents water from crossing from one side of the flashing to the other. This can be useful if you are adjoining two roof planes that are asymmetrical in size.
Then, consider the aesthetic of the flashing. Some homeowners want the flashing painted to match the shingles. Others want a dramatic look with contrasting colors, or with the copper or steel face left unaltered. Your choice of shingle color and flashing can make a dramatic difference to the exterior of a home.
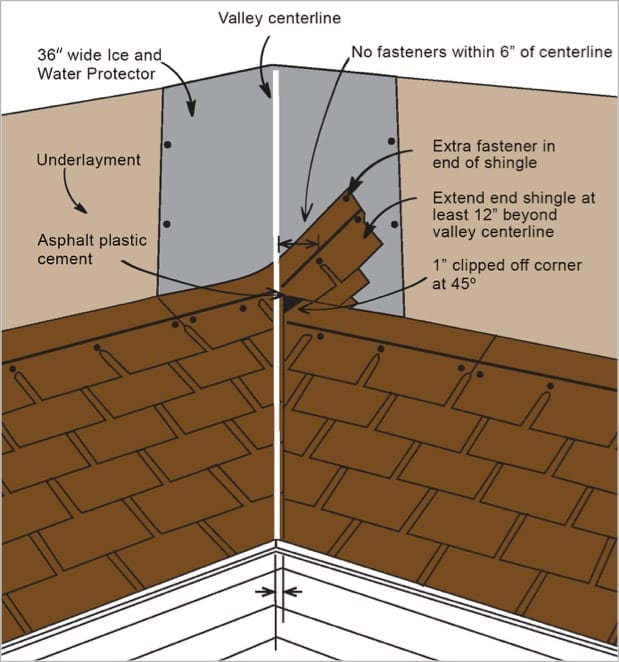
How to Shingle a Valley With Architectural Shingles
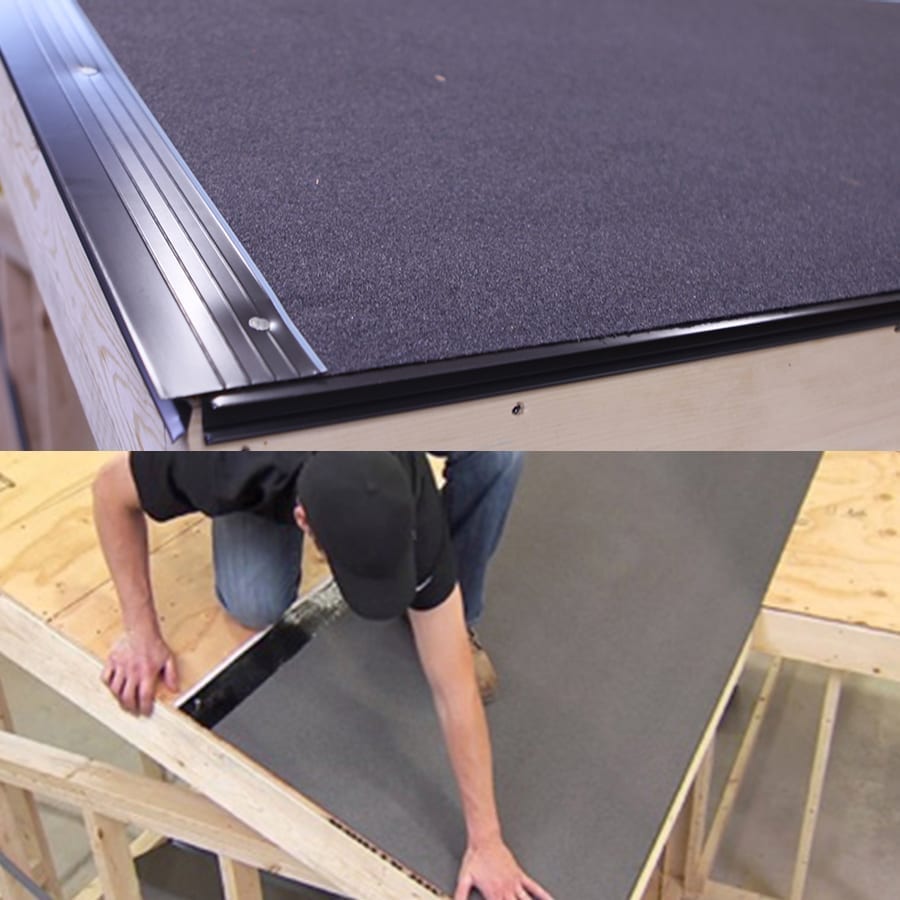
Step One: Ensure ice and water protector has been installed along the valley first. Then, starting at the base of the valley, center your first piece of flashing in the valley.
Step Two: To secure the roof valley flashing, nail it down carefully. Only nail at the edges, with only enough nails to hold it in place. Extra nails may increase the risk of leaks.
Step Three: Moving up the valley, install any additional roof flashing, as required to cover the entire length. Overlap each piece of flashing by at least 6 inches (150 mm). First, apply asphalt plastic cement under the overlap area, then place and nail down the second piece of flashing.
Step Four: Now you need to set out chalk lines to guide you as you install shingles along the valley. Snap two chalk lines parallel to the valley and down its entire length. At the top of the valley, the lines should be 6 inches (150 mm) apart. Then, they should gently slope outward at a quarter inch (3 mm) every 12 inches (300 mm), to a maximum of 8 inches (200 mm) apart at the base of the valley. As a stream of water moves down a valley, it gets wider; so, the exposed flashing must also get wider.
Step Five: Begin to install roof shingles on either roof face. When you reach the valley, lay the shingles over the valley and trim the edges to the chalk line. You can use a straight edge to achieve a straight cut.
Step Six: Nail down each valley shingle at least two inches (50 mm) back from the chalk line. Over-driving nails is always a problem, but it is especially dangerous in a valley, where water collects. Take care to drive nails straight so that the heads are flush with the shingle surface.
Step Seven: Finish installing valley shingles by embedding each shingle into three inches (75 mm) of asphalt plastic cement.
After you have laid all of the shingles in the valley, it should look uniform, like the roof below.
A proper valley installation is a critical component of any roof, ensuring the long-term protection of this vulnerable area. IKO’s recommendation is to install laminated shingles, or architectural shingles, using the open valley method, for best roof performance. To learn more about roofing, please visit our Roofing 101 section. To find a local roofer in your area, please visit our Contractor Locator page.
Disclaimer: Please use caution when working on sloped roofs. If you have any concerns about working on a roof, hire a trained professional.
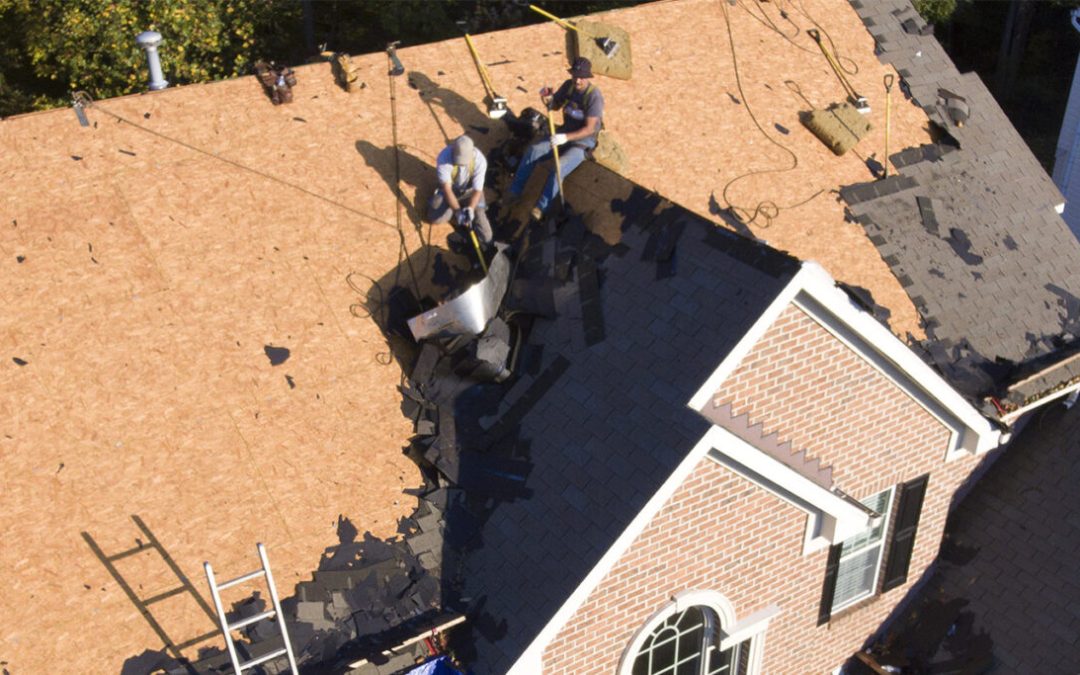
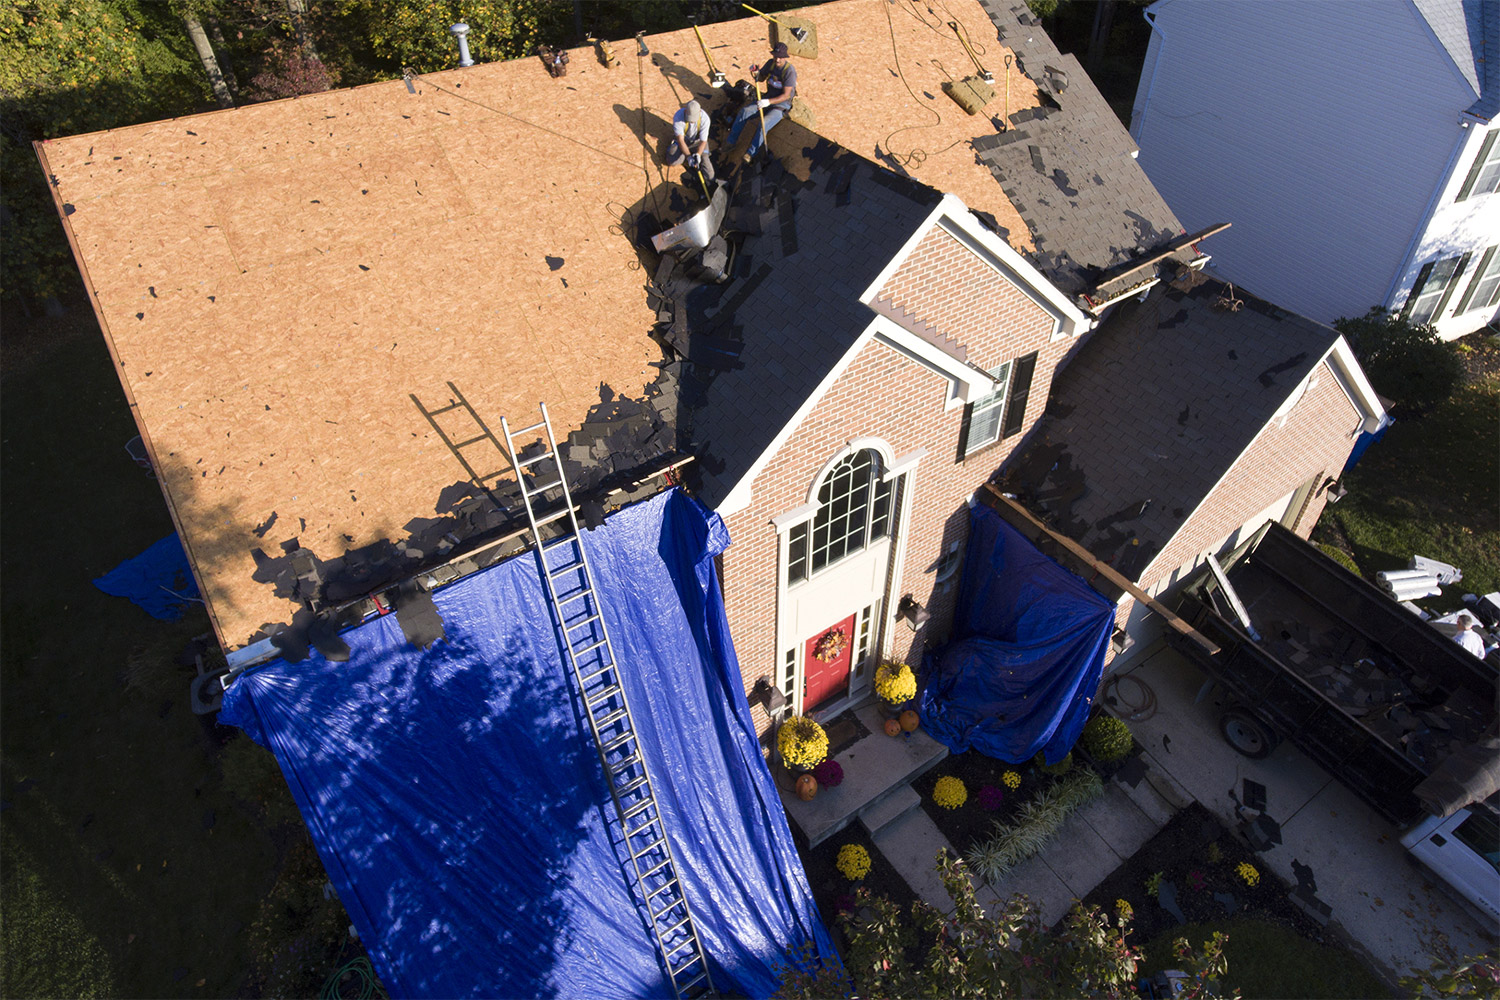
So, you have an old roof, or at least a roof that needs to be replaced, and you’re considering tearing off the old asphalt shingles. The essential process you’ll follow to tear shingles off a roof is listed below, with a detailed explanation of each step.
1. Step One: Determine if the existing shingles need to be removed. If you’re in doubt, an experienced contractor can help you understand the pros and cons of installing new shingles on top of the old ones.
For many years, roofers have successfully installed a new layer of shingles over an old layer. So, you need to ask yourself whether or not removing the old asphalt shingles is necessary for your roof. It’s a frequently asked question: Are two layers of shingles a problem? Not necessarily. If your roof is well-constructed, and the old shingles are relatively flat, consider roofing over the old shingles.
However, it seems like the more common approach these days is to tear off the existing layer. And there are benefits to doing so, including:
You get a chance to inspect the deck for any weak or rotted areas and make repairs prior to installing the new layer.
Some shingle manufacturers’ limited warranty coverage may require the old layer be removed.
Some shingle properties (for example impact resistance) may have only been evaluated on shingles applied directly to the deck. An underlying old shingle layer may affect those roof performance properties.
And, of course, a new layer of shingles applied directly to the roof deck has the best opportunity to look smooth, uniform and flat.
Although removing asphalt shingles requires less roofing knowledge and training than the installation of the new layer, it is still a lot of work. Maybe you’re not afraid of hard work, but also remember you’ll be working on a sloped surface, using tools you likely have never used before.
So, the first step should perhaps be calling some experienced contractors to do the work. In fact, quite likely the quotes you have obtained for your new roof include costs for the tear-off process anyway. Sure, you may save a few bucks tearing it off yourself, but aside from the effort, you’ll then be faced with the additional hassle of perfectly coordinating the installation of your next roof so your roof won’t be left exposed—which brings us to the next step in the process: Make sure your new materials are ready.
2. Step Two: Ensure that the materials for the new roof are ready and on-site. That way, the roof will be left exposed for as little time as possible.
Off with the old, and on with the new, right? This is a fairly obvious step in tearing shingles off a roof, but, occasionally, an eager homeowner may not plan ahead and get him/herself into an awkward situation. The obvious step is this: Make sure you have the materials and labor for your new roof all delivered, arranged and ready to install before you start ripping off your old roof.
Whether you intend to install the shingles yourself, or have contracted with a roofer, you don’t want your roof deck left exposed after the tear-off; so, plan ahead for the new roof to go on immediately. This may take a bit of fine-tuning to work around unfavorable weather forecasts and possible delays in the tear-off process.
3. Step Three: Plan for debris and removal of the old shingles by positioning your trash can nearby. You will also need to cover the ground beneath the eaves with tarps to catch stray shingles.
Just as the disclaimer says at the beginning of this article, use caution when working on sloped roofs. If you have any concerns about working on a roof, hire a trained professional who knows and follows all the required safety regulations.
One of the key safety practices in tearing shingles off a roof is avoiding all the debris that will be generated. All that scrap ends up making the roof surface even more difficult to move across. And the old shingles may not lift off without a fight; so, be careful when prying and lifting that the shingles don’t suddenly release, which can send you flying.
To help keep the roof site as safe as practical, position your trash bin in a readily accessible location, so the old shingles can just “slide” into the bin. Contact your local waste management company to book your trash bin ahead of time.
When you rip the old shingles off your roof, they are not likely to come off like a clean and neat old carpet, but in various sized “patches.” There will be bits of broken shingles everywhere; and try as you might to get every bit into that trash bin, some scraps are likely to slip and slide off in different directions. And if it’s a wee bit windy, those bits can fly further.
So, as a precaution, it’s a good idea to cover the ground around the house beneath the eaves with tarps or sheets of plywood. This will help protect scuff marks and prevent damage to your home’s walls and to your gardens and landscaping, and will make cleanup go much faster.
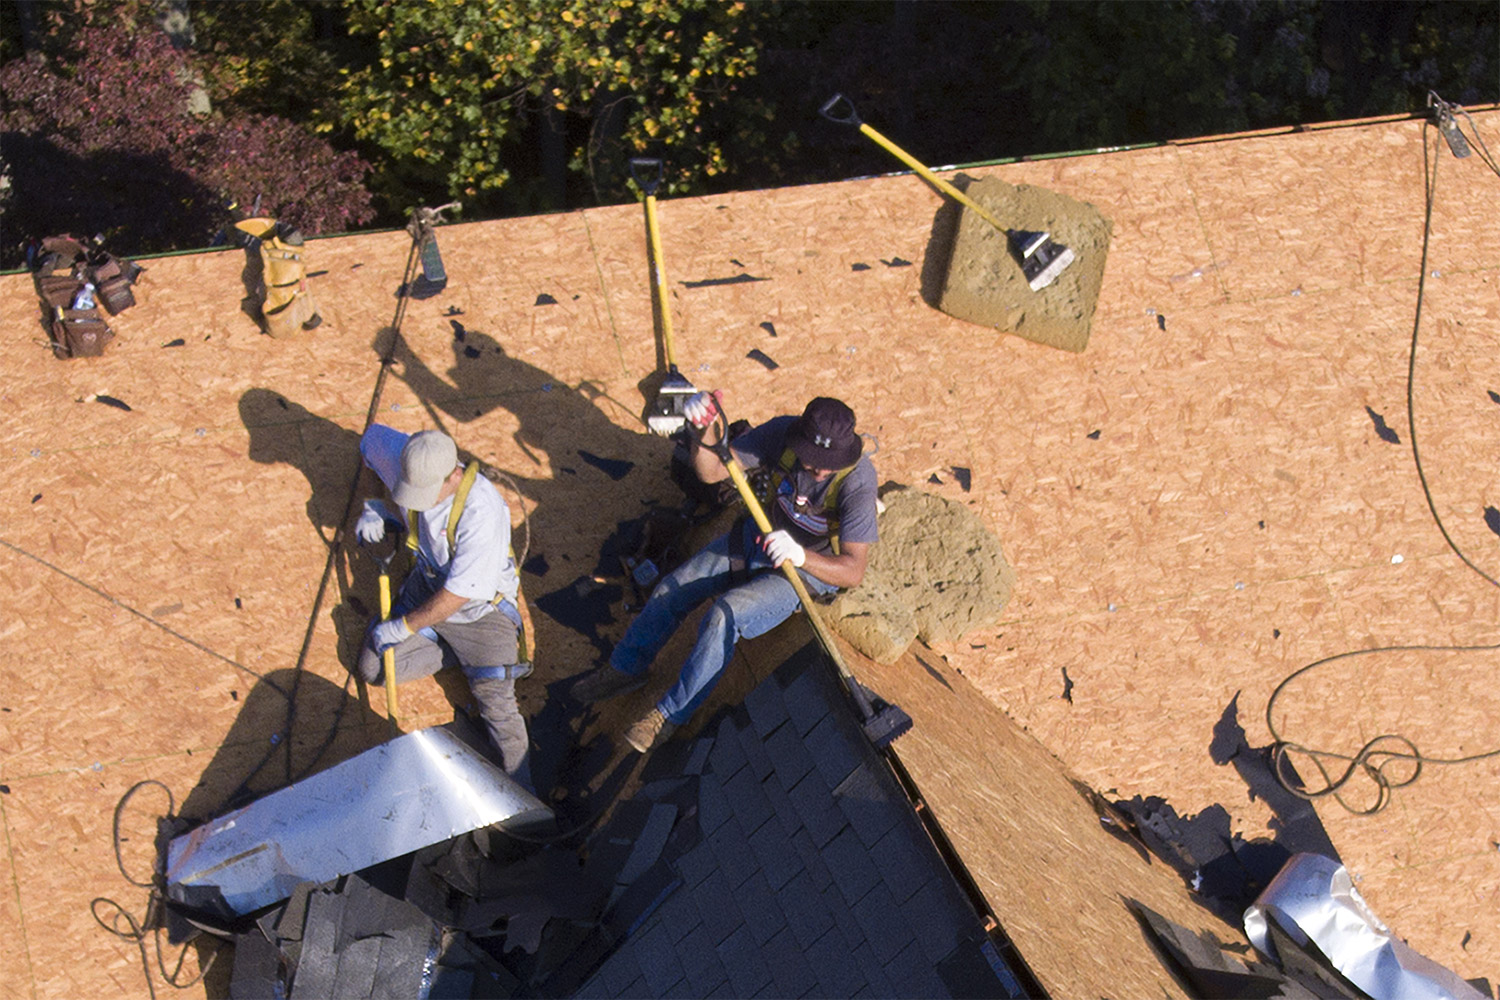
4. Step Four: Gather your tools. A square-edged shovel may work, but a modified shovel-type tool has been designed specifically to pry up old shingles.
If you want to remove old asphalt shingles yourself, you can try using a standard square-edged shovel to tear them off; but the best device is a modified shovel-type tool, specifically designed for this purpose. It has a serrated front edge to grab under the nails, and a raised “foot” on the back to add leverage to make it easier to tear off roof shingles. That’s the key tool you’re going to need, and you likely don’t have one in your shed, all the more reason to hire a professional.
Besides the roof-stripping shovel tool, you’ll need things like a broom, some good work gloves, safety googles, a ladder and a smaller pry bar or hammer for those stubborn nails and flashing bits. You’ll also need some tarps and/or sheets of plywood. Oh, and you should call your friends, all of them; they’ll come in handy when you realize this involves a lot of effort.
5. Step Five: Begin prying off the shingles on the opposite edge of the roof from your garbage bin. Drive your shovel under the lower shingle edge and use leverage to pry it up.
So, there you are, safely standing on your roof, holding your shiny new roof stripping shovel tool in your neatly gloved hands. Now, where does one actually start? While each roof is different and may present its own unique geometries and logistic challenges, as a rule, it’s best to start furthest away from the trash bin. That should make it a bit safer and cleaner to travel across the roof as you take your garbage to the bin.
It’s best to remove the ridge caps first by themselves, and then start on the shingles in the adjacent field of the roof. Drive the shovel up under the lower shingle edge, a few shingle courses below the top of the roof. Lift up, and voila, you should have a few loosened shingles. Repeat until all the shingles are detached from the deck.
6. Step Six: Follow safety precautions and do not carry too many shingles at once. Take care not to box yourself in as you move across the roof.
As you continue to clear the roof, you’ll notice that it gets very messy with loose bits of shingles and many stubborn nails still in the deck. Each of those elements is a trip hazard; so, you should deal with them every now and then to keep your path safe and clear. And don’t try to carry too many shingles per trip to the bin. It’s safer to make a few more trips with more manageable, lighter handfuls than to try and carry too much weight. Remember, shingles are heavy — a patch of even five or six old shingles could weigh 20 – 25 pounds.
7. Step Seven: If you plan on stripping off the flashing as well, do so while you move across the roof. If your flashing is in good condition, this may not be necessary.
After much effort of prying and lifting and pulling, eventually, all the shingles will be off your old roof. As you progress, you’ll also have to decide how to deal with the other roof elements, such as the vents and flashing. Most often on a tear-off, it’s simply easier to also strip off the flashings as well, especially if you’re not a professional, as they’ll be more likely to be damaged. If your flashings are in good condition, and you want to try to reuse them, pry them up with a smaller pry bar or hammer to minimize damage.
8. Step Eight: If you find ice and water protector, you will not be able to get it off. Decide if you want to remove it by replacing the roof deck beneath it or if you’d rather apply a new layer of ice and water protector over it.
In the old days, roof tear-offs were pretty straightforward — shingles, saturated felt and then the flashings. However, self-adhesive ice and water protectors were introduced to the roofing industry, particularly in cold-climate regions, about 30 years ago. These membranes adhere to the roof deck and are most often used in the eave area, covering the lower three to six feet of deck. The challenge is that they usually do a good job of adhering to the deck, especially after many years of summer heat, which works to fuse the membrane to the oriented strand board (OSB) or plywood substrate. These membranes cannot be lifted with that shingle-stripping shovel.
You’ll be faced with two options — either cut and replace the deck in the affected area or leave the membrane there and roof over it. If you choose the second option, you’ll need new ice and water protector as the old membrane won’t have the same watershedding integrity once you’ve removed all the shingle nails. Here’s a good tip: To reduce the appearance of a “ridge” from what will end up being two layers of ice and water protector, install the new membrane slightly higher than the old one, so that the upper edges of the old and new membranes don’t align. This “feathered edge” should be much less visible once the new shingles are installed.
9. Step Nine: Clean up your property at ground level using a magnetic roller/sweeper to find loose nails.
By following all the steps above, you should have your roof deck clean and clear, and ready for a new IKO shingle installation. Don’t forget to clean up at ground level, using a magnetic roller/sweeper to pick up as many of the loose nails as possible. You don’t want your lawn mower to find them next time you cut the grass, and you certainly don’t want to find them with your bare feet on a nice sunny, summer day—maybe while you’re in your front yard showing off your new roof to your neighbors.
A reputable, qualified roofing professional can help you with the shingle removal process as well as re-roofing. To find such a professional roofing contractor near you, use our contractor search tool.
Once upon a time, traditional strip or 3-tab shingle dimensions, as well as asphalt shingle dimensions, measured 12 inches wide by 36 inches long. These are still considered standard asphalt shingle dimensions.
The dimensions of an architectural shingle vs. a 3 tab shingle
IKO was among the first roofing material manufacturers to introduce the “metric-size” roofing shingle, defined as being 13-1/4 inches long by 39-3/8 inches wide. Admittedly, it’s rather confusing to call a shingle “metric” and then proceed to define it in Imperial measure; however, 39-3/8 inches is the equivalent of one meter.
This increase in size provided greater coverage and exposure. It’s estimated that the larger size allowed installers to lay a roof up to 10 percent faster than with the smaller standard-sized shingle, providing a considerable time and labor-saving advantage.
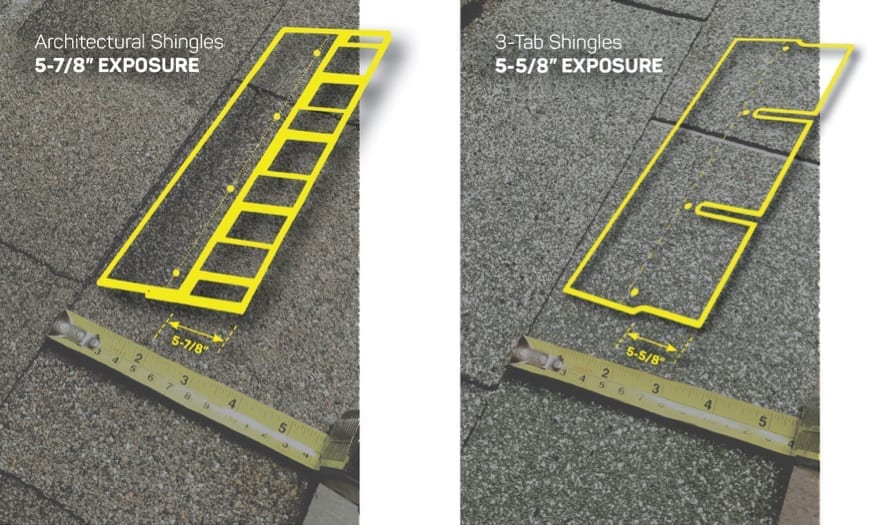
3 Tab Shingle Exposure
Architectural & Performance Shingle Exposure
Below is a handy chart to check IKO shingle dimensions at a glance:
IKO SHINGLE DIMENSIONS & EXPOSURE*
SHINGLE
SIZE
EXPOSURE
ArmourshakeTM
Designer
37-3/8″ x 18-1/2″
(950 mm x 470 mm)
5-1/2″
(140 mm)
Crowne SlateTM
Designer
39-1/2″ x 13-1/4″
(1,003 mm x 336 mm)
10″
(254 mm)
Royal EstateTM
Designer
40″ x 13-1/4″
(1,016 mm x 336 mm)
5-5/8″
(143 mm)
NordicTM
Performance
40-7/8″ x 13-3/4″
(1,038 mm x 349 mm)
5-7/8″
(149 mm)
Dynasty®
Performance
40-7/8″ x 13-3/4″
(1,038 mm x 349 mm)
5-7/8″
(149 mm)
Cambridge®
Architectural
40-7/8″ x 13-3/4″
(1,038 mm x 349 mm)
5-7/8″
(149 mm)
Cambridge Cool ColorsTM
Architectural
40-7/8″ x 13-3/4″
(1,038 mm x 349 mm)
5-7/8″
(149 mm)
MarathonTM PLUS AR
Traditional
39-3/8″ x 13-1/4″
(1,000 mm x 336 mm)
5-5/8″
(143 mm)
*All values shown are nominal.
How IKO Shingle Dimensions Vary by Type
Today, the dimensions of architectural shingles may vary from one manufacturer to another for several reasons, such as the physical limitations of the laminators, the dimensions of the fiberglass mat used (especially if the manufacturer makes its own as IKO does), the profile, cut and shape of the individual shingles or simply to create a point of competitive differentiation.
IKO offers four different categories of quality asphalt shingles: Performance, Designer, Architectural and Traditional (3-tab) Collections. The size and exposure of the shingles within each Collection vary, as shown in the chart above.
For example, IKO MarathonTM Plus AR belongs to the Traditional Collection of 3-tab shingles and possess those standard metric shingles dimensions.
We hope you’ve found these explanations and this comparison chart useful. For more information, please read this article on shingle exposure, ask your local IKO sales rep or find a reputable roofing professional close to your home.
The Correct Roof Shingle Exposure for 3-Tab and Laminate Shingles
A shingle’s exposure is the portion of the shingle left uncovered by the one above it. Proper shingle exposure is achieved by carefully layering the shingles as you work up the roof plane. Shingles with the right exposure will create the intended look and, assuming all else is installed properly, will provide optimal protection to the roof.
If the shingles are layered too far apart, the shingle exposure will be too wide, potentially exposing areas of the shingles to the elements that are not designed for the task. If shingles are spaced too closely together, they may not look as intended, especially if they have shadow lines, not to mention being a waste of material.
In either case, too close or too far, improper exposure makes it difficult, if not impossible, to properly position the nails and the self-sealing adhesive to achieve the best wind resistance. Many shingle manufacturers’ limited warranties are void if their shingles are not installed in accordance with the application instructions.
Though some roofing contractors assume all asphalt shingles and architectural shingles have the same exposure, they actually vary widely. In the past, a 5-inch exposure was most common, but things have changed. The proper shingle exposure can depend on the size of the shingle, its material and the desired look of the roof.
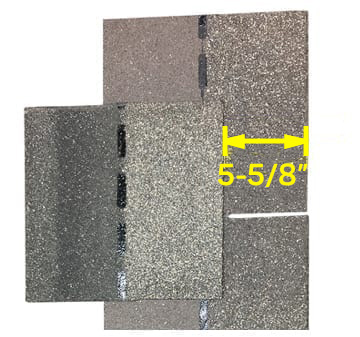
3-Tab Shingle Exposure
In the past, most 3-tab shingles were “Imperial”-sized at 12 inches wide and 36 inches long with an exposure of 5 inches. Now, most 3-tab shingles, typically referred to as “metric” shingles, are larger. Metric shingle exposure is proportional to their larger size, commonly 5 5/8 inches. For example, IKO Marathon™ Plus AR has a 5 5/8-inch exposure. However, you should consult with the manufacturer to confirm shingle exposure.
Laminate Shingle Exposure
Laminated or architectural shingles have a wider variety of exposures. The maximum exposure for laminated shingles is 10 inches, but it all depends on which specific shingle you use. Other laminated shingles may have exposures as small as 5 inches. Overall, the roofing industry is changing to meet consumer demand for more elaborate shingles, which sometimes means creating unusual sizes.
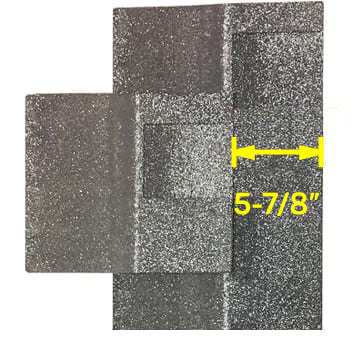
IKO’s architectural shingles are available in “advantage” size. These shingles are larger than most competitors’ products, larger even than most “metric” shingles, with a 5 7/8-inch exposure. Shingles available in advantage size include IKO Cambridge™, IKO Nordic™ and IKO Dynasty®.
Fewer courses, or rows, of advantage-sized shingles need to be used for the same roof area. For the roofing professional, this means easier and faster installation as well as savings on material costs.
A wider shingle exposure can also give an enhanced appearance without burdening the homeowner with the high cost this aesthetic usually demands. In fact, IKO’s Dynasty shingles have deep shadow bands, which add contrast and create a stunning appearance. If these shingles are installed with a smaller exposure, the shadow bands may not be visible, so correct installation is key.
IKO also offers one of the only laminated shingles with 10-inch exposure: Crowne Slate[TM]. This generous exposure helps Crowne Slate[TM] emulate the look of real slate tiles. Shingles with such wide exposures look especially stunning on large roofs and those with steep pitches. IKO’s buyer’s guide to residential roofing products can help you decide if these shingles are right for you.
Wind Resistance and Shingle Exposure
Using the correct exposure is critical to obtain the optimum wind resistance of your shingles. Most shingles are manufactured with a strip of adhesive that self-seals with sufficient heat from the sun. Using the correct exposure ensures that this sealant strip is properly positioned for maximum performance. The wind resistance rating of a shingle is dependent on proper nailing position and exposure, so any deviations from the specification may invalidate the rating.
You can also follow the High Wind Application procedure for most of IKO’s laminated shingles to provide further wind protection. High Wind Application typically calls for securing the shingle with six instead of four nails, may require manually sealing the shingles, and more. For the full details on High Wind Application refer to the application instructions for your specific shingles. It is worth noting that IKO’s Dynasty and Nordic shingle styles have the ArmourZone tape. High Wind Warranty coverage is offered on these styles using a four-nail application.
Shingle Exposure Concerns When
Replacing a Roof
When you are replacing the shingles on an existing roof, shingle exposure is a key consideration. Because the old shingles may not have the same exposure as the new shingles, it is not good practice to simply install the new shingles over the older shingles.
When any shingle of a different exposure is installed above another, even if they are both 3-tab asphalt shingles or both architectural asphalt shingles, there may be issues. The bottom shingles may create an uneven surface for the top shingles, which may then deform, which can affect their ability to seal properly.
If the existing roof’s shingle exposure matches the new shingles, the new shingles are sometimes “nested” onto the roof. Nesting is a technique where a roofing professional applies the top edge of the new shingle at the bottom edge of the old shingle. This will only work if the old and new shingles have the same exposure.
Even when the new shingles have the same exposure as the old, it is good practice to remove the old shingles before beginning installation. Then, your new shingles will be applied to a smooth, even surface, which gives them the best chance to perform as designed. At any rate, the International Building Code limits the maximum number of shingle layers to two. Please check manufacturers’ installation instructions and limited warranty requirements to ensure that installing old shingles over new shingles are in accordance therewith.
Proper shingle exposure is essential to achieving the best roof performance. To learn more about a specific shingle’s exposure, refer to the product’s installation instructions or contact an IKO representative. To find an experienced roofing contractor who can help you find the best shingle for your roof, please visit our Contractor Locator to find a roofer local to your area.
Proper roof ventilation is critical to keep your roof and home healthy. While all homes should have soffit vents on the bottom of the roof, they also need to have another kind of vent near the ridge. Most homeowners typically choose between ridge vents and box vents. But which is better for your home? It depends on a few factors, including climate and roof slope. Let us walk you through what you and your roofer should consider when deciding between these two kinds of roofing vents.
Understanding how roof ventilation is supposed to work and why it is important will help you understand these two types of vents better. Essentially, roof ventilation is meant to remove excess moisture and heat from your attic and roof so that neither will negatively impact the home. Breathing, cooking, showering, washing dishes and sweating all release moisture that rises and ends up in the attic.
If this moisture is not properly vented, then it will collect on the roofing materials, roof truss, attic insulation and potentially even structural wood of the home. This moisture may cause significant water damage and encourage the growth of mold. It may also negatively impact the life span of a roof, which is why most limited warranties from roofing manufacturers will not cover products installed on roofs that don’t have proper ventilation.
It is also important for your roof ventilation to release captured heat. This small amount of heat release shouldn’t affect the energy efficiency of your home too much. Instead, it should just be enough to keep your roof at the proper temperature. Ventilation, along with ice and water protector, is important to prevent ice dams.
Further, it is important to note that roof ventilation should refresh the air in the whole attic space. At the bottom of the roof, roofers install soffit vents. These act as air intakes, drawing new, fresh air into the attic space. The air moves up, and the air that was in the attic space is pushed out through the exhaust vents near the ridge. The exhaust vents can be ridge vents, box vents, turbine vents, powered roof vents, solar attic fans and more. In order to promote proper airflow, the amount of intake and exhaust vents must be balanced. Either they must be equal, or there must be more intakes.
It is essential to install all roofing vents properly.
The Types of Ventilation
There are three general kinds of ventilation:
Natural: Simply providing vents in the right spot will often promote ventilation. Most roofs rely on natural ventilation, where the breeze outside draws air out of the exhaust vents, and this pulls fresh air in through the soffit vents.
Mechanical: Using a powered fan, we can ventilate more air. Bathrooms and workshops typically have mechanical ventilation. However, it is not typically recommended for roofs, as it may actually draw snow and rain into the attic, damaging it.
Mixed mode: In some situations, it may be necessary to combine both kinds of ventilation. It is best to avoid this on a roof, as it involves some degree of mechanical ventilation.
What Is a Ridge Vent?
A ridge vent is a long, continuous vent that runs beneath the ridge shingles along the peak or hip of the roof. Ridge vents are partly covered by the shingles and add height to them, which many people find to be an appealing look.
What Is a Box Vent?
A box vent is a static vent that protrudes up from the roof and is typically square-shaped like a box, though it may also be round. They are covered and have no moving parts. These vents may also be called louver vents. Roofers should install box vents right near the ridge or peak of the roof. They need to be integrated with the roof properly to prevent leaks and provide proper ventilation.
Advantages and Disadvantages of Ridge Vents
Ridge vents have many advantages, which may make them ideal for your roof. The advantages include:
Location: These vents are installed directly on the ridge, so they are well-positioned to provide complete roof ventilation, as this is where the hottest air will collect (as heat naturally rises.) It is not possible to accidentally install a ridge vent too low as it is with a box vent.
Length: Ridge vents run the entire length of the roof, and therefore each vent provides a lot of airflow.
Appearance: Ridge vents do not stick out from the surface of the roof or interfere with its silhouette. They do raise the ridge, but most consider this to be appealing.
Security: Animals cannot fit into the small grates of ridge vents, as the gaps are very small.
Installation: Ridge vents can be simpler for roofers to install than box vents. You do not need to cut holes in existing roof shingles or cut underlayment to fit around ridge vents.
Cathedral ceilings: If there is little room in the attic due to a cathedral ceiling, ridge vents are typically a good vent option. They will still function in these tight conditions so long as they have matching soffit vents below.
While ridge vents have many advantages, they are not always ideal. In cold climates, ridge vents can allow snow into the attic. They’re also more expensive than box vents and won’t work on all types of roofs.
Advantages and Disadvantages of Box Vents
Box vents also have many advantages, including:
Snow: Box vents have covered tops and have less surface area than ridge vents. This means box vents are less likely to allow snow and rain into the attic. They are also less likely to develop ice and less likely to be blocked by snow buildup.
Expense: Box vents are smaller and typically less expensive to purchase.
Low slope: These vents will perform better than ridge vents on low-slope roofs.
Roof shape: Box vents will work with all roof shapes. This includes pyramid roofs, which don’t have a ridge and therefore cannot have ridge vents.
Location: While not as perfectly placed as ridge vents, roofers can still install box vents near the peak of the roof.
Beauty: Box vents do protrude from the roof and can therefore interfere with its looks. However, most roofers install these vents on the backside of the home, so that they may not be seen if you’re looking at the home from the front.
Box vents are more common in cold climates because they have such strong advantages in snowy and icy conditions. On the other hand, box vents do not provide as much ventilation as ridge vents, and you typically need to install more of them to provide proper airflow. Box vents are also somewhat more challenging to integrate with the roof.
Why Not Use Both Kinds of Vents?
If both types of vents have so many advantages, why not install them both on your roof? Doing so is a mistake that actually undermines the quality of ventilation in your attic. When there are two kinds of exhaust vents installed on a roof, air skips over the intake vents. Instead, it tends to flow only from the box vent and out the ridge vent. This creates only a small pocket of ventilation at the very top of the roof and will fail to remove the required amount of moisture from the attic. This is also why your roofer should not combine a ridge or box vent with gable vents or any other kind of exhaust vent.
Choose Your Roof Vents Wisely
Proper roof ventilation is essential to protect your home from moisture damage and keep your roofing materials from premature failure. When you are making your choice, it may also benefit you to learn about other parts that make up a roof and how they work with the ventilation system.
Like all industries, the roofing industry is constantly evolving to create better products and services that meet our ever-changing needs. And we should know.
We’ve seen firsthand how much the roofing industry has changed. However, if you’re a homeowner getting your first new roof in 15 years (or ever!), you may feel out of the loop. You want what’s best for your home, which means making the right choice for your roof. However, as things change and new roofing products are introduced, the right choice can be hard to nail down.
To help guide you through the new and exciting world of roofing, we’re taking you through ways the roofing industry has changed and certain roofing trends that have emerged in recent years.
Performance Is In:
One of the most significant changes in the roofing industry has been the shift from your basic 3-tab to architectural and performance shingles. For a long time, 3-tab shingles dominated the market because they were, for all intents and purposes, all most homeowners needed. They were reasonably tough and durable, and met the standards of their day.
But standards have changed. Weather patterns have become increasingly unpredictable, bringing harsher storms and higher winds. To combat this, homeowners are looking for new roofing products that are stronger and capable of withstanding more inclement weather.
Nowadays, what’s in is wind resistance, sealant strength, ice and water protection, and heavy-duty products designed to go the distance and handle whatever Mother Nature decides to throw at them. Homeowners want tried, true and tested products, like our Dynasty Performance shingles, which are engineered to withstand harsh winds and have a Limited Wind Warranty of up to 130 mph (210 km/h).
Impact Resistance Is Coming in Strong
One performance feature that has been making serious headway in the roofing industry is impact resistance. Our Nordic Performance shingles are engineered with a special Polymer-Modified Asphalt, which acts like a shock absorber and have earned a Class 4 Impact Resistance Rating, the highest you can get. Interest in impact-resistance shingles is continuously growing due to their ability to better withstand the elements and help minimize damage which may result in leaks and costly repairs. The Class 4 impact resistance rating is not a guarantee of performance, and damage from hail is not covered under IKO’s limited warranty, but some insurance companies will offer a discount on home insurance premiums when roofing with shingles with a Class 4 Impact Resistance Rating, like our Nordic line.
Exploring Color:
There have been exciting advancements in the world of shingle color. Thanks to new roofing technology (and a little IKO innovation), shingles now come in various beautiful and vibrant HD color blends. This has allowed people to fully utilize their roofs to express their home’s unique style and personality.
Today’s homeowners are moving away from classic monochromatic colors in favor of something bolder and more exciting. While blacks, browns and greys remain popular colors, people have begun exploring different hues and shades, like our Summit Grey or Driftshake, to stand out and add a personal touch to their roof. Contrasting colors are also gaining popularity in the residential roofing industry. People looking to add depth and character to their homes often choose a shingle color that offsets the exterior color.
The biggest change in shingle color is the freedom homeowners now have to think outside the box and get a bit more creative with their roofing choices. This expansion of color has recontextualized the part your roof plays in the look and feel of your home, and homeowners are taking advantage. If you’d like to learn more about choosing a shingle color, check out our blog, “How to Pick Roof Shingle Colors,” or browse through IKO’s shingle color collection. Then, have some fun and experiment with new looks on our ROOFViewer color visualizer.
Cool Roofs:
More and more people are looking to make their homes more sustainable and energy-efficient, leading to the growth of cool roofs and colors. Cool roofs are roofing systems designed to absorb less solar energy, helping to reduce your home’s internal temperature and potentially reducing energy consumption. Cool roofs can come in many forms, but the ones sparking interest among homeowners are cool colors.
Cool colors, like our Cambridge Cool Color Plus series, are specially designed shingles that actively reflect the sun’s rays using infrared-reflective pigments. With our Cambridge Cool Colors, you can boost your roof’s reflectivity and transmit less heat into your home. Cool Colors are only available in select U.S. markets, specifically in the hotter climates where they are increasingly popular because they are less expensive and easier to maintain than solar or green roofs and aren’t limited to light colors.
While cool colors may be an intriguing option for the more environmentally conscious, where you live should factor heavily into your decision. Unless you live in an area with intense sun, you may not reap the full rewards and might be better off choosing a performance shingle in a lighter color.
Roofs Are Becoming More Intricate:
To understand, we first need to talk about roof pitch. Roof pitch is the slope of your roof. It’s calculated by measuring how many feet your roof rises vertically for every 12 feet it extends horizontally. For example, a roof with a 6/12 pitch will rise 6 feet up for every 12 feet across. With us so far?
In the residential roofing industry, roof pitches have changed over the years to match the popular styles of the era, being as high as 12/12 in the ‘60s to as low as 2/12 in the ‘70s and ‘80s. Today’s roofs are far more complex. New-build roofs are more geometric and less uniform, so we’re seeing more peaks, valleys, hips and ridges.
Impact of Steeper and Multiple Roof Pitches on Your Home
We’re also seeing steeper pitches and multiple pitches on the same roof. That means your roof’s central section (front and back) may have a 12/12 pitch, but the hips (the sides) may have a 6/12. This may even change again depending on the complexity of the design.
What does this mean for you? Well, first off, steep roofs display shingles differently, which affects how they look. You may see a shingle you like on one house only to realize it doesn’t look the same on yours after the job is done. Also, reroofing a home with multiple levels and angles takes more time, effort and material, which will increase costs.
The More You Know:
One of the biggest changes in the roofing industry has been your role in the process. Before, roofing was left to the roofers. A contractor would come, they’d install, and they’d go, with the homeowner rarely getting involved. That is no longer the case.
The internet has brought a world of information to our fingertips. Type “roofing” or “new roofing products” into Google, and you’re instantly connected to photos, articles, reviews and even DIY videos that can teach you everything you need to know. But, like all changes, there are some growing pains.
Information:
Let’s start with the good. Homeowners are more knowledgeable about the roofing industry than ever. They research products, read reviews, compare costs and have a better idea of what they want and what they don’t. This has encouraged them to get more involved in the process, which is good. Getting a new roof is a large investment and one that shouldn’t be taken lightly. Getting more involved in the process will ensure you get a high-quality roof you can trust and reveal choices you didn’t even know you had.
Our Roofing Industry Outlook:
The roofing world certainly has undergone some exciting new changes in recent years. But this is only the beginning. We at IKO are constantly innovating to provide better products and new roofing materials that will elevate the standard of roofing even further. So, it doesn’t matter what the weather tomorrow brings. To us, the future is looking bright.