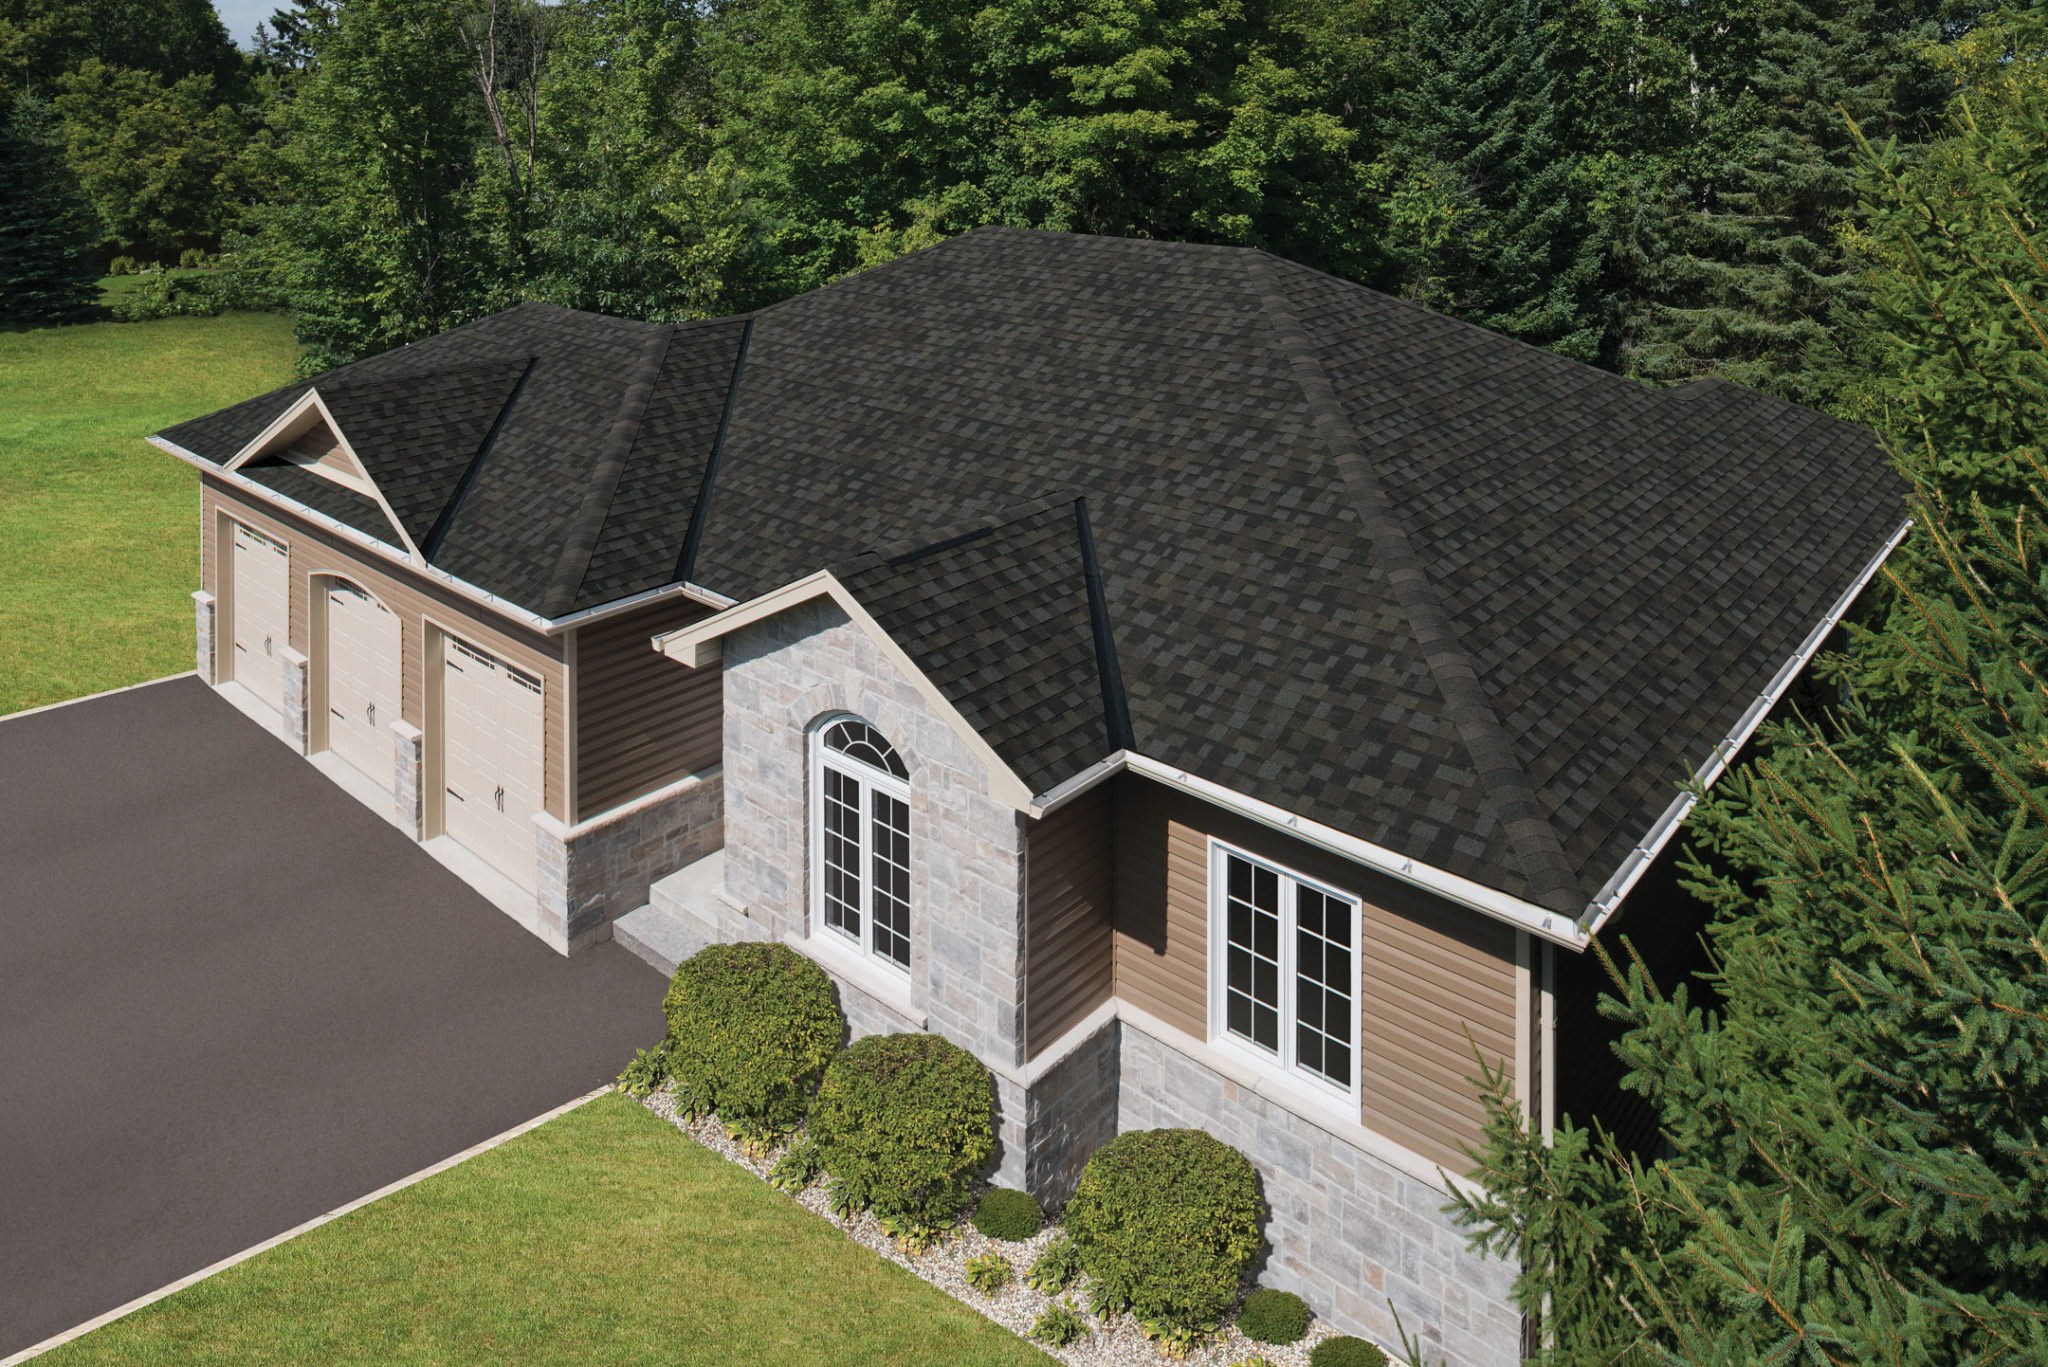
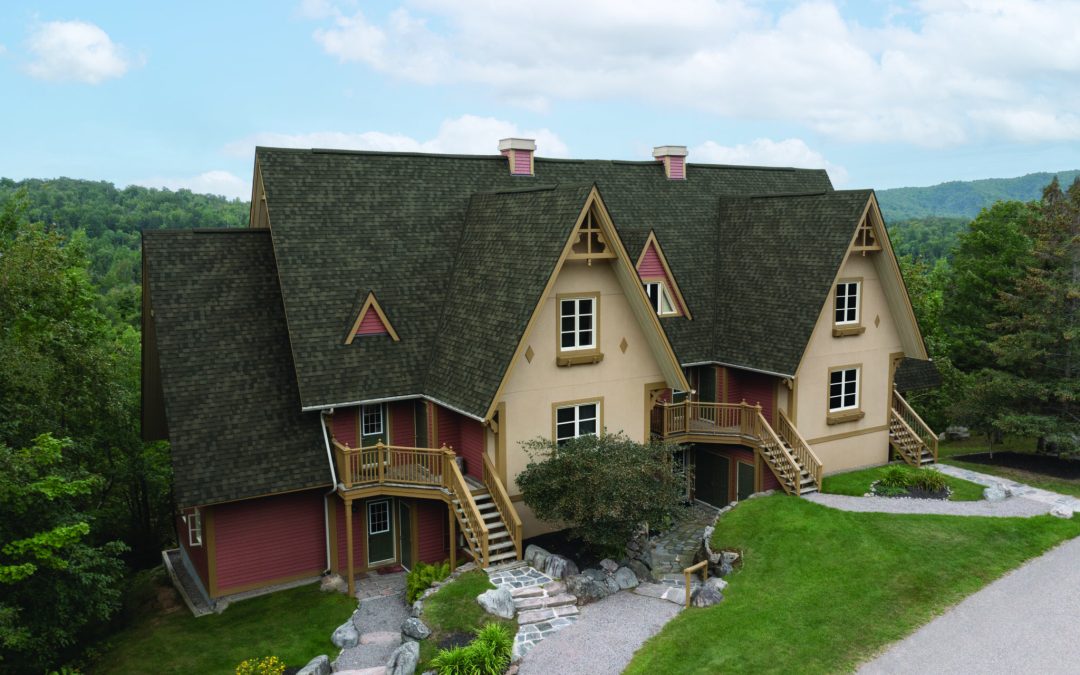
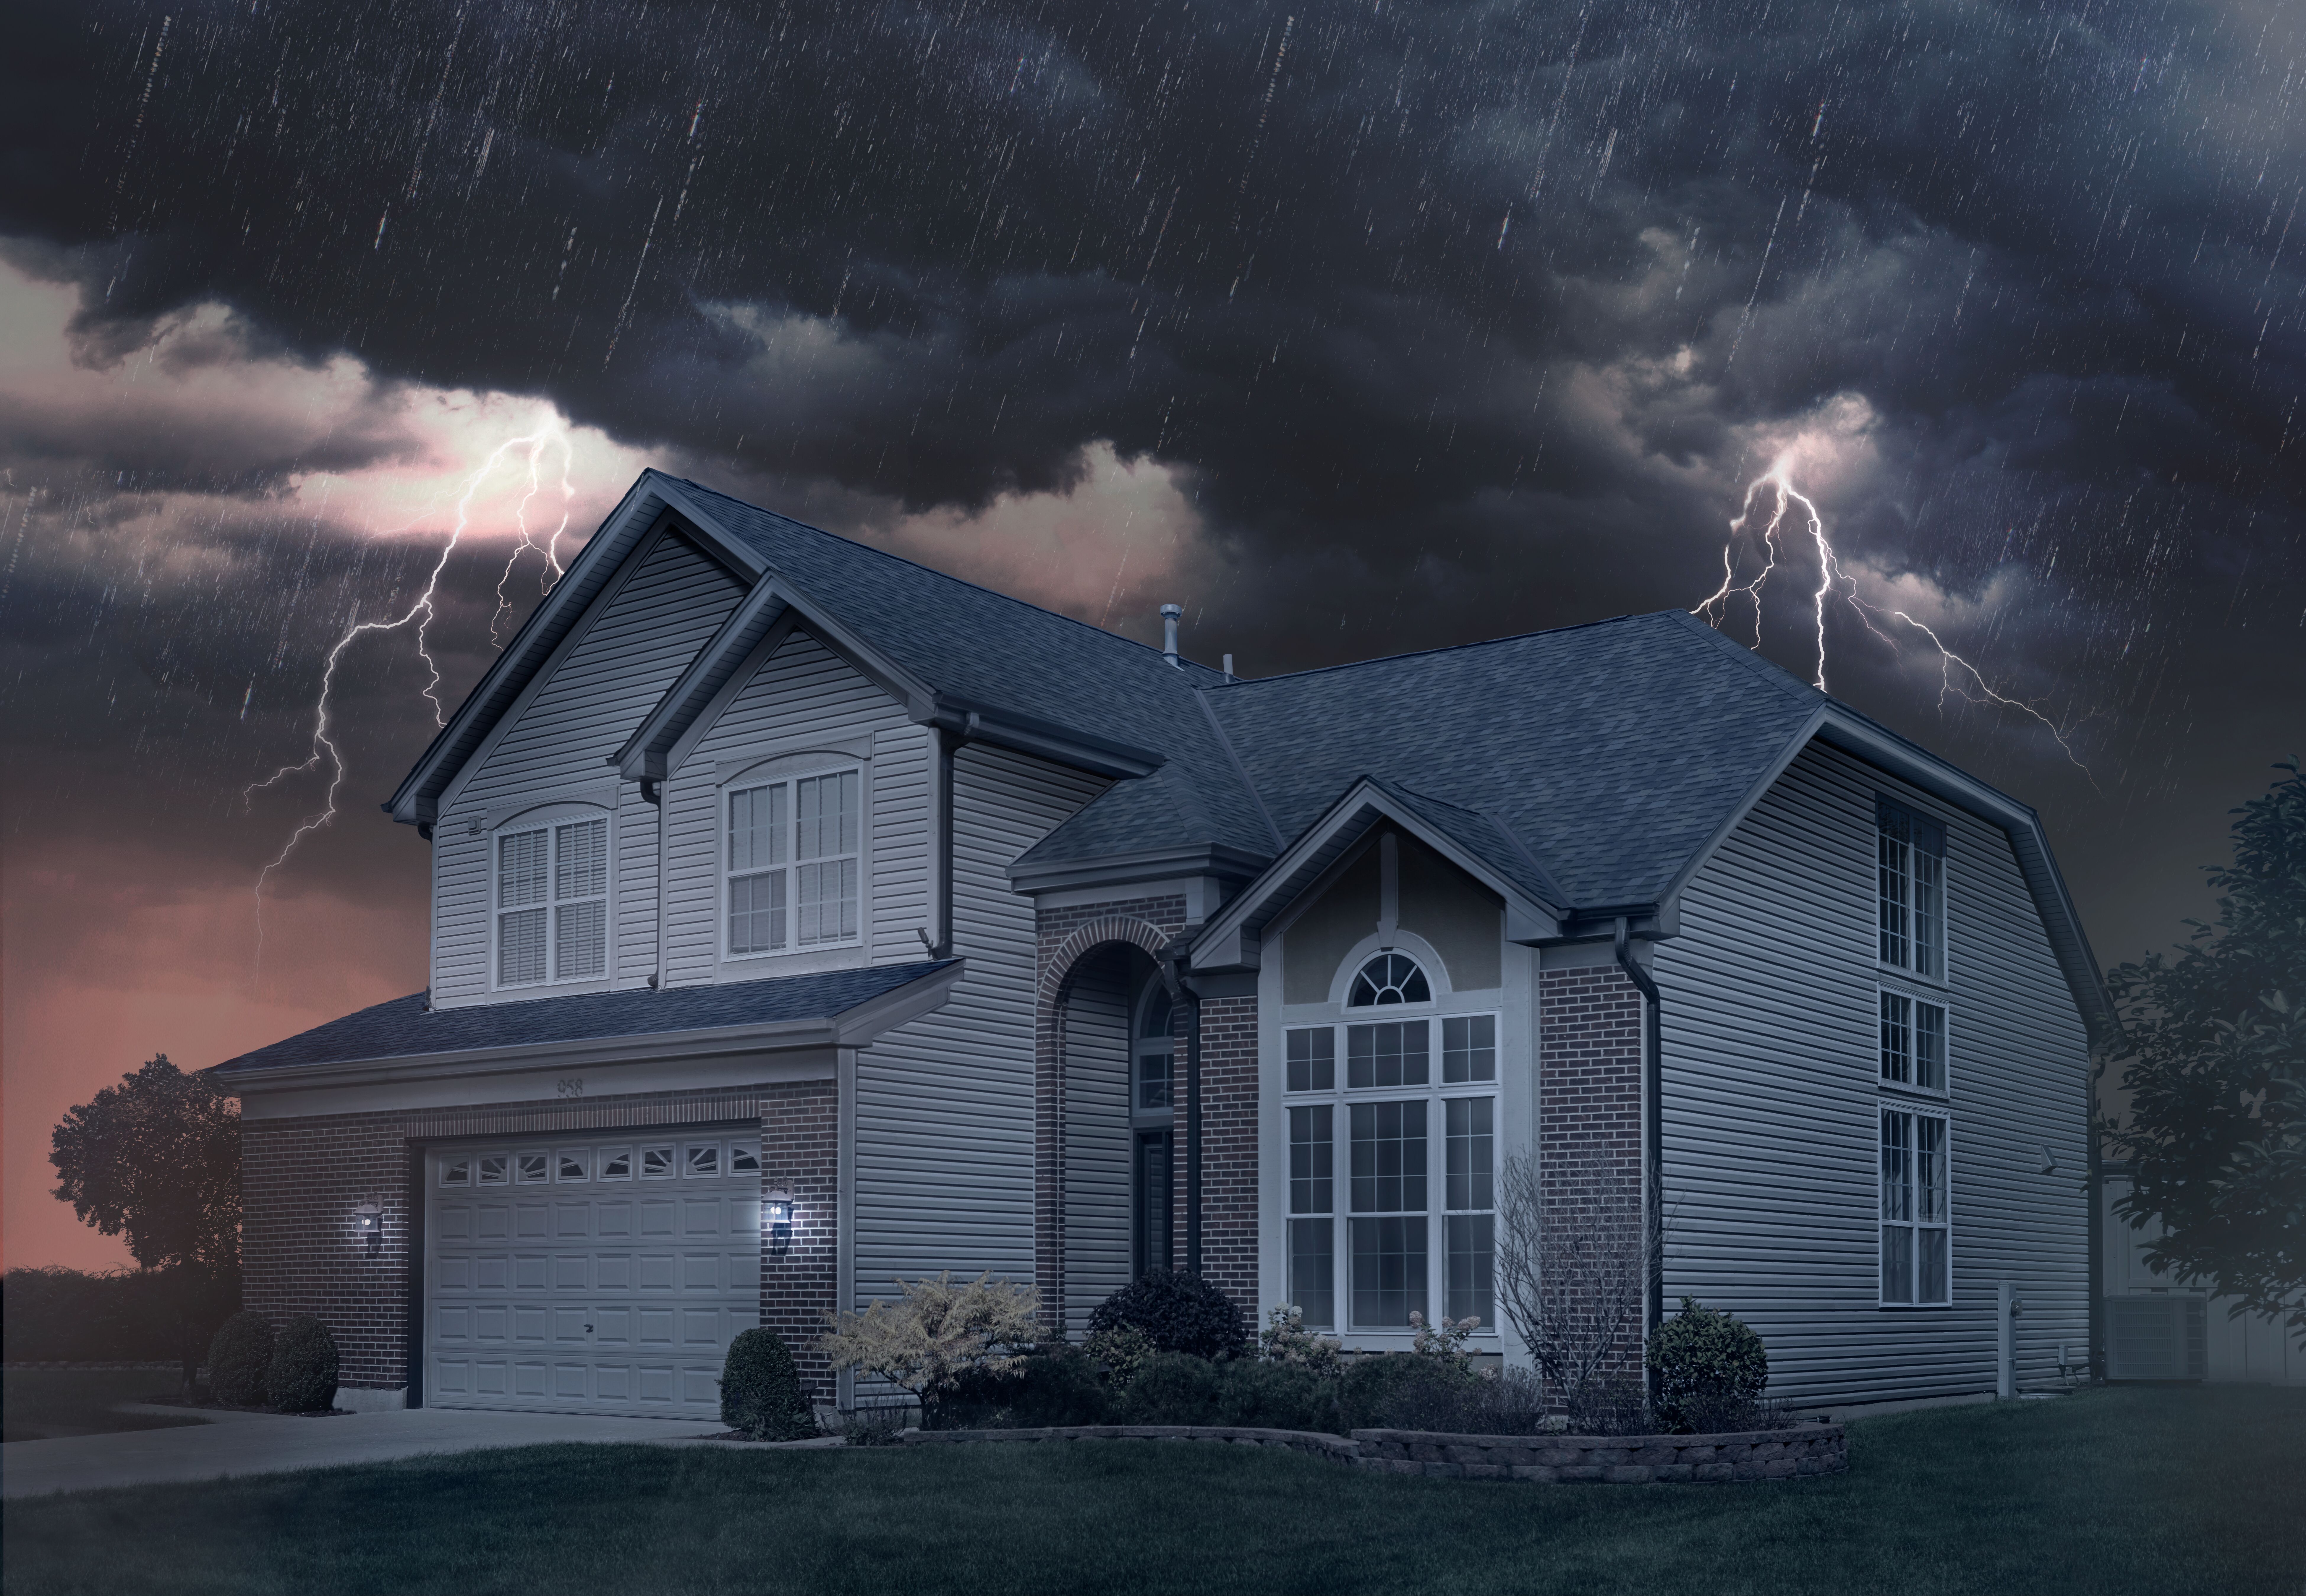
As a homeowner in the Dallas-Fort Worth (DFW) area, you understand the critical role your roof plays in protecting your family and your investment from the Texas elements. From scorching summer heat and intense thunderstorms to occasional hail, your roof endures a lot. Over time, wear and tear are inevitable, leading to the question every homeowner eventually faces: is it time for a complete roof replacement, or can roof repairs extend its lifespan? Making the right decision is crucial for your budget and the long-term integrity of your home. At Major League Roofing, we’re dedicated to providing honest assessments and expert solutions to help you navigate this important choice.
Assessing the Age of Your Roof:
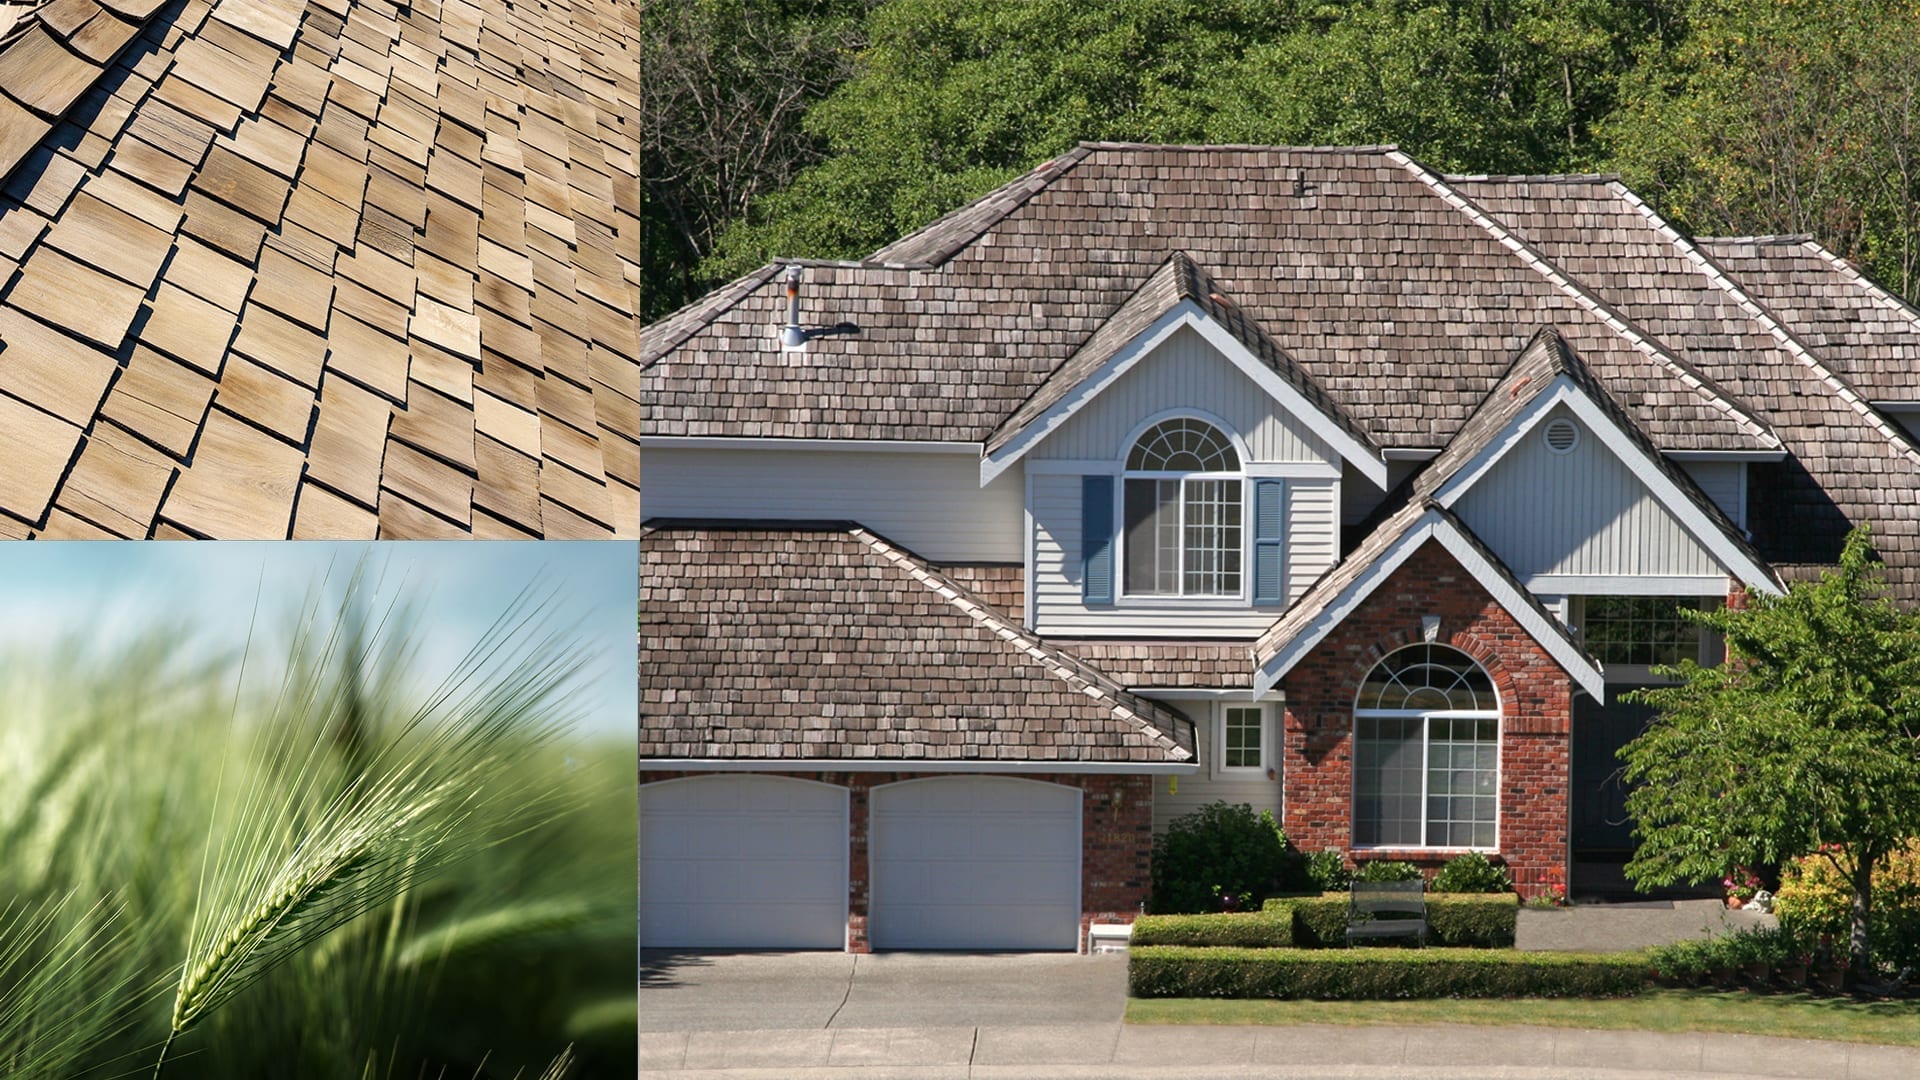
One of the primary factors in determining whether to repair or replace is the age of your existing roof. Most asphalt shingle roofs, the most common type in DFW, have a lifespan of 20-30 years, depending on the quality of materials, installation, and weather exposure. If your roof is approaching or has exceeded this timeframe, it’s likely nearing the end of its functional life. Even if isolated issues appear minor, the underlying materials may be deteriorating, making frequent roof repairs a temporary and potentially more costly solution in the long run. A roof nearing its expiration date is a strong indicator that a full roof replacement is the more prudent investment.
Evaluating the Extent of the Damage:
The nature and extent of the damage are also key considerations. Minor, isolated issues like a few cracked or missing shingles, a small leak around a flashing, or localized wind damage can often be effectively addressed with targeted roof repairs. Our experienced team at Major League Roofing can quickly assess these situations and provide efficient and reliable roof repair service to restore the integrity of your roof. However, if the damage is widespread, affecting a significant portion of the roof, or if there are signs of underlying structural issues, a full replacement is usually the more cost-effective and long-term solution. Multiple areas of damage often indicate a system-wide problem that patching won’t resolve.
Considering the Frequency of Repairs:
If you find yourself frequently calling for roof repairs, it’s a clear sign that your roof is struggling to withstand the elements. While occasional repairs are normal over a roof’s lifespan, constant issues point to a larger, systemic problem. Each repair comes with its own cost, and cumulatively, these expenses can easily surpass the cost of a complete roof replacement. Moreover, repeatedly patching an aging roof offers no guarantee against future leaks and further damage, potentially leading to more significant problems like mold growth and structural deterioration.
Long-Term Cost vs. Short-Term Fix:
While the upfront cost of a roof replacement is undoubtedly higher than individual roof repairs, it’s essential to consider the long-term financial implications. A new roof provides a fresh start with a manufacturer’s warranty, offering peace of mind and protection against future issues for decades. Conversely, continually investing in roof repairs on an aging roof is often a case of throwing good money after bad. A replacement can also increase your home’s value and improve its energy efficiency, potentially leading to savings on utility bills.
The Importance of Professional Inspection:
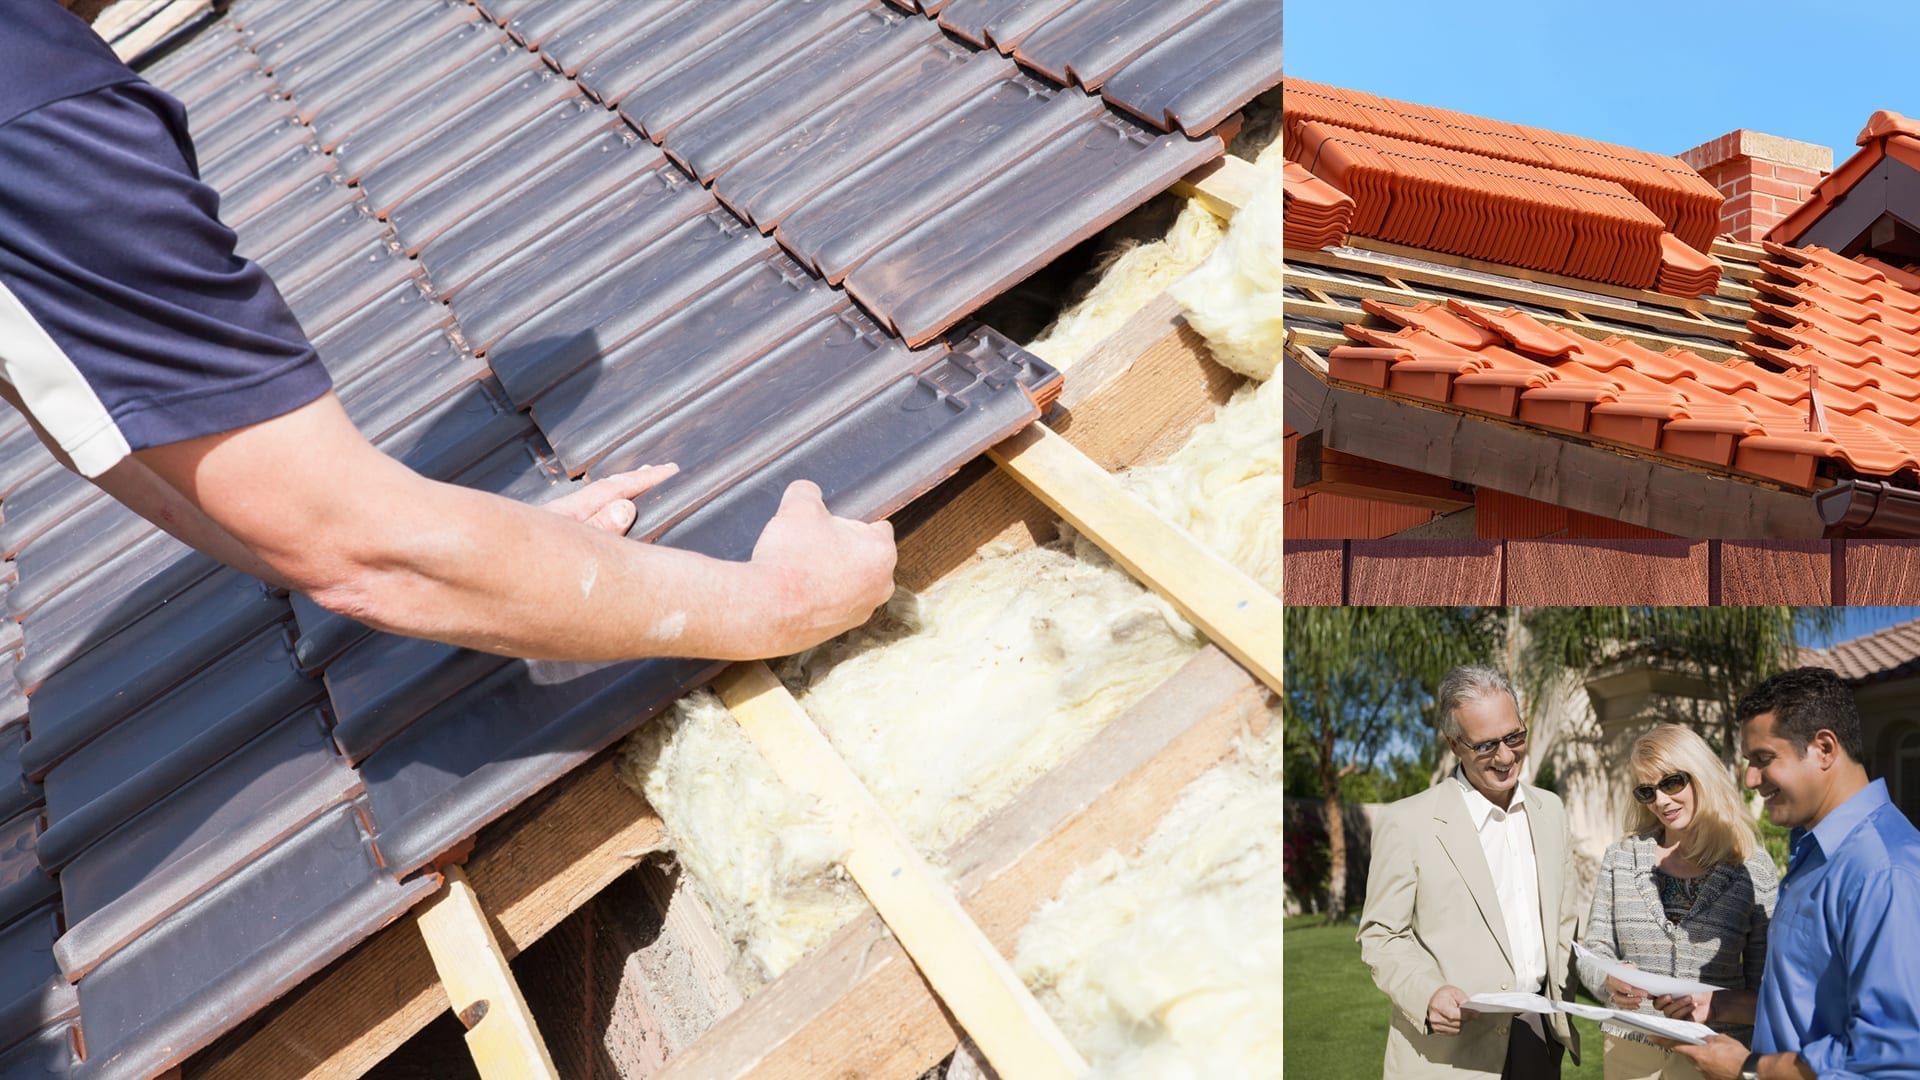
Ultimately, the best way to determine whether roof replacement or roof repairs is the right choice for your DFW home is to schedule a professional roof inspection. Experienced contractors like ours at Major League Roofing have the expertise to thoroughly assess the condition of your roof, identify all areas of damage (visible and hidden), and provide an honest and comprehensive evaluation. We’ll consider the age of your roof, the extent of the damage, the frequency of past repairs, and your long-term needs and budget to recommend the most appropriate and cost-effective solution. Our goal is to provide reliable roof repair service when feasible and recommend a full replacement when it’s truly the best investment for your home’s protection. Don’t wait until a minor issue becomes a major crisis – contact Major League Roofing today for a professional inspection and expert guidance.
Texas weather is as diverse as its landscape, ranging from scorching summers and intense thunderstorms to occasional hail and high winds. This unique climate can take a toll on your roof, leading to a variety of common roofing problems. Identifying these issues early and addressing them promptly is crucial for protecting your home and preventing costly repairs down the line. At Major League Roofing, we understand the specific challenges homeowners face in the Lone Star State. This blog will delve into some of the most frequent roofing problems in Texas that residents encounter and provide insights on how to fix them.
1. Hail Damage:
Texas is no stranger to hailstorms, and even small hailstones can cause significant damage to your roof. Hail impacts can crack or bruise shingles, dislodge granules, and weaken the roof’s protective layers. This damage might not be immediately apparent but can lead to leaks and premature roof failure.
How to Fix It: After a hailstorm, have your roof professionally inspected for hail damage. Depending on the severity, repairs might involve replacing damaged shingles or, in more extensive cases, a complete roof replacement. Prompt action is crucial to prevent water infiltration.
2. Wind Damage:
High winds, especially during thunderstorms and hurricane season along the coast, can wreak havoc on roofs. Wind can lift and tear off shingles, damage flashing around vents and chimneys, and even cause structural damage in extreme cases.
How to Fix It: Regular inspections can identify loose or missing shingles. Minor wind damage can often be repaired by replacing the affected shingles and securing flashing. Severe wind damage may necessitate a more extensive repair or a full roof replacement.
3. Extreme Heat:
The intense Texas sun can be relentless on roofing materials. Prolonged exposure to high temperatures can cause shingles to dry out, crack, become brittle, and lose their protective granules. This degradation accelerates the aging process of your roof.
How to Fix It: While you can’t change the weather, choosing heat-resistant roofing materials during installation or replacement can mitigate this issue. Proper attic ventilation is also crucial to reduce heat buildup. Regular inspections can identify signs of heat damage early.
4. Leaks:
Leaks are a common roofing problem in Texas, often stemming from the issues mentioned above (hail, wind, heat damage) or from deteriorated flashing, cracked pipes, or clogged gutters. Even small leaks can lead to significant water damage, mold growth, and structural issues if left unaddressed.
How to Fix It: Identifying the source of the leak is the first step. This may require a professional inspection. Repairs can range from patching a small hole or replacing damaged flashing to more extensive repairs depending on the severity and duration of the leak. Prompt repair is essential to prevent further damage.
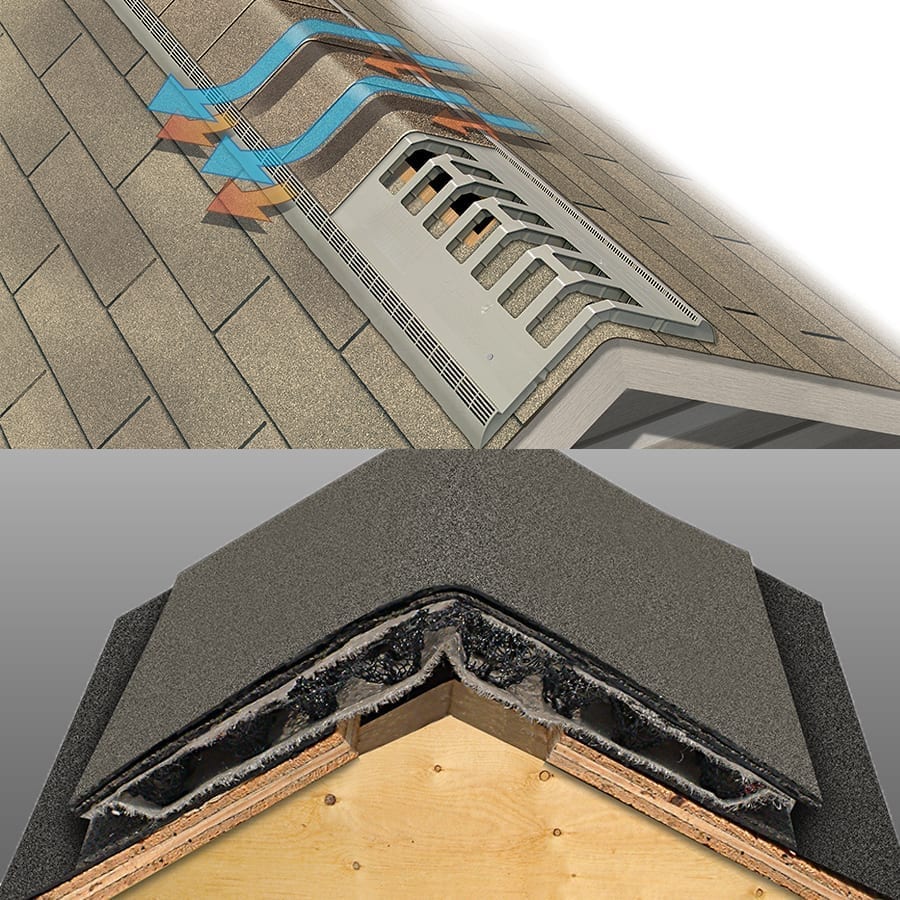
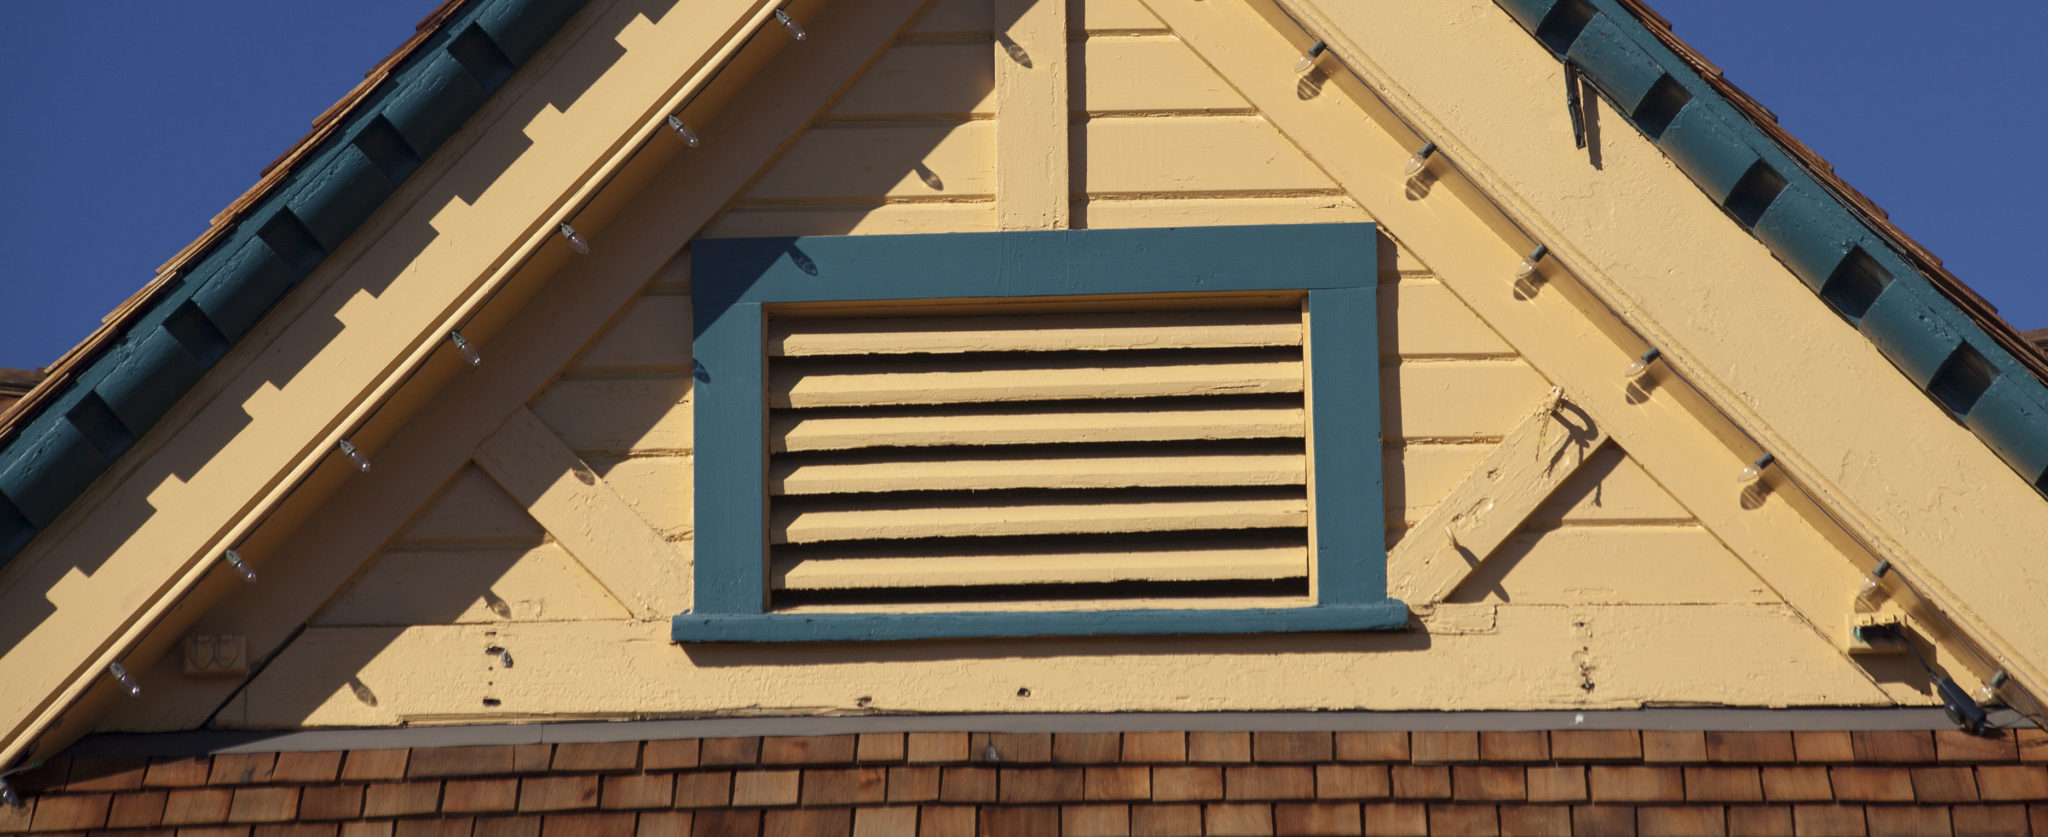
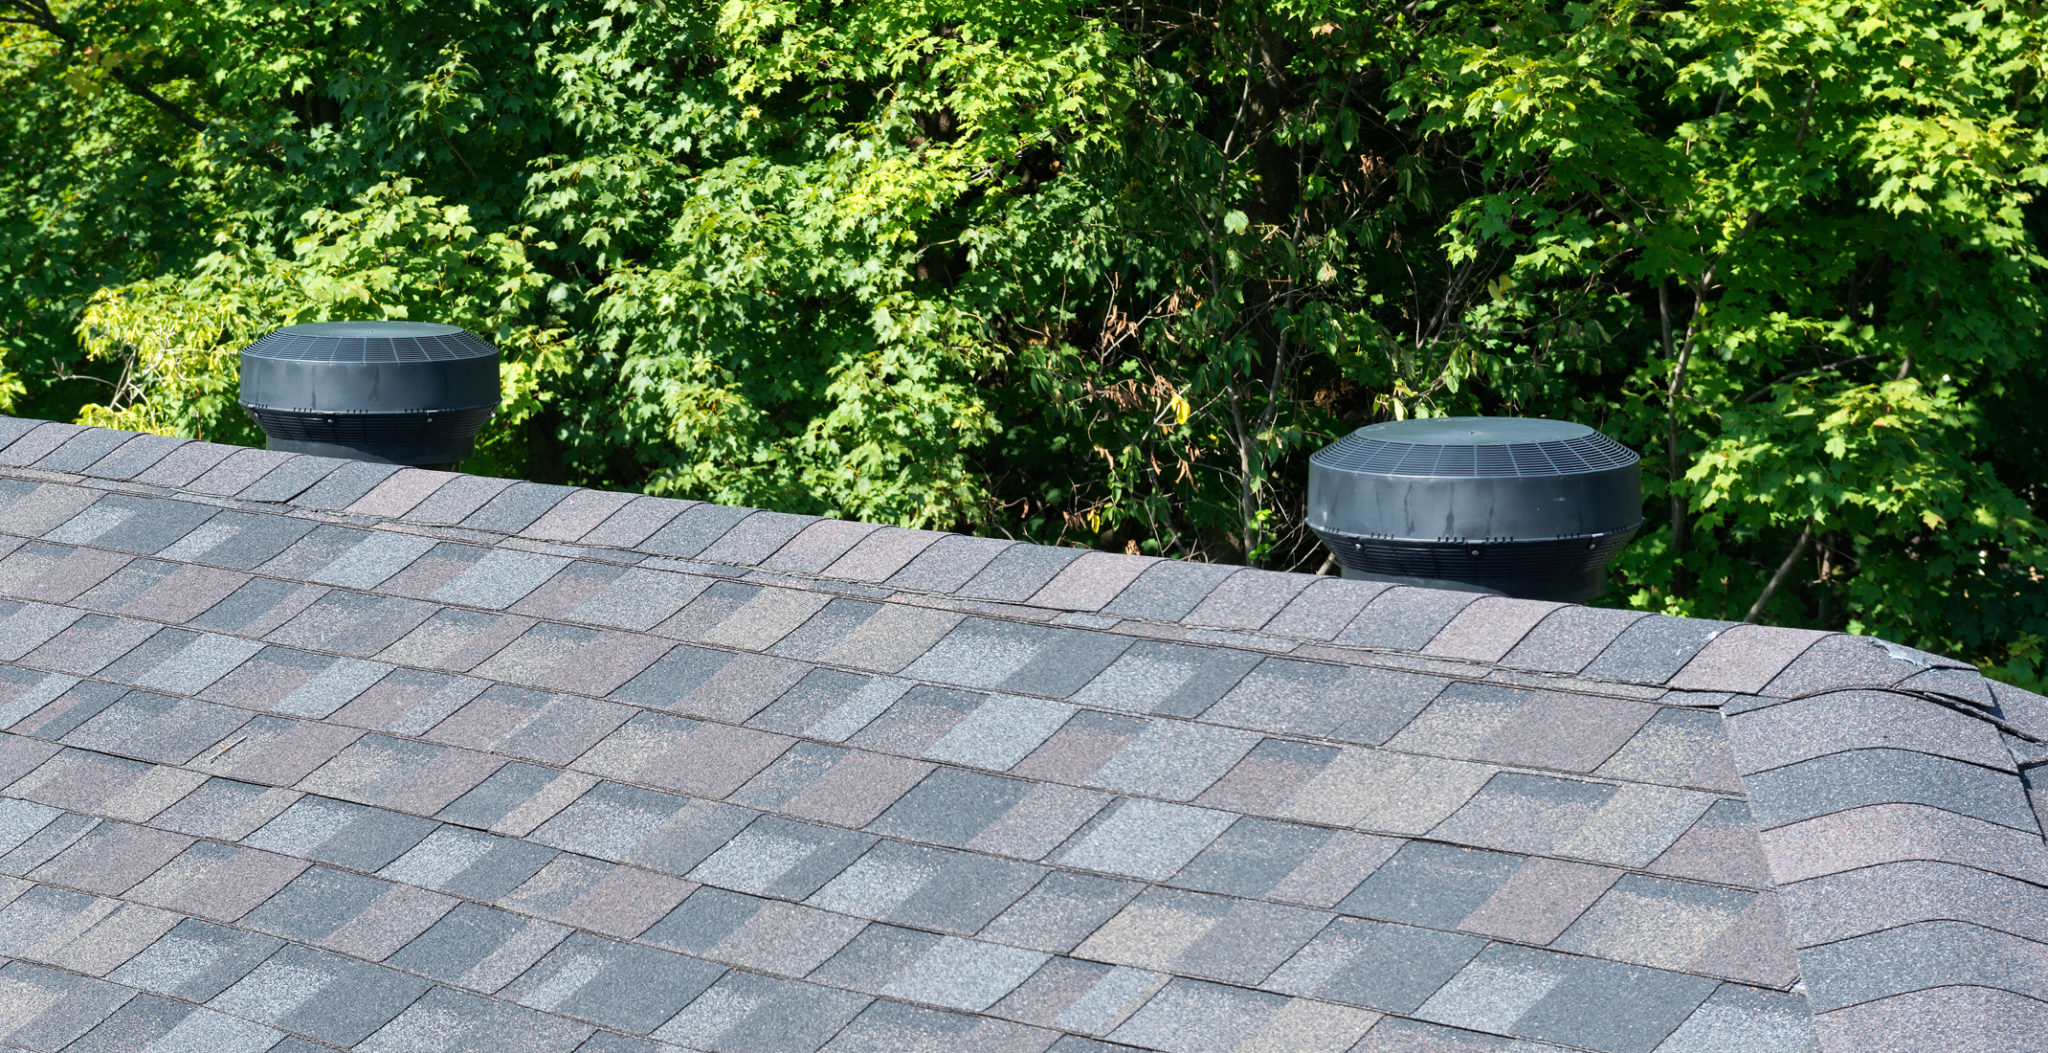
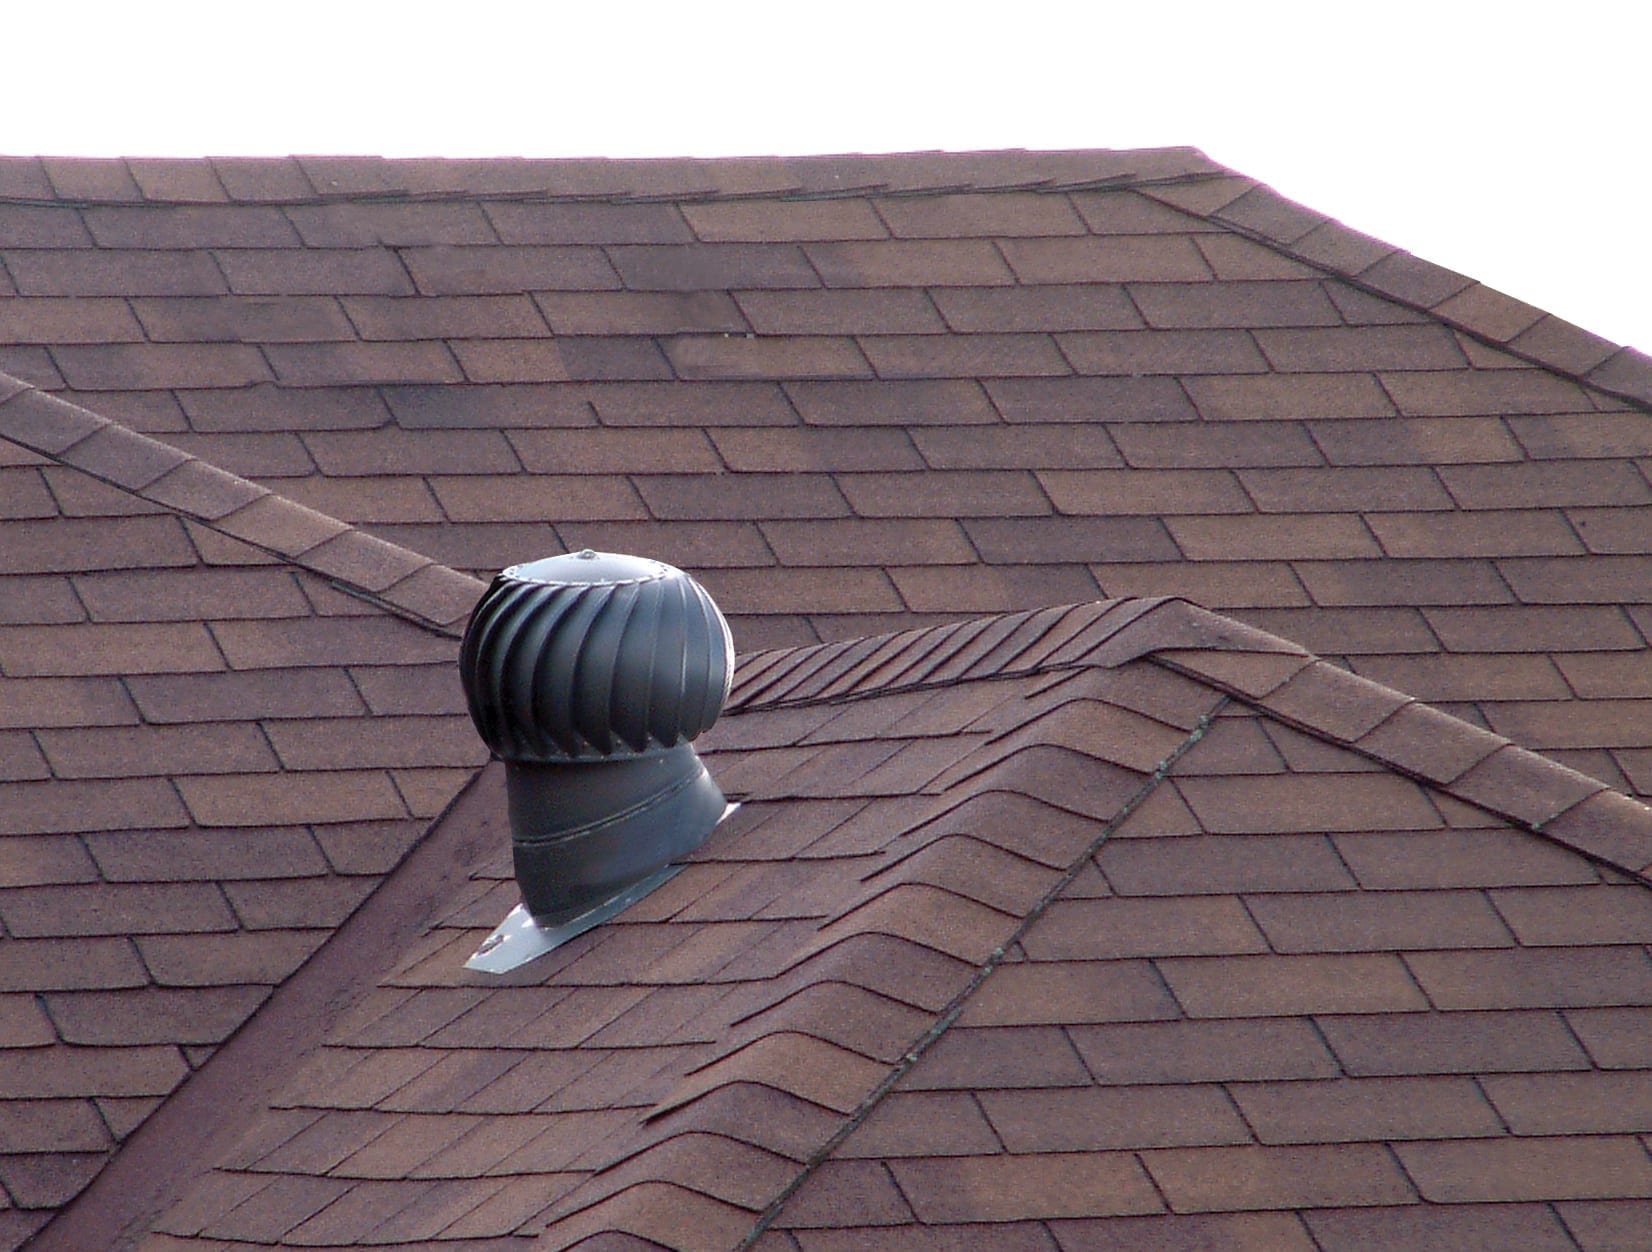
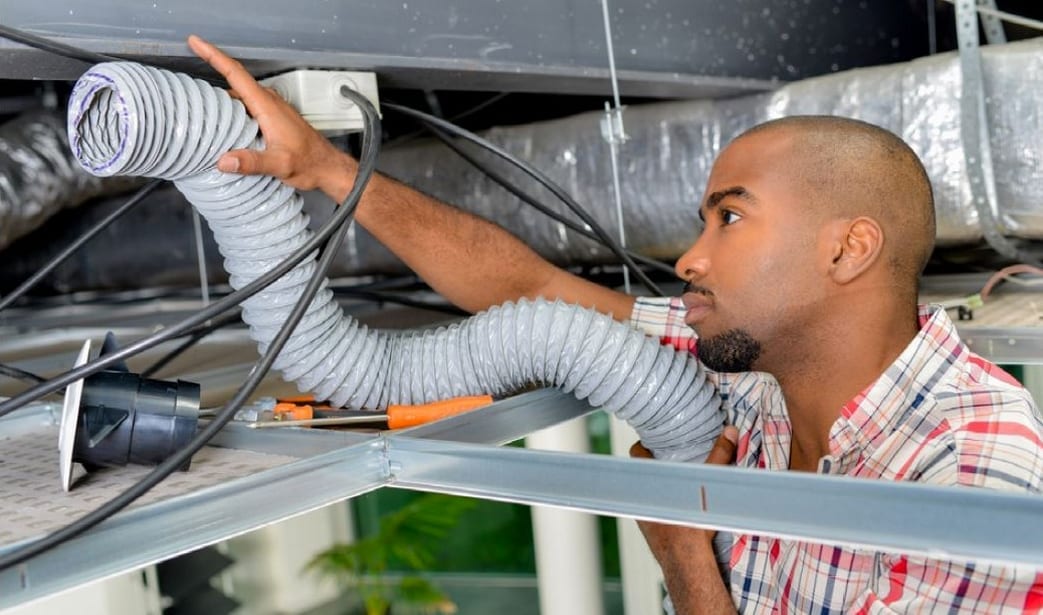
5. Poor Ventilation:
Inadequate attic ventilation is a significant roofing problem Texas homeowners often face. Without proper airflow, heat and moisture can become trapped in the attic, leading to increased temperatures, shingle damage, mold growth, and higher energy bills.
How to Fix It: Ensure your attic has adequate intake and exhaust vents. A professional roofer can assess your ventilation system and recommend solutions like adding ridge vents, soffit vents, or turbine vents to improve airflow.
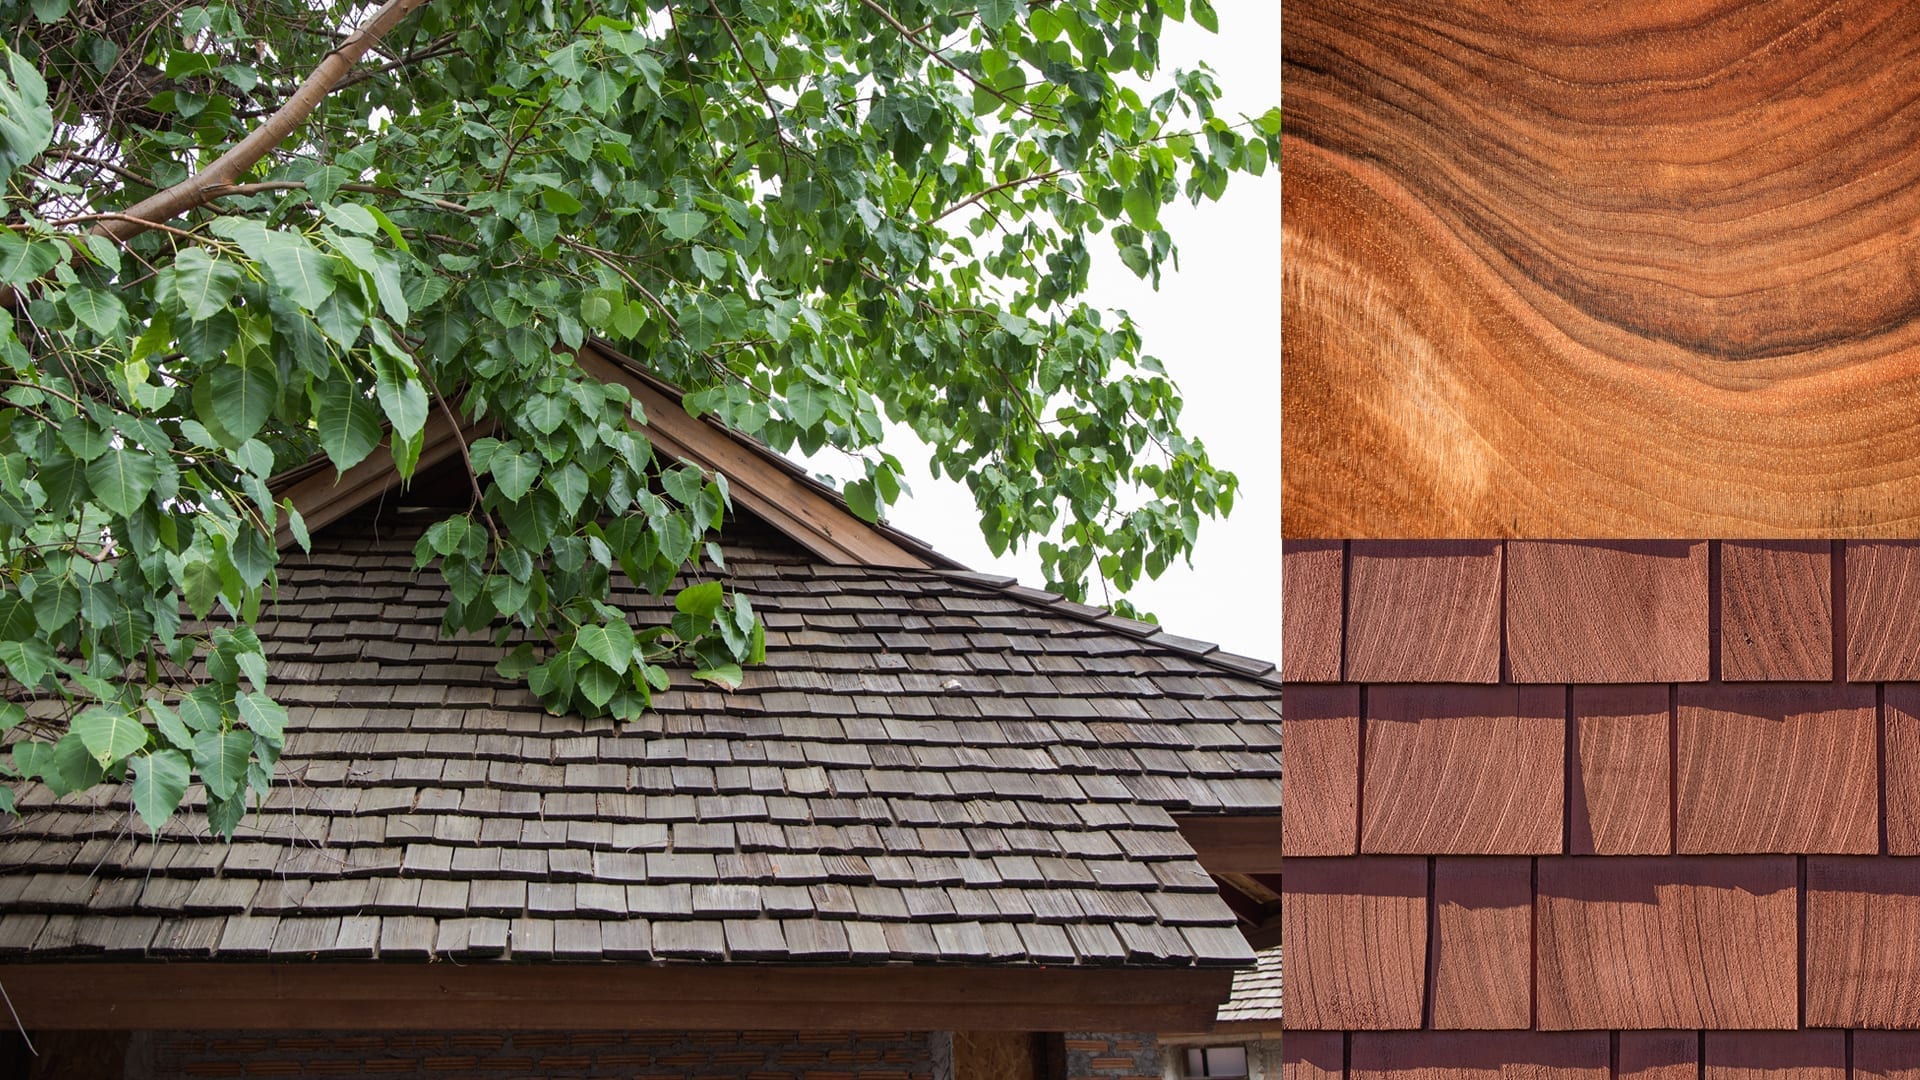
6. Tree Damage:
Overhanging tree branches can pose a threat to your roof. They can rub against shingles, causing damage, and falling branches, especially during storms, can cause significant impact damage.
How to Fix It: Regularly trim tree branches that are close to or overhanging your roof. This simple preventative measure can save you from costly repairs.
The Importance of Regular Roof Inspections:
The key to avoiding major roofing problems in Texas is regular roof inspections, ideally twice a year (spring and fall) and after any significant weather event. A professional roofing contractor can identify potential issues early, allowing for timely and often less expensive repairs.
Major League Roofing: Your Trusted Texas Roofing Partner:
At Major League Roofing, we understand the unique challenges Texas weather presents to your roof. Our experienced team is equipped to handle all your roofing needs, from minor repairs to complete roof replacements. We are committed to providing quality workmanship and ensuring your home is protected.
Contact Major League Roofing today for a comprehensive roof inspection and expert solutions to your Texas roofing problems.
Roof repairs can be an unexpected expense, but neglecting them can lead to far more costly problems down the line. At Major League Roofing, we understand the importance of maintaining a sturdy roof without breaking the bank. This blog will explore five effective ways to save money on roof repairs without compromising the quality and longevity of your roof.
1. Get Multiple Quotes and Compare Services:
Don’t settle for the first estimate you receive. Obtain quotes from at least three reputable roofing contractors. Compare not only the prices but also the services offered, the materials used, and the warranties provided. A lower price doesn’t always mean better value if the contractor uses inferior materials or lacks experience.
Tip: Ask for detailed breakdowns of the costs, including labor, materials, and any potential extras.
2. Schedule Repairs During Off-Peak Seasons:
Roofing contractors are often busier during peak seasons, such as spring and summer. Scheduling your repairs during the off-season, like fall or winter, can sometimes lead to lower prices due to reduced demand.
Tip: Be mindful of weather conditions. Ensure your chosen contractor is experienced in working in colder or wetter climates if necessary.
3. Address Minor Issues Promptly:
Small leaks, damaged shingles, or loose flashing may seem insignificant, but they can quickly escalate into major problems if left unattended. Addressing these minor repairs promptly can prevent water damage, structural issues, and the need for a complete roof replacement.
Tip: Regularly inspect your roof for signs of damage, especially after severe weather events.
4. Consider Partial Roof Repairs:
If only a portion of your roof is damaged, consider partial repairs instead of a full replacement. A reputable roofing contractor can assess the extent of the damage and recommend the most cost-effective solution.
Tip: Ensure the repair work seamlessly integrates with the existing roof to maintain its integrity and appearance.
5. Choose Durable and Cost-Effective Roofing Materials:
While some roofing materials are more expensive upfront, they can offer significant long-term savings due to their durability and longevity. Consider materials like metal roofing or high-quality asphalt shingles that can withstand harsh weather conditions and require less frequent repairs.
Tip: Ask your roofing contractor about the lifespan and maintenance requirements of different roofing materials.
The Importance of Quality in Roof Repairs:
While saving money is important, never sacrifice quality for a lower price. A poorly executed roof repair service can lead to recurring problems, premature roof failure, and costly repairs in the future.
Tip: Choose a licensed and insured roofing contractor with a proven track record of quality workmanship.
Why Choose Major League Roofing for Your Roof Repairs:
At ML Roof, we understand the importance of providing quality roof repairs at competitive prices. We are committed to delivering exceptional workmanship and using only the best materials. Our experienced team will assess your roof’s condition, provide honest recommendations, and ensure your repairs are completed to the highest standards.
Expert Assessment: We thoroughly evaluate your roof to identify all issues and recommend the most cost-effective solutions.
Quality Materials: We use only premium roofing materials to ensure the longevity and durability of your repairs.
Skilled Craftsmanship: Our experienced roofers are dedicated to providing meticulous and reliable repairs.
Transparent Pricing: We provide detailed and accurate estimates, so you know exactly what to expect.
Customer Satisfaction: We prioritize your satisfaction and strive to exceed your expectations.
Saving money on roof repairs is possible without compromising quality. By obtaining multiple quotes, scheduling repairs strategically, addressing minor issues promptly, considering partial repairs, and choosing durable materials, you can protect your investment and ensure a long-lasting roof. Always prioritize quality workmanship and choose a reputable roof repair service to safeguard your home.
Contact Major League Roofing today for a comprehensive roof inspection and expert repair services. We are here to help you maintain a safe and reliable roof without breaking the bank.
Your roof is your home’s first line of defense against the elements, and choosing the right roofing material is crucial for its longevity and performance. However, not all roofing materials are created equal, and the ideal choice depends heavily on your local climate. At Major League Roofing, we understand the importance of selecting a durable and weather-resistant roof. This blog will guide you through the process of choosing the right type of roofing material for your home’s climate, ensuring maximum protection and long-term value.
Understanding Climate Impact on Roofing:
Different climates present unique challenges for roofing materials. Extreme temperatures, heavy rainfall, high winds, and intense sunlight can all take a toll on your roof. Selecting a material that can withstand these specific conditions is essential for preventing premature wear and tear, leaks, and other costly issues.
Roofing Materials for Hot and Sunny Climates:
In regions with hot and sunny climates, the primary concerns are heat absorption and UV damage.
Tile Roofing:
Tile roofs, particularly clay or concrete tiles, are excellent choices for hot climates. They reflect sunlight, keeping your home cooler, and are highly resistant to UV damage.
They also offer exceptional durability and longevity.
Metal Roofing:
Metal roofs, especially those with reflective coatings, are highly effective at reflecting sunlight and reducing heat absorption.
They are also durable and resistant to fire and wind.
Light-Colored Asphalt Shingles:
While asphalt shingles are a common and affordable option, light-colored shingles are preferable in hot climates as they reflect more sunlight than dark-colored shingles.
Roofing Materials for Cold and Snowy Climates:
In areas with cold and snowy climates, the focus is on withstanding heavy snow loads, ice dams, and freezing temperatures.
Metal Roofing:
Metal roofs are excellent for cold climates as they shed snow easily and are resistant to ice damage.
They can also withstand heavy snow loads and are durable in freezing temperatures.
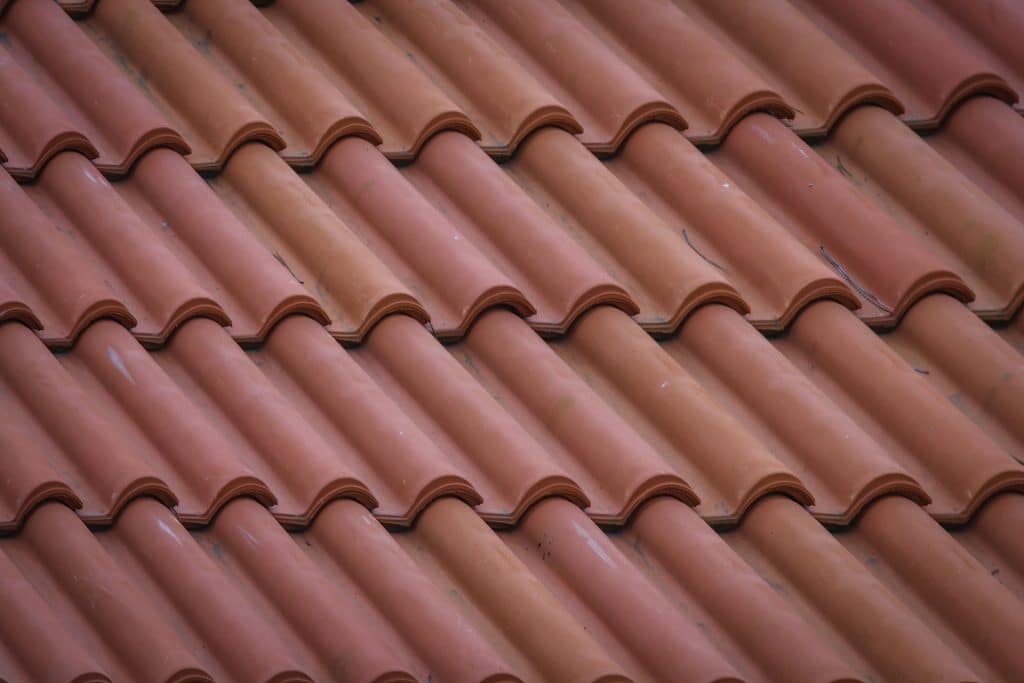
Asphalt Shingles:
Asphalt shingles, particularly those designed for cold climates, can withstand freezing temperatures and snow loads.
However, proper ventilation and ice and water barriers are crucial for preventing ice dams.
Slate Roofing:
Slate roofs are highly durable and can withstand extreme cold and heavy snow.
They are also resistant to fire and wind.
Roofing Materials for Humid Climates:
In humid climates, the primary concerns are mold growth and moisture damage.
Tile Roofing:
Tile roofs are resistant to moisture and mold growth, making them a good choice for humid climates.
Proper ventilation is still essential to prevent moisture buildup.
Metal Roofing:
Metal roofs are also resistant to moisture and mold growth.
They are also durable and can withstand high winds.
TPO or PVC Roofing:
These single ply roofing systems are great for flat or low sloped roofs. They are highly resistant to moisture and mold growth.
Roofing Materials for Windy Climates:
In areas with high winds, the focus is on choosing materials that can withstand strong gusts and prevent wind damage.
Metal Roofing:
Metal roofs are highly resistant to wind damage and can withstand strong gusts.
Tile Roofing:
Tile roofs, when properly installed, can also withstand high winds.
High-Wind Rated Asphalt Shingles:
Asphalt shingles with high wind ratings are designed to withstand strong gusts and prevent blow-offs.
Considerations for Coastal Climates:
Coastal climates present unique challenges due to salt spray and high winds.
Metal Roofing:
Metal roofs, particularly those with corrosion-resistant coatings, are ideal for coastal climates.
Tile Roofing:
Tile roofs are also resistant to salt spray and can withstand high winds.
Major League Roofing – Your Roofing Experts:
At Major League Roofing, we understand the importance of choosing the right roofing material for your home’s climate. Our experienced team can help you select the best type of roofing material and provide expert installation services.
Contact us today for a consultation and ensure your home is protected with a durable and weather-resistant roof.
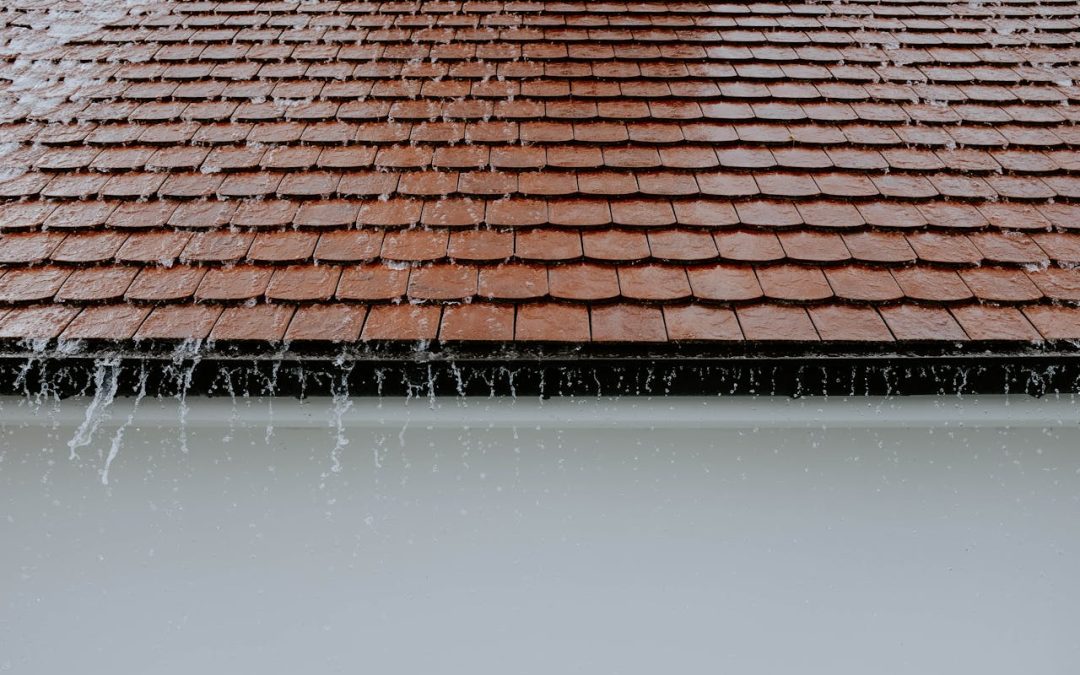
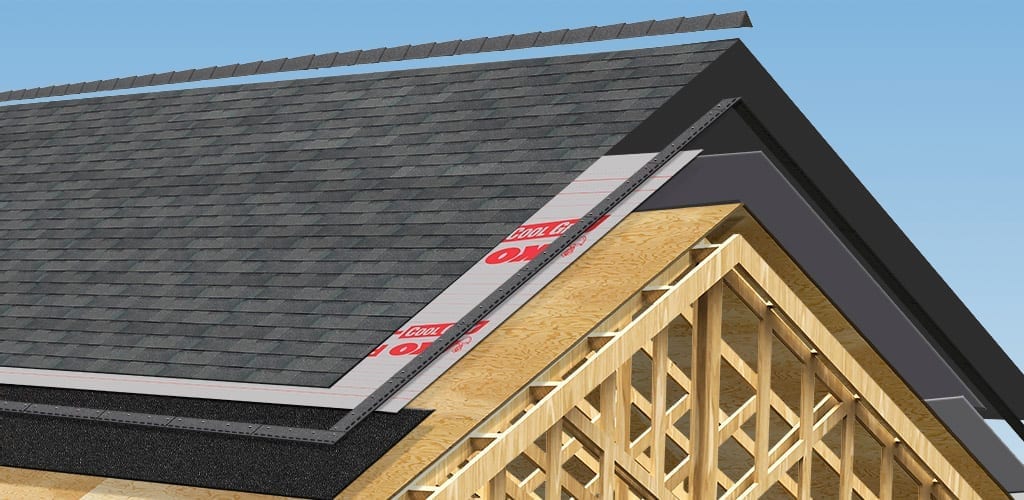
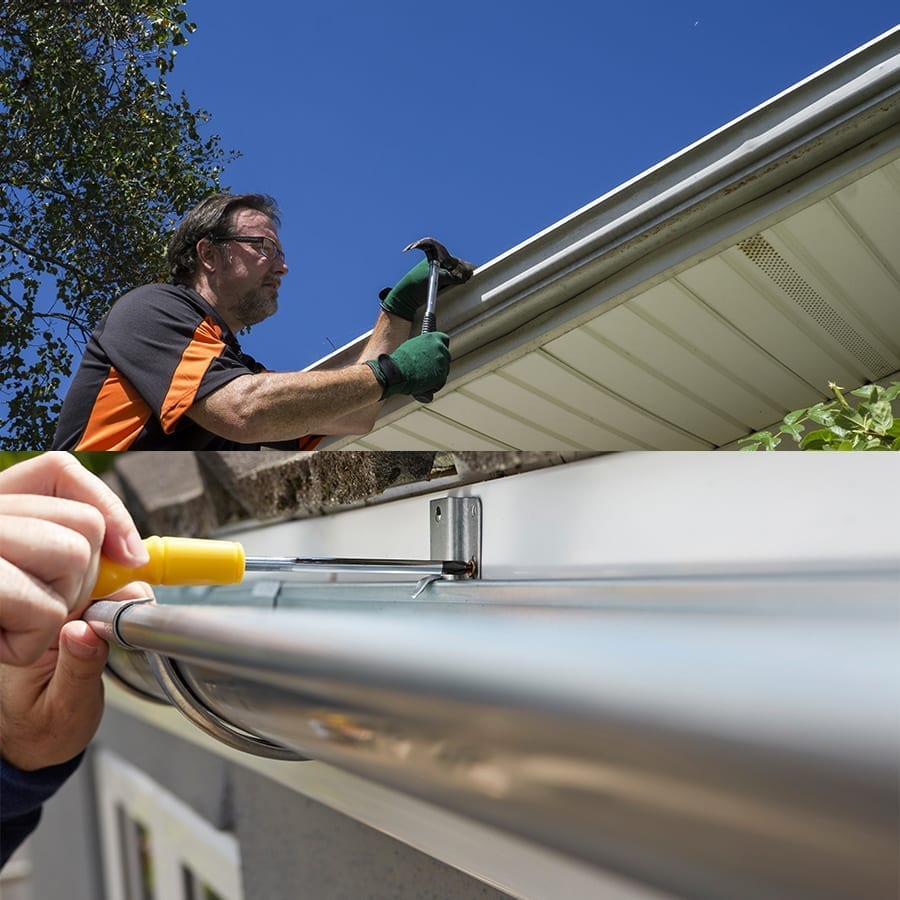
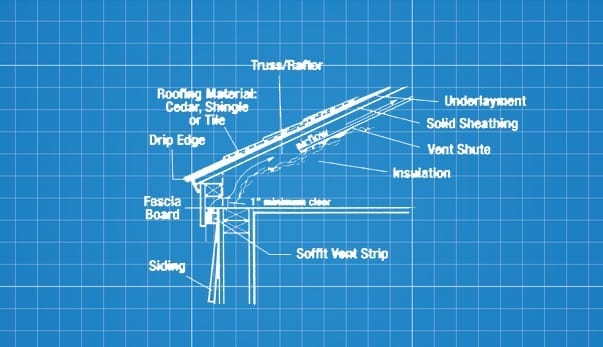
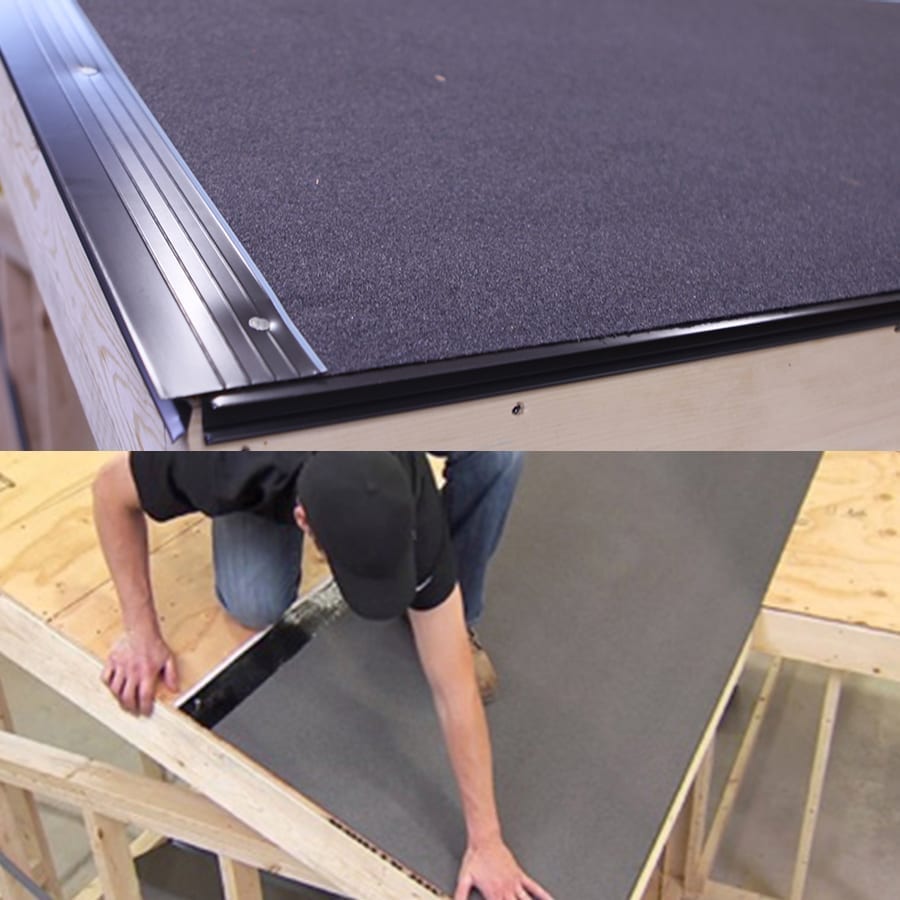
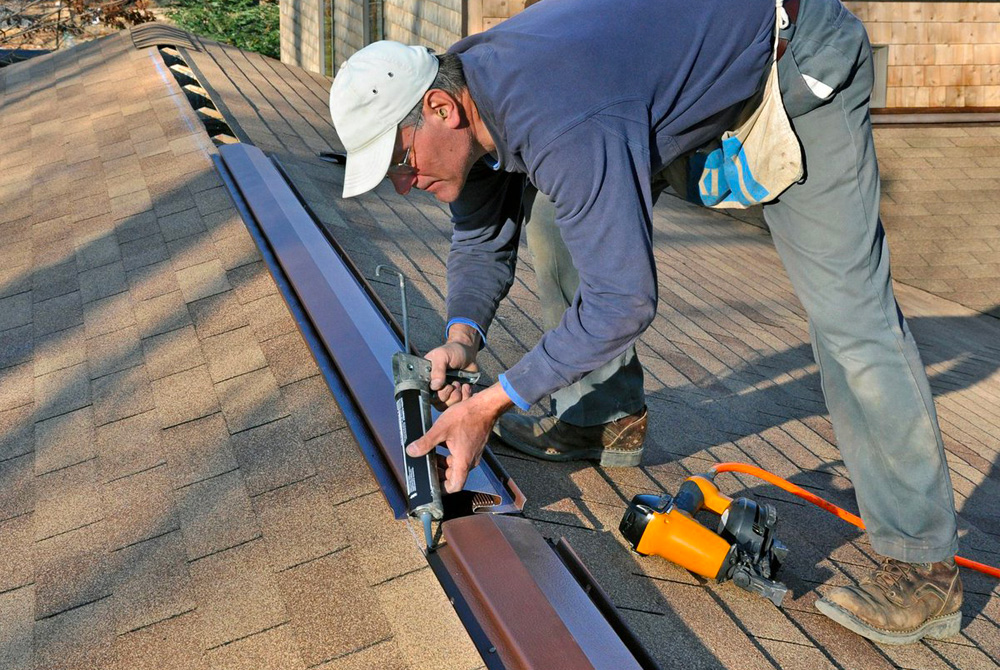
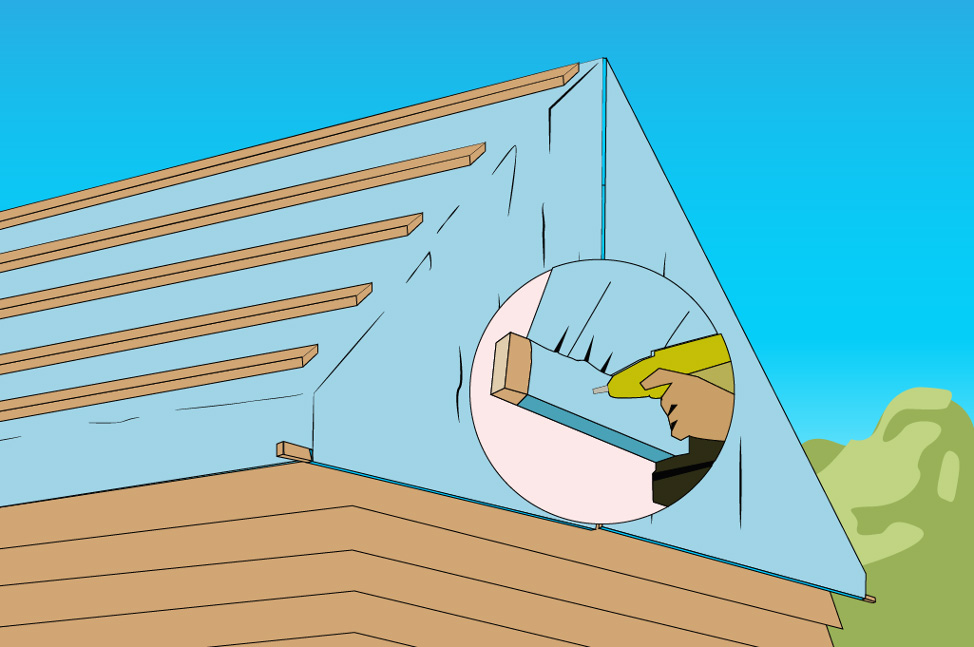
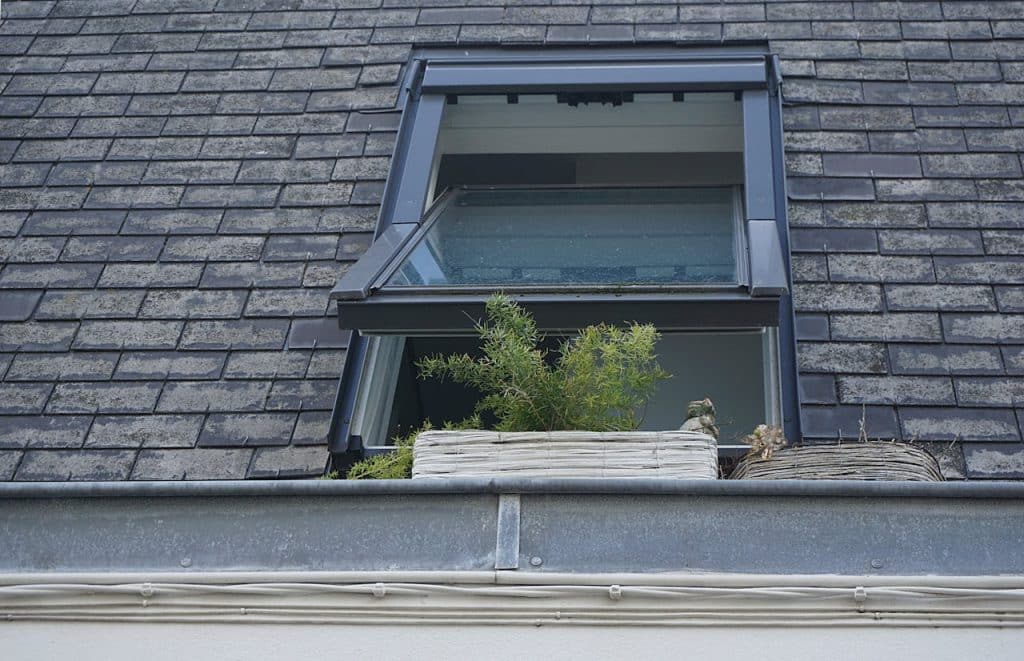
Protecting your home from water damage is paramount, and having a drip edge for roofs plays a crucial role in this defense. At Major League Roofing, we understand the importance of installing a drip edge for roofs, including every detail in ensuring a long-lasting and reliable roof. This blog post will delve into what a drip edge is and why it’s an essential element for your roofing system.
What is a Drip Edge?
A drip edge is a metal flashing installed at the edge of your roof, designed to direct water away from the fascia and siding. It’s typically an L-shaped piece of metal that extends slightly over the edge of the roof deck and into the gutter. This simple yet effective component prevents water from running back underneath the shingles and causing damage.
Why is a Drip Edge Important?
The benefits of installing a drip edge for roofs are numerous, contributing significantly to the overall health and longevity of your roofing system.
Water Diversion: The primary function of a drip edge is to divert rainwater away from the fascia and siding. Without it, water can seep behind these components, leading to rot, mold growth, and structural damage.
Protection of Fascia and Siding: By directing water into the gutters, a drip edge prevents water from clinging to the fascia and siding, which can cause these materials to deteriorate over time.
Prevention of Rot and Mold: Moisture trapped behind the fascia and siding creates an ideal environment for rot and mold to thrive. A drip edge helps to prevent this by keeping these areas dry.
Enhanced Gutter Performance: A drip edge helps to direct water more efficiently into the gutters, ensuring that they can effectively channel water away from your home.
Protection Against Wind-Driven Rain: In areas prone to strong winds, a drip edge can help to prevent wind-driven rain from being forced underneath the shingles.
Increased Roof Longevity: By preventing water damage and rot, a drip edge can significantly extend the lifespan of your roof.
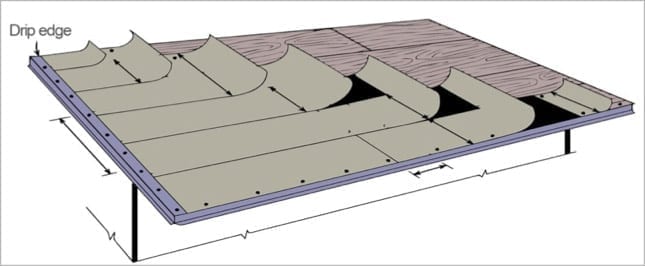
Types of Drip Edge:
There are several types of drip edge available, each with its own specific design and application.
Type C (L-Shape): This is the most common type of drip edge, featuring an L-shape that extends over the edge of the roof deck and into the gutter.
Type D (T-Shape): This type of drip edge has a T-shape that provides additional protection against wind-driven rain.
Gutter Apron: This type of drip edge is designed to be used in conjunction with gutters, providing a smooth transition for water flow.
Proper Installation is Key:
The effectiveness of a drip edge depends heavily on proper installation. It’s crucial to ensure that the drip edge is installed correctly to prevent water from seeping behind it.
Installation Sequence: The drip edge should be installed before the underlayment and shingles are applied.
Nailing: The drip edge should be securely nailed to the roof deck, ensuring that it lies flat and extends properly over the edge.
Overlapping: When installing multiple sections of drip edge, ensure that they overlap properly to prevent water from seeping through the joints.
Major League Roofing: Your Trusted Roofing Partner
At Major League Roofing, we understand the importance of quality materials and proper installation. We are committed to providing our customers with reliable and long-lasting roofing solutions. When you choose Major League Roofing, you can be confident that your roof will be protected from the elements for years to come.
Contact us today for a free roof inspection and let our team of professionals help you ensure that your roof is properly protected with a high-quality drip edge. We’re here to help you protect your investment.
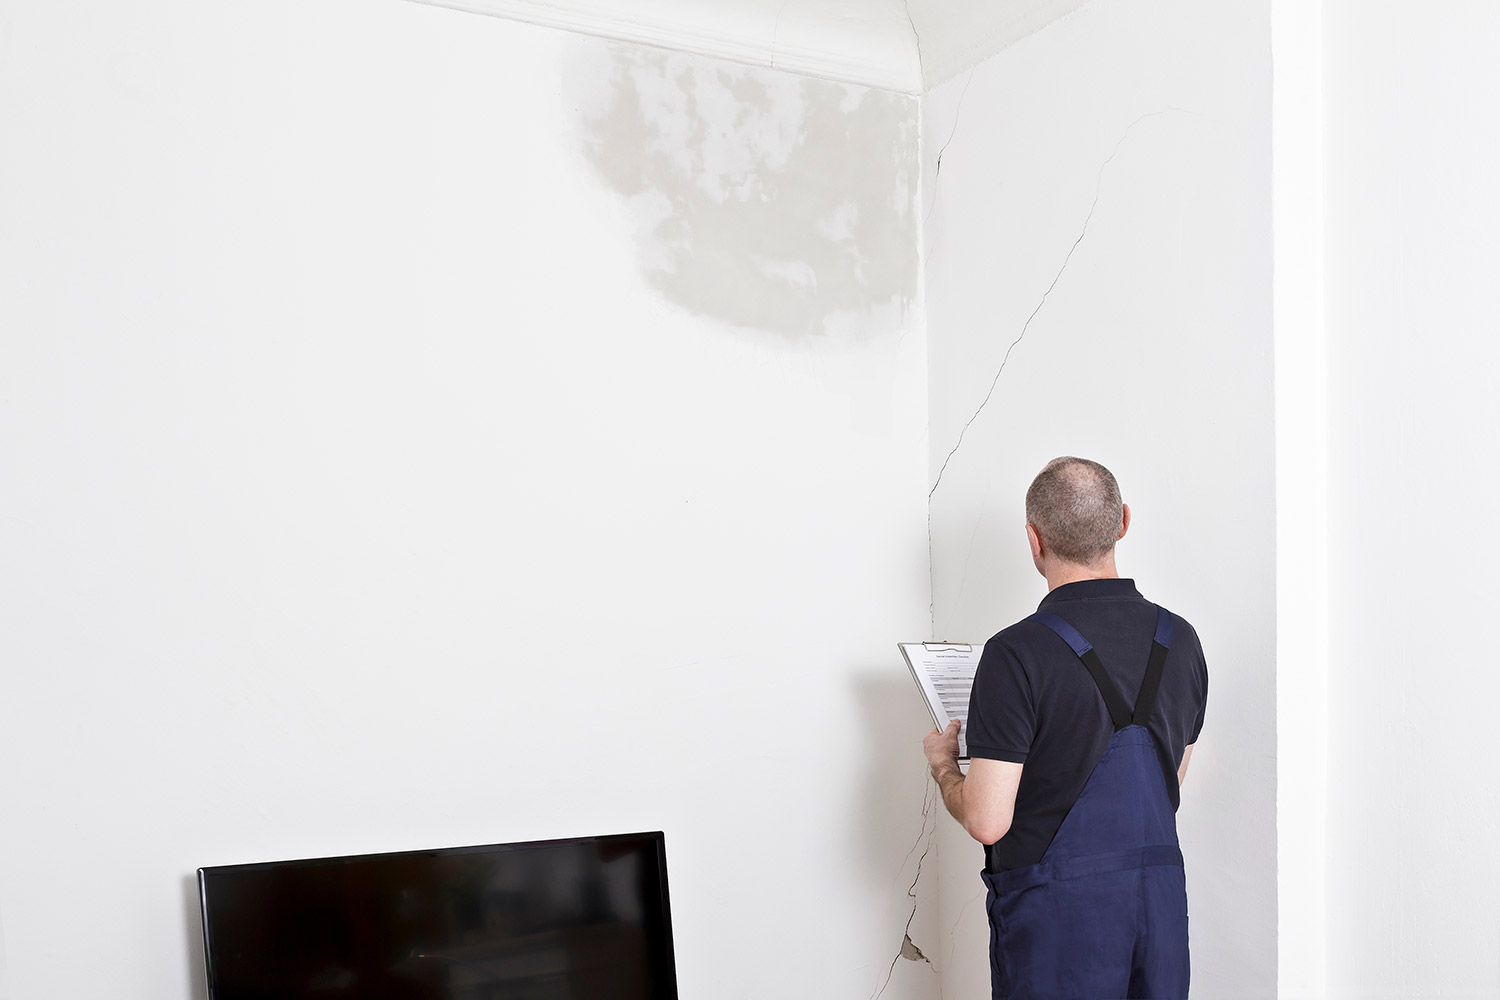
A leaky roof can cause significant damage to your home, from water stains and mold to structural issues. Identifying the source of the leak is crucial for effective roof leak repair. This blog post will explore the 10 most common causes of roof leaks to help you understand potential issues and take proactive steps to protect your home.
1. Age and Wear & Tear:
The Issue: Over time, all roofing materials will experience wear and tear. Shingles can crack, curl, or lose their granules, while other materials may degrade due to exposure to the elements.
The Solution: Regular roof inspections and preventative maintenance, such as replacing damaged shingles, can help prolong the lifespan of your roof and prevent needing roof leak repair.
2. Storm Damage:
The Issue: Strong winds, heavy rain, hail, and even snow can cause significant damage to your roof. This can include dislodged shingles, punctures, and damage to flashing.
The Solution: After a severe storm, inspect your roof for any signs of damage. If you notice any issues, contact a qualified roofing contractor like Major League Roofing for a professional inspection and necessary repairs.
3. Poor Installation:
The Issue: Improper installation is a common cause of roof leaks. This can include incorrect nailing, inadequate flashing, and poor workmanship.
The Solution: Ensure you hire a reputable roofing contractor with a proven track record and a commitment to quality workmanship during roof leak repair.
4. Clogged Gutters and Downspouts:
The Issue: Clogged gutters and downspouts prevent water from draining properly, leading to water overflow and potential damage to the roof and foundation.
The Solution: Regularly clean your gutters and downspouts to ensure proper water flow.
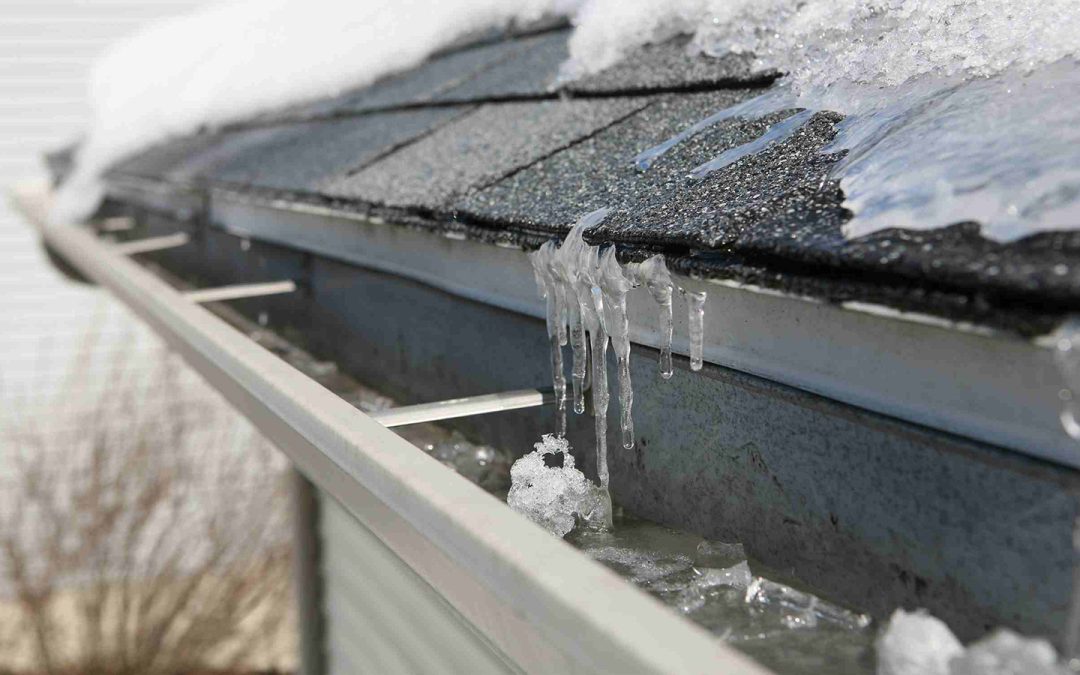
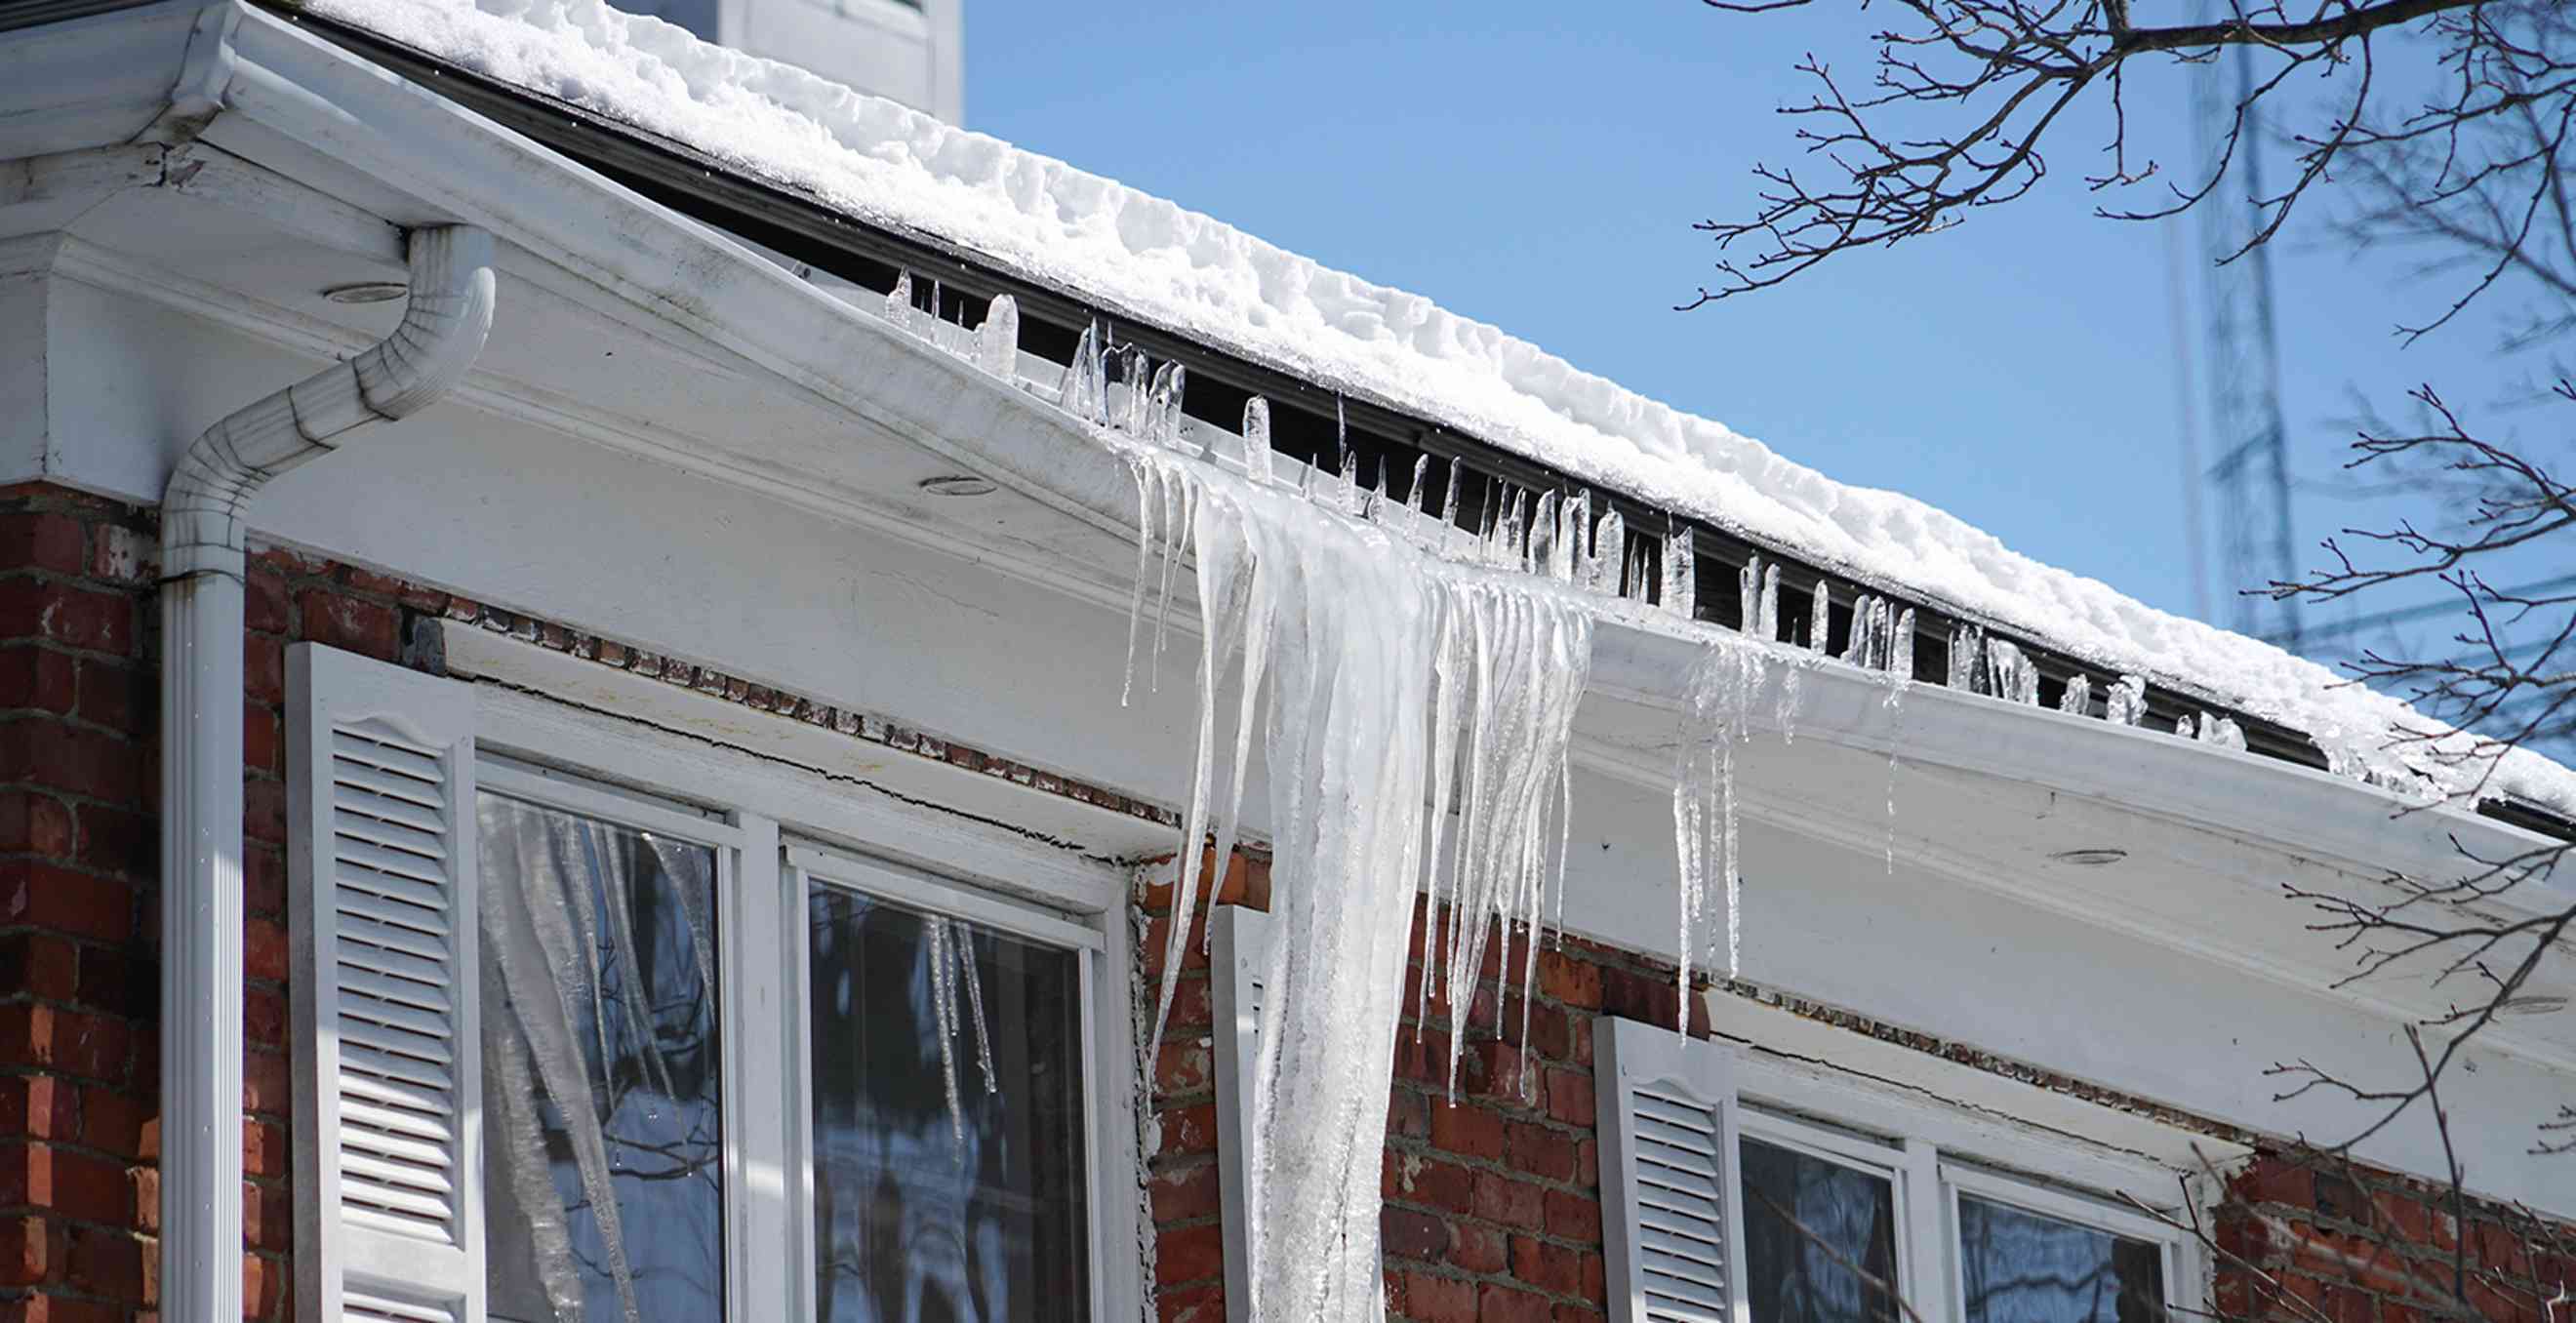
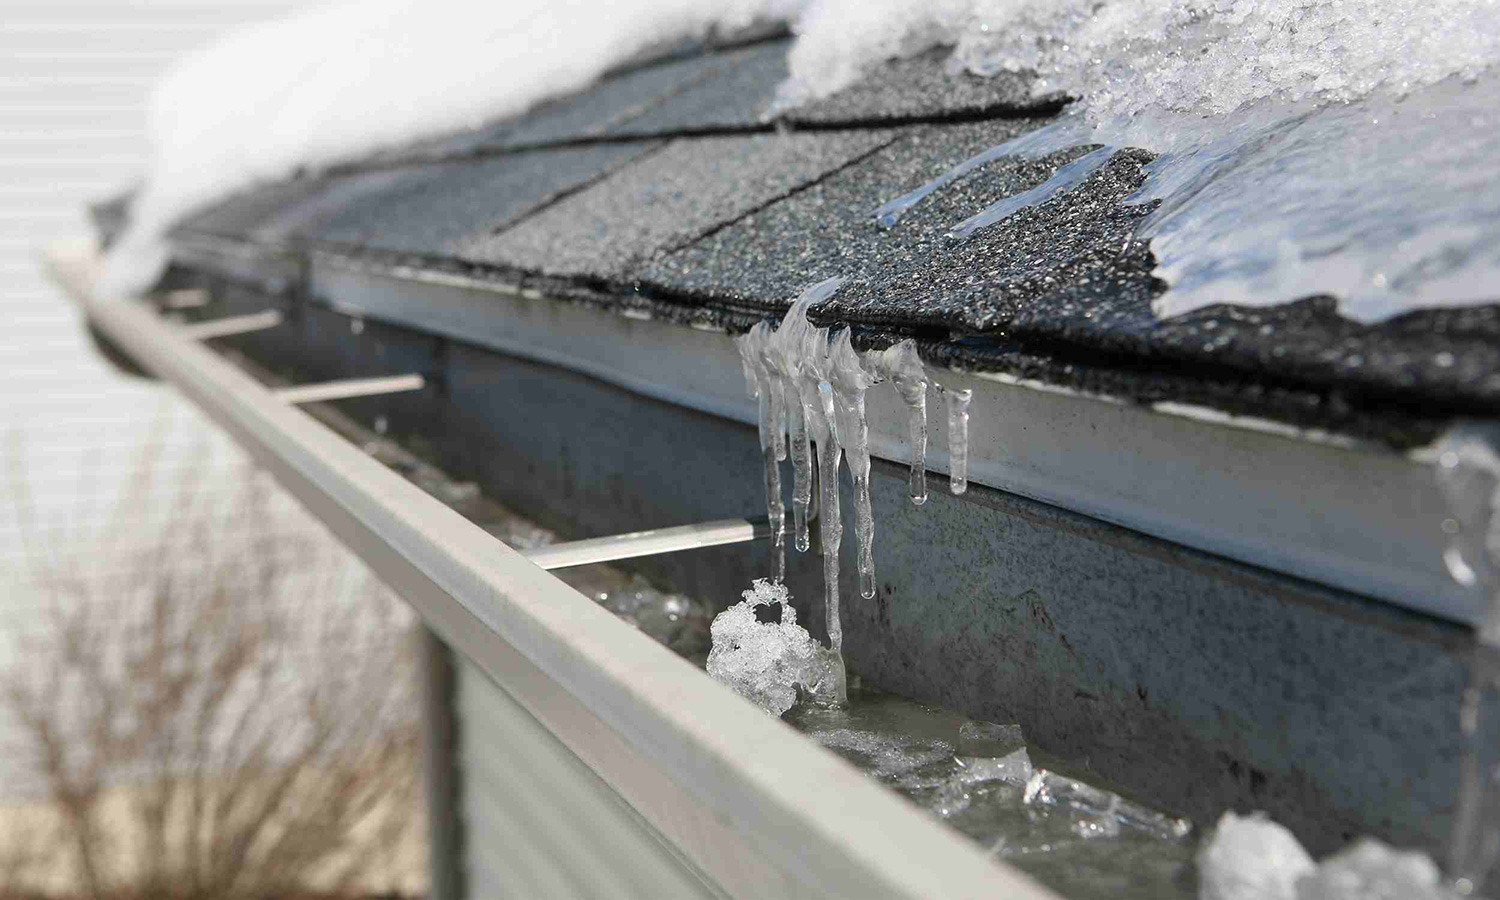
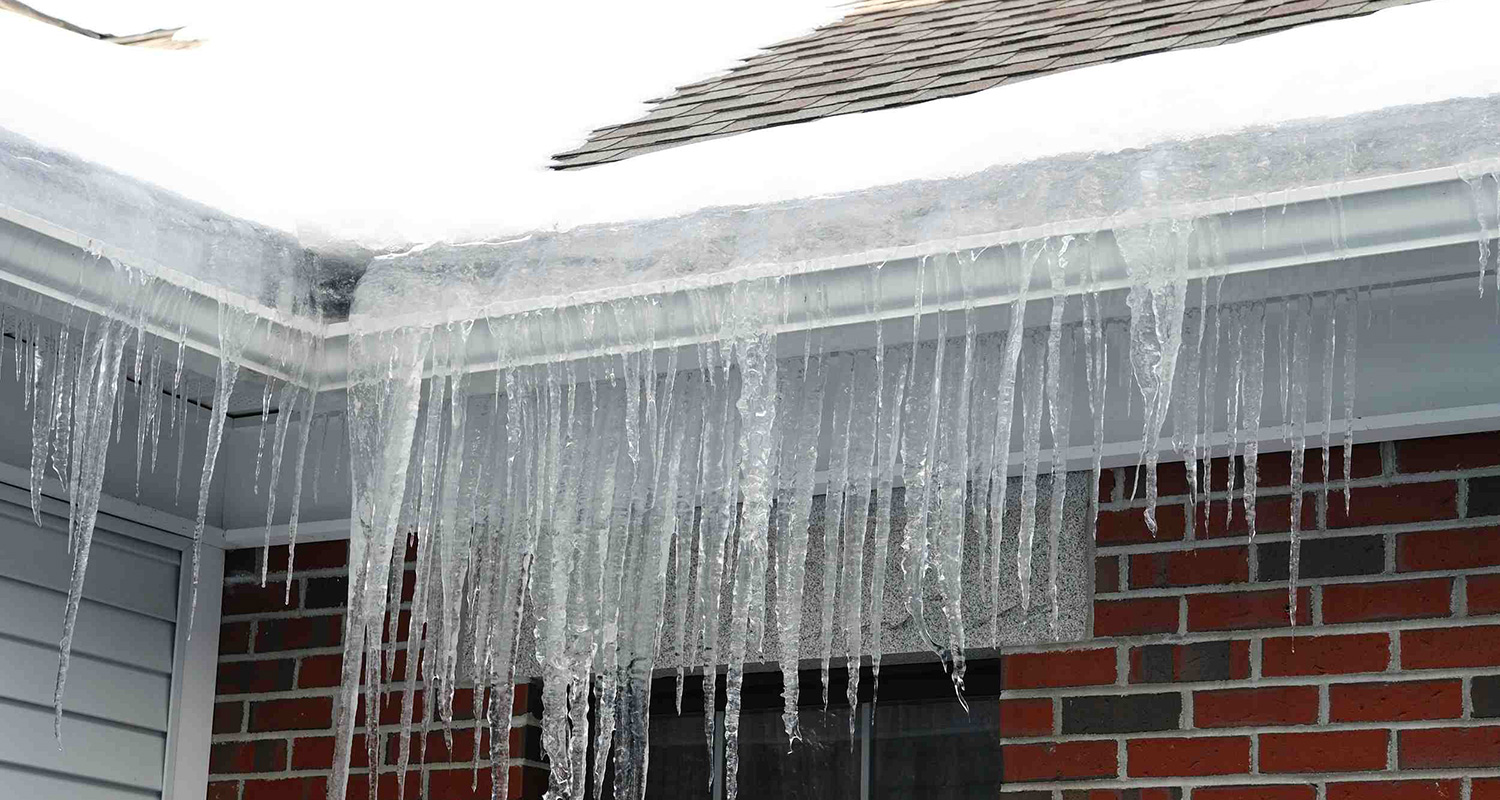
5. Ice Dams:
The Issue: Ice dams form when melting snow refreezes at the edge of the roof, creating a barrier that prevents water from draining properly. This can lead to water backing up under the shingles.
The Solution: Improve attic ventilation to prevent ice dams from forming. Consider installing ice and water shields under the shingles in vulnerable areas.
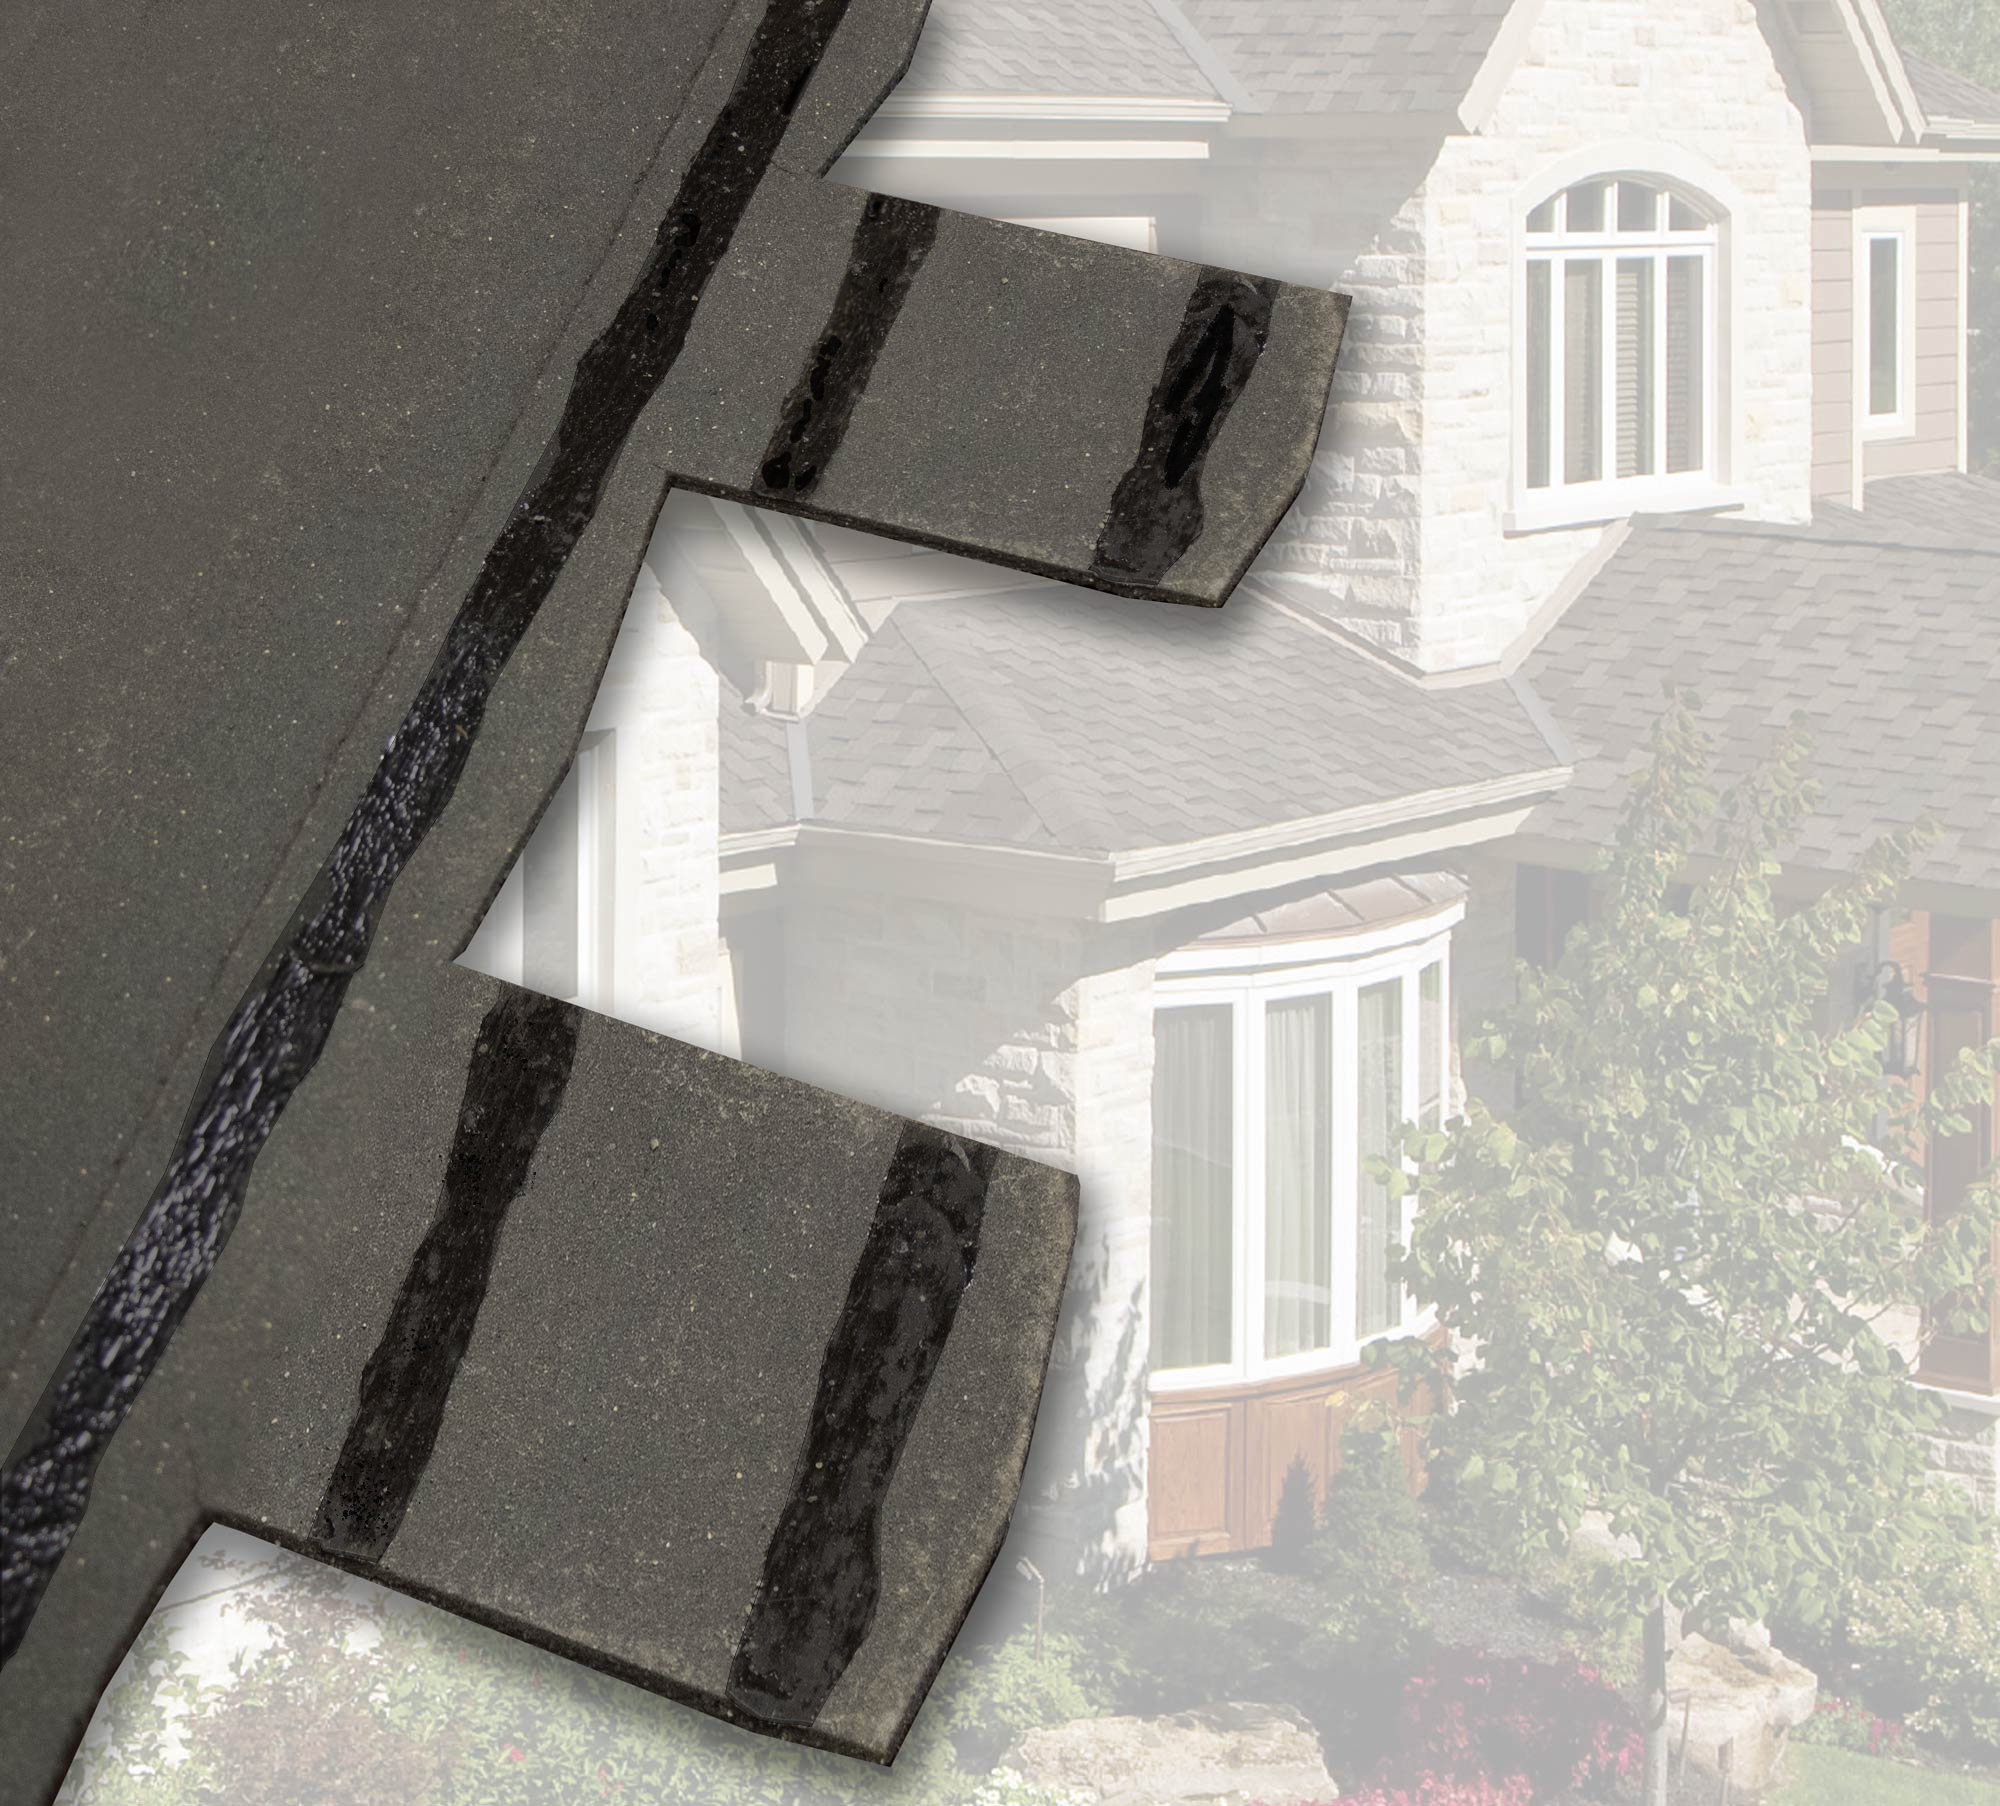
6. Defective Flashing:
The Issue: Flashing is the material used to seal joints and penetrations in the roof, such as around chimneys, skylights, and vents. Improperly installed or damaged flashing can allow water to seep into the roof.
The Solution: Regularly inspect flashing for signs of damage or wear and tear. If you notice any issues, contact a roofing professional for repairs.
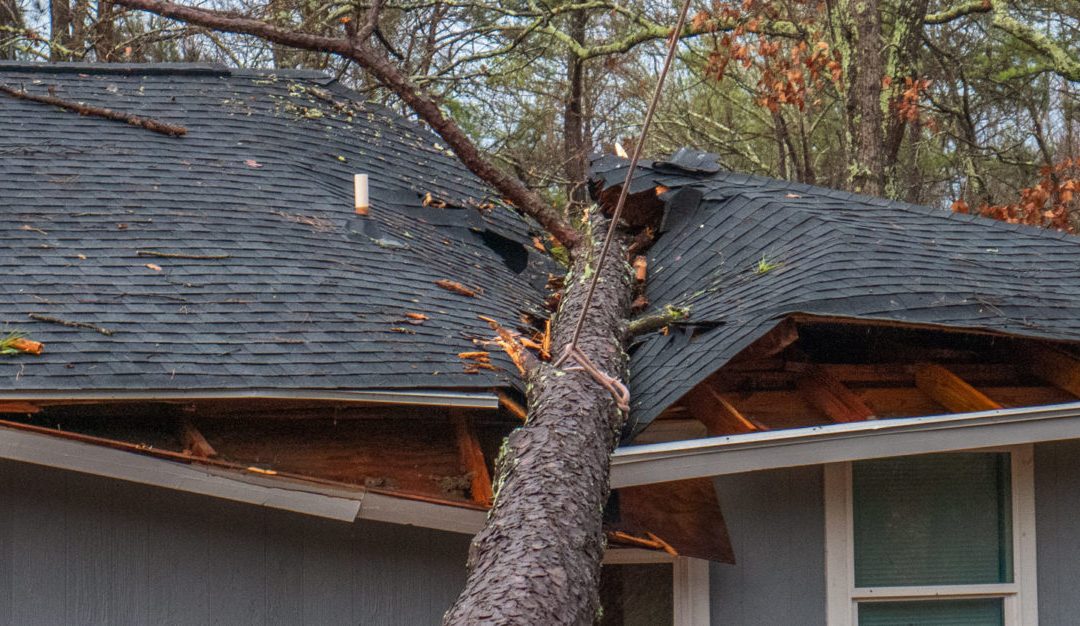
7. Tree Damage:
The Issue: Falling branches or limbs can puncture the roof, while overhanging branches can scrape against the shingles, causing damage.
The Solution: Trim overhanging trees and remove any branches that pose a risk to your roof.
8. Animal Damage:
The Issue: Animals like squirrels, raccoons, and birds can cause damage to your roof by chewing on shingles, creating nests, or accessing the attic through holes in the roofing.
The Solution: Seal any potential entry points for animals and contact wildlife removal professionals if necessary.
9. Age and Deterioration of Roofing Materials:
The Issue: All roofing materials have a limited lifespan. Over time, shingles can deteriorate, become brittle, and lose their ability to protect your home from the elements.
The Solution: Regular roof inspections can help identify signs of aging and deterioration, allowing you to address issues before they become major problems.
10. Foundation Issues:
The Issue: Shifting or settling foundations can cause stress on the structure of your home, including the roof. This can lead to cracks in the roofline and potential leaks.
The Solution: Address any foundation issues promptly to prevent further damage to your roof and the overall structure of your home.
Partnering with Major League Roofing for Expert Roof Leak Repair
If you suspect a roof leak, it’s crucial to address the issue promptly to prevent further damage. At Major League Roofing, we have the expertise and experience to diagnose the source of your roof leak and provide effective and long-lasting roof leak repairs.
Contact us today for a free roof inspection and let our team of professionals help you protect your home from the elements.
Plano, Texas, experiences a wide range of weather conditions throughout the year. From scorching summers and hailstorms to heavy rains and occasional freezing temperatures, your roof endures a lot. Regular maintenance is crucial to ensure your Plano roof remains in optimal condition, preventing costly repairs and leaks down the road. Here at Major League Roofing, we’re committed to helping homeowners protect their most valuable asset – their home. This blog post provides seasonal roof maintenance tips for Plano residents, ensuring your roof weathers the elements effectively.
Spring: A Time for Renewal and Roof Inspection
As spring arrives and winter’s harsh grip loosens, it’s the perfect time to schedule a comprehensive roof inspection by a qualified Plano roofing professional. Here’s what to focus on:
Debris Removal: Winter storms can leave behind a trail of debris like leaves, twigs, and branches. Clear all debris from your roof’s surface and gutters to prevent water pooling and potential leaks.
Shingle Inspection: Look for missing, cracked, or curled shingles. These imperfections can expose the underlayment to moisture, increasing the risk of leaks. Damaged shingles should be repaired or replaced promptly.
Flashing and Vent Inspection: Pay close attention to roof flashing around chimneys, skylights, and vents. Ensure these areas are properly sealed and free of rust or damage.
Gutter Cleaning: Clean out clogged gutters to ensure proper water drainage away from your roof and foundation.
Summer: Battling the Heat and Sun’s Damaging Rays
The relentless Texas sun can take a toll on your roof. Here’s how to safeguard it during the summer months:
Attic Ventilation: Proper attic ventilation helps regulate temperature and prevents heat buildup, which can damage shingles and shorten roof lifespan. Ensure your attic vents are functioning correctly.
Reflective Roof Coatings: Consider reflective roof coatings, especially for metal roofs. These coatings reflect sunlight, reducing heat absorption and lowering energy bills.
Tree Trimming: Overhanging branches can scrape shingles and cause damage during storms. Trim tree branches away from your roof to minimize potential problems.
Fall: Preparing for Winter’s Wrath
As fall arrives and temperatures begin to dip, take steps to prepare your roof for the challenges of winter:
Second Roof Inspection: Schedule another roof inspection before the harsh winter elements arrive. Address any minor issues identified during the inspection to prevent them from escalating into major problems during winter.
Ice Dams and Ventilation: Ensure proper attic ventilation to minimize the formation of ice dams along the eaves. Ice dams can cause water to back up under the shingles and lead to leaks.
Winter: Minimizing Damage from Snow and Ice
Plano winters are generally mild, but occasional snow and ice accumulation can pose a threat to your roof. Here’s how to be prepared:
Snow Removal: Heavy snowfall can put stress on your roof. If safe to do so, gently remove snow buildup to prevent overloading. Safety first! Consider hiring a professional snow removal service if necessary.
Ice Dams: Monitor for ice dam formation along the eaves. If necessary, consult a professional roofer for safe removal to prevent water backup and leaks.
Beyond Seasonal Roof Maintenance Plano: Tips for Residents
Regular Visual Inspections: In addition to seasonal inspections, conduct regular visual inspections of your roof throughout the year. Look for signs of damage like missing shingles, loose flashing, or water stains on the ceiling.
Schedule Prompt Repairs: Don’t delay addressing any roof problems you identify. Prompt repairs are far more cost-effective than dealing with extensive damage later.
Hire Qualified Professionals: For roof inspections and repairs, always hire licensed and insured Plano roofing contractors. Ask for references and check online reviews before making a decision.
Major League Roofing: Your Trusted Partner for Roof Maintenance Plano
At Major League Roofing, we understand the importance of roof maintenance in Plano’s diverse climate. Our team of experienced and certified roofing professionals offers comprehensive roof inspections, repairs, and replacements. We use high-quality materials and prioritize customer satisfaction.
Contact us today for a free consultation and let us help you keep your Plano roof in top condition throughout the year. Remember, a well-maintained roof protects your home, your belongings, and your loved ones.
Your roof is the shield of your home, protecting you and your loved ones from the elements. When it comes time for repairs or a complete replacement, finding the best residential roofing services in Frisco, TX becomes a crucial decision. This blog post will guide you through the process, highlighting key aspects to consider and providing a starting point for your search.
Why Local Matters in Residential Roofing:
While Frisco boasts a vibrant market for roofing services, prioritizing local companies offers several advantages:
Understanding Local Weather: Local roofers possess firsthand experience dealing with the specific weather patterns of Frisco, TX. They understand the challenges posed by hail, strong winds, and fluctuating temperatures, allowing them to recommend the most suitable roofing materials and installation techniques.
Building Relationships: Working with a local company allows you to establish a rapport with the team and build a sense of trust. Local businesses are often more invested in building long-term customer relationships and providing exceptional service.
Familiarity with Building Codes: Local roofing contractors are well-versed in the specific building codes and permitting procedures of Frisco, TX. This ensures a smooth and compliant installation process, saving you time and potential headaches.
Availability and Response Time: Local companies can often respond more quickly to emergencies and offer more flexible scheduling options for repairs or consultations.
Qualities of the Best Residential Roofing Services:
Experience and Licensing: Look for a company with extensive experience in residential roofing and a proven track record of successful projects. Ensure they hold the necessary licenses and certifications required to operate in Frisco, TX.
Insurance and Warranties: Verify that the company carries adequate liability insurance and offers warranties on both materials and workmanship. This provides peace of mind and protects your investment.
Reputation and Reviews: Read online reviews and ask for referrals from friends and neighbors. A company with a strong reputation for quality work, excellent communication, and fair pricing stands out from the crowd.
Communication and Transparency: Choose a company that prioritizes clear communication. They should be able to explain their recommendations and answer your questions in a way that is easy to understand.
Materials and Options: Look for a company that offers a variety of high-quality roofing materials to suit your budget and aesthetic preferences. They should also be able to advise you on the most appropriate material for your specific needs.
Safety and Cleanliness: Safety is paramount. Ensure the company employs qualified and insured roofers who prioritize safety procedures throughout the project. Additionally, a clean and responsible company will minimize disruption during the roofing process and ensure proper cleanup upon completion.
Getting Started: Finding the Perfect Roofing Partner
Ready to find the best residential roofing services in Frisco, TX for your home? Here are some tips to get you started:
Ask for recommendations: Talk to neighbors, friends, or family who have recently had roofing work done and seek their feedback.
Research online: Search for roofing services in Frisco, TX and explore their company websites and online reviews.
Contact multiple companies: Get quotes from several different roofing companies to compare prices, services offered, and overall impression.
Schedule consultations: Don’t be afraid to ask questions and discuss your project in detail with each potential contractor. This allows you to gauge their expertise, communication style, and overall professionalism.
Major League Roofing: Trusted Roofing Services in Frisco, TX
At Major League Roofing, we understand the importance of keeping your home safe. As a Frisco-based, family-owned company, we have been providing exceptional residential roofing services in Frisco, TX for over 20 years. We pride ourselves on experience, expertise, and a commitment to exceptional customer service. We offer:
A team of highly qualified and experienced roofers
A wide range of roofing materials and services
Competitive pricing and financing options
A commitment to safety and clear communication
Contact us today for a free consultation and let us help you choose the right roof for your Frisco home. We are confident that we can provide the quality, expertise, and peace of mind you deserve.
While they are a staple of the commercial world, flat roofs are becoming more popular on residential structures. You may have purchased a home with a flat roof or added one to your garage or home addition. While flat roofs can be beautiful and modern, many homeowners are unprepared for how different these systems are from sloped roof systems.
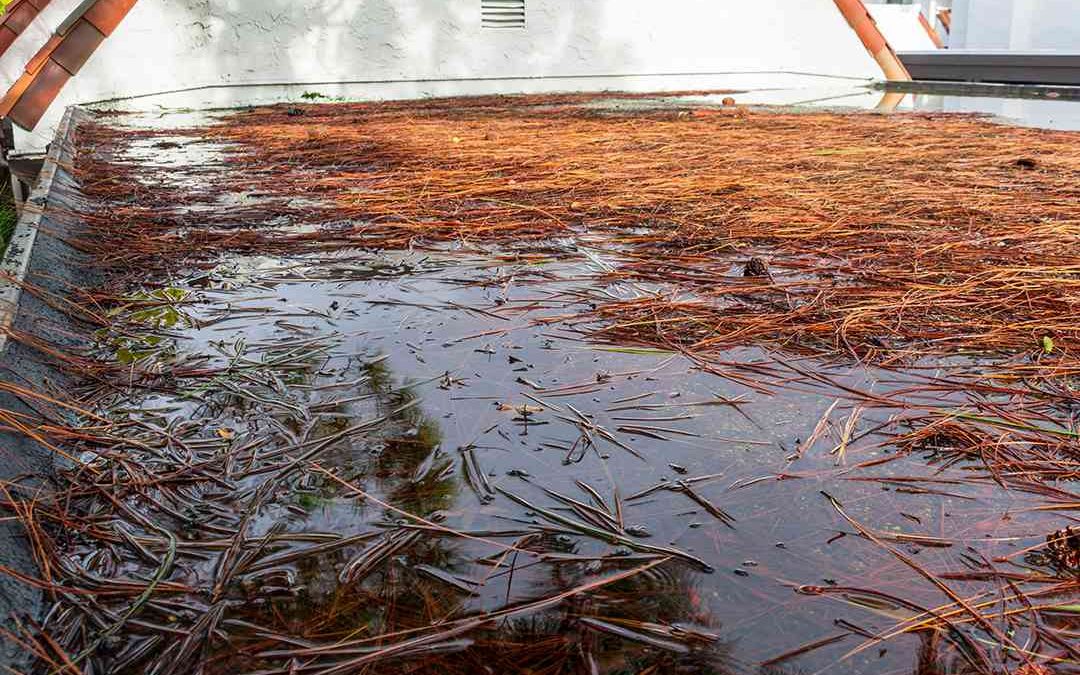
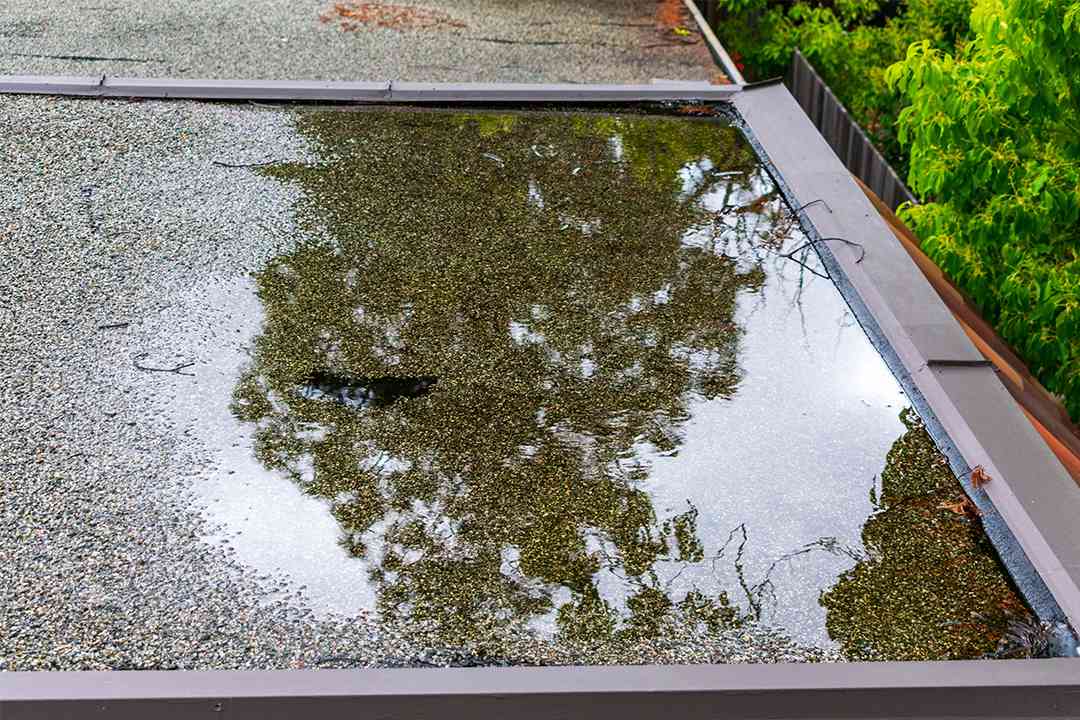
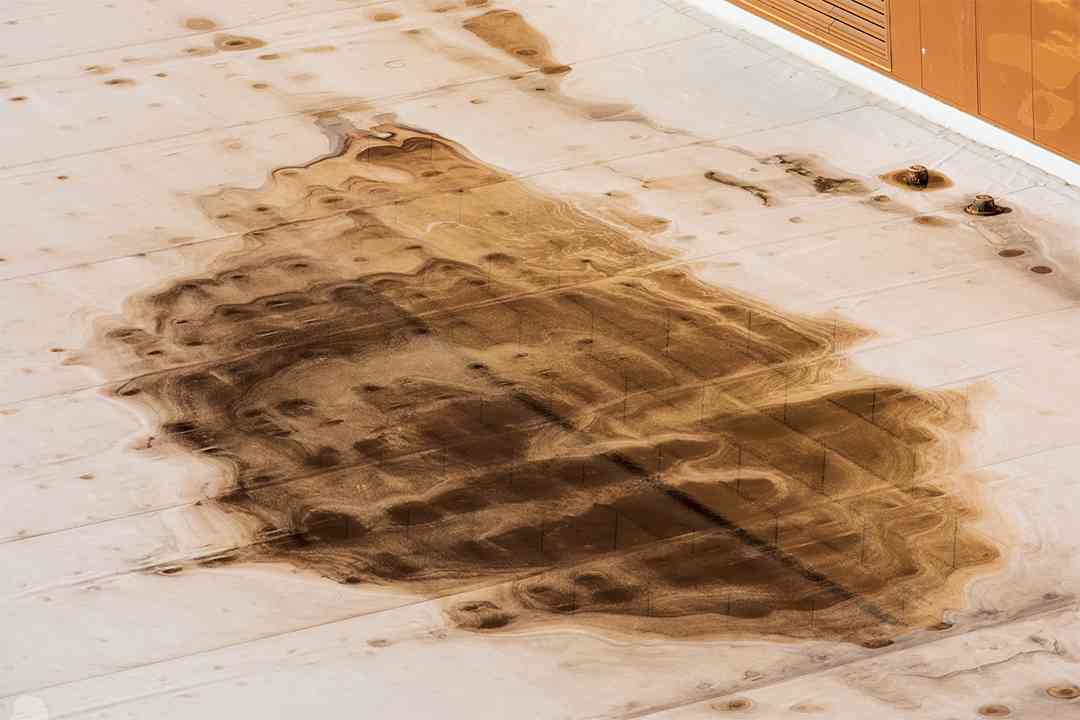
For example, flat roofs may develop a problem called ponding that doesn’t occur on sloped roofs. Ponding is when water collects in puddles on the roof instead of draining off in a timely manner. Homeowners may think this small amount of water is harmless, but ponding tends to get worse over time and can have a negative impact on the roof and your whole home.
If you own a flat roof, it is essential to understand what counts as ponding, why it happens, and how to resolve it before it damages your roof and home. We’ll explain the basics of ponding and why it’s a wise idea to get a professional involved as soon as possible when your flat roof has ponding.
What is Ponding?
Roof ponding is where water gathers on a flat roof. So how much ponding is acceptable on a flat roof? Specifically, water must remain on the roof for 24-48 hours for the National Roofing Contractor’s Association (NRCA) to consider it ponding. If you have this leftover water, you may notice it collects in dips in the roof or around drains.
Why Shouldn’t Flat Roofs have Puddles?
Even minor ponding can have a serious impact on your roof and your home. The excess weight from the water may cause damage to the building’s structure, especially if it exceeds the safe weight that the home can carry. Even if it does not, increased weight can stress the roof trusses and other parts of the building.
Constant exposure to water is also a problem for roofing materials. Water can erode your roofing materials, which may result in early roof failure.
Water may also enable the growth of algae, moss and lichen. This vegetation can stain or damage your roofing materials. Standing water may also attract animals or insects who are looking for a drink, and they may damage the roof or the rest of your home. Or, they may simply become a nuisance that impacts the quality of your home and your quality of life in it. For example, mosquitoes may breed in standing pools of water on the roof. This may become a nuisance when you try to enjoy your outdoor space.
Damage from ponding may result in a roof leak. One way it can cause a leak is when the depth of the ponding exceeds the height of the flashing on a roof feature, thereby allowing water to penetrate the structure. In cold climates there is also the possibility that the water will freeze in winter. Freeze/thaw cycling can erode the mineral surface on some roofing materials, such as modified bitumen, which can reduce the life of the roof.
For all of these reasons, ponding may also significantly shorten the lifespan of the roof, so do everything that you can, as a homeowner, to avoid it.
Why Does Ponding Happen?
Why does ponding happen, and why does it tend to get worse over time? There are several possible causes of this problem, including:
Improper installation: A flat roof isn’t perfectly flat. It must be installed on a slight pitch to allow for positive drainage of the roof. The slope should gently guide water towards the drains. If it slopes away from the drains instead or has an inconsistent slope, you may get ponding at the lowest points on the roof.
Drainage issues: Clogged or slow-moving flat roof drains can create ponding issues. Some flat roofs are so large that they need siphonic drains to move water in a timely manner. On residential roofs, a more common issue is the connection point between flat and sloped roofs. Improper installation of this connection can result in poor drainage and ponding issues.
Compressed insulation: Some flat roofs are not built for foot traffic or for the storage of heavy items. When these roofs are used for that purpose, the insulation can compress. This compression will create a low spot which may naturally collect water. The weight of the water can exaggerate this problem over time. You should not store objects or place heavy decoration on your flat roof unless the roof is specifically designed and protected to accommodate these loads.
Dips near roof features: Certain roof features, such as skylights or plumbing vents, may have been installed with small dips that allow for ponding and become worse over time. It is essential to get an experienced roofing professional to install these features and their flashing to prevent this problem.
Structural issues: Buildings settle over time, and sometimes this settling can create problems with the slope of the roof and cause ponding.
HVAC leaks: Sometimes HVAC equipment that is installed on the top of the roof causes ponding because it is too heavy and creates a dip in the roof. The ponding water may also be normal condensation or an abnormal leak from the air conditioner itself. The water may be slowly draining, but resupplied by the machinery. In this case you will need an HVAC professional to fix the equipment’s leak or reroute the normal condensation.
How to Fix Ponding on a Flat Roof
You will need a professional to help you fix ponding on your flat roof. There are several flat roof ponding solutions that your roofer may discuss with you. Which one is right for your roof will depend on what’s causing the ponding and the specifics of your residential roof system. However, to give you an idea of what might be involved, we’ll discuss some common strategies that might be useful to fix ponding on your flat roof.
Conduct the Roof Inspection: When you call roofers about your flat roof’s ponding, the first thing they should do is inspect the roof to discover what is causing the ponding. Your roofers may also need the help of an architect or structural engineer if there has been structural damage to the home. Your roofers should explain what the problem is and give you a quote before they begin work.
Fix Structural Issues: When ponding has caused structural damage to the building, that damage should be addressed first. Your roofers may need to work with structural engineers or architects to make a plan to address structural issues.
Fix Slope Issues: If your roofers found that your previous roofers installed the flat roof without the proper slope, they may need to replace the entire roof. Unfortunately, this is one of the more expensive and time-consuming solutions to ponding, but if the roof is improperly sloped, you may have no other choice to solve the ponding for the long-term.
Fix Drainage Issues: When the drains are the problem, your roofers have a wide variety of solutions available to them. It may be that you need to add in a new drain or change the drainage system so that it can accommodate more water. If the drain is frequently getting clogged, your roofers may recommend a better drain screen, or for you to get the roof cleaned more regularly. In cold climates, meltwater from snow may freeze in the drain. In this case, your roofers may recommend an electric cable to re-melt any ice in the drain. Or, they may suggest a new schedule for snow removal that may reduce ice development.
Fix Low Points on the Roof: If your roof has a correct slope overall but has developed low points from improper installation, misuse or damage, your roofers can correct those specific low spots on the roof. They may install a roof cricket to redirect water away from a low point. They may use a flat roof puddle filler to bring low points back up to the appropriate level. Or, if the low spot is near a roof feature or a drain, they may need to reinstall the flashing on that feature.
Fix Other Roof Damage: Once they have fixed the underlying cause of the ponding, your roofers should also be careful to replace any materials that were damaged by the ponding. They may need to replace sections of your cap sheet that were constantly exposed to water or replace insulation that was compressed under the weight of the water, or any other part of the roof.
The Importance of Getting Professional Help with Ponding
Ponding tends to get worse over time, and, if not appropriately addressed, can result in roof leaks, premature failure of the roof, and damage to the rest of your home. A professional roofer should be able to get to the root of your ponding problem, resolve it, and help you understand how you can avoid this problem in the future. If you need help with ponding on your residential flat roof, you can find a local roofer to help through IKO’s Contractor Locator.
Disclaimer: The following information is provided for general information purposes only. It is incumbent upon the homeowner to follow all building codes and safety codes as well as public advisories from safety and emergency response authorities. The information provided in this article is supplemental to advice from your roofer, local building code authorities and your local laws. IKO disclaims all liability in respect to the information provided.
Unfortunately, there’s no such thing as a hurricane-proof roof. However, there are still plenty of things you can do to protect your roof, and therefore the rest of your home, from hurricanes and the damage they can do. Research published by the Environmental Protection Agency (EPA) suggests that hurricane winds are getting stronger, and hurricanes will begin to affect more people. While any given year might have more hurricanes than average or fewer, the overall trend is for hurricanes to cause more damage.
That means it is more important than ever to do what you can to protect your home and ensure a hurricane-proof roof, especially during hurricane season. Below, we provide information on how roofs handle hurricanes and practical steps you can take to reinforce your roof or otherwise reduce your risk from a serious storm.
How Hurricanes Impact Roofing
While some roofs survive major hurricanes intact, other roofs suffer severe damage. Some roof trusses even blow off the home entirely. Much of the difference in roof performance during a hurricane has to do with the construction of the building. The major factors that determine whether or not your roof will blow off your home in a hurricane include:
Where the home is situated.
The strength of the structural connections in the building.
The shape of the roof.
Other architectural choices.
Hip roofs survive hurricanes better than gable roofs. The flat face of the gable catches wind, while the angle of a hip roof can better withstand the same pressure. In addition, low-slope roofs inherently experience higher wind loads and therefore perform worse in hurricanes than steep-slope roofs, according to research conducted by civil engineers at the New Jersey Institute of Technology. Specifically, this research found that roofs at a 7:12 pitch perform the best in high wind conditions.
How to Secure Your Roof for Hurricane Season Against Wind-Driven Rain
Roofs that are structurally sound and well-attached to the rest of the building may still suffer in hurricanes. The extreme wind forces often blow water at a structure horizontally. Instead of moving down from the sky, the water is directed across, hitting the roof from the side. This phenomenon is called wind-driven rain, and when it occurs during hurricanes, it can involve large amounts of water directed at your home for hours. It is a tough challenge to design materials and roofing systems that can resist this force.
Any small gap in flashing, missing shingles or holes in the roof may let water into the home. Any piece of roofing material that catches the wind may be ripped off, creating a chain reaction that can strip the roof of shingles or underlayment. Then, the exposed decking can soak, which can create major leaks.
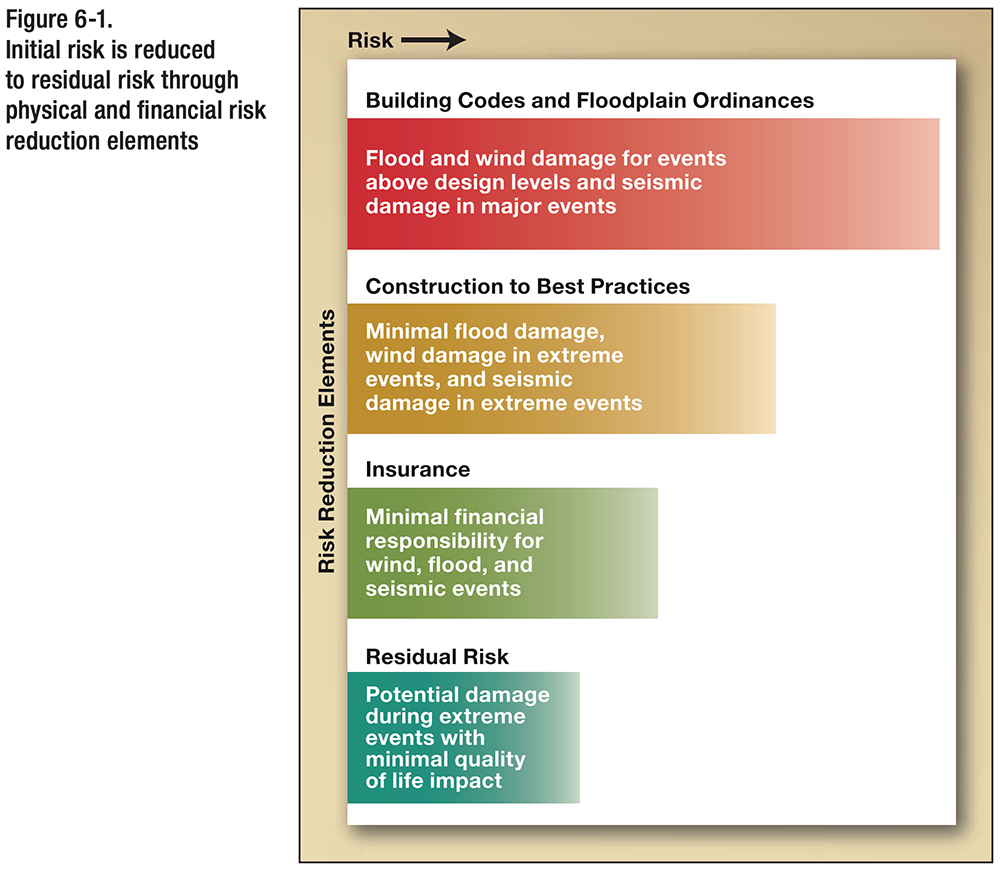
According to the Federal Emergency Management Agency (FEMA), there are multiple layers of risk reduction you can take to protect your home. Following building codes is the first step. Following construction best practices is the second. Obtaining homeowners insurance policies and purchasing additional insurance to cover hurricanes and flooding when your homeowner’s insurance does not cover these perils, is third. With these three elements of risk reduction, you should have excellent protection during a hurricane. However, FEMA recognizes that there will always be residual risk during extreme events.
What Can You Do To Protect Your Roof in a Hurricane?
Protecting your roof in a hurricane is all about preparation. Unless you intend to do a major rebuild of your home, you can’t control the design of your home or your roof. Instead, factors for roof performance that are within your control are about ensuring the roof you have will do the best job it can under the circumstances.
1. Ask for a Preseason Roof Inspection
Professional roofers are your roof’s first line of defense from hurricanes. Before hurricane season begins (this varies by year, but it is roughly May 15 for the Pacific and June 1 for the Atlantic), you should have a roofer inspect your roof. They may spot potential problems, from bent flashing to missing shingles, which could make your roof more vulnerable to extreme winds. One of the most common issues is damage to the edge of the roof, including the fascia and soffit boards. Roofers should pay special attention to this area of the roof and ensure all is secure before hurricane season.
Routine maintenance, such as cleaning gutters, downspouts and valleys, as well as trimming nearby tree limbs, can also help protect your roof from damage during storms.
While you have your trusted roofer inspecting your roof, ensure that you have their updated contact information available in case of an emergency roof issue after the storm.
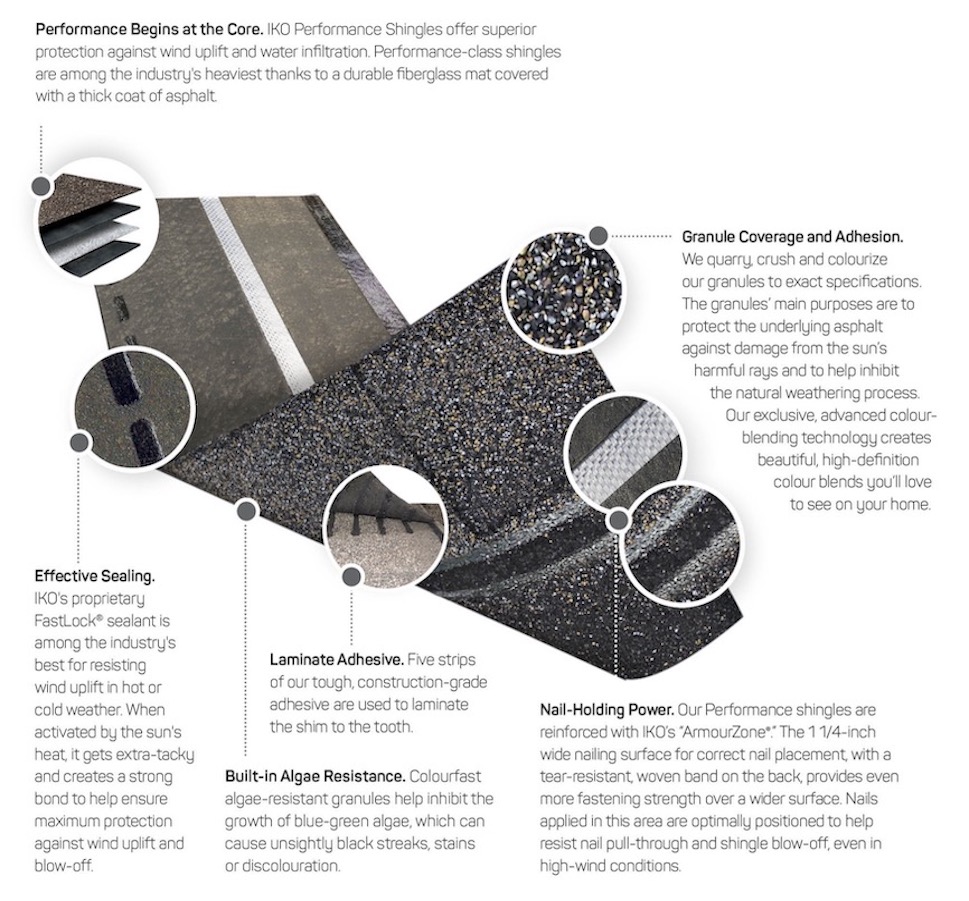
2. Choose Performance Products
Not all roofing materials and features are made equal. Choose roofing products that offer limited wind warranties up to 130 mph (210 km/h). No shingle is impervious, but IKO has specifically designed performance shingles to better handle various environmental challenges, including high winds.
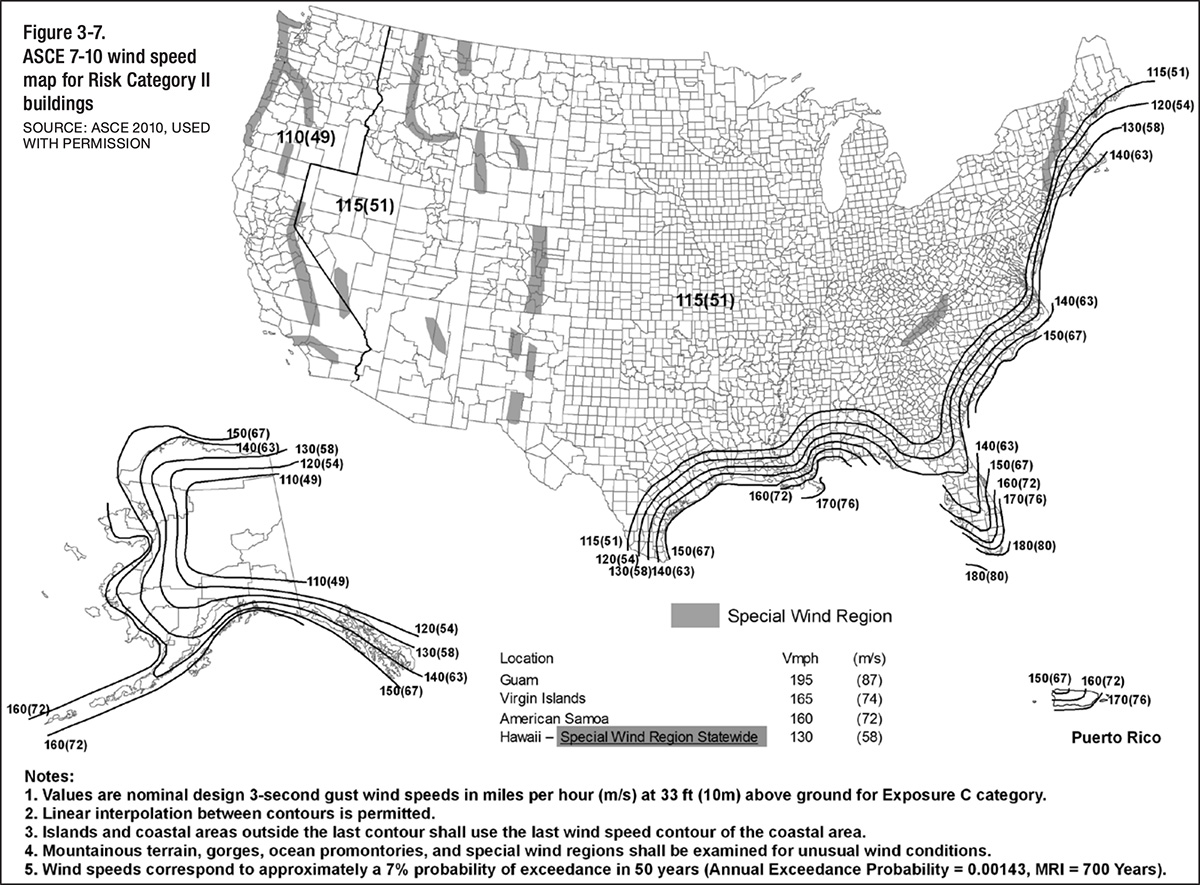
Some shingle manufacturers, including IKO, suggest different installation practices for high-wind conditions. We strongly suggest you consider a high-wind application if you live in a high-wind area. The chart below shows FEMA’s assessment of the high-wind areas in the United States.
Underlayment choice can also impact roof performance. Ensure that your roof has at least the bare minimum amount of ice and water protector. Choose synthetic underlayments that offer better moisture protection than felt. Even if some shingles are blown off, the right underlayment can help reduce the amount of water that gets into your home.
3. Follow Building Codes
Typically, you will only have to get your roof up to code with any changes to the building codes when you get a roof replacement or a repair of an area affected by the building code change. However, sometimes adopting the improvements laid out in the building codes before hurricane season can help offer you additional protection.
For example, as of January 1, 2021, the Florida Building Code has changed several roof requirements, including adding a secondary water barrier and additional fastening. Changes to rules for soffits were also implemented to reduce the impact of high winds on this key area of the roof. These new regulations do not negate other building code requirements for your roof.
Ask your roofer if it is in your best interest to update your roof to meet any new building code requirements before a hurricane.
4. Add or Inspect Hurricane Ties
Hurricane ties strengthen the connection between the roof truss and the home’s structural elements, preventing roof blow-off in high winds. Consider adding hurricane ties. If your home already has hurricane ties, your roofer should inspect them for corrosion and other damage during the preseason inspection.
5. Consider the FORTIFIED™ Program
The FORTIFIED ™ program is a voluntary program run by the Insurance Institute for Business & Home Safety (IBHS) with the goal of improving roof and home performance in hurricanes. By bringing your home up to the program’s standards, you can improve your roof’s performance in weather events.
The program has requirements for roofing and other parts of the home beyond what most building codes require. These enhancements can help a roof and home withstand even Category 3 hurricanes. The program’s requirements are based on research from the IBHS. Standards include sealing the roof deck, using a thicker drip edge, and ensuring that starter shingles are fully adhered to the roof deck. As research has demonstrated, the most critical factor in shingle performance is the strength of the seal between the shingles. These measures are intended to bolster this connection. You can ask a professional roofer to ensure your roof meets FORTIFIED™ standards.
6. Address Roof Repairs, Including Leaking Roof Vents
Before a storm, it is smart to get your roofer to complete any roof repairs that you have been putting off. Even small issues with the roof can lead to more serious damage during a hurricane.
Roof vents are especially important to inspect and repair. They are crucial components of a roofing system, but they can become points of concern during hurricanes, particularly if they leak. Choose hurricane-rated roof vents and have a reputable roofer install them to prevent leaks and hurricane-related vulnerabilities.
7. Protect Skylights
Skylights are particularly vulnerable during hurricanes and any high-wind conditions. Manufacturers equip modern skylights with tempered glass or plastic, which means they do not leave dangerous shards behind if broken during a hurricane. Skylights are typically designed to resist wind, but they can still suffer damage in high winds and hurricanes.
Have your roofers replace your current skylights with hurricane-resistant skylights. They are not hurricane proof, but they do have much higher wind-resistance properties than some other options on the market.
If this is not an option, you may be able to cover your skylight with a metal cage, plywood or a specifically designed skylight shutter. If the installation is temporary, your roofers will need to repair any shingles surrounding the skylight that they had to puncture with nails to secure the skylight cover.
8. Secure Roof Documentation
Take some “before” pictures of your roof for insurance and limited warranty claims. Take overall pictures from multiple angles and some close-ups as well. Your roofer can help by taking photos of points of interest, like chimneys and skylights, from on top of the roof. Save the photos to your cloud storage to ensure that you don’t lose them if something happens to your phone.
It may also be useful to scan and save digital copies of any limited warranties your roof may be under, including those from your manufacturer and the roofers who installed the roof.
9. Store Potential Projectiles
Many of the loose objects you have on your property may become projectiles in hurricane conditions. These can damage your roof, other parts of your home or your neighbor’s property. Before a hurricane, bring in lawn furniture, trampolines, children’s toys and anything else that you typically store unsecured outside.
10. Verify Your Home Insurance
In the United States, most homeowner’s insurance policies will not cover flooding and may not cover other hurricane damage. Before you choose a policy, or at least before a hurricane, confirm with your insurance provider that you also have hurricane and flood protection policies in addition to your homeowner’s insurance policy. You can purchase flood insurance through the National Flood Insurance Program (NFIP) in the United States. In Canada, you may find it offered by any insurance broker as an umbrella policy on top of homeowner’s insurance or separate to homeowner’s insurance.
Also, ensure that your coverage is large enough to provide for the whole cost of your roof replacement in the event a hurricane destroys it. It may be worthwhile to buy an umbrella insurance policy to increase the dollar amount of coverage so that your policies will cover more of your roof replacement cost.
11. Buy a Tarp
When roofers deal with roof damage after a hurricane, they typically install a tarp over the damaged sections of the roof to prevent further water damage. They can only address the repairs properly after storm conditions and precipitation have passed. If you have a tarp on hand, your roofers may use it instead of bringing their own. While having a tarp is useful for minor storms too, it is an especially good idea if a hurricane is approaching, as roofers may run out of tarps if enough roofs in your area have been damaged.
Though owning your own tarp is a wise precaution, attempting to install it yourself, especially during a storm, is dangerous. Homeowners should allow professionals to tarp their roof. Do not walk on your roof, during a storm or otherwise, or you may fall and suffer serious injury.
Protecting Your Home’s Roof From Hurricanes
When considering what steps you should take to protect your home from hurricanes, it is always wise to speak with your trusted roofer, who may have specific advice for your roof. In the unfortunate event a hurricane damages your roof, it can help you to know you have financing options for roof replacement and repair that can ensure you get the damage fixed quickly. Plan ahead and be prepared this hurricane season.
The roof of your commercial building is its first line of defense against the elements. Selecting the right commercial roofing materials play a crucial role in protecting your investment, ensuring the building’s energy efficiency, and contributing to its overall longevity. At Major League Roofing, we’re here to guide you through the various commercial roof materials available, helping you choose the one that best suits your building’s needs and budget.
Factors to Consider When Choosing Commercial Roofing Materials
Several factors influence the selection of commercial roofing materials:
Roof Slope: The slope or pitch of your roof will dictate which materials are suitable. Low-slope roofs are ideal for membrane systems, while steeper slopes can accommodate traditional shingles or metal panels.
Durability and Longevity: Consider the desired lifespan of the roof and choose materials known for their resilience in your climate.
Maintenance Requirements: Some materials require minimal maintenance, while others might necessitate periodic inspections and upkeep.
Energy Efficiency: Certain materials offer superior thermal insulation properties, contributing to lower energy costs.
Cost: Commercial roof materials vary significantly in price. Evaluate the initial investment against the material’s lifespan and maintenance requirements to determine the best value.
Building Aesthetics: Consider how the chosen material complements the overall architectural style of your commercial building.
Top Choices in Commercial Roofing Materials
Here’s an overview of some of the most popular commercial roofing materials, along with their key characteristics:
Low-Slope Roof Systems:
Modified Bitumen (SBS & APP): A popular choice known for its durability, affordability, and ease of repair. SBS modified bitumen offers superior flexibility in cold climates.
Ethylene Propylene Diene Monomer (EPDM): A lightweight, single-ply membrane system known for its affordability, energy efficiency, and long lifespan.
Thermoplastic Polyolefin (TPO): Another single-ply membrane system gaining popularity due to its heat reflectivity, durability, and resistance to chemicals and UV rays.
Spray Polyurethane Foam (SPF): A lightweight, seamless roofing system offering excellent insulation properties and resistance to water infiltration.
Steep-Slope Roof Systems:
Metal Roofing: Available in various profiles and materials (steel, aluminum), metal roofs offer exceptional durability, longevity, and fire resistance.
Metal Standing Seam: A popular metal roofing option known for its clean lines, weather resistance, and long lifespan.
Built-Up Roof (BUR): A traditional multi-layered roofing system composed of asphalt, bitumen, and gravel. While durable, BUR roofs are labor-intensive to install and require more maintenance.
Additional Considerations for Choosing Commercial Roof Materials
Sustainability: Some materials offer recycled content or high solar reflectance properties, contributing to a more sustainable building.
Warranty: Compare warranty coverage offered by different materials and manufacturers.
Partner with a Reputable Commercial Roofing Contractor
Choosing the right commercial roofing materials is a critical decision. At Major League Roofing, our experienced team can help you evaluate your specific needs and recommend the best commercial roof materials for your building. We offer a comprehensive range of commercial roofing services, from installation and maintenance to repairs and inspections.
Contact Major League Roofing Today for a Free Consultation
Don’t leave your commercial building’s protection to chance. Contact us today to schedule a free consultation. Our expert team will assess your roof, discuss your requirements, and recommend the optimal commercial roofing materials to ensure your building’s long-term performance and value.
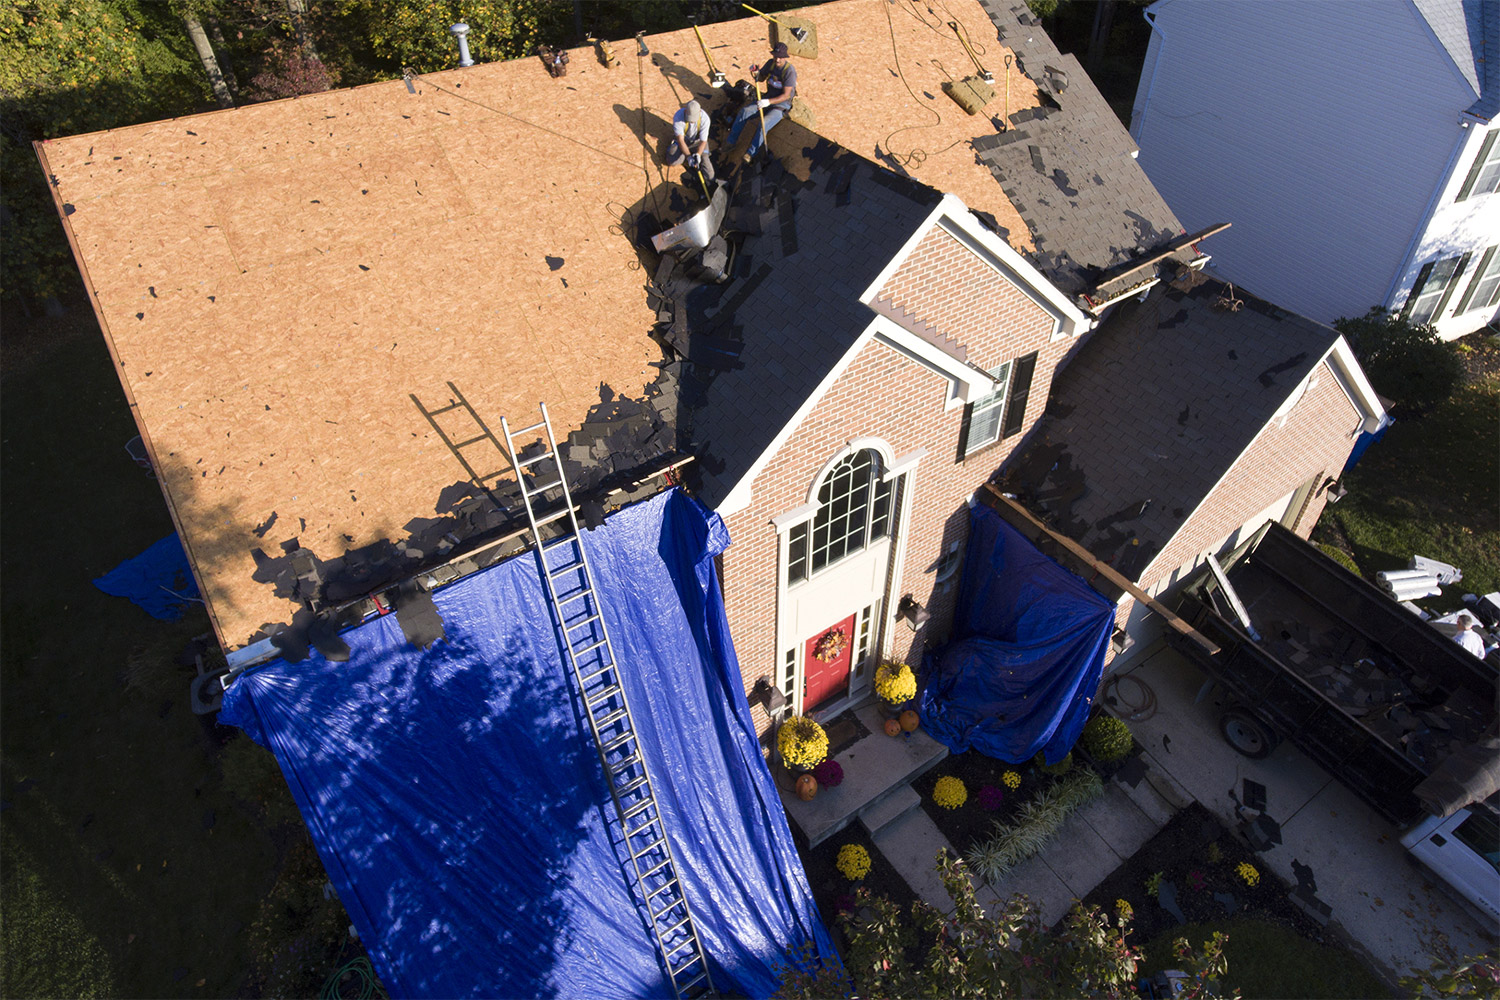
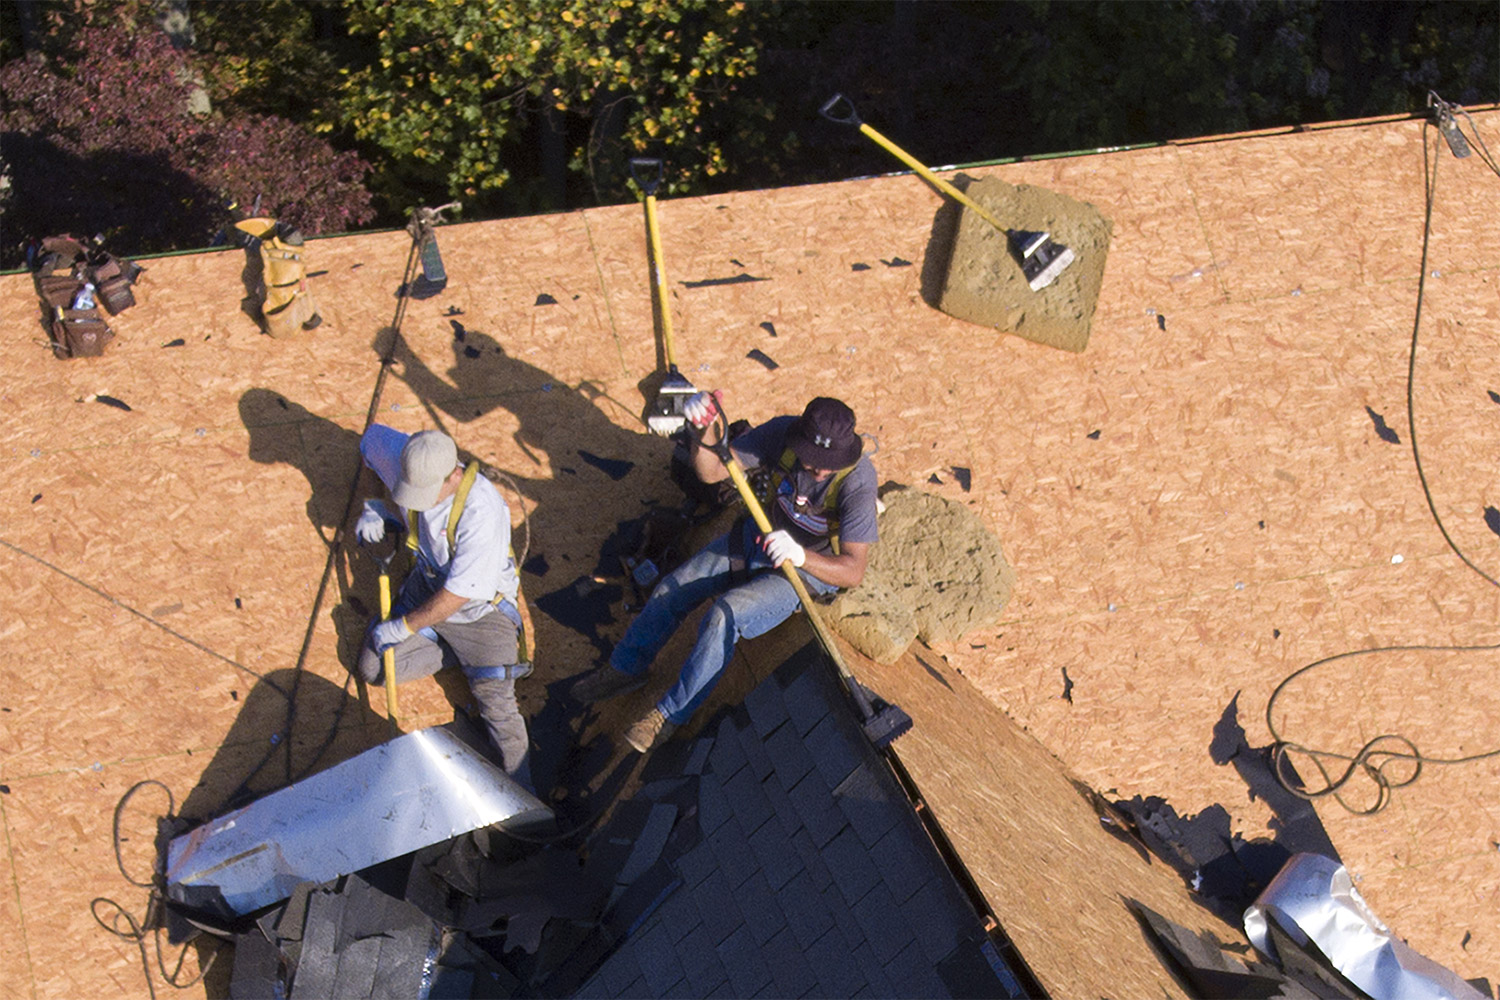
How to Plan a Roof Replacement That Fits Your Schedule
Need to replace your roof but not sure what the best time is or how to make it fit your schedule? You’re not alone. From weather conditions to contractor availability to everything else that life throws at you, planning a roof replacement can feel a little bit like putting a puzzle together (unless, of course, the reason you need to replace your roof is due to emergency circumstances).
If your roof incurred damage from a storm or you have a significant leak in your home, then the best time to do it is as soon as possible. But, if you are planning a full home remodeling project, or you intend to replace your roof to increase the value of your home prior to sale, you will have a bit more flexibility.
Having your roof replaced can feel quite disruptive as a homeowner due to the noise and time commitment, but there are a few ways to prepare yourself to make it feel less like a burden and more like an exciting project to take on.
Here’s how to plan a roof replacement that fits your timeline.
1. Planning a full home renovation? Consider the timeline of the entire project before booking your roofers.
If you are building an addition to your home, or are in the midst of a full home remodel, the best time to replace your roof will depend on the overall scope of the project (as long as none of the various projects are urgent).
For example, if you plan to replace most of the exterior of your home (i.e., doors, windows, siding and your roof), then it is ideal to start with your roof. This will help ensure that your new windows or siding are not damaged while your roof is being replaced.
Whenever you are planning a series of home improvement projects, it is best to speak to a contractor or roofer before confirming start dates.
2. Plan to replace your roof during a time when you have the resources to get your pets and small children out of the house.
When you are trying to choose the best time to replace your roof, ensuring that you have the resources to get your pets and small children away from the home will be beneficial. If your pets exhibit fear during a thunderstorm, they are more than likely going to be quite scared during a roof replacement.
There is no way for a roofing crew to avoid the inevitable hammering and walking on the roof of your home, so you may want to make arrangements before your roof replacement for them to stay with a friend or sitter.
3. Choose a time to replace your roof that will not disrupt your work schedule.
Choosing a convenient time to replace your roof depends on several factors: weather conditions, roofer availability, and your own schedule.
But, just like small pets and children will be disturbed by the noise when you replace your roof, you likely will be, too, particularly if you work from home! If this is the case, weekends might be an ideal time for a roof replacement (if your roofer works on weekends), as you will be able to leave the home or set work aside for the time that the project is completed.
Additional scheduling factors to take into consideration include whether you want to be close by to oversee the project and potentially leave space for unexpected delays.
4. Consider the best time to replace your roof based on weather conditions.
Summer and fall are some of the best times to replace your roof for a reason: Lower humidity and moderate temperatures are ideal for shingle installation. Summer is a particularly ideal time to replace your roof because products like IKO shingles with FastLock sealant are activated by the sun’s heat.
Replacing your roof in cold-weather conditions is not ideal for the materials or your roofers, but it can be easier to find a reputable contractor since it is a slow season. With that said, your roofer will need to take additional health and safety precautions, and the project will likely take longer than it would in fair weather conditions. Cold weather roof replacement also requires additional installation steps, which is likely to result in higher labor costs.
5. Make a plan for your vehicles.
Your driveway is more or less occupied while contractors replace your roof. Your roofer will likely have a large dumpster delivered to your home a day or two before the beginning of the project, which they will use to dispose of the current roofing materials they remove.
It is not advisable to use your driveway while your roof is being replaced. Reputable contractors will use a magnet to pick up any stray roofing nails from your driveway and gardens at the end of each day of roofing but to be safe, it’s best to find somewhere else to park your cars for the extent of the project.
6. Set time aside to take down and store any valuables before your roof replacement.
You might be surprised by the level of vibrations that can come with the process of having your roof replaced!
Ensure any fragile interior objects like mementos or photos on the wall are put away in a safe place before the roofers’ arrival. While they are not guaranteed to knock things off the walls or shelves, it is an extra safety precaution that is worth setting aside some extra time for!
7. Plan for any necessary permits or approvals ahead of your roof replacement to avoid delays.
Depending on where you live and the scope of your roof replacement project, there is a possibility that you may require permits before the contractors can get started. Most contractors will navigate the permit process on your behalf, but it is still important to take into consideration when choosing a time for your roof replacement, particularly if you are planning multiple home renovation or home improvement projects.
Replacing a roof with the same type of roofing materials, repairing missing or damaged shingles and eavestrough replacement often does not require any permits, but we recommend checking your local zoning regulations and bylaws, as well as any Homeowner Association (HOA) rules apply to you and your home. But, if you are adding a second story to your home, changing the slope or pitch of your roof, or, say, installing a skylight, these are circumstances that may require a permit. Be sure to speak to your contractor ahead of time and plan your roof replacement accordingly.
8. Stay in touch with the roofing company for updates and have a backup plan for delays
Communication is key in any project. By staying in communication with your roofing company before the project starts and staying informed throughout a roof replacement, you will be less likely to come up against any surprises. If your contractor expects any project delays due to setbacks, like changing weather conditions or material delays, maintaining a steady stream of communication will ensure that you are prepared to adjust your plans accordingly (i.e., leave the dog at the sitter for an extra few days, let your employer know that you need an extra day off, etc.).
9. Consider the type of roofing material you want to use and its availability.
Material shortages and delays have become quite common in any trade industry following the COVID-19 pandemic. While most reputable roofing companies plan their projects and timelines accordingly, if you hope to replace your roof with a trending, custom, or particularly unique roofing material, be sure to let your roofer know well ahead of time.
10. Finally, be sure to ask the roofing company for advice and guidance on how to best plan for a successful and timely replacement.
As a homeowner, you can try to plan your life around your roof replacement as carefully as possible with the information you have, but one of the best places to start is by speaking to your contractor before even booking the project.
They are the experts and will be able to guide you on best practices, material availability, their schedules, and the ideal weather conditions in your particular location.
Texas weather is known for its extremes. From scorching summers and flash floods to brutal hailstorms and powerful winds, these conditions can wreak havoc on your roof. While routine maintenance goes a long way in preventing major problems, sometimes unexpected events cause damage that requires immediate attention. Knowing when to call for emergency roof services can save you from costly repairs and potential water damage down the line. This blog post will help you identify situations where emergency roof services are necessary in Texas.
Signs You Need Emergency Roof Repair:
Here are some key indicators that your roof needs immediate attention:
Visible Leaks: This is the most obvious sign of a roof breach. Leaking water can damage your ceilings, walls, and insulation, leading to expensive repairs and potential mold growth. If you see any signs of water intrusion, don’t hesitate to call for emergency roof services.
Missing or Damaged Shingles: Shingles are the first line of defense for your roof. Missing or damaged shingles expose the underlying structure to the elements, increasing the risk of leaks. If you notice missing or significantly damaged shingles, especially after a storm, call an emergency roof repair company.
Large Cracks or Holes: Cracks and holes in your roof’s surface create direct pathways for water infiltration. Whether caused by aging, storm damage, or improper installation, these gaps require immediate attention.
Exposed Underlayment: Underlayment is a waterproof membrane that protects your roof deck from moisture. If you see any exposed underlayment, it indicates that the shingles or other protective layers have been compromised.
Fallen Trees or Branches on the Roof: A fallen tree limb on your roof can puncture the shingles or damage the underlying structure. The longer it remains there, the greater the potential for leaks and further damage.
Standing Water on the Roof: Standing water on a flat roof signifies a drainage problem. This can lead to ponding and ultimately roof collapse. If you notice water accumulating on your flat roof, call an emergency roofer who specializes in flat roof repair.
Interior Ceiling Damage: Water damage on your ceiling is a clear sign that your roof has a leak.
Stains on Walls: Stains on walls near the ceiling or upper floors can indicate a roof leak that hasn’t yet manifested as a visible drip.
Loss of Granules in Gutters: Over time, shingles lose their granules, the small stones embedded in the asphalt. However, excessive granule loss in your gutters can indicate advanced shingle deterioration and a potential need for roof replacement.
Additional Considerations for Texas Weather:
Texas is prone to specific weather events that require immediate attention regarding your roof:
Hail Damage: Hailstorms are common in Texas and can cause significant damage to shingles. Depending on the size and intensity of the hail, it might be necessary to replace the entire roof or significant sections.
High Winds: Strong winds can rip off shingles, loosen flashing, and damage roof vents.
What to Do When You Need Emergency Roof Services:
If you suspect a roof emergency, take the following steps:
Move People and Pets to Safety: If the roof is leaking or there’s visible damage, move everyone and pets away from the affected area to prevent injuries.
Contain the Damage: If possible, take steps to minimize further damage. Cover exposed areas with tarps or plastic sheeting to prevent additional water infiltration. However, prioritize your safety and don’t attempt to climb onto your roof.
Document the Damage: Take pictures and videos of the damage to your roof. This documentation will be helpful when contacting your insurance company.
Contact a Reputable Roofing Company: Look for a company with experience in emergency roof services and a proven track record of quality work. Don’t be pressured by high-pressure sales tactics – focus on getting a professional assessment of the damage.
Preventing Roof Emergencies:
While some events are unpredictable, regular maintenance can significantly reduce the chances of needing emergency roof services. Here are some preventative measures you can take:
Schedule Regular Roof Inspections: Have a qualified roofer inspect your roof at least once a year, preferably before the peak storm season.
Keep Gutters Clean: Clean your gutters regularly to ensure proper drainage of rainwater. Clogged gutters can lead to water pooling on the roof and subsequent damage.
Trim Overhanging Trees: Branches overhanging your roof can cause damage by scraping shingles or falling through during storms.
Address Minor Issues Immediately: Don’t ignore minor roof issues like missing shingles or loose flashing. Addressing these problems promptly can prevent them from escalating into major issues.
By taking these proactive steps and knowing when to call for emergency roof services, you can protect your home from the ravages of Texas weather.
Major League Roofing is your trusted partner for all your roofing needs, including emergency roof repair. Our team of experienced professionals is available 24/7 to provide prompt and efficient service. Don’t hesitate to contact us for a free estimate or to schedule emergency roof services.
What Homeowners Need to Know About Roofing Insurance Claims
Most homeowners in North America have homeowners’ insurance. Unfortunately, not many homeowners truly understand their policy, what it covers and how it can help them if they need to make a roof insurance claim.
We sat down with IKO ROOFPRO Jen Silver, the founder and CEO of Roofing Utah, one of the fastest-growing roofing companies North America, to gain some insight into the roof insurance claim process and what homeowners need to know before they contact their insurance agent and file a roof insurance claim. In addition to sitting at the helm of Roofing Utah, Jen is a public speaker, consultant and expert in roof insurance claim work who speaks publicly across the nation on the topic.
So, she shared with us seven things that every homeowner should know about their insurance policy prior to filing a roof insurance claim and what resources are available to them to learn this essential information.
Whether you wonder what kind of roof damage is covered by your insurance company, if your homeowners insurance will cover your roof leak or how often insurance will pay for a new roof, there are a few questions you should answer about your homeowners insurance prior to filing a roof insurance claim.
Thinking About Filing a Roof Insurance Claim? Here’s What You Need To Know First.
1. Do You Have Replacement Cost Value (RCV) or Actual Cash Value (ACV) Coverage?
If you are in the process of purchasing a homeowners insurance policy or considering making a roof insurance claim, be sure to know whether you are getting RCV or ACV coverage.
RCV will cover you for the entire cost of a roof replacement, minus your deductible. So, if you were in the middle of a hailstorm and got a quote for $15,000 to replace your roof, and you have a $1,000 deductible, your insurance company will cover the remaining $14,000 to replace your roof upon approval of your quote.
ACV, on the other hand, will only pay out the value of your current roof if you make a roof insurance claim. So, if your roof was already 10 years old and has depreciated by $10,000, your insurance policy will only cover $5,000, minus your deductible, which means you as a homeowner would be responsible for covering the remaining $11,000.
The reason why this is so important to know prior to filing a roof insurance claim, Jen explains, is that if for whatever reason you are unable to cover the gap in insurance coverage, but your roof is approved, and you don’t replace it, your insurance company could drop you as a client.
2. What Is Your Deductible?
When you make any sort of roofing-related claim on your homeowners’ insurance, the deductible is the amount that you must pay out before your insurance company will cover the remaining cost. Depending on your homeowners’ insurance policy, this deductible may be a set amount or a percentage of the claim.
So, say you have an RCV policy, and you make a roof insurance claim because you need to replace your roof due to storm damage beyond repair and you have a $1,000 deductible. if the total cost to replace your roof was $10,000, you would pay $1,000, and your insurance company would cover the remaining $9,000.
Deductibles apply in almost all cases of property loss or damage, including most roof insurance claims. If the cost of the claim is below your deductible (e.g., you try to claim a relatively simple $500 repair), you are responsible for covering that cost in most cases. In which case, you would likely be better off covering those repairs out of pocket to avoid negatively impacting your premium moving forward.
Your deductible can be waived under certain circumstances, most often When a claim is over a certain dollar amount; but this depends on your insurance policy.
Always choose a deductible that you know you will comfortably be able to afford. If you opt to have a higher deductible (e.g., $5,000), you will need to be able to pay that amount out of pocket in the event of a claim
3. What Is Your Insurance Policy Limit?
Insurance policies rarely offer unlimited coverage. Rather, they set maximum amounts that they are willing to pay out for different types of insurance claims.
When you purchase homeowners’ insurance, you have the option to raise or lower these limits based on the coverage you need.
Choosing insurance limits is really a balancing act between ensuring you have enough coverage for any sort of significant loss (otherwise, what’s the point of having insurance?), yet avoiding such high limits that cause you to pay way more for your premiums than necessary.
4. What Applicable Exclusions Do You Have?
The general understanding of insurance of any kind is that there needs to be enough people with a shared need for protection for insurance to work properly and keep premiums at reasonable rates.
This means that it is not possible for insurance companies to cover every single type of loss that could ever occur, and this is where the term “exclusions” applies.
Most insurance policies across North America will contain a similar set of exclusions, but it is important to read the fine print of your policy to understand what is and is not covered by your home insurance.
Some of the more common exclusions include losses that are the result of wear and tear or a homeowner’s failure to maintain their property. Old roofs are one of them. So, even if your roof was damaged in a storm, you could come up against challenges in making a claim if your roof is significantly aged.
Additional exclusions may include intentional, fraudulent or criminal losses; failure to reasonably protect your home; high-risk activities; and catastrophic losses that would exceed an insurance company’s resources (for example, war, terrorism, unexpected natural disasters like floods, tornados, earthquakes, or other “acts of God”).
5. How Does Your Policy’s Loss of Settlement Provision Work?
This brings us back to that ACV vs. RCV policy-type question. ACV insurance policies are often calculated at approximately 20 to 25% less than a replacement cost policy, as well as figuring depreciation into the claim.
So, again, if your roof is 20-years-old and has depreciated significantly in value, your insurance company will cover significantly less of the cost to replace it, even if the claim is related to a natural event, like hail or a windstorm, at the time of the claim.
Keep in mind that when considering roof insurance claims, depreciation rates tend to be higher than, say, your kitchen appliances due to exposure to the elements.
6. What Is the Statute of Limitations on Your Claim?
A statute of limitations is a specific period during which you, the insurance policyholder, can file a claim for damages. This varies from state to state in the United States and from province to province in Canada.
Your insurance policy may provide the time period within which a claim may be made, which typically is as short as one year.
If the policy does not provide such a limitation, the claim will be subject to the statute of limitations, which can be anywhere from two to four years, and in rare cases, up to six.
In some jurisdictions, the statute of limitations period may override the period stated in the policy. It is important to review your policy and consult with legal counsel in your jurisdiction to make sure you make a timely claim.
If you are certain that you intend to file a roof insurance claim, be sure to do so within the statute of limitations in your geographical area.
7. Do You Have Ordinance and Law Coverage?
Ordinance and law coverage would cover the cost to rebuild your home or undergo significant renovations and updates to bring it up to current code in the event of a major covered loss.
When considering roof insurance claims, what might seem like a simple repair when making a claim could, in some cases, require a full roof replacement if your roof is not up to the current building code.
Ordinance and law coverage would ensure that your policy covers the cost to replace your roof in compliance with the most up-to-date code and laws.
Many homeowners are unaware that this type of coverage can be included in homeowners’ insurance, and it is not included in every policy type. To determine whether you need this type of coverage, it is best to speak to an insurance specialist.
Understanding Your Homeowners Insurance Policy Prior To Filing a Roof Insurance Claim: Whom Can You Talk To?
Homeowners insurance policies can be extremely overwhelming to understand, but there are experts out there who can help you interpret your policy prior to filing your roof insurance claim.
With that said, not just anyone is able to discuss, explain or interpret your policy for you. Rather, you will want to reach out to an insurance agent, attorney or public adjustor.
“Once a homeowner has all of this information, then they will be in a better position to make an educated decision on whether they want to file a claim or not,” Jen concluded. And, if you ever notice roof damage of any kind, the best first move is always to reach out to a ROOFPRO roofing contractor, as they are a wealth of information and may be able to guide you through the claims process.
Follow IKO’s tips about the seven things you need to know prior to filing a roof insurance claim, and you will be well-prepared if you discover any sort of roof damage.
The weather might not always be in the roof’s favor, which is why a roof needs to be able to handle all types of extreme weather. From large snow loads to high temperatures, IKO Dynasty shingles are tried and true! Plus, they come in a beautiful color palette!
Why Calendar Construction Loves IKO Dynasty Shingles Reviews
Why do Matt and Erin, owners of Calendar Construction, recommend using IKO Dynasty shingles? Between the high-definition colors and the ArmourZone, there are many reasons why IKO Dynasty shingles standout to homeowners!
IKO ROOFPRO Jen Silver of Roofing Utah talks about the new and improved IKO Dynasty shingle that is now rated as Class 3 impact resistant, what that means and why it is a great shingle choice for your home!
Check out the facts on one of IKO’s most technologically advanced roofing shingles!
Here are three reasons homeowners and contractors love IKO Dynasty®, our most advanced roofing shingle.
The Dynasty ArmourZone® provides a 40% wider nailing area
With a 40 percent wider nailing area of 1.25 (1 ¼”) inches, Dynasty is easier and faster to install than the 0.87 (7/8”) inch standard roofing shingle nailing zone. Shingles go on faster, so roofing projects take less time to complete!
Fasteners nailed within the ArmourZone reduce the risk of call-backs from the nail pulling through the shingles in high wind. Dynasty ArmourZone features a woven band on the back of the shingle that is super tough and will not let go of nails without a fight! Watch our Dynasty Demo to learn more about the ArmourZone.
Dynasty shingles carry a Class 3 Impact Resistance rating
With a Class 3 Impact Resistance rating, IKO Dynasty shingles offer an added layer of protection from harsh weather with their thick coating of weathering asphalt. This rating is solely for the purpose of enabling residential property owners to obtain a reduction in their residential insurance premium, if available. This is not a guarantee of impact resistance against hail. Damage from hail is not covered under the limited warranty.
Dynasty is available in a wide range of high-definition color options
IKO Dynasty roofing shingles use granules with a proprietary pigmentation process that gives them rich, vibrant colors that increase a home’s curb appeal. Check out the stunning range of HD colors available in Dynasty shingles for homeowners and contractors!
Why IKO Dynasty® Roofing Shingles Are a Top Choice
By now it should be obvious why IKO Dynasty shingles are a favorite to both homeowners and contractors. The innovative Dynasty features are only the beginning of what IKO has to offer.
Like all of IKO’s Architectural and Performance shingles, Dynasty shingles also feature FastLock sealant tabs and the True Square Advantage. At IKO, we are constantly working to provide better products and new roofing materials that will further elevate the standard of roofing.
So, it doesn’t matter what the weather brings tomorrow. To us, the future always looks bright.
Learn the basics of installing an asphalt shingle roof, courtesy of IKO.
When it’s time to replace your roof, the amount of information available can be overwhelming. Lots of websites and videos go into great detail on how to shingle a roof. This article from the experts at IKO Roofing will help you make sense of it all by highlighting the basic steps and outlining the fundamental purpose for each roofing system component. This article is not a substitute for proper live training and IKO recommends that only properly trained professional roofing contractors engage in the shingling of roofs.
The next time you read the package instructions or watch a how-to video on YouTube, you’ll have a much better understanding of why roof shingles are installed the way they are.
Here are the basic steps to shingle a roof.
1. Step one in any roofing project is always safety first.
Working at heights on a roof presents fall hazard risks and other safety concerns. IKO recommends that roofing work be done by qualified professionals who know the best way to shingle a roof and have been fully trained in all aspects of roof construction safety. Further, it’s important to review local applicable building codes and ensure the roof conforms to all requirements.
2. Understand the physics of how a sloped shingle roof works.
Asphalt roofing shingles simply rely on the force of gravity to shed water from rain or snow melt. If the roof shingles and all accessory roof components are arranged and overlapped with this in mind, the roof should successfully shed water. In the dictionary, “to shingle” is defined as “to lay out or arrange so as to overlap.” So now let’s look at the sequence of overlapping roof construction components to see how this applies.
3. Deck preparation.
Before installing any roofing materials, make sure that the roof deck is smooth, properly fastened to the roof trusses, dry and free of any gaps or holes. Having a clean, flat deck surface will help ensure that the newly shingled roof will likewise appear smooth and flat when finished.
4. Work from the bottom up.
Not only are we working from the bottom of the roof, we’re also starting with the bottom-most layer, in terms of roofing components. The asphalt roof shingles are the visible part and the first line of defense against inclement weather, but what’s underneath them really counts.The first material installed at the eave is the drip edge. It literally provides a clean, sharp edge for the start of the roof and protects the lower edge of the roof deck from water damage by preventing water from “defying gravity” and wicking back “up” before it leaves the roof.
Drip edge is installed under the ice and water at the eaves and on top of the ice and water and underlayment on the rakes.
5. Ice dam protection at the eaves.
If you live in an area where the climate includes significant cold winter weather, you’d wear boots to protect your feet from ice, slush and puddles, right? Well, your roof and the home under it need the same kind of protection that an ice and water protector is engineered to provide. This thin, self-adhering membrane is the next component and it gets installed over the drip edge. Ice dam formation is best prevented by having a proper attic vapor barrier, adequate attic insulation and thorough ventilation;
However, an ice protection membrane is a wise roofing system component and is likely required by your local building code in cold climates. This ice and water membrane is typically applied to overhang the eaves by 1/4″-3/4″. To be fully effective, it should extend up the roof to a point at least 24″ inside the vertical extension of the interior side of the wall.
At this time, any valleys on the roof should also be flashed with an ice and water membrane. Why an ice and water protector? Because these membranes work on the principle that their rubberized asphalt coating seals around the shanks of the overlying shingle fasteners, adding an extra degree of water-shedding protection.
Ice dams form when melted snow runs down the roof to the eaves and freezes again, which forces water back up underneath the shingles.
StormShield Ice and water protector.
6. Underlayment for overall secondary roof protection.
Next it’s time for the roof underlayment, which can either be an asphalt-saturated felt or a synthetic roof underlayment. Both offer you peace-of-mind protection beneath the shingles. While the asphalt shingles will be the primary water-shedding roof layer, there are many benefits to installing a roof underlayment. The felt is laid in horizontal courses, overlapping the eave ice and water protector by 4″ and the valley membrane flashing by 6″.
Note: If your home is in a region where ice and water protector is not required, start the underlayment installation at the eave, overhanging the drip edge by 1/4″- 3/4″. Remember that drip edge we installed at the bottom of the roof? When going up the sloped edges of the roof (called the “rakes”) it goes on top of the underlayment.
Although this seems to contradict the overlapping principle, installing the drip edge over the underlayment at the rakes creates a clean roof edge and provides the underlayment attachment with increased resistance against wind uplift. Also, any wind-driven rain blowing on the rake edge would cross the top flange of the drip edge and go on top of the underlayment instead of beneath the underlayment where it could potentially cause a problem.
IKO’s RoofGard-Cool Grey Synthetic Roof Underlayment gives your roof secondary layer of protection.
7. Covering the joints and valleys.
If a roof is going to leak, it will most likely occur wherever the shingle layer is penetrated, interrupted or meets a wall. These are the special areas that require flashing – an added layer of water-shedding material to help keep the water running downslope. Valleys can either be open or closed – open valleys are not covered with shingles, closed valleys are. If your roof will have open valleys, which IKO recommends, now is when the valleys should be lined with a pre-formed width of corrosion-resistant metal.
Closed valleys are completed during shingle installation. For longer roof performance, IKO strongly recommends open metal valleys. Complete the application of underlayment and valley flashing before the roofing shingles are applied. The recommended flashing material is a 28-gauge galvanized metal or an equivalent corrosion resistant, non-staining material (check with local codes). Center a 914 mm (36″) width strip of an ice and water protector membrane in the valley. The product is tacked in place temporarily along one edge.
Carefully peel away the backing, and put it in place, smoothing out any wrinkles. Start working from the eave, allowing additional pieces to overlap by at least 150 mm (6″). Remove the temporary nails. Center a minimum 610 mm (24″) wide, minimum 28 gauge pre-finished/galvanized metal valley liner in the valley, and fasten with only enough nails to hold it in place, nailing at the edges only.
Proper Overlap and Flashing for Roofing Valleys
Overlap each metal piece by at least 150 mm (6″) and use asphalt plastic cement under each section of overlap. Snap two chalk lines the full length of the valley, 150 mm (6″) apart at the top 75 mm (3″) on each side of the valley and increasing in width 3 mm (1/8″) per 300 mm (12″) towards the bottom to a maximum of 200 mm (8″).
When the shingles are being applied, lay them over the valley flashing, trim the ends to the chalk line and nail the shingles at least 50 mm (2″) back from the chalk line. Cut a 50 mm (2″) triangle off the top corner to direct water into the valley and embed the valley end of each shingle into a 75 mm (3″) band of asphalt plastic cement. It’s critical to flash around plumbing stacks and attic vents because they are the most common roof penetrations. Install metal flashings where shingles meet walls or chimneys, too.
Flashing is placed around plumbing stacks and vents to help prevent leaks.
Complete shingle installation above the plumbing stack flashing.
Various Roof Vents
Roof planes that butt against vertical walls at the end of the shingle course are protected by metal step flashing at least 125 mm high and 125 mm wide (5″ high and 5″ wide). When applying the new shingles, each shingle course will be covered by a step flashing.
Metal Step Flashing Pieces
There are two simple rules to follow:
Each flashing should overlap the one below by at least 75 mm (3″), but not be visible below the shingle top lap.
Imbed each step flashing in a 75 mm (3″) wide application of asphaltic plastic cement, and nail in place. Then the end of each shingle overlapping a step flashing must also be well embedded in plastic cement.
The metal step flashing pieces are rectangular in shape and style, approximately 250 mm (10″) long and at least 50 mm (2″) wider than the face of the shingle being used. For instance, when using metal flashing with shingles with a typical 143 mm (5 5/8″) exposure (such as traditional 3-tab shingles), the size of the flashing will be 250 mm x 200 mm (10″ x 8″). The 250 mm (10″) length is bent in half so that 125 mm (5″) will reach up the wall surface and the other 125 mm (5″) will extend onto the roof deck.
Note: Other step flashing sizes are also acceptable. For IKO’s Cambridge shingle, with its larger 5 7/8″ exposure, a 10″ x 8″ flashing piece is still suitable, since the 8″ dimension is still at least 2″ larger than the shingle’s exposure dimension. However, when flashing Crowne Slate, with its much larger 10″ exposure, the flashing piece would need to be 10″ x 12″.
How to Install Asphalt Shingles with Flashing
To install the flashing piece on the first course, place it over the end of the starter strip. Place it so the tab of the end shingle covers it completely. Secure the horizontal flange to the roof deck using two nails. Do not fasten the flashing piece to the vertical wall. This will allow the flashing piece to move independently of any differential expansion and contraction that may occur between the roof deck and the wall.
Place the second step flashing piece over the end shingle in the first course by positioning it 143 mm (5 5/8″) above the bottom edge of the exposed asphalt shingle.
Make sure that the tab of the shingle in the second course will cover it completely. Secure the horizontal flange to the roof. The second and succeeding courses will follow with the end shingles flashed as in preceding courses.
8. The shingles in the “field” of the roof.
Once everything that goes beneath the shingles has been properly prepared and installed, it’s finally time to learn how to shingle a roof. Regardless of the asphalt shingle type or style you’ve chosen, the process is basically the same as mentioned earlier – you start at the bottom and overlap as you work your way across and up the roof.
First – before you lay the field shingles (“field” referring to the large expanse of roof within the boundaries of eaves, ridge and rakes) – it’s important to install a preparatory course of starter shingles which are specifically manufactured for that purpose. But, even if you fashion your own on-site by cutting standard shingles to size, both serve critical functions at the roof’s eave. They provide a sealant adhesion point for the first course of shingles and provide water-shedding protection at shingle joints as well as at any cut-outs.
Using Starter Strips and Proper Nail Placement
Professional contractors often recommend and use starter strips along rake edges in order to yield a straight edge from which all the field courses can begin. Furthermore, these starter strips enhance the roof system’s wind-resistance at the rake. It’s critical to follow the manufacturer’s instructions for the specific roof shingle because not all shingles have the same exposure (the part of the shingle that’s visible once installed), offset (the lateral distance between joints in successive courses sometimes called ‘stagger’ or ‘edge-to-edge spacing’) and/or nail placement. Problems may occur if the shingles are given too much exposure or too little or if they’re not offset by the proper dimension in successive courses (rows of shingles).
You must place nails in the proper location and drive them flush with, but not cutting into, the shingle. Nailing the shingles correctly is critical to the roof system’s wind-resistance. Proper nail placement is also a requirement for the shingles’ limited warranty coverage. If you’ve chosen closed valleys, they are completed as shingle courses approach and run through the valley.
The most common closed valley is a “closed cut” valley, where shingles are installed on the entire roof area on one side of the valley first, with each shingle course extending at least 12″ through the valley centerline. As shingles are installed on the adjoining roof area, the end of each course of shingles is trimmed (cut) 2″ back of the valley centerline.
9. The hip and ridge caps.
You’ve nailed in the last field shingle and you can see the finish line from here. Well done! In this case, the finish line is the hip and ridge capping. When you install the field shingles up to the peak of the roof, you can’t just “bend them” over the peak. Instead, individual ridge cap shingles are used to straddle the ridge and shed water down either slope. There are various ridge cap shingles available on the market but, once again, the procedure for installing them is based on the same fundamental principle of overlapping.
For hips, start at the bottom and work upslope. Since ridges are on a horizontal plane, the upslope principle doesn’t apply, so ridge cap shingles are typically installed like this: begin at the end of the ridge opposite the prevailing wind direction, for optimum ridge cap wind-resistance. On hip roofs, it’s also acceptable to install the ridge caps starting at each end of the ridge, with the last piece installed in the middle of the ridge.
The last ridge cap piece should be nailed in place and, since this will be the only place on the roof where the nails are directly exposed, the nail heads should be sealed and covered with a suitable asphalt roof cement. Always remember to use longer nails for ridge cap shingles. Because the nails must penetrate the ridge caps and the last course of roof shingles below, you’ll need longer nails to fully penetrate through them to the roof deck.
An example of a hip and ridge installation.
Take a look at IKO’s PROFORMAX Integrated Roofing Accessories to see how the various roof system elements described above work together.
Now that you have a greater insight into the major steps involved in how to shingle a roof, you can more fully understand the nuances of the entire process. You may even appreciate why it’s recommended to hire a professional!
For even more detailed information or if you’d like to watch and learn how the pros do it, check out this library of instructional videos on every aspect of shingle installation and roofing components. You can also read our article describing how to replace shingles.
Which Residential Roofing Products Are Right for You?
You have many more options in roofing products than you think. Here are some tips on choosing the best roof, and how to get the best value, from the pros at IKO Roofing.
You need a roof for your home, whether it’s a brand-new build or an existing roof that needs replacement. The big question is, of all the roofing products available, which one should you pick?
In some cases, the decision may have been made for you based on local municipal requirements but, most of the time, the decision is up to you, the homeowner. There are five general categories, or families, of roofing products which we outline below. Keep in mind that availability of these roofing products may vary by region, so be sure to do research ahead of time to determine what options are available in your area.
The price of roofing products can also vary significantly, sometimes even within a certain category, so read through our tips to ensure you get the best value for your dollar. We offer an average price range here for your reference. Just remember that pricing is highly variable, depending on what you’re looking for and where you live.
Roofing Product Types
Asphalt Shingles
Asphalt shingles continue to dominate the North American roofing market for a variety of reasons: they are affordable (while still offering great value over their lifetime), easy to install, maintain and repair, and come in a variety of styles and colors.
Plus, asphalt shingles are available in all North American markets, so you won’t have any trouble finding a selection to choose from. IKO recommends having a qualified roofing professional install them.
According to Maciek Rupar, an NRCA Director of Technical Services, “There is a wide and ever-increasing range of residential roofing products on the market today.” He adds, “Although NRCA member-contractors are trained and qualified to install a variety of roofing products, for steep-slope applications, asphalt shingles continue to be the product most commonly installed by our professional members.”
Royal Estate Asphalt shingles, like IKO Royal Estate shown, continue to dominate the residential roofing market. Increasingly, homeowners are opting for the upscale, high-definition profiles that look like genuine slate tiles or cedar shakes.
Metal Roofing
Metal roofing is available in shingle-style panels (most often made from rolled steel or aluminum) or in larger sheets. Larger metal sheet roofing is the more established type of metal roofing, while smaller stamped panels have been developed in recent decades to simulate the look of shingles and shakes. Unlike asphalt shingles, steel panels must be treated for rust resistance before they’re installed. This is done at the factory.
Copper has long been used for roofing, primarily due to its water resistance and malleability. You can see the characteristic green-colored, aged patina of copper roofing on many historic buildings.
A Typical Metal Shingle Roof Photo courtesy of The Metal Roofing Alliance.
Wood Shakes And Shingles
One of the earliest types of roof covering used throughout North America, wood shakes can give your home a rustic, country appearance. Cedar is the most commonly used wood species because its inherent oil content provides good weather-resistance.
The term “cedar shakes” typically implies the wood has been split, whereas the term “cedar shingles” usually indicates the wood has been cut to shingle thickness. Untreated pine shakes were introduced in the 1980s in parts of North America, but they have not performed well in service.
More common in the snow-free southern states due to traditional architectural home styles and product availability, rigid concrete and clay roof tiles come in a wide variety of colors and profiles. “Profile” is a common industry term that refers to a tile or shingle’s shape or contour. Because these tiles require special installation techniques, accessory materials and tools, tile roofs are typically installed by trained professional contractors, not by do-it-yourselfers.
Some tile profiles, like the larger half-tube-shaped ones, may require vermin screening in areas where there is a gap between the underside of the tile and the roof deck to help prevent critters from entering the roof space.
You can find a comprehensive review of these tiles’ features and benefits, along with the most recent installation manual, at the Tile Roofing Institute.
Synthetic Tiles
Synthetic tiles are the newest roofing products on the market. Most brands have been around for less than twenty years. Many manufacturers are making a wide range of synthetic roofing shingles designed to emulate concrete tiles, asphalt shingles, slate tiles and wood shakes. Availability varies by region.
These roofing products generally have a high recycled material content of post-consumer plastics, which can be a priority for some enviro-conscious homeowners. They are manufactured according to different formulas which may include plastics, rubbers and other resins and extenders.
Factors to Consider When Selecting Your Roofing Product
Value
You cannot base the value of the roofing product you select solely on its initial material cost. Rather, when considering the right roofing product for your home, consider the total cost, including any special structural or decking considerations, labor and special accessory materials, factored over the anticipated service life of the material. Although somewhat difficult to calculate, you also need to consider any increase in overall value that the new roof may add to your home.
Appearance
Any new roof is likely to look better than the one it’s replacing. It’s your home and, unless there are neighborhood rules dictating otherwise, you should choose the style you like! If you really want your roof and home to stand out, you may want to select a radically different roofing material not found in your area.
More often, homeowners want a great looking roof that blends in with the home and roof styles around them. Consider what look best suits your home’s style and your family’s personality.
Climate and Performance
Severe weather events such as hurricanes, tornadoes, hailstorms and heavy rain are on the rise. Choose shingles that are specifically engineered to provide maximum protection against the elements, based on the prevailing climate and weather conditions where you live. IKO offers two performance class shingles, IKO Nordic and Dynasty. They’re fortified with ArmourZone for maximum resistance to uplift and blow-off even in high wind. Nordic also offers a Class 4 Impact Resistance rating*. And their high-definition color blends make them look every bit as great as they perform.
*This impact rating is solely for the purpose of enabling residential property owners to obtain a reduction in their residential insurance premium, if available. It is not to be construed as any type of express or implied warranty or guarantee of the impact performance against hail, of this shingle by the manufacturer, supplier or installer. Damage from hail is not covered under the limited warranty. For further details concerning the FM 4473 standards, visit the FM Approvals website.
Structural and Roof Design Issues
Some roofing materials (particularly tiles made of heavy materials such as clay or concrete) may require additional structural support for the installed roof system. Consult the roofing contractor, product installation specifications and/or a qualified structural engineer if you’re thinking of using a heavy material.
Color options: Make sure that the roofing material you choose is available in a color that complements your home’s exterior. Certain roofing options may have a limited color range.
Compliance: Consult your local building code and homeowner association rules for your neighborhood to ensure the product you want to install is approved for your area.
Installation and Availability
You may have seen a nice roofing product on a trip, or maybe your cousins had some beautiful tiles installed at their home down south, and you want the same roof on your home. Contact local roofing supply outlets and local roofing contractors to ensure the material you want is available, and there are trained professionals available who have experience installing that product.
As you consider each roofing option, many other factors may enter your decision-making process. For instance: the limited warranty coverage offered for each product, the history of the proposed roofing material in your region, the roofing product’s environmental impact in terms of recyclability or sustainability, its compatibility with solar panel installations and, if you live in an area prone to hail storms, its impact-resistance rating.
Choosing the Best Residential Roofing Materials
Carefully evaluating all these factors will help you choose an appropriate roof for your home – not just one that’s been hyped up through marketing.
Choosing a new roof is a big decision, one you’ll have to live with for many years, so review all the options to make an informed and successful choice.
As a starting point, visit IKO Roofing to check out the latest shingle designs and color blends from one of North America’s largest shingle manufacturers.
Please note:The below information and instructions are for the general information and are not intended to be relied upon as specific advice for a particular roof.
An important part of a healthy home, and a complete roofing system, is roof vents.
The installation of roof vents is a crucial part of roof design because it allows for proper attic ventilation, which may help prevent condensation and early aging of your roofing materials.
Advantages Of Proper Roofing Ventilation
Although there are many different types of roof vents to choose from, ensuring you have the right number of both intake and exhaust vents is a central part of roof design. Proper attic ventilation offers numerous advantages to the homeowner:
As the ventilation helps moderate the temperatures in the attic, this may also help moderate the temperature in the rest of the home
It helps prevent moisture buildup in your attic, which, during colder months, can help prevent condensation issues that can affect the materials in the attic space, especially insulation.
By preventing excess heat buildup, proper ventilation promotes energy efficiency in the home, so your heating costs may be lower
It helps protect the life of the roofing materials (condensation is a leading cause of damage to roofing materials, such as asphalt roofing shingles)
It helps you remain compliant with most local building codes, which often require proper attic ventilation in homes
How To Calculate The Amount Of Ventilation You Need
Please note: the following provides advice for homes with ventilated attics. There are some styles of vaulted ceiling homes or flat roof homes that have ventilation spaces within the roof itself, and no attic. These ventilation needs are calculated differently.
The key to proper ventilation of your roof and attic is balance: the amount of space you devote to intake must be equal to the amount you allow for exhaust, and these must be calculated according to the size of your attic and slope of your roof.
You can calculate attic ventilation requirements by determining the square footage of your attic floor (its width times its length), and compare that to the total required “net free area” (NFA). Vents are rated by their net free area, or the amount of space for air to flow in or out. This helps make it easy to calculate how many vents you need for your attic, once you’ve determined your requirements.
If your attic floor has a vapor barrier, you will need one square foot of NFA per every 300 square feet of attic floor area (half of that will be intake, half for exhaust). If there is no vapor barrier, double it to one square foot of NFA for every 150 square feet of attic floor space (half for intake, half for exhaust). These are broad guidelines, so be sure to check with your local building code.
(Source: NRCA, Stanley Complete Roofs and Siding, AirVent.com.)
Also, the NFA will be calculated differently if your roof slope is greater than average. If the slope of your roof is greater than 6:12 you will need more ventilation to reflect the extra volume of attic space: Calculate 20 per cent more for 7:12 to 10:12 pitches, and 30 per cent more for a pitch that is 11:12 or greater.
(Source: Asphalt Roofing and NRCA.)
Then, you can begin choosing the style and type of roof vents you want for your home.
It’s important to remember that it’s better to have too much intake ventilation than too little – and many homes often undercalculate the amount of intake needed — so worry less about having too much intake and err on the side of having more.
(Source: House Logic and ARCA.)
The most popular way to ventilate an attic is to take advantage of buoyancy, or warm, moist air’s natural tendency to rise, especially when pushed by cold air beneath it. Homes are naturally filled with warm moist air on a daily basis thanks to human physiology and activities such as cooking and showering.
To take full advantage of this effect, a roofer will generally install intake roof vents for houses lower on the roof (closer to the eaves) while placing exhaust vents higher (near the peak), to let the cold air push the hot air out more easily.
(Source: NRCA.)
How to Install Roof Vents
Before a roofer gets to work installing your roof vents, they will need to determine what type of vents your home needs (or which you prefer) and how many you require according to the calculations above.
Below we describe the different types of roof vents, which will vary according to the needs and architecture of your home, the geography and weather patterns of your region, and your roof structure.
These are general guidelines, as most manufacturers will offer instructions on how to best install roof vents and what measures are required to meet the limited warranty specifications.
Intake Vents
Continuous or Individual Soffits
Soffit vents are one of the most popular intake vent styles: they are easy to install under the roof’s overhang (which is known as the soffit), are generally hidden from sight and provide excellent protection from weather, outdoor debris and pests, while still allowing air to flow into the attic.
Soffit vents are commonly made of aluminum or vinyl and are installed into your soffit, the surface under the eave of the roof. Soffit vents are recognizable for the narrow slits that provide open space into which air can flow. There are a number of different types and styles of soffit vents. Always be sure to check with your manufacturer that the vent you choose has sufficient NFA for your project.
No matter which style you choose, it’s essential soffit vents remain clear of buildup or debris so air can continuously flow freely though the openings.
Homeowners also need to ensure their attic insulation isn’t blocking the flow of air. Check that the insulation is pulled back, away from the vents, or ask your roofer to install attic ventilation baffles to prevent the insulation from creeping over the edge of the soffit.
(Source: Professional Roofing)
How to Install Soffit Vents
Note: Always ask a licensed professional to install your roofing materials.
Working from under the soffit, your roofing professional will mark the size of the vent and then cut a hole slightly smaller than the unit (about two inches shorter and narrower), between the rafters. They will then install using screws, according to manufacturer specifications.
(Source: NRHA.)
Drip Edge Vent
If you don’t have soffits, or your roof style doesn’t allow for soffit vents, some homeowners will consider a drip edge vent. Drip edge vents are a two-in-one installation that promote water shedding at the eaves and rakes of a roof, while also allowing for ventilation into the attic. A drip edge vent is made of a corrosive-resistant material that sticks out about three inches back from the roof edge and then bends downward over them. Slits in the product allow for air to flow into the attic.
Organizations such as the NRCA recommend against this roof vent style in cold climates because it can promote ice dams. So, only use this if soffit vents aren’t an option. This style should also not be used with gutters.
How to Install A Drip Edge Vent
Just like a drip edge, the drip edge vent is applied along the eaves, the underlayment or waterproofing membrane is installed on top, and then the gable end drip edge can be applied on top. This sequence will help promote waterproofing.
Exhaust Vents
Ridge Vents
These vents are laid along the ridge of the roof and can come as a series of separate pieces or one long piece.
Because the vent material will look different than the shingles, some homeowners may choose to have their roofer shingle over the ridge vent once it’s installed.
These exhaust vents provide a reliable open area for warm air to escape the attic, providing essential outward ventilation across the entire length of the attic (versus a few isolated areas from other smaller vents). However, some pros recommend against this style because along with increased openings for air also comes the possibility for blowing snow or rain to enter. Newer styles of ridge vents have curved channels to reduce this risk or are comprised of a mesh like material.
(Source: Winnipeg Free Press, Fine Homebuilding)
How to Install A Ridge Vent
First, the roofer should remove any cap shingles along the ridge.
Next, they will outline the area using chalk and use a circular saw to cut away sheathing about one or 1.5 inches down on either side of the ridge, stopping three inches from the end of the roof on either side (or according to how far from the end the manufacturer recommends).
The roofer will be careful not to cut into the trusses or ridge board. They will then remove sheathing and install the ridge vent by securing one piece of vent at a time and attaching the next piece into it, nailing each piece as he goes. The ends should be capped or sealed. If it’s a newer style of shingle-over vent, it may be one continuous piece of aluminum or vinyl, or made of a single fibrous material that’s rolled out over the ridge hole.
The final piece may need to be cut to the right length with a hacksaw at the end of the roof.
Finally, the roofer will secure and weatherproof according to manufacturer instructions (which will generally recommend different materials for different styles). If it’s a shingle-over roof vent, ridge cap shingles will be applied over the vent and secured with two-inch nails.
(Source: Home Guides, NRHA, Fine Homebuilding, Stanley Complete Roofs and Siding)
Static Vent
Static vents come in a variety of different styles and sizes, but are all non-motorized vents installed near the roof ridge to allow for unobstructed flow of air from the attic. If there are more than one, they are centered between the rafters and installed at regular intervals in a horizontal line along the roof.
How to Install A Static Vent
First, from inside the attic, your roofer will drive a nail through the roof structure to mark spots for the vents. (The nail will either drive directly through the roof or pop a shingle that’s easy to spot) on the topside of the roof. The roofer will mark these spots between the rafters evenly along the roof. From the roof they will then draw a guide hole the size the diameter of each vent. These holes will likely be installed closer to the ridge but manufacturer instructions should always be followed.
From the roof, the roofer will remove shingles around the guide hole and about one inch back on the upper side of the hole. They will use a saber saw to cut through the underlayment and decking of each marked hole.
To install the vent, the roofer slips the flange (the metal lip of the vent) under shingles at the upper part of the hole and rests the flange on top of the shingles at the down-slope part of the hole.
To secure, your roofer will (following manufacturer instructions) likely use roofing nails, ensuring these are long enough to penetrate through the unit, the shingles and the decking.
The final step is waterproofing the vent, which will be done by applying manufacturer-recommended material (such as caulking) around the flange.
(Source: Air Vent.)
Gable Vents
A gable vent is a slotted piece of wood or siding that’s installed into the side of a home near the gable ( where two roof pitches meet in a triangle). Gable vents can function as both intake and exhaust, but rely on strong winds to be effective, so they are recommended to be used in conjunction with additional intake soffit vents near the bottom of the roof. Also, roofing professionals usually recommend against installing a gable vent if that side of the home is subject to driving rain on a regular basis.
(Source: Stanley Complete Roofs and Siding.)
How to Install A Gable-End Vent
Rather than being installed on the roof, gable vents are installed on the exterior side wall of the home, near the roof ridge. Installation first requires a wood frame, made of 2X4s, installed from the attic between two studs. Your roofer will build this frame just a little larger than size of the vent (leaving 1/8 inch of extra room on each side). Your roofer will secure the frame from inside the attic then drill holes in each corner of the frame right to the exterior of the house.Working from the outside he will use these four holes as a marker to create a rough hole of where the vent is to be installed. He will cut through the siding and sheathing to create the hole for the vent. He will add felt paper around to hole to add a layer of water proofing, lapping it over the existing felt paper. Then he will install the flashing to the frame, or directly to the vent, and insert the vent into the wood frame, securing with screws and/or applying caulking or sealant recommended by the manufacturer.
(Sources: Home Addition Plus, Do It Yourself, Home Advisor, Homes Guide.)
Turbine Vent
A turbine vent draws air from inside the attic as wind turns the turbines. This is most effective in areas where winds average at least five miles per hour, or otherwise will not offer the most effective, reliable source of venting.
How to Install Turbine Vents
The installation of a turbine vent is nearly identical to a static vent. A roofer will, from the attic, mark a spot near the ridge of the roof (he may first use nails from the attic to mark preferred spots between two rafters). From the roof, the roofer will cut away shingles and underlayment, and use a saber saw to cut a hole the same size as the diameter of the vent.
Following manufacturer’s instructions for securing the vent, the roofer will likely spread plastic roof cement on the underside of the vent, place it over the hole, slip the flange under the top-side shingles, and lay the flange over the down-slope shingles.
The roofer will then nail the base in place with galvanized roofing nails and cover nail heads with roofing cement.
(Source: NRHA and House Logic)
Powered Vent
A powered exhaust vent is much like a roof-mounted exhaust fan. It can be controlled by a thermostat or moisture monitor. Blades spin within the unit to expel air from the attic until the right temperature or moisture level is reached, at which point it will automatically shut off.
How to Install Powered Vents
From inside the attic, your roofing professional will drive a nail about one third of the way down from the ridge between two rafters to mark the desired spot for installation. From the roof, he will cut a hole the same size as the diameter of the vent. As with static and turbine vents, he will then secure the flange under the top-side layer of shingles, lay the flange on top of the bottom shingles and use roofing cement (or manufacturer-recommended waterproofing materials) to seal the unit.
(Source: Home Guides and Roofing Canada.)
A Note About Bathroom And Kitchen Exhaust Vents
Bathroom and kitchen exhaust vents are not a type of roofing vent. It should be noted that these vents, which expel warm moist air from the bathroom and food prep areas of the home, need their own ducts and vent hoods, which direct air to the home’s exterior. These vents and ducts should never share space with the roof vent, and air should never be vented directly into the attic.
(Source: Family Handyman.)
The Lasting Benefits Of Ventilation
With the right balance of intake and exhaust ventilation, a homeowner can help optimize the life of his roof system and his home’s energy efficiency. He can also feel confident neither the roofing system nor the contents of the attic will be victim to the destructive effects of condensation so common to poorly ventilated roofs.
A Guide to Roofing Valleys with Architectural Shingles
A roof valley is formed where two roof slopes meet. Water collects in a valley to flow off the roof. Your choice of valley installation method is critical because, when improperly installed, valleys are risks for serious leaks.
Essentially, there are three main ways to shingle a roof valley: woven, closed-cut and open. There are various techniques you’ll need to know for each type of installation, which we’ll go over in detail. When deciding how to shingle a roof valley, you will need to consider your materials, the climate and the desired look of the roof. IKO recommends that you install architectural shingles with the open valley method for the best roof performance. This recommendation includes IKO’s premium shingles.
The Three Methods to Shingle a Roof Valley
1. Woven Valley Shingle Installation
To achieve a woven valley installation, a roofing professional lays shingles in the valley and weaves them together. Some homeowners prefer the consistent look that a woven valley provides. But, if the shingles are not laid in the valley properly, a woven valley may not lay flat, creating bumps and detracting from the overall look of the roof.
The woven valley shingle installation method does not call for roofing cement, relying instead on the weave pattern to protect from water infiltration. So, if you are installing a woven valley, you must push the shingles snugly into the valley, while not nailing within six inches of the valley center. If this is not done properly, hollow space may develop under the shingles.
This “bridging” is a serious problem for the durability of a roof. The empty space makes the shingles vulnerable to penetration, either by footsteps, hail or other debris. For this reason, installing some manufacturers’ shingles in a woven valley may void their limited warranty.
A woven valley shingle installation has other drawbacks, including that they are slow to install, especially in cold weather, and more difficult to repair than the other types. In order to shingle this kind of roof valley, a roofing professional has to install both roof faces at the same time, which is quite slow. If repairs are needed, the contractor has to remove and then reweave multiple shingles to replace a single one. While a woven valley may save on initial installation costs, because they require less materials, they may cost more in the long term.
Woven valleys are suitable for three-tab shingles as their single-layer construction allows them to be woven together and overlapped more easily. When considering how to shingle a valley with architectural shingles, you must take into account their thickness and reduced flexibility. Laminated shingles are more liable to create bumps in woven valleys. Often, they are too thick to be woven at all. Thus, IKO does not recommend installing a woven valley with laminated shingles.
2. Closed-Cut Shingle Valley Installation
Closed-cut valleys, also called closed valleys, are installed quickly and have a cleaner, sharper look than woven valleys. From the ground, it looks as though the shingles meet in a clean line in the center of the valley. One layer of shingles actually crosses the valley beneath the other.
In summary, during the installation of a closed-cut valley, you install the first roof plane’s shingles into the valley. It is essential to only use whole (not cut) shingles during this step. As you install roof shingles on the second roof plane, you allow them to lap over the valley on top of the first shingles. The shingles on the second layer are then cut, ideally creating a clean line down the center of the valley. A chalk line can be used to guide you as you cut the shingles.
Unlike a woven valley, a closed valley will not have hollows. However, closed valleys still rely on shingles to protect the valley, which has its drawbacks. The shingles in the valley may lose their granules, and thus their coloration and protective capability, faster than the rest of the roof. Ultimately, laying any shingle in a valley can restrict proper water and debris flow, unlike the metal flashing used in an open valley.
A Variation of Closed-Cut Valley: the California Valley
One variant of the closed-cut valley is the California valley, also called Long Island valley and New Jersey valley. For this method, the last shingles on the “cut” side of a cut valley are actually installed sideways, so they run up and down the valley. This saves the time of cutting shingles and is the fastest way to shingle a roof valley, but it does not provide adequate protection in most climates. Indeed, California valleys are prohibited in some areas. Always be sure to refer to your local codes to see if they demand a particular kind of valley installation.
3. Open Valley Shingle Installation
An open valley relies on metal flashing for protection. That flashing is left exposed, so the roof has visible lines of metal running down the valley. Some homeowners do not like the look of open valleys, while others feel the metal accentuates the roof’s shape, particularly if copper or painted flashing is used.
IKO recommends installing an open valley with architectural or laminated shingles. Jeff Tessaro, a knowledgeable IKO sales representative, explains that open valleys have key advantages, including longevity. Tessaro says, “Provided the rest of the roofing shingles were properly installed and are performing properly, my experience has been that an open valley system holds up better over time.”
Metal sheds ice and water faster than shingles, reducing the risk of ice dams and blockages of debris. Also, as all valley flashing metal is galvanized, it isn’t susceptible to losing its integrity under running water. Neither can it be pushed open by an ice dam or wind-driven rain. Additionally, the National Roofing Contractors Association explains that low-slope roofs are good candidates for open valleys because they are more likely to accumulate debris.
Tessaro also says that the open method allows for faster replacement and repair than the other techniques of shingling a roof valley. As another benefit to the roofing professional, open valleys are sometimes used to easily bridge the gap between roof faces of vastly different pitches.
If homeowners are looking to have their roof last for many years, an open valley is IKO’s recommended choice and a good up-sell opportunity for the roofing professional.
Valley Flashing Options for an Open Valley Installation
If you are installing an open valley, you will need to select a flashing material. Generally, flashing is a metal. Possibilities include:
Copper (may be cold-rolled or high yield).
Aluminum.
Steel (must be stainless or galvanized).
Zinc alloy.
Painted terne (steel with a lead and tin coating).
Different codes may require different materials, but IKO recommends, as a minimum, a 28-gauge galvanized metal. If not metal, the material must still be corrosion-resistant and non-staining. Also, at a minimum, valley flashing must be 24 inches (610 mm) wide.
Take care to understand your code’s thickness requirements for flashing, as there is often confusion about this point according to Professional Roofing. Also, it is ideal to install valley flashing that will match or outlast the life span of the shingles, so they can be replaced together.
You also want to consider the valley flashing profile. While some flashing is straight, others have a “W”-shaped bend in the center. This creates a crimp in the center of the flashing, which prevents water from crossing from one side of the flashing to the other. This can be useful if you are adjoining two roof planes that are asymmetrical in size.
Then, consider the aesthetic of the flashing. Some homeowners want the flashing painted to match the shingles. Others want a dramatic look with contrasting colors, or with the copper or steel face left unaltered. Your choice of shingle color and flashing can make a dramatic difference to the exterior of a home.
How to Shingle a Valley With Architectural Shingles
Step One: Ensure ice and water protector has been installed along the valley first. Then, starting at the base of the valley, center your first piece of flashing in the valley.
Step Two: To secure the roof valley flashing, nail it down carefully. Only nail at the edges, with only enough nails to hold it in place. Extra nails may increase the risk of leaks.
Step Three: Moving up the valley, install any additional roof flashing, as required to cover the entire length. Overlap each piece of flashing by at least 6 inches (150 mm). First, apply asphalt plastic cement under the overlap area, then place and nail down the second piece of flashing.
Step Four: Now you need to set out chalk lines to guide you as you install shingles along the valley. Snap two chalk lines parallel to the valley and down its entire length. At the top of the valley, the lines should be 6 inches (150 mm) apart. Then, they should gently slope outward at a quarter inch (3 mm) every 12 inches (300 mm), to a maximum of 8 inches (200 mm) apart at the base of the valley. As a stream of water moves down a valley, it gets wider; so, the exposed flashing must also get wider.
Step Five: Begin to install roof shingles on either roof face. When you reach the valley, lay the shingles over the valley and trim the edges to the chalk line. You can use a straight edge to achieve a straight cut.
Step Six: Nail down each valley shingle at least two inches (50 mm) back from the chalk line. Over-driving nails is always a problem, but it is especially dangerous in a valley, where water collects. Take care to drive nails straight so that the heads are flush with the shingle surface.
Step Seven: Finish installing valley shingles by embedding each shingle into three inches (75 mm) of asphalt plastic cement.
After you have laid all of the shingles in the valley, it should look uniform, like the roof below.
A proper valley installation is a critical component of any roof, ensuring the long-term protection of this vulnerable area. IKO’s recommendation is to install laminated shingles, or architectural shingles, using the open valley method, for best roof performance. To learn more about roofing, please visit our Roofing 101 section. To find a local roofer in your area, please visit our Contractor Locator page.
Disclaimer: Please use caution when working on sloped roofs. If you have any concerns about working on a roof, hire a trained professional.
So, you have an old roof, or at least a roof that needs to be replaced, and you’re considering tearing off the old asphalt shingles. The essential process you’ll follow to tear shingles off a roof is listed below, with a detailed explanation of each step.
1. Step One: Determine if the existing shingles need to be removed. If you’re in doubt, an experienced contractor can help you understand the pros and cons of installing new shingles on top of the old ones.
For many years, roofers have successfully installed a new layer of shingles over an old layer. So, you need to ask yourself whether or not removing the old asphalt shingles is necessary for your roof. It’s a frequently asked question: Are two layers of shingles a problem? Not necessarily. If your roof is well-constructed, and the old shingles are relatively flat, consider roofing over the old shingles.
However, it seems like the more common approach these days is to tear off the existing layer. And there are benefits to doing so, including:
You get a chance to inspect the deck for any weak or rotted areas and make repairs prior to installing the new layer.
Some shingle manufacturers’ limited warranty coverage may require the old layer be removed.
Some shingle properties (for example impact resistance) may have only been evaluated on shingles applied directly to the deck. An underlying old shingle layer may affect those roof performance properties.
And, of course, a new layer of shingles applied directly to the roof deck has the best opportunity to look smooth, uniform and flat.
Although removing asphalt shingles requires less roofing knowledge and training than the installation of the new layer, it is still a lot of work. Maybe you’re not afraid of hard work, but also remember you’ll be working on a sloped surface, using tools you likely have never used before.
So, the first step should perhaps be calling some experienced contractors to do the work. In fact, quite likely the quotes you have obtained for your new roof include costs for the tear-off process anyway. Sure, you may save a few bucks tearing it off yourself, but aside from the effort, you’ll then be faced with the additional hassle of perfectly coordinating the installation of your next roof so your roof won’t be left exposed—which brings us to the next step in the process: Make sure your new materials are ready.
2. Step Two: Ensure that the materials for the new roof are ready and on-site. That way, the roof will be left exposed for as little time as possible.
Off with the old, and on with the new, right? This is a fairly obvious step in tearing shingles off a roof, but, occasionally, an eager homeowner may not plan ahead and get him/herself into an awkward situation. The obvious step is this: Make sure you have the materials and labor for your new roof all delivered, arranged and ready to install before you start ripping off your old roof.
Whether you intend to install the shingles yourself, or have contracted with a roofer, you don’t want your roof deck left exposed after the tear-off; so, plan ahead for the new roof to go on immediately. This may take a bit of fine-tuning to work around unfavorable weather forecasts and possible delays in the tear-off process.
3. Step Three: Plan for debris and removal of the old shingles by positioning your trash can nearby. You will also need to cover the ground beneath the eaves with tarps to catch stray shingles.
Just as the disclaimer says at the beginning of this article, use caution when working on sloped roofs. If you have any concerns about working on a roof, hire a trained professional who knows and follows all the required safety regulations.
One of the key safety practices in tearing shingles off a roof is avoiding all the debris that will be generated. All that scrap ends up making the roof surface even more difficult to move across. And the old shingles may not lift off without a fight; so, be careful when prying and lifting that the shingles don’t suddenly release, which can send you flying.
To help keep the roof site as safe as practical, position your trash bin in a readily accessible location, so the old shingles can just “slide” into the bin. Contact your local waste management company to book your trash bin ahead of time.
When you rip the old shingles off your roof, they are not likely to come off like a clean and neat old carpet, but in various sized “patches.” There will be bits of broken shingles everywhere; and try as you might to get every bit into that trash bin, some scraps are likely to slip and slide off in different directions. And if it’s a wee bit windy, those bits can fly further.
So, as a precaution, it’s a good idea to cover the ground around the house beneath the eaves with tarps or sheets of plywood. This will help protect scuff marks and prevent damage to your home’s walls and to your gardens and landscaping, and will make cleanup go much faster.
4. Step Four: Gather your tools. A square-edged shovel may work, but a modified shovel-type tool has been designed specifically to pry up old shingles.
If you want to remove old asphalt shingles yourself, you can try using a standard square-edged shovel to tear them off; but the best device is a modified shovel-type tool, specifically designed for this purpose. It has a serrated front edge to grab under the nails, and a raised “foot” on the back to add leverage to make it easier to tear off roof shingles. That’s the key tool you’re going to need, and you likely don’t have one in your shed, all the more reason to hire a professional.
Besides the roof-stripping shovel tool, you’ll need things like a broom, some good work gloves, safety googles, a ladder and a smaller pry bar or hammer for those stubborn nails and flashing bits. You’ll also need some tarps and/or sheets of plywood. Oh, and you should call your friends, all of them; they’ll come in handy when you realize this involves a lot of effort.
5. Step Five: Begin prying off the shingles on the opposite edge of the roof from your garbage bin. Drive your shovel under the lower shingle edge and use leverage to pry it up.
So, there you are, safely standing on your roof, holding your shiny new roof stripping shovel tool in your neatly gloved hands. Now, where does one actually start? While each roof is different and may present its own unique geometries and logistic challenges, as a rule, it’s best to start furthest away from the trash bin. That should make it a bit safer and cleaner to travel across the roof as you take your garbage to the bin.
It’s best to remove the ridge caps first by themselves, and then start on the shingles in the adjacent field of the roof. Drive the shovel up under the lower shingle edge, a few shingle courses below the top of the roof. Lift up, and voila, you should have a few loosened shingles. Repeat until all the shingles are detached from the deck.
6. Step Six: Follow safety precautions and do not carry too many shingles at once. Take care not to box yourself in as you move across the roof.
As you continue to clear the roof, you’ll notice that it gets very messy with loose bits of shingles and many stubborn nails still in the deck. Each of those elements is a trip hazard; so, you should deal with them every now and then to keep your path safe and clear. And don’t try to carry too many shingles per trip to the bin. It’s safer to make a few more trips with more manageable, lighter handfuls than to try and carry too much weight. Remember, shingles are heavy — a patch of even five or six old shingles could weigh 20 – 25 pounds.
7. Step Seven: If you plan on stripping off the flashing as well, do so while you move across the roof. If your flashing is in good condition, this may not be necessary.
After much effort of prying and lifting and pulling, eventually, all the shingles will be off your old roof. As you progress, you’ll also have to decide how to deal with the other roof elements, such as the vents and flashing. Most often on a tear-off, it’s simply easier to also strip off the flashings as well, especially if you’re not a professional, as they’ll be more likely to be damaged. If your flashings are in good condition, and you want to try to reuse them, pry them up with a smaller pry bar or hammer to minimize damage.
8. Step Eight: If you find ice and water protector, you will not be able to get it off. Decide if you want to remove it by replacing the roof deck beneath it or if you’d rather apply a new layer of ice and water protector over it.
In the old days, roof tear-offs were pretty straightforward — shingles, saturated felt and then the flashings. However, self-adhesive ice and water protectors were introduced to the roofing industry, particularly in cold-climate regions, about 30 years ago. These membranes adhere to the roof deck and are most often used in the eave area, covering the lower three to six feet of deck. The challenge is that they usually do a good job of adhering to the deck, especially after many years of summer heat, which works to fuse the membrane to the oriented strand board (OSB) or plywood substrate. These membranes cannot be lifted with that shingle-stripping shovel.
You’ll be faced with two options — either cut and replace the deck in the affected area or leave the membrane there and roof over it. If you choose the second option, you’ll need new ice and water protector as the old membrane won’t have the same watershedding integrity once you’ve removed all the shingle nails. Here’s a good tip: To reduce the appearance of a “ridge” from what will end up being two layers of ice and water protector, install the new membrane slightly higher than the old one, so that the upper edges of the old and new membranes don’t align. This “feathered edge” should be much less visible once the new shingles are installed.
9. Step Nine: Clean up your property at ground level using a magnetic roller/sweeper to find loose nails.
By following all the steps above, you should have your roof deck clean and clear, and ready for a new IKO shingle installation. Don’t forget to clean up at ground level, using a magnetic roller/sweeper to pick up as many of the loose nails as possible. You don’t want your lawn mower to find them next time you cut the grass, and you certainly don’t want to find them with your bare feet on a nice sunny, summer day—maybe while you’re in your front yard showing off your new roof to your neighbors.
A reputable, qualified roofing professional can help you with the shingle removal process as well as re-roofing. To find such a professional roofing contractor near you, use our contractor search tool.
Once upon a time, traditional strip or 3-tab shingle dimensions, as well as asphalt shingle dimensions, measured 12 inches wide by 36 inches long. These are still considered standard asphalt shingle dimensions.
The dimensions of an architectural shingle vs. a 3 tab shingle
IKO was among the first roofing material manufacturers to introduce the “metric-size” roofing shingle, defined as being 13-1/4 inches long by 39-3/8 inches wide. Admittedly, it’s rather confusing to call a shingle “metric” and then proceed to define it in Imperial measure; however, 39-3/8 inches is the equivalent of one meter.
This increase in size provided greater coverage and exposure. It’s estimated that the larger size allowed installers to lay a roof up to 10 percent faster than with the smaller standard-sized shingle, providing a considerable time and labor-saving advantage.
3 Tab Shingle Exposure
Architectural & Performance Shingle Exposure
Below is a handy chart to check IKO shingle dimensions at a glance:
IKO SHINGLE DIMENSIONS & EXPOSURE*
SHINGLE
SIZE
EXPOSURE
ArmourshakeTM
Designer
37-3/8″ x 18-1/2″
(950 mm x 470 mm)
5-1/2″
(140 mm)
Crowne SlateTM
Designer
39-1/2″ x 13-1/4″
(1,003 mm x 336 mm)
10″
(254 mm)
Royal EstateTM
Designer
40″ x 13-1/4″
(1,016 mm x 336 mm)
5-5/8″
(143 mm)
NordicTM
Performance
40-7/8″ x 13-3/4″
(1,038 mm x 349 mm)
5-7/8″
(149 mm)
Dynasty®
Performance
40-7/8″ x 13-3/4″
(1,038 mm x 349 mm)
5-7/8″
(149 mm)
Cambridge®
Architectural
40-7/8″ x 13-3/4″
(1,038 mm x 349 mm)
5-7/8″
(149 mm)
Cambridge Cool ColorsTM
Architectural
40-7/8″ x 13-3/4″
(1,038 mm x 349 mm)
5-7/8″
(149 mm)
MarathonTM PLUS AR
Traditional
39-3/8″ x 13-1/4″
(1,000 mm x 336 mm)
5-5/8″
(143 mm)
*All values shown are nominal.
How IKO Shingle Dimensions Vary by Type
Today, the dimensions of architectural shingles may vary from one manufacturer to another for several reasons, such as the physical limitations of the laminators, the dimensions of the fiberglass mat used (especially if the manufacturer makes its own as IKO does), the profile, cut and shape of the individual shingles or simply to create a point of competitive differentiation.
IKO offers four different categories of quality asphalt shingles: Performance, Designer, Architectural and Traditional (3-tab) Collections. The size and exposure of the shingles within each Collection vary, as shown in the chart above.
For example, IKO MarathonTM Plus AR belongs to the Traditional Collection of 3-tab shingles and possess those standard metric shingles dimensions.
We hope you’ve found these explanations and this comparison chart useful. For more information, please read this article on shingle exposure, ask your local IKO sales rep or find a reputable roofing professional close to your home.
The Correct Roof Shingle Exposure for 3-Tab and Laminate Shingles
A shingle’s exposure is the portion of the shingle left uncovered by the one above it. Proper shingle exposure is achieved by carefully layering the shingles as you work up the roof plane. Shingles with the right exposure will create the intended look and, assuming all else is installed properly, will provide optimal protection to the roof.
If the shingles are layered too far apart, the shingle exposure will be too wide, potentially exposing areas of the shingles to the elements that are not designed for the task. If shingles are spaced too closely together, they may not look as intended, especially if they have shadow lines, not to mention being a waste of material.
In either case, too close or too far, improper exposure makes it difficult, if not impossible, to properly position the nails and the self-sealing adhesive to achieve the best wind resistance. Many shingle manufacturers’ limited warranties are void if their shingles are not installed in accordance with the application instructions.
Though some roofing contractors assume all asphalt shingles and architectural shingles have the same exposure, they actually vary widely. In the past, a 5-inch exposure was most common, but things have changed. The proper shingle exposure can depend on the size of the shingle, its material and the desired look of the roof.
3-Tab Shingle Exposure
In the past, most 3-tab shingles were “Imperial”-sized at 12 inches wide and 36 inches long with an exposure of 5 inches. Now, most 3-tab shingles, typically referred to as “metric” shingles, are larger. Metric shingle exposure is proportional to their larger size, commonly 5 5/8 inches. For example, IKO Marathon™ Plus AR has a 5 5/8-inch exposure. However, you should consult with the manufacturer to confirm shingle exposure.
Laminate Shingle Exposure
Laminated or architectural shingles have a wider variety of exposures. The maximum exposure for laminated shingles is 10 inches, but it all depends on which specific shingle you use. Other laminated shingles may have exposures as small as 5 inches. Overall, the roofing industry is changing to meet consumer demand for more elaborate shingles, which sometimes means creating unusual sizes.
IKO’s architectural shingles are available in “advantage” size. These shingles are larger than most competitors’ products, larger even than most “metric” shingles, with a 5 7/8-inch exposure. Shingles available in advantage size include IKO Cambridge™, IKO Nordic™ and IKO Dynasty®.
Fewer courses, or rows, of advantage-sized shingles need to be used for the same roof area. For the roofing professional, this means easier and faster installation as well as savings on material costs.
A wider shingle exposure can also give an enhanced appearance without burdening the homeowner with the high cost this aesthetic usually demands. In fact, IKO’s Dynasty shingles have deep shadow bands, which add contrast and create a stunning appearance. If these shingles are installed with a smaller exposure, the shadow bands may not be visible, so correct installation is key.
IKO also offers one of the only laminated shingles with 10-inch exposure: Crowne Slate[TM]. This generous exposure helps Crowne Slate[TM] emulate the look of real slate tiles. Shingles with such wide exposures look especially stunning on large roofs and those with steep pitches. IKO’s buyer’s guide to residential roofing products can help you decide if these shingles are right for you.
Wind Resistance and Shingle Exposure
Using the correct exposure is critical to obtain the optimum wind resistance of your shingles. Most shingles are manufactured with a strip of adhesive that self-seals with sufficient heat from the sun. Using the correct exposure ensures that this sealant strip is properly positioned for maximum performance. The wind resistance rating of a shingle is dependent on proper nailing position and exposure, so any deviations from the specification may invalidate the rating.
You can also follow the High Wind Application procedure for most of IKO’s laminated shingles to provide further wind protection. High Wind Application typically calls for securing the shingle with six instead of four nails, may require manually sealing the shingles, and more. For the full details on High Wind Application refer to the application instructions for your specific shingles. It is worth noting that IKO’s Dynasty and Nordic shingle styles have the ArmourZone tape. High Wind Warranty coverage is offered on these styles using a four-nail application.
Shingle Exposure Concerns When
Replacing a Roof
When you are replacing the shingles on an existing roof, shingle exposure is a key consideration. Because the old shingles may not have the same exposure as the new shingles, it is not good practice to simply install the new shingles over the older shingles.
When any shingle of a different exposure is installed above another, even if they are both 3-tab asphalt shingles or both architectural asphalt shingles, there may be issues. The bottom shingles may create an uneven surface for the top shingles, which may then deform, which can affect their ability to seal properly.
If the existing roof’s shingle exposure matches the new shingles, the new shingles are sometimes “nested” onto the roof. Nesting is a technique where a roofing professional applies the top edge of the new shingle at the bottom edge of the old shingle. This will only work if the old and new shingles have the same exposure.
Even when the new shingles have the same exposure as the old, it is good practice to remove the old shingles before beginning installation. Then, your new shingles will be applied to a smooth, even surface, which gives them the best chance to perform as designed. At any rate, the International Building Code limits the maximum number of shingle layers to two. Please check manufacturers’ installation instructions and limited warranty requirements to ensure that installing old shingles over new shingles are in accordance therewith.
Proper shingle exposure is essential to achieving the best roof performance. To learn more about a specific shingle’s exposure, refer to the product’s installation instructions or contact an IKO representative. To find an experienced roofing contractor who can help you find the best shingle for your roof, please visit our Contractor Locator to find a roofer local to your area.
Proper roof ventilation is critical to keep your roof and home healthy. While all homes should have soffit vents on the bottom of the roof, they also need to have another kind of vent near the ridge. Most homeowners typically choose between ridge vents and box vents. But which is better for your home? It depends on a few factors, including climate and roof slope. Let us walk you through what you and your roofer should consider when deciding between these two kinds of roofing vents.
Understanding how roof ventilation is supposed to work and why it is important will help you understand these two types of vents better. Essentially, roof ventilation is meant to remove excess moisture and heat from your attic and roof so that neither will negatively impact the home. Breathing, cooking, showering, washing dishes and sweating all release moisture that rises and ends up in the attic.
If this moisture is not properly vented, then it will collect on the roofing materials, roof truss, attic insulation and potentially even structural wood of the home. This moisture may cause significant water damage and encourage the growth of mold. It may also negatively impact the life span of a roof, which is why most limited warranties from roofing manufacturers will not cover products installed on roofs that don’t have proper ventilation.
It is also important for your roof ventilation to release captured heat. This small amount of heat release shouldn’t affect the energy efficiency of your home too much. Instead, it should just be enough to keep your roof at the proper temperature. Ventilation, along with ice and water protector, is important to prevent ice dams.
Further, it is important to note that roof ventilation should refresh the air in the whole attic space. At the bottom of the roof, roofers install soffit vents. These act as air intakes, drawing new, fresh air into the attic space. The air moves up, and the air that was in the attic space is pushed out through the exhaust vents near the ridge. The exhaust vents can be ridge vents, box vents, turbine vents, powered roof vents, solar attic fans and more. In order to promote proper airflow, the amount of intake and exhaust vents must be balanced. Either they must be equal, or there must be more intakes.
It is essential to install all roofing vents properly.
The Types of Ventilation
There are three general kinds of ventilation:
Natural: Simply providing vents in the right spot will often promote ventilation. Most roofs rely on natural ventilation, where the breeze outside draws air out of the exhaust vents, and this pulls fresh air in through the soffit vents.
Mechanical: Using a powered fan, we can ventilate more air. Bathrooms and workshops typically have mechanical ventilation. However, it is not typically recommended for roofs, as it may actually draw snow and rain into the attic, damaging it.
Mixed mode: In some situations, it may be necessary to combine both kinds of ventilation. It is best to avoid this on a roof, as it involves some degree of mechanical ventilation.
What Is a Ridge Vent?
A ridge vent is a long, continuous vent that runs beneath the ridge shingles along the peak or hip of the roof. Ridge vents are partly covered by the shingles and add height to them, which many people find to be an appealing look.
What Is a Box Vent?
A box vent is a static vent that protrudes up from the roof and is typically square-shaped like a box, though it may also be round. They are covered and have no moving parts. These vents may also be called louver vents. Roofers should install box vents right near the ridge or peak of the roof. They need to be integrated with the roof properly to prevent leaks and provide proper ventilation.
Advantages and Disadvantages of Ridge Vents
Ridge vents have many advantages, which may make them ideal for your roof. The advantages include:
Location: These vents are installed directly on the ridge, so they are well-positioned to provide complete roof ventilation, as this is where the hottest air will collect (as heat naturally rises.) It is not possible to accidentally install a ridge vent too low as it is with a box vent.
Length: Ridge vents run the entire length of the roof, and therefore each vent provides a lot of airflow.
Appearance: Ridge vents do not stick out from the surface of the roof or interfere with its silhouette. They do raise the ridge, but most consider this to be appealing.
Security: Animals cannot fit into the small grates of ridge vents, as the gaps are very small.
Installation: Ridge vents can be simpler for roofers to install than box vents. You do not need to cut holes in existing roof shingles or cut underlayment to fit around ridge vents.
Cathedral ceilings: If there is little room in the attic due to a cathedral ceiling, ridge vents are typically a good vent option. They will still function in these tight conditions so long as they have matching soffit vents below.
While ridge vents have many advantages, they are not always ideal. In cold climates, ridge vents can allow snow into the attic. They’re also more expensive than box vents and won’t work on all types of roofs.
Advantages and Disadvantages of Box Vents
Box vents also have many advantages, including:
Snow: Box vents have covered tops and have less surface area than ridge vents. This means box vents are less likely to allow snow and rain into the attic. They are also less likely to develop ice and less likely to be blocked by snow buildup.
Expense: Box vents are smaller and typically less expensive to purchase.
Low slope: These vents will perform better than ridge vents on low-slope roofs.
Roof shape: Box vents will work with all roof shapes. This includes pyramid roofs, which don’t have a ridge and therefore cannot have ridge vents.
Location: While not as perfectly placed as ridge vents, roofers can still install box vents near the peak of the roof.
Beauty: Box vents do protrude from the roof and can therefore interfere with its looks. However, most roofers install these vents on the backside of the home, so that they may not be seen if you’re looking at the home from the front.
Box vents are more common in cold climates because they have such strong advantages in snowy and icy conditions. On the other hand, box vents do not provide as much ventilation as ridge vents, and you typically need to install more of them to provide proper airflow. Box vents are also somewhat more challenging to integrate with the roof.
Why Not Use Both Kinds of Vents?
If both types of vents have so many advantages, why not install them both on your roof? Doing so is a mistake that actually undermines the quality of ventilation in your attic. When there are two kinds of exhaust vents installed on a roof, air skips over the intake vents. Instead, it tends to flow only from the box vent and out the ridge vent. This creates only a small pocket of ventilation at the very top of the roof and will fail to remove the required amount of moisture from the attic. This is also why your roofer should not combine a ridge or box vent with gable vents or any other kind of exhaust vent.
Choose Your Roof Vents Wisely
Proper roof ventilation is essential to protect your home from moisture damage and keep your roofing materials from premature failure. When you are making your choice, it may also benefit you to learn about other parts that make up a roof and how they work with the ventilation system.
There’s a problem with your roof, but your roofer is too busy to come by and fix the problem right away. What should you do? This is a common situation that homeowners may find themselves in after a major storm or hurricane has blown through town. After extreme weather events, roofers are so busy fixing multiple roofs throughout town that they don’t have time to address even emergency repairs right away. In this case, you may opt to add a temporary roof tarp to prevent further damage.
A roof tarp, when secured properly, can protect your roof from new rain, snow or wind. It can prevent holes or missing shingles from turning into leaks and can keep existing leaks from getting worse. Not only is protecting your roof with a tarp a wise precaution to shield your home, but it may also be necessary under your homeowners insurance policy. If you don’t limit the damage that the storm has caused on your roof and the rest of your home, your insurance company could refuse to cover the additional damage, even if it will cover the costs of the initial damage.
You should hire a professional roofer to put up a roof tarp. Attaching a tarp doesn’t take much time, and roofers are also motivated to do this work as it increases the odds that you’ll wait until they can fit you into their schedule instead of choosing another roofer.
You should not attempt to place a tarp by yourself. Standing on the roof without proper safety training and equipment is dangerous at the best of times, never mind after a major storm or when you suspect your roof has damage. It’s easier to fall off wet roofs or those with tripping hazards, such as loose shingles. Roofs that are extremely damaged may even collapse under your weight. If you’re the type of person who likes to take action, look into safe things you can do to prepare for your roof replacement in nonemergency situations.
While a professional should do the actual work of attaching the tarp, you may want to make sure that your roof is tarped properly, to ensure your peace of mind and to reassure your insurance company. So, we’ll explain how to install a roof tarp and answer some common questions homeowners have about the process.
How to Tarp a Roof
Here are step-by-step instructions on how to secure a tarp to a roof:
Tools required:
Ladder and safety equipment.
Camera or smartphone.
Measuring tape.
Suitably sized tarp.
Thin wooden boards, 2×4 or thinner.
Tool to remove debris, such as a roofing shovel.
Nails or screws.
Examine the Roof and Measure
To start, your roofers must first examine the roof to determine which parts of the roof need a tarp. They may survey the roof from a ladder, wear a safety harness to inspect the damage physically or use a drone. Using a tape measure, they’ll determine what size tarp they will need to cover the damaged area.
Take Pictures
You should ask your roofers to take pictures of the damaged parts of the roof to show to your insurance company. You should take pictures before the tarp is applied and before any debris is removed from the roof unless removing the debris is necessary to see the full extent of the damage.
Select Tarp
Your roofers will select a tarp to place on your roof. As the tarp should extend a few feet past any damage to provide proper protection, it should be larger than the area the roofers have measured. Ideally, the tarp will also be long enough to hang over the ridge of the roof. When the tarp hangs over both sides of the roof, water will roll onto the tarp smoothly, without getting beneath it. If the water rolls down the roof and then reaches the lip where the tarp begins, it is more likely to work its way under the tarp.
The quality of tarp needed may also depend on how soon your roofing team expects to be able to get to your roof, or whether or not the severe weather is expected to return.
Remove Debris
Next, your roofers will remove any loose debris from the roof, including shingles and nails. If debris is left behind, it can clog gutters, interfere with the proper flow of water and create the opportunity for more roof issues.
Unfurl Tarp
Two or more roofers will be needed to unfurl the tarp and place it over the damage. If your roofers are using an adhesive roof tarp, they may then remove the backing on the adhesive to secure the tarp. Adhesive tarps can be a challenge to install, but they are similar to the ice and water protectors that roofers use all the time. Although, the shingles beneath an adhesive tarp will need to be replaced, because the adhesive pulls up some granules.
If your roofers are not using an adhesive tarp, they will need to complete a few more steps in order to weigh down the tarp.
Secure Tarp
In order to secure a tarp with nails or screws, your roofers will need to wrap the end of the tarp around a piece of lumber as an anchor. The board helps give weight to the tarp to keep it on the roof and prevent it from flapping around. Also, if your roofers were to add a few nails to the tarp, this would create points where the tarp could easily rip. When the whole end of a tarp is wrapped around the board, it spreads out the pressure through the whole tarp, making it much less likely to rip off.
Depending on the extent of the damage, your roofing team may need to add several boards to ensure the tarp will stay in place. They’ll also need to position the boards carefully to prevent water dams. For example, the boards should not be perfectly horizontal. One end should be lower on the roof, allowing water to drain off that side.
Nail or Screw Boards Down
After they roll the edge of the tarp around a thin wooden board, the roofers will secure the board to the roof with nails or screws. The nails or screws should be driven right into the shingles. All these shingles will need to be replaced when the roofers repair the roof; but this is a small price to pay to prevent more water intrusion.
How to Tarp a Roof Around a Chimney
It is more challenging to tarp a roof if the damage is near roof features, such as chimneys, plumbing vents and skylights. While you can leave a skylight covered by a tarp, it would be a serious safety hazard to leave a plumbing vent or chimney covered. In general, your roofer should cut a hole for these features and then tape the edges of the tarp to it. It is very important to use quality tape to keep these areas watertight. Some tapes may not adhere well to chimney masonry; so, your roofer may need to tape the tarp to the chimney flashing.
How to Tarp a Roof Without Nails
Most roofers will use screws when attaching the tarp’s anchor boards to the roof. However, if you want to avoid making additional punctures in the roof, you can use an adhesive roof tarp. These have a glue-like material built in to stick to the shingles. However, these tarps may be less secure than tarps secured with wooden boards and nails; so, you should check on them regularly to make sure they are still in place. Using an adhesive roof tarp may require additional effort to remove the adhesive residue or replacing the shingles that the tarp was adhered to.
How Long Can You Leave a Tarp on Your Roof?
Ideally, you would leave the tarp on your roof for as little time as possible. That said, as long as the tarp is in good condition, without tears or rips, and as long as the water isn’t getting beneath it, it can be left in place. When your tarp will wear out depends on the quality of the tarp and the conditions it is exposed to.
If you’re concerned that your tarp isn’t effectively protecting your roof anymore, you should reach out to the roofers who put it in place. They should be able to tell you if anything has changed since their initial installation.
Get Help with Your Damaged Roof
It is important to get a tarp on your roof as soon as the bad weather has cleared so that it is in place if another storm rolls in. It is also important to get repairs done as soon as possible and not leave the tarp on for an extended period. If you’re looking for a roofer to help with emergency roof repairs or to just place a tarp, look for a local contractor through IKO’s Contractor Locator
Is there anything more important than the safety of those you love? Once the storm has passed, it’s time to turn your attention to the shelter that protected them. If your roof has been damaged, it’s important to have it repaired or replaced as soon as possible to avoid further damage to your home and property. It can be hard to know where to start, which is why we’ve compiled these top tips to help.
It’s important to know how badly your roof has been damaged, to prevent further harm to your belongings and to provide your insurance agent with some basic information. In checking your roof for damage, unless you are experienced in working at heights and have the necessary safety equipment, you should limit your investigations to visual inspections from street level and have a professional roofer conduct a full inspection for you.
Here’s what to look out for in different weather conditions:
Snow: A roof stacked with a fresh coat of white snow may look pretty, but if a heavy pile of it is left long enough, the accumulated weight can damage the roof’s structure and gutters. Using IKO StormShield to create a watertight seal can help protect the most vulnerable areas of the roof that are susceptible to water leakage caused by ice and snow accumulation.
Wind: After a heavy windstorm, you may find yourself with wind-damaged roof shingles. Homeowners must know what to look for when assessing wind damage to asphalt roof shingles. This will help to determine if you should call a roofing contractor for repairs. During the storm, you may have noticed your roof shingles flapping in the wind. If this is the case, you should have a look around your property for any missing shingles that may have blown off your roof. You should also look for cracked and lifted shingles. If you must replace your roof due to wind damage, pay attention to the roof shingles’ wind rating when deciding on a replacement shingle. IKO Nordic and Dynasty shingles are reinforced with ArmourZone for exceptional high-wind performance, making them some of the best wind-resistant shingles on the market.
Heavy Rain: When a roof is in good condition and properly installed, rain damage is rare. However, if your gutters are clogged, the water may not be able to drain off your roof properly. This can result in the water slowly damaging the roofing materials. In very heavy downpours, water can quickly gush out of downspouts, potentially damaging landscaping. A downspout diverter or extension can help redirect excess storm rainwater, resulting in less ground damage.
Hail: Hail damage to roof shingles may not always be the most obvious, but it is critical to look for deterioration before it leads to water damage inside your home. So, what does hail damage look like on roof shingles? Some things to look out for include patches of the shingles’ black asphalt left exposed due to missing surface granules, small divots or dents and cracks or dents in roof accessories. When dealing with hail damage, roofing contractors can help to determine the damage and suggest the best course of action for repair. IKO Nordic, Crowne Slate and Armourshake shingles have been tested for impact resistance and have achieved the highest rating possible, Class 4.* These are IKO’s best asphalt shingles for regions subject to hail and may be good replacement shingles to minimize future hail damage.
* The Impact Resistance ratings are solely for the purpose of enabling residential property owners to obtain a reduction in their residential insurance premium, if available. This is not a guarantee of impact resistance against hail. Damage from hail is not covered under the limited warranty.
Contact Your Insurance Agent.
Whether you call a professional roofing contractor or your insurance agent first, they will need information from each other in order to evaluate the damage and provide an estimate for your insurance claim. Ideally, invite your adjuster and your contractor to meet at your home, to work together most efficiently.
Before you make that call, check out this handy guide on how to deal with insurance:
Once you’ve contacted your insurance agent, it’s important to do what you can to avoid further damage by keeping water out until your chosen contractor can start the project.
Click here to find an IKO-approved contractor in your area:
Beware of “storm-chasers”. People who may represent themselves as either roofing or insurance experts often appear at the door of homeowners who have experienced storm damage. They may claim they’ll be able to get you a new roof or have you sign what’s called a “contingency agreement” so they can climb up to assess the damage. Such a document may legally bind your claim to their company.
Never sign anything before you read it fully, have your questions adequately answered and know exactly who they are or whom they represent.
Before you hire a roofing contractor, ask to see all licenses and certificates of insurance that your municipal, state or provincial laws require and ensure that all are up to date.
Once your insurance adjuster and selected roofing contractor have worked out the essential details, the insurance settlement may be sufficient to pay for a new roof that’s similar or better than the one you had before.
Consider not only the style and color of a possible new roof, but the available warranties, accessory products and application methods that might protect your home and family best should similar extreme weather events occur in future. Ask your contractor for options and to see samples of actual shingles before you commit to buying.
Like all industries, the roofing industry is constantly evolving to create better products and services that meet our ever-changing needs. And we should know.
We’ve seen firsthand how much the roofing industry has changed. However, if you’re a homeowner getting your first new roof in 15 years (or ever!), you may feel out of the loop. You want what’s best for your home, which means making the right choice for your roof. However, as things change and new roofing products are introduced, the right choice can be hard to nail down.
To help guide you through the new and exciting world of roofing, we’re taking you through ways the roofing industry has changed and certain roofing trends that have emerged in recent years.
Performance Is In:
One of the most significant changes in the roofing industry has been the shift from your basic 3-tab to architectural and performance shingles. For a long time, 3-tab shingles dominated the market because they were, for all intents and purposes, all most homeowners needed. They were reasonably tough and durable, and met the standards of their day.
But standards have changed. Weather patterns have become increasingly unpredictable, bringing harsher storms and higher winds. To combat this, homeowners are looking for new roofing products that are stronger and capable of withstanding more inclement weather.
Nowadays, what’s in is wind resistance, sealant strength, ice and water protection, and heavy-duty products designed to go the distance and handle whatever Mother Nature decides to throw at them. Homeowners want tried, true and tested products, like our Dynasty Performance shingles, which are engineered to withstand harsh winds and have a Limited Wind Warranty of up to 130 mph (210 km/h).
Impact Resistance Is Coming in Strong
One performance feature that has been making serious headway in the roofing industry is impact resistance. Our Nordic Performance shingles are engineered with a special Polymer-Modified Asphalt, which acts like a shock absorber and have earned a Class 4 Impact Resistance Rating, the highest you can get. Interest in impact-resistance shingles is continuously growing due to their ability to better withstand the elements and help minimize damage which may result in leaks and costly repairs. The Class 4 impact resistance rating is not a guarantee of performance, and damage from hail is not covered under IKO’s limited warranty, but some insurance companies will offer a discount on home insurance premiums when roofing with shingles with a Class 4 Impact Resistance Rating, like our Nordic line.
Exploring Color:
There have been exciting advancements in the world of shingle color. Thanks to new roofing technology (and a little IKO innovation), shingles now come in various beautiful and vibrant HD color blends. This has allowed people to fully utilize their roofs to express their home’s unique style and personality.
Today’s homeowners are moving away from classic monochromatic colors in favor of something bolder and more exciting. While blacks, browns and greys remain popular colors, people have begun exploring different hues and shades, like our Summit Grey or Driftshake, to stand out and add a personal touch to their roof. Contrasting colors are also gaining popularity in the residential roofing industry. People looking to add depth and character to their homes often choose a shingle color that offsets the exterior color.
The biggest change in shingle color is the freedom homeowners now have to think outside the box and get a bit more creative with their roofing choices. This expansion of color has recontextualized the part your roof plays in the look and feel of your home, and homeowners are taking advantage. If you’d like to learn more about choosing a shingle color, check out our blog, “How to Pick Roof Shingle Colors,” or browse through IKO’s shingle color collection. Then, have some fun and experiment with new looks on our ROOFViewer color visualizer.
Cool Roofs:
More and more people are looking to make their homes more sustainable and energy-efficient, leading to the growth of cool roofs and colors. Cool roofs are roofing systems designed to absorb less solar energy, helping to reduce your home’s internal temperature and potentially reducing energy consumption. Cool roofs can come in many forms, but the ones sparking interest among homeowners are cool colors.
Cool colors, like our Cambridge Cool Color Plus series, are specially designed shingles that actively reflect the sun’s rays using infrared-reflective pigments. With our Cambridge Cool Colors, you can boost your roof’s reflectivity and transmit less heat into your home. Cool Colors are only available in select U.S. markets, specifically in the hotter climates where they are increasingly popular because they are less expensive and easier to maintain than solar or green roofs and aren’t limited to light colors.
While cool colors may be an intriguing option for the more environmentally conscious, where you live should factor heavily into your decision. Unless you live in an area with intense sun, you may not reap the full rewards and might be better off choosing a performance shingle in a lighter color.
Roofs Are Becoming More Intricate:
To understand, we first need to talk about roof pitch. Roof pitch is the slope of your roof. It’s calculated by measuring how many feet your roof rises vertically for every 12 feet it extends horizontally. For example, a roof with a 6/12 pitch will rise 6 feet up for every 12 feet across. With us so far?
In the residential roofing industry, roof pitches have changed over the years to match the popular styles of the era, being as high as 12/12 in the ‘60s to as low as 2/12 in the ‘70s and ‘80s. Today’s roofs are far more complex. New-build roofs are more geometric and less uniform, so we’re seeing more peaks, valleys, hips and ridges.
Impact of Steeper and Multiple Roof Pitches on Your Home
We’re also seeing steeper pitches and multiple pitches on the same roof. That means your roof’s central section (front and back) may have a 12/12 pitch, but the hips (the sides) may have a 6/12. This may even change again depending on the complexity of the design.
What does this mean for you? Well, first off, steep roofs display shingles differently, which affects how they look. You may see a shingle you like on one house only to realize it doesn’t look the same on yours after the job is done. Also, reroofing a home with multiple levels and angles takes more time, effort and material, which will increase costs.
The More You Know:
One of the biggest changes in the roofing industry has been your role in the process. Before, roofing was left to the roofers. A contractor would come, they’d install, and they’d go, with the homeowner rarely getting involved. That is no longer the case.
The internet has brought a world of information to our fingertips. Type “roofing” or “new roofing products” into Google, and you’re instantly connected to photos, articles, reviews and even DIY videos that can teach you everything you need to know. But, like all changes, there are some growing pains.
Information:
Let’s start with the good. Homeowners are more knowledgeable about the roofing industry than ever. They research products, read reviews, compare costs and have a better idea of what they want and what they don’t. This has encouraged them to get more involved in the process, which is good. Getting a new roof is a large investment and one that shouldn’t be taken lightly. Getting more involved in the process will ensure you get a high-quality roof you can trust and reveal choices you didn’t even know you had.
Our Roofing Industry Outlook:
The roofing world certainly has undergone some exciting new changes in recent years. But this is only the beginning. We at IKO are constantly innovating to provide better products and new roofing materials that will elevate the standard of roofing even further. So, it doesn’t matter what the weather tomorrow brings. To us, the future is looking bright.
So, you’re planning to buy a house. Let us be the first to say congratulations! Buying a home is an exhilarating and rewarding experience. But it can also feel a bit overwhelming. This is one of the biggest investments you’ll make and shouldn’t be done lightly. Before you sign your name on the dotted line, there is a lot to consider, especially for first-time buyers.
Whether buying a new build or an existing home, we want your homeownership journey to be as exciting and fulfilling as possible. Using our decades of experience working with contractors, home inspectors, specifiers and more, we’ve compiled a little home buyer’s checklist and inspection guide so you can buy with confidence.
Please remember that this article is meant to provide advice for new home buyers only and is not a substitute for legal or financial advice. It should also not be considered a complete guide to home inspections. No home is perfect, and issues will undoubtedly arise. The goal is to provide you with enough information to help you make an informed decision. We’ve broken down our home buyer’s checklist into the following steps, which will be discussed in detail below:
Viewing a home is one of the best parts of buying a home. While it can’t tell you everything you need to know when buying a house, it’s a great place to start. The trick is to know what to look for. To help make the best decision possible, here are some inspection tips for new homeowners to consider when viewing a home.
Roof
The roof is the first thing you should look at when approaching a potential home. From the ground, inspect the state of the shingles. See if they are curling severely, if any are missing, or if any areas look completely worn out. Curling shingles aren’t necessarily a sign that the roof is leaking, but they could indicate that the roof may have to be replaced sooner than you’re prepared for.
Also, check to see if any areas appear to be buckling. This could mean water has infiltrated the roofing deck, affecting its dimensional stability and possibly its structural integrity. Keep this in mind when inspecting the attic and see if you spot any signs of water damage.
Check for algae or moss growing on the roof, or mold in the attic. This can appear as dark, white, green, or black patches and can indicate poor ventilation and/or water leakage. Also, look around and see if there are any overhanging trees touching or sitting extremely close to the roof, as this may cause issues in the future.
If you’re looking at a semidetached home, inspect the neighbor’s roof as well. When talking to the seller, ask them how old the roof is, if it’s been replaced and why.
Gutters and Drainage Systems
While you’re there, look at the roof’s drainage system. Gutters and downspouts should capture and direct runoff away from the house, protecting it from water damage. Take a walk around to see if you can spot any gaps or breaks that would cause water to run down rather than away from the house. If the fascia (the board beneath the gutters) is damaged or degraded, that could mean the gutters are frequently clogged. Damaged fascia can also cause leaks and allow animals to get in.
Check to see if the downspouts have an extension. A downspout without an extension may cause water to pool, causing soil saturation, which can damage the foundation. All downspouts should have an attachment to carry water safely away from the house.
Foundation
Inspecting the foundation can be tricky as it’s usually covered up externally by soil, decks, porches, etc., and internally by drywall. However, there are a few ways to inspect its structural integrity. Look for any cracks in the walls, particularly around doorways or windows, and see if any doors or windows stick or jam. These may all be signs that the foundation has shifted. Remember, downspouts without an extension may also affect the foundation’s integrity. An unfinished basement will likely give you the best view of the foundation and reveal any cracks or water damage.
Bedrooms
When inspecting the bedrooms, the first thing to consider is the size. Take note of window placement. Will there be a lot of natural light? Is there enough privacy? Walk from each bedroom to the bathroom to get a feel of how far it is and check all light switches. Check the ceiling and walls for any water damage. Finally, scan the room for outlets. We use a lot of devices nowadays, so having multiple outlets within reaching distance will make all the difference in the world. Do you really want to get out of bed every time you have to plug your phone in?
Living Room
As you did in the bedrooms, consider the size, windows and outlet placement when walking through the living room. Try not to get too wrapped up in the current décor. Instead, consider the style and layout. Will your existing furniture work? Take pictures of your current living room layout and use them as references. Also, like in every room, test all electrical outlets and switches to ensure they work correctly. An easy way of doing this is by using your phone charger. Also, be sure to check for any water damage.
Kitchen
The kitchen is where you’ll move around the most, sometimes holding hot pots and pans, so you want to make sure you can do so easily and safely. Play out your typical routine a few times to get a feel for the space. Counter space is king in any kitchen, so you’ll want to ensure you have enough for appliances, cooking and prep work. To check the plumbing, let the water run and look under the sink to see if there are any leaks. Once again, test all electrical outlets and switches to make sure everything works.
Bathrooms
You’ll want to make sure everything in the bathroom is watertight and in working order. Test the faucets, toilet, and shower. To check the water pressure, turn on the faucet and flush the toilet. If the water flows uninterrupted, that usually means the water pressure is good. Check under the sink and around the toilet for leaks, water damage, or mold. Make sure there is a working exhaust fan. Bathroom fans help reduce odors, improve air quality, and remove moisture and humidity that can cause mildew, mold, and structural damage.
Basement
Basements are like a box of chocolates: You never know what you’re going to get. Nowadays, most basements are finished. However, it’s not guaranteed. If the basement is finished, inspect it like you would the main floor, being especially vigilant for any signs of water damage as this is where it’s most likely to occur. If it’s unfinished, you’ll get a clear view of the foundation, plumbing, floor/ceiling joists and wiring. The basements of older homes were often used for cold storage and may not be set up for HVAC, making them cold in the winter and humid in the summer. So, keep this in mind when viewing.
In the end, it comes down to personal preference. A finished basement provides more room and is great for kids. However, if you’re only using it for laundry/storage, you may not care if it’s unfinished. Plus, an unfinished basement is a great blank canvas for you to create your own space.
Getting a Home Inspection
A home inspection is an in-depth visual examination of a home, from the roof down to the foundation. Home inspectors are trained to see what others can’t, identify potential issues, and save you tens of thousands of dollars in repairs and renovations down the line. A home inspection should consist of, but is not limited to, the following:
Roof:
A home inspector can get up on a roof to look closely at the state of the shingles, flashing and ventilation systems. Many new homeowners believe that seeing excessive granules in the gutters is a sign that the shingles need to be replaced, but that isn’t always the case. All shingles, including IKO’s performance shingles, are engineered with extra granules to ensure complete coverage of the shingle’s asphalt weathering layer. So, having a few of those extra granules in the gutters isn’t necessarily a cause for concern.
However, a qualified home inspector can get on the roof and see if the shingles have been worn down so much that the base layer is showing. This is a sign that the shingles may need to be replaced. While up there, they can also inspect the gutters to see if they are clogged or need to be replaced.
Attic:
Here, a home inspector can further examine the underside of the roof deck, the attic’s ventilation system and insulation. Adequate ventilation, in conjunction with vapour barriers and attic insulation, helps maintain the home’s temperature and moisture levels. They can also help prevent the formation of ice dams in the winter. A home inspector should check all roof intake and exhaust vents and the type of insulation used and should recommend whether or not the attic insulation levels should be increased. A properly ventilated and insulated attic can save you hundreds on your energy bills.
HVAC:
Most of us are unfamiliar with HVAC systems. A home inspector will be able to tell you how old the home’s furnace and duct system are, whether they’re working properly and if there are any leaks. Depending on the home, they should also check the air conditioning unit.
Electrical and Plumbing:
While you can check all the outlets and switches in the home, a home inspector can check the wiring. They can determine its age, if it’s been done properly and if there are any fire hazards. They will also inspect the circuit breakers to ensure everything is up to code and installed correctly. They’ll check all visible plumbing, including the water heater, for leaks or signs of degradation.
Floors, Ceilings and Foundation:
A home inspector will look closely at the structural integrity of the home’s floors, ceiling, and foundation. They can pinpoint subtle signs of water damage, shifting, buckling and the quality of the craftsmanship, and can identify load-bearing walls. This can come in handy if you ever decide to renovate.
Doors and Windows:
Improperly sealed windows and doors allow for hot and cold air to escape, can make a room drafty and increase the chances of water infiltration. A home inspector can ensure all windows and doors keep the outside out and the inside in.
What a Home Inspection Isn’t
While a home inspection can provide great advice for new home buyers and give you a better understanding of the home, it’s important to remember that it is a visual inspection only. There are certain things a standard home inspection cannot always account for. Such as:
Asbestos.
Radon.
Methane.
Radiation.
Wood-destroying organisms like termites.
Extensive mold, mildew, or fungi.
Pests and rodents.
Lead.
Sewer, septic and waste systems.
A home inspector will not enter inaccessible areas like locked or cluttered rooms. They also will not venture into any space that is deemed unsafe, such as steep roofs. Specialized inspectors are available for the above, but usually come at an added cost.
Can a Home Fail an Inspection?
No, a home cannot fail a home inspection. A home inspection only describes the home’s physical condition and anything that requires significant repair or replacement.
Also, a home inspection is not an appraisal and cannot affect the home’s market value. However, it can open price negotiations between you and the seller. You can also request repairs after a home inspection, though the seller may refuse.
The best action plan is to schedule a home inspection immediately after the Agreement of Purchase and Sale (APS) documents have been signed. You can also negotiate with the seller to include a home inspection as a condition in the APS. This will make the purchase of the home contingent on the outcome of the inspection.
We hope our beginner’s guide to buying a new home eases some of those first-time buyer jitters and helps you find the house you want to make a home.
In the winter, ice tends to collect on some roofs near the edges because of snow from a snowstorm that melts and refreezes during a drop in temperature. While you can, and should, address the underlying cause of the ice dam, you should also seek to remove the current dam from the roof. Otherwise, it may wear on the roof and increase your likelihood of developing a leak.
The longer the ice dam remains, the higher the risk you take. However, you also must be careful about how you remove the ice dam, as certain methods may damage the roof. We’ll guide you through the ice dam removal process, revealing which methods are safe for your roofer to try, and which methods should not be attempted at all.
The Best Ways To Get Rid of Ice Dams
You can temporarily get rid of ice dams by melting them away. There are four safe ways your roofing professional can remove an ice dam from your roof:
Use hot water: Running hot water over the ice dam, gently, will melt it and allow the water to drain out through the gutters.
Install heat cable: You can have heat cables installed on the roof in the summertime which will then be there come cold weather to melt the ice dam for you. Your roofer may recommend that you use them temporarily or install them permanently to solve your ice dam problems moving forward. For example, they may be installed on roof planes that face north and have a higher roof plane draining onto them. As these roof planes get very little sun in the winter, the excess water becomes an ice dam more easily. Roofers may also use heat cables to prevent ice dams from forming and drainpipes from freezing on commercial roofs.
Remove snow: If warmer weather is on its way, and the ice dam is likely to melt, your roofer might choose to have the rest of the snow on your roof removed. Otherwise, the snow may melt under the sun and become another ice dam when it refreezes at the colder roof’s eave. The National Roofing Contractors Association (NRCA) recommends that some snow be left on the roof in order to prevent damage to the shingles. That way, the contractor’s shovel doesn’t come into direct contact with the roof, so it won’t scrape it. Remember that only a professional can safely remove snow from the roof with a shovel, and they must be very careful.
While it’s always best to consult with a professional roofer about how best to remove your ice dam, there are some less-experienced roofers or general contractors who may attempt to remove ice in an unsafe way. It is important for you to be educated about how a professional should remove ice safely, so that you can protect your investment in your roof. Here’s a guide explaining how a professional can safely remove ice dams with hot water.
How To Remove Ice Dams on Your Roof
Tools you’ll need include:
Ladder.
Garden hose.
Roofing team.
Steps you’ll need to take are as follows:
Step One: Your roofers should place their ladder safely next to the portion of your roof with the ice dam. They should follow ladder safety protocol to keep themselves safe. They should not place their ladder on ice or snow.
Step Two: One roofer will climb the ladder and have another member of the team hand him or her the hose. One roofer will then turn on the hose.
Step Three: Next, your roofers will direct the hot water onto the roof. It may take some time depending on the size of the ice dam, but it will eventually melt. As they work, your roofers will be careful not to aim the pressurized water directly against the shingles. Otherwise the shingles may lift, and the water could damage them. This is one reason why you should not use a pressure washer on a roof. Once the ice has melted, your roofer should ensure that all chunks of ice have cleared the gutters, or they may create a gutter clog.
How Not To Remove Ice Dams
There are many incorrect ways to remove ice from your roof that will damage your asphalt shingles and compromise your roof’s water-shedding ability. Protect your roof and home, and keep your limited warranty valid by asking your roofer to avoid these risky ice-removal methods:
Manual removal: It is NOT a good idea to take a pick, shovel or another tool to the ice and chip it off. This might remove the ice, but might end up damaging the shingles too. Plus, the next ice dam in this spot is likely to take advantage of the cracks or gaps your roofers have created in the roof. As the snow melts, the water could settle into these cracks and freeze and expand. This kind of damage may result in a leak. The only time roofers should manually remove ice is when they will also replace the roof beneath it.
Chemicals: Roofers should avoid using any chemicals on your roof. Many ice-melt products combine salt and other chemicals that make the salt a more effective de-icing treatment. More targeted ice dam ice-melt tablets are available, but are not recommended for asphalt roofs. Unfortunately, some of these chemicals can have a negative effect on asphalt shingles, especially if the chemicals are left on the roof for long periods, and their use may void the manufacturer’s limited warranty.
Prevent Ice Dams for Good
These ice dam removal methods are all temporary. They can help your roof avoid damage in the short term, but they won’t stop another ice dam from forming. In order to resolve your ice dam problem for the long run, your roofers need to address the underlying issue that is causing the ice dam to form. While many homeowners believe that the real problem is poorly maintained gutters, this is rarely the case. Most commonly, the underlying issue is inadequate attic insulation.
Work with your roofing professional to discover what kind of insulation you have and whether it needs to be replaced with a more effective type of attic insulation. Better insulation will prevent the home’s heat from reaching your shingles. Therefore, the snow on the shingles will likely not melt or be able to refreeze as an ice dam.
Other roof issues may be contributing to the formation of ice dams on your roof. While fixing these problems will not typically resolve the ice dam by themselves, they may help reduce the severity. They will also help keep your roof in better condition in general. These contributing factors may include:
Ventilation: Plumbing vents commonly end on the top of the roof. However, ventilation for other home systems should not end on the roof. If they do, they run the risk of melting the snow around them, leading to ice dam formation when the water refreezes. Consider running vents out through the wall of the home instead.
Connection points: Roof design may contribute to ice dam formation. For example, if an upper roof plane drains onto a lower, unheated, roof plane, this water may create ice dams. A roofing professional can tell you if your roof design is the problem and what can be done to correct it.
Gutter maintenance: Although they are very rarely the primary cause of an ice dam, clogged and slowly draining gutters may develop ice dams. It’s essential to clean your gutters in the fall to avoid this problem.
There is also a way to protect your roof and home from damage from any potential ice dams that might develop. Installing ice and water protector is often required by building codes because it offers your roof extra protection.
Need Help With Your Ice Dams?
Ice dams should always be removed by professionals who understand winter roof safety and how to protect the shingles from further damage. Plus, once they have removed your current ice dam, they will need to address the underlying cause before another ice dam occurs. If you need to reach out to a professional, consider IKO’s Contractor Locator, which may suggest roofers right in your area.
Unfortunately, there’s no such thing as a hurricane-proof roof. However, there are still plenty of things you can do to protect your roof, and therefore the rest of your home, from hurricanes and the damage they can do. Research published by the Environmental Protection Agency (EPA) suggests that hurricane winds are getting stronger, and hurricanes will begin to affect more people.
While any given year might have more hurricanes than average or fewer, the overall trend is for hurricanes to cause more damage. That means it is more important than ever to do what you can to protect your home and ensure a hurricane-proof roof, especially during hurricane season.
Below, we provide information on how roofs handle hurricanes and practical steps you can take to reinforce your roof or otherwise reduce your risk from a serious storm.
How Hurricanes Impact Roofing
While some roofs survive major hurricanes intact, other roofs suffer severe damage. Some roof trusses even blow off the home entirely. Much of the difference in roof performance during a hurricane has to do with the construction of the building. The major factors that determine whether or not your roof will blow off your home in a hurricane include:
Where the home is situated.
The strength of the structural connections in the building.
The shape of the roof.
Other architectural choices.
Hip roofs survive hurricanes better than gable roofs. The flat face of the gable catches wind, while the angle of a hip roof can better withstand the same pressure. In addition, low-slope roofs inherently experience higher wind loads and therefore perform worse in hurricanes than steep-slope roofs, according to research conducted by civil engineers at the New Jersey Institute of Technology. Specifically, this research found that roofs at a 7:12 pitch perform the best in high wind conditions.
Roofs that are structurally sound and well-attached to the rest of the building may still suffer in hurricanes. The extreme wind forces often blow water at a structure horizontally. Instead of moving down from the sky, the water is directed across, hitting the roof from the side.
This phenomenon is called wind-driven rain, and when it occurs during hurricanes, it can involve large amounts of water directed at your home for hours. It is a tough challenge to design materials and roofing systems that can resist this force. Any small gap in flashing, missing shingles or holes in the roof may let water into the home.
The multi-layered approach to risk reduction
Any piece of roofing material that catches the wind may be ripped off, creating a chain reaction that can strip the roof of shingles or underlayment. Then, the exposed decking can soak, which can create major leaks.
According to the Federal Emergency Management Agency (FEMA), there are multiple layers of risk reduction you can take to protect your home. Following building codes is the first step. Following construction best practices is the second. Obtaining homeowners insurance policies and purchasing additional insurance to cover hurricanes and flooding when your homeowner’s insurance does not cover these perils, is third.
With these three elements of risk reduction, you should have excellent protection during a hurricane. However, FEMA recognizes that there will always be residual risk during extreme events.
Disclaimer: The following information is provided for general information purposes only. It is incumbent upon the homeowner to follow all building codes and safety codes as well as public advisories from safety and emergency response authorities. The information provided in this article is supplemental to advice from your roofer, local building code authorities and your local laws. IKO disclaims all liability in respect to the information provided.
What Can You Do To Protect Your Roof in a Hurricane?
Protecting your roof in a hurricane is all about preparation. Unless you intend to do a major rebuild of your home, you can’t control the design of your home or your roof. Instead, factors for roof performance that are within your control are about ensuring the roof you have will do the best job it can under the circumstances.
1. Ask for a Preseason Roof Inspection
Professional roofers are your roof’s first line of defense from hurricanes. Before hurricane season begins (this varies by year, but it is roughly May 15 for the Pacific and June 1 for the Atlantic), you should have a roofer inspect your roof. They may spot potential problems, from bent flashing to missing shingles, which could make your roof more vulnerable to extreme winds. One of the most common issues is damage to the edge of the roof, including the fascia and soffit boards. Roofers should pay special attention to this area of the roof and ensure all is secure before hurricane season.
Routine maintenance, such as cleaning gutters, downspouts and valleys, as well as trimming nearby tree limbs, can also help protect your roof from damage during storms.
While you have your trusted roofer inspecting your roof, ensure that you have their updated contact information available in case of an emergency roof issue after the storm.
2. Choose Performance Products
Not all roofing materials and features are made equal. Choose roofing products that offer limited wind warranties up to 130 mph (210 km/h). No shingle is impervious, but IKO has specifically designed performance shingles to better handle various environmental challenges, including high winds.
Some shingle manufacturers, including IKO, suggest different installation practices for high-wind conditions. We strongly suggest you consider a high-wind application if you live in a high-wind area. The chart below shows FEMA’s assessment of the high-wind areas in the United States.
3. Follow Building Codes
Typically, you will only have to get your roof up to code with any changes to the building codes when you get a roof replacement or a repair of an area affected by the building code change. However, sometimes adopting the improvements laid out in the building codes before hurricane season can help offer you additional protection.
For example, as of January 1, 2021, the Florida Building Code has changed several roof requirements, including adding a secondary water barrier and additional fastening. Changes to rules for soffits were also implemented to reduce the impact of high winds on this key area of the roof. These new regulations do not negate other building code requirements for your roof.
Ask your roofer if it is in your best interest to update your roof to meet any new building code requirements before a hurricane.
4. Add or Inspect Hurricane Ties
Hurricane ties strengthen the connection between the roof truss and the home’s structural elements, preventing roof blow-off in high winds. Consider adding hurricane ties. If your home already has hurricane ties, your roofer should inspect them for corrosion and other damage during the preseason inspection.
5. Consider the FORTIFIED™ Program
The FORTIFIED ™ program is a voluntary program run by the Insurance Institute for Business & Home Safety (IBHS) with the goal of improving roof and home performance in hurricanes. By bringing your home up to the program’s standards, you can improve your roof’s performance in weather events.
The program has requirements for roofing and other parts of the home beyond what most building codes require. These enhancements can help a roof and home withstand even Category 3 hurricanes. The program’s requirements are based on research from the IBHS. Standards include sealing the roof deck, using a thicker drip edge, and ensuring that starter shingles are fully adhered to the roof deck.
As research has demonstrated, the most critical factor in shingle performance is the strength of the seal between the shingles. These measures are intended to bolster this connection. You can ask a professional roofer to ensure your roof meets FORTIFIED™ standards.
6. Address Roof Repairs, Including Leaking Roof Vents
Before a storm, it is smart to get your roofer to complete any roof repairs that you have been putting off. Even small issues with the roof can lead to more serious damage during a hurricane.
Roof vents are especially important to inspect and repair. They are crucial components of a roofing system, but they can become points of concern during hurricanes, particularly if they leak. Choose hurricane-rated roof vents and have a reputable roofer install them to prevent leaks and hurricane-related vulnerabilities.
7. Protect Skylights
Skylights are particularly vulnerable during hurricanes and any high-wind conditions. Manufacturers equip modern skylights with tempered glass or plastic, which means they do not leave dangerous shards behind if broken during a hurricane. Skylights are typically designed to resist wind, but they can still suffer damage in high winds and hurricanes.
Have your roofers replace your current skylights with hurricane-resistant skylights. They are not hurricane proof, but they do have much higher wind-resistance properties than some other options on the market.
If this is not an option, you may be able to cover your skylight with a metal cage, plywood or a specifically designed skylight shutter. If the installation is temporary, your roofers will need to repair any shingles surrounding the skylight that they had to puncture with nails to secure the skylight cover.
8. Secure Roof Documentation
Take some “before” pictures of your roof for insurance and limited warranty claims. Take overall pictures from multiple angles and some close-ups as well. Your roofer can help by taking photos of points of interest, like chimneys and skylights, from on top of the roof. Save the photos to your cloud storage to ensure that you don’t lose them if something happens to your phone.
It may also be useful to scan and save digital copies of any limited warranties your roof may be under, including those from your manufacturer and the roofers who installed the roof.
9. Store Potential Projectiles
Many of the loose objects you have on your property may become projectiles in hurricane conditions. These can damage your roof, other parts of your home or your neighbor’s property. Before a hurricane, bring in lawn furniture, trampolines, children’s toys and anything else that you typically store unsecured outside.
10. Verify Your Home Insurance
In the United States, most homeowner’s insurance policies will not cover flooding and may not cover other hurricane damage. Before you choose a policy, or at least before a hurricane, confirm with your insurance provider that you also have hurricane and flood protection policies in addition to your homeowner’s insurance policy.
You can purchase flood insurance through the National Flood Insurance Program (NFIP) in the United States. In Canada, you may find it offered by any insurance broker as an umbrella policy on top of homeowner’s insurance or separate to homeowner’s insurance. Also, ensure that your coverage is large enough to provide for the whole cost of your roof replacement in the event a hurricane destroys it.
It may be worthwhile to buy an umbrella insurance policy to increase the dollar amount of coverage so that your policies will cover more of your roof replacement cost.
11. Buy a Tarp
When roofers deal with roof damage after a hurricane, they typically install a tarp over the damaged sections of the roof to prevent further water damage. They can only address the repairs properly after storm conditions and precipitation have passed. If you have a tarp on hand, your roofers may use it instead of bringing their own. While having a tarp is useful for minor storms too, it is an especially good idea if a hurricane is approaching, as roofers may run out of tarps if enough roofs in your area have been damaged.
Though owning your own tarp is a wise precaution, attempting to install it yourself, especially during a storm, is dangerous. Homeowners should allow professionals to tarp their roof. Do not walk on your roof, during a storm or otherwise, or you may fall and suffer serious injury.
Protecting Your Home’s Roof From Hurricanes
When considering what steps you should take to protect your home from hurricanes, it is always wise to speak with your trusted roofer, who may have specific advice for your roof. In the unfortunate event a hurricane damages your roof, it can help you to know you have financing options for roof replacement and repair that can ensure you get the damage fixed quickly. Plan ahead and be prepared this hurricane season.
Need to replace your roof but not sure what the best time is or how to make it fit your schedule?
You’re not alone. From weather conditions to contractor availability to everything else that life throws at you, determining the best time to replace your roof can feel a little bit like putting a puzzle together (unless, of course, the reason you need to replace your roof is due to emergency circumstances).
If your roof incurred damage from a storm or you have a significant leak in your home, then the best time to do it is as soon as possible. But, if you are planning a full home remodeling project, or you intend to replace your roof to increase the value of your home prior to sale, you will have a bit more flexibility.
Having your roof replaced can feel quite disruptive as a homeowner due to the noise and time commitment, but there are a few ways to prepare yourself to make it feel less like a burden and more like an exciting project to take on.
Here’s how to plan a roof replacement that fits your timeline.
1. Planning a full home renovation?
Consider the timeline of the entire project before booking your roofers. If you are building an addition to your home, or are in the midst of a full home remodel, the best time to replace your roof will depend on the overall scope of the project (as long as none of the various projects are urgent).
For example, if you plan to replace most of the exterior of your home (i.e., doors, windows, siding and your roof), then it is ideal to start with your roof. This will help ensure that your new windows or siding are not damaged while your roof is being replaced.
Whenever you are planning a series of home improvement projects, it is best to speak to a contractor or roofer before confirming start dates.
2. Schedule roof replacement when you can relocate pets and kids temporarily.
When you are trying to choose the best time to replace your roof, ensuring that you have the resources to get your pets and small children away from the home will be beneficial. If your pets exhibit fear during a thunderstorm, they are more than likely going to be quite scared during a roof replacement.
There is no way for a roofing crew to avoid the inevitable hammering and walking on the roof of your home, so you may want to make arrangements before your roof replacement for them to stay with a friend or sitter.
3. Choose a time to replace your roof that will not disrupt your work schedule.
Choosing a convenient time to replace your roof depends on several factors: weather conditions, roofer availability, and your own schedule.
But, just like small pets and children will be disturbed by the noise when you replace your roof, you likely will be, too, particularly if you work from home! If this is the case, weekends might be an ideal time for a roof replacement (if your roofer works on weekends), as you will be able to leave the home or set work aside for the time that the project is completed.
Additional scheduling factors to take into consideration include whether you want to be close by to oversee the project and potentially leave space for unexpected delays.
4. Consider the best time to replace your roof based on weather conditions.
Summer and fall are some of the best times to replace your roof for a reason: Lower humidity and moderate temperatures are ideal for shingle installation. Summer is a particularly ideal time to replace your roof because products like IKO shingles with FastLock sealant are activated by the sun’s heat.
Replacing your roof in cold-weather conditions is not ideal for the materials or your roofers, but it can be easier to find a reputable contractor since it is a slow season. With that said, your roofer will need to take additional health and safety precautions, and the project will likely take longer than it would in fair weather conditions. Cold weather roof replacement also requires additional installation steps, which is likely to result in higher labor costs.
5. Make a plan for your vehicles.
Your driveway is more or less occupied while contractors replace your roof. Your roofer will likely have a large dumpster delivered to your home a day or two before the beginning of the project, which they will use to dispose of the current roofing materials they remove.
It is not advisable to use your driveway while your roof is being replaced. Reputable contractors will use a magnet to pick up any stray roofing nails from your driveway and gardens at the end of each day of roofing but to be safe, it’s best to find somewhere else to park your cars for the extent of the project.
6. Set time aside to take down and store any valuables before your roof replacement.
You might be surprised by the level of vibrations that can come with the process of having your roof replaced!
Ensure any fragile interior objects like mementos or photos on the wall are put away in a safe place before the roofers’ arrival. While they are not guaranteed to knock things off the walls or shelves, it is an extra safety precaution that is worth setting aside some extra time for!
7. Plan for any necessary permits or approvals ahead of your roof replacement to avoid delays.
Depending on where you live and the scope of your roof replacement project, there is a possibility that you may require permits before the contractors can get started. Most contractors will navigate the permit process on your behalf, but it is still important to take into consideration when choosing a time for your roof replacement, particularly if you are planning multiple home renovation or home improvement projects.
Replacing a roof with the same type of roofing materials, repairing missing or damaged shingles and eavestrough replacement often does not require any permits, but we recommend checking your local zoning regulations and bylaws, as well as any Homeowner Association (HOA) rules apply to you and your home. But, if you are adding a second story to your home, changing the slope or pitch of your roof, or, say, installing a skylight, these are circumstances that may require a permit. Be sure to speak to your contractor ahead of time and plan your roof replacement accordingly.
8.Regular communication with the roofing company
Communication is key in any project. By staying in communication with your roofing company before the project starts and staying informed throughout a roof replacement, you will be less likely to come up against any surprises. If your contractor expects any project delays due to setbacks, like changing weather conditions or material delays, maintaining a steady stream of communication will ensure that you are prepared to adjust your plans accordingly (i.e., leave the dog at the sitter for an extra few days, let your employer know that you need an extra day off, etc.).
9. Consider the type of roofing material you want to use and its availability.
Material shortages and delays have become quite common in any trade industry following the COVID-19 pandemic. While most reputable roofing companies plan their projects and timelines accordingly, if you hope to replace your roof with a trending, custom, or particularly unique roofing material, be sure to let your roofer know well ahead of time.
10.Regular communication with the roofing company
As a homeowner, you can try to plan your life around your roof replacement as carefully as possible with the information you have, but one of the best places to start is by speaking to your contractor before even booking the project.
They are the experts and will be able to guide you on best practices, material availability, their schedules, and the ideal weather conditions in your particular location.
Roof Insurance Claim: Key Information for Homeowners
Most homeowners in North America have homeowners’ insurance. Unfortunately, not many homeowners truly understand their policy, what it covers and how it can help them if they need to make a roof insurance claim.
We sat down with IKO ROOFPRO Jen Silver, the founder and CEO of Roofing Utah, one of the fastest-growing roofing companies North America, to gain some insight into the roof insurance claim process and what homeowners need to know before they contact their insurance agent and file a roof insurance claim. In addition to sitting at the helm of Roofing Utah, Jen is a public speaker, consultant and expert in roof insurance claim work who speaks publicly across the nation on the topic.
So, she shared with us seven things that every homeowner should know about their insurance policy prior to filing a roof insurance claim and what resources are available to them to learn this essential information.
Whether you wonder what kind of roof damage is covered by your insurance company, if your homeowners insurance will cover your roof leak or how often insurance will pay for a new roof, there are a few questions you should answer about your homeowners insurance prior to filing a roof insurance claim.
Thinking About Filing a Roof Insurance Claim? Here’s What You Need To Know First.
1. Do You Have Replacement Cost Value (RCV) or Actual Cash Value (ACV) Coverage?
If you are in the process of purchasing a homeowners insurance policy or considering making a roof insurance claim, be sure to know whether you are getting RCV or ACV coverage.
RCV will cover you for the entire cost of a roof replacement, minus your deductible. So, if you were in the middle of a hailstorm and got a quote for $15,000 to replace your roof, and you have a $1,000 deductible, your insurance company will cover the remaining $14,000 to replace your roof upon approval of your quote.
ACV, on the other hand, will only pay out the value of your current roof if you make a roof insurance claim. So, if your roof was already 10 years old and has depreciated by $10,000, your insurance policy will only cover $5,000, minus your deductible, which means you as a homeowner would be responsible for covering the remaining $11,000.
The reason why this is so important to know prior to filing a roof insurance claim, Jen explains, is that if for whatever reason you are unable to cover the gap in insurance coverage, but your roof is approved, and you don’t replace it, your insurance company could drop you as a client.
2. What Is Your Deductible?
When you make any sort of roofing-related claim on your homeowners’ insurance, the deductible is the amount that you must pay out before your insurance company will cover the remaining cost. Depending on your homeowners’ insurance policy, this deductible may be a set amount or a percentage of the claim.
So, say you have an RCV policy, and you make a roof insurance claim because you need to replace your roof due to storm damage beyond repair and you have a $1,000 deductible. if the total cost to replace your roof was $10,000, you would pay $1,000, and your insurance company would cover the remaining $9,000.
Deductibles apply in almost all cases of property loss or damage, including most roof insurance claims. If the cost of the claim is below your deductible (e.g., you try to claim a relatively simple $500 repair), you are responsible for covering that cost in most cases. In which case, you would likely be better off covering those repairs out of pocket to avoid negatively impacting your premium moving forward.
Your deductible can be waived under certain circumstances, most often When a claim is over a certain dollar amount; but this depends on your insurance policy.
Always choose a deductible that you know you will comfortably be able to afford. If you opt to have a higher deductible (e.g., $5,000), you will need to be able to pay that amount out of pocket in the event of a claim
3. What Is Your Insurance Policy Limit?
Insurance policies rarely offer unlimited coverage. Rather, they set maximum amounts that they are willing to pay out for different types of insurance claims.
When you purchase homeowners’ insurance, you have the option to raise or lower these limits based on the coverage you need.
Choosing insurance limits is really a balancing act between ensuring you have enough coverage for any sort of significant loss (otherwise, what’s the point of having insurance?), yet avoiding such high limits that cause you to pay way more for your premiums than necessary.
4. What Applicable Exclusions Do You Have?
The general understanding of insurance of any kind is that there needs to be enough people with a shared need for protection for insurance to work properly and keep premiums at reasonable rates.
This means that it is not possible for insurance companies to cover every single type of loss that could ever occur, and this is where the term “exclusions” applies.
Most insurance policies across North America will contain a similar set of exclusions, but it is important to read the fine print of your policy to understand what is and is not covered by your home insurance.
Some of the more common exclusions include losses that are the result of wear and tear or a homeowner’s failure to maintain their property. Old roofs are one of them. So, even if your roof was damaged in a storm, you could come up against challenges in making a claim if your roof is significantly aged.
Additional exclusions may include intentional, fraudulent or criminal losses; failure to reasonably protect your home; high-risk activities; and catastrophic losses that would exceed an insurance company’s resources (for example, war, terrorism, unexpected natural disasters like floods, tornados, earthquakes, or other “acts of God”).
5. How Does Your Policy’s Loss of Settlement Provision Work?
This brings us back to that ACV vs. RCV policy-type question. ACV insurance policies are often calculated at approximately 20 to 25% less than a replacement cost policy, as well as figuring depreciation into the claim.
So, again, if your roof is 20-years-old and has depreciated significantly in value, your insurance company will cover significantly less of the cost to replace it, even if the claim is related to a natural event, like hail or a windstorm, at the time of the claim.
Keep in mind that when considering roof insurance claims, depreciation rates tend to be higher than, say, your kitchen appliances due to exposure to the elements.
6. What Is the Statute of Limitations on Your Claim?
A statute of limitations is a specific period during which you, the insurance policyholder, can file a claim for damages. This varies from state to state in the United States and from province to province in Canada.
Your insurance policy may provide the time period within which a claim may be made, which typically is as short as one year.
If the policy does not provide such a limitation, the claim will be subject to the statute of limitations, which can be anywhere from two to four years, and in rare cases, up to six.
In some jurisdictions, the statute of limitations period may override the period stated in the policy. It is important to review your policy and consult with legal counsel in your jurisdiction to make sure you make a timely claim.
If you are certain that you intend to file a roof insurance claim, be sure to do so within the statute of limitations in your geographical area.
7. Do You Have Ordinance and Law Coverage?
Ordinance and law coverage would cover the cost to rebuild your home or undergo significant renovations and updates to bring it up to current code in the event of a major covered loss.
When considering roof insurance claims, what might seem like a simple repair when making a claim could, in some cases, require a full roof replacement if your roof is not up to the current building code.
Ordinance and law coverage would ensure that your policy covers the cost to replace your roof in compliance with the most up-to-date code and laws.
Many homeowners are unaware that this type of coverage can be included in homeowners’ insurance, and it is not included in every policy type. To determine whether you need this type of coverage, it is best to speak to an insurance specialist.
Understanding Your Homeowners Insurance Policy Prior To Filing a Roof Insurance Claim: Whom Can You Talk To?
Homeowners insurance policies can be extremely overwhelming to understand, but there are experts out there who can help you interpret your policy prior to filing your roof insurance claim.
With that said, not just anyone is able to discuss, explain or interpret your policy for you. Rather, you will want to reach out to an insurance agent, attorney, or public adjustor.
“Once a homeowner has all of this information, then they will be in a better position to make an educated decision on whether they want to file a claim or not,” Jen concluded. And, if you ever notice roof damage of any kind, the best first move is always to reach out to a ROOFPRO roofing contractor, as they are a wealth of information and may be able to guide you through the claims process.
Roof Inspection: Don’t Wait for Leaks to Check for Damage
A common misconception is that if you don’t see a leak in your home, there’s no roof damage. Hail doesn’t have to be baseball-sized to cause major issues.
Richarson said the amount of hail we see in North Texas is reason enough to get a yearly inspection on your roof.
He added that your roof should be treated like your HVAC system or plumbing – crucial components of the home that are normally checked every year.
If it’s not hail, it could be pests, wind damage, or other factors that could become a problem later on.
“It’s like with lawn care or getting your pool installed, you see that every single day. You know what to look for and when it’s wrong. A roof, it’s different story,” said Richardson. “Surprisingly enough, though, the roof is the one thing that protects a homeowner’s biggest investment in life, their house and their inside. So it’s definitely overlooked, but it shouldn’t be.”
Roof Inspection: Ensure You Choose a Trusted Contractor
Richardson said it is standard that roof inspections are free. Homeowners shouldn’t pay anyone up front and will just pay for the services and fixes needed after it has been inspected. At the same time, be cautious of those who solicit you for free inspections or try to push on-the-spot repair.
Another thing to remember, the roofing industry is one of the few trades in Texas that does not require a license. You might need to do a little more research to find a contractor and company you can trust.
“Knowing and trusting who your contractor is so vital,” said Richardson. “And making sure they’re a preferred vendor for all major insurance carriers. What that is the insurance company has trusted and vetted them so they know that they provide quality to the homeowners.”
Another plus is whether or not that contractor is licensed with the Roofing Contractors Association of Texas, or RCAT, as well as the North Texas Roofing Contractors Association, or NTRCA. An accreditation with the Better Business Bureau is another green flag, said Richardson.
“Because being in North Texas, it’s such a saturated market, so you want to make sure that they’re accredited, that they’ve got the licensing that they need, and that they have the background and experience with insurance so you know you’re getting quality,” he said. “You don’t see it, you’re not up on your roof – so you want to know that your contractor’s not cutting corners.”
Richardson said it is better to schedule an inspection sooner than later, although the summertime is a good time to get it done when the wild weather quiets down.
Original Post can be found here:
By Alanna Quillen • Published May 10, 2024 • Updated on May 10, 2024 at 7:51 am
From Denton to Dallas and Frisco to Farmersville, the damage is widespread
People are still cleaning up the aftermath of massive hail that fell across parts of North Texas.
From Denton to Dallas and Frisco to Farmersville, the damage is widespread. The shredded leaves are a telltale sign of where large hail occurred.
Hail Damage Causes Fear and Destruction
“It was very scary. Very scary. You could just hear things breaking all over the place and that’s the second time in my life I’ve ever been in a hail storm that big,” said Montie Upchurch, whose home was damaged by hail.
Neighbors at Rocky Point Mobile Home Park in Flower Mound are dealing with dented cars, broken windshields, and broken windows on their homes. They believe the hail was as big as tennis balls.
Covering Costs of Severe Hail Damage
“It came up and hit the window – and my nose was about this far from the window,” said Gary Bitsko, holding his hand right up to his nose. “That’s when I shut the door.”
He had two windows damaged in the storm. His neighbor Upchurch also had three windows smashed by the stones.
Upchurch said he worries about how families will cover the costs of the widespread damage.
The original Post can be found here.
By Alanna Quillen • Published June 12, 2023 • Updated on June 12, 2023 at 6:29 pm
Major League Roofing, Plano’s trusted roofing experts, are featured on NBC discussing hail storm damage. We offer top-notch roofing services with integrity and dedication. From leak repairs to new installations, we prioritize quality and customer satisfaction.
For Learn more about Plano Hail Damage Contact us for a free consultation today!